Advanced Compositing Using Layers
Lesson 20 from: FAST CLASS: Photoshop for Beginners: Essential TrainingMark Wallace
Advanced Compositing Using Layers
Lesson 20 from: FAST CLASS: Photoshop for Beginners: Essential TrainingMark Wallace
Lesson Info
20. Advanced Compositing Using Layers
Lessons
How To Open Files
01:10 2Using The Home Screen
01:49 3Exploring The Interface
02:36 4Understanding Workspaces
03:04 5Tools and The Options Bar
01:56 6Finding Hidden Tools
02:31 7How to See What You’re Working On
06:19 8Selecting Things
07:06More Selection Tools
10:34 10Testing the Magic Wand and Quick Selection Tools
03:55 11The History Palette – Undoing Things
02:47 12Menu and Item Shortcut Keys
02:28 13Non-Destructive Editing
02:14 14Working with Layers
09:11 15Groovy 3 Exercise
10:38 16Layer Effects and Styles
04:25 17Layer Masks – Karen on Beans
06:41 18Using Adjustment Layers
04:36 19Using Filters
03:06 20Advanced Compositing Using Layers
07:42 21Non-Destructive Editing Techniques
03:17 22Understanding Smart Objects
05:16 23Smart Sharpen
04:36 24Understanding Histogram
04:08 25Adjusting Curves
03:46 26The Healing Brush Tools
07:28 27The Clone Stamp Tool
05:24 28The Burn and Dodge Tools
03:41 29Neural Filters
07:52Lesson Info
Advanced Compositing Using Layers
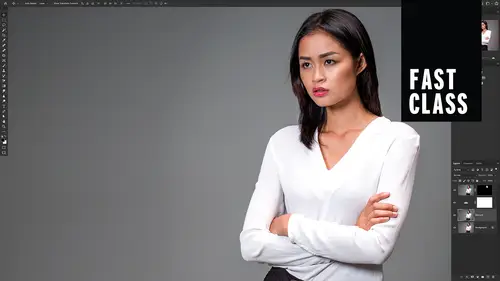
So this was something that was sort of fun that we did in an old studio where we wanted to try out a model to see if she could be different characters. And this was the file that we created sort of sell the idea. This was, you did years ago but you can see this is the same girl on the same location. And it looks like she's interacting with herself. Of course she's not, we composited this. And so I took all these images and threw them in as layers. And you can see here if I turn off or on a layer, these people appear or disappear. And so it works really great. You know, if you can take this at home and look very closely at the layer masks and see exactly how these were created. Now, I wanna show you something that I use when I'm doing compositing like this, or any kind of layout where I have to do multiple different versions of the layout. So similar to this snapshots in the history palette you can take your layers and you can save a current state. And so you can do multiple different s...
etups for all your layers. And so this is not by default. So what we're gonna do is we're gonna go into window and then we're gonna zip down here. And then we are gonna look at this right here. It says layer comps. So that short for layer compositions. And so if you click on that you get this little dialogue that shows up here. And what you can do is let's say I wanna see black dress walking. So just like layers to the left, I can click on that. And now you see a different composition. So these are what this does is it saves which layers are turned on and which layers are turned off. And the position of each of the layers. If I say black dress sitting, I click on that and notice that the model is sitting here. This girl is being really creepy. If I say black dress walking you can see she's being even creepier but a different kind of creepy. And this girl is walking by and she's looking at herself, it's sort of fun. And so you can also save the last document state. And there is that. And so you can do these different things. And then on this layer comps pallet you can create a new layer comp. You can update a layer comp, you can do all kinds of things. And so we're not necessarily gonna cover this in the workshop. I want you to go and experiment and play with this at home. Now, what I've done here is I have given you all of the files to try to play with this. There are some different shots that we did that didn't make it into this shot. And you can go in first and look at each of these layers so you can turn them on and off and see exactly what's been painted on and what's painted off. And then you can try recreating this stuff yourself. You can mess it up. You can do all of that stuff. So do that. And then I want you to try to start from scratch. And so here's how you do this. So do this exercise take an hour or two and play with this and see what you can create. And so what I'm gonna do here is I'm going to close this document. So the document is closed and then we're gonna go into a new thing. So what we need to do here is we need to go to file. And instead of saying open we're gonna do something different and only show you why. If I go over here to my finder window here's where all of these images are, there's a folder called composite image photos. If I open that folder, you can see that we have a bunch of different files. So we have CR2 files. Those are the raw files. We have JPEG files. Those are the small compressed JPEG files. And then we have the XNP files which we're gonna learn about later. Those are sidecar files that tell Photoshop how to interpret a raw file. We're gonna get into that in a future sessions. And so what we want to do is we want to go in here. Maybe you can sort this by kind. We wanna open all of these camera raw files and we wanna open those into Photoshop. Now, if I just drag and drop them into Photoshop it's gonna open in different tabs. And then I've gotta figure out how to get those tabs and align the images and get everything stacked in layers. It can be a real hassle, especially if you have maybe 20 or 30 images and you're trying to align everything. There's a better way to do it. So what we're going to do here is we're gonna go over to Photoshop, say file. And then we're gonna go to scripts. So you can write scripts if you're a developer, this one comes as a part of Photoshop. And what we're going to do is we're going to load files into stack. So it means stack those in layers. So I'm gonna click on that. Now it's gonna say load layers. What do you wanna do? I wanna use files or folder. We're gonna use files because we know that we want a specific file but if you had a folder full of the same type of files you could do that as well. So I'm gonna say files, I'm going to browse. I'm going to go to my composite image photos. Then I'm gonna sort these by kind or by type. And then I'm just going to click on the very first CR2 file and then shift and click on the last one. So I have all of those selected, and then I'm going to say open, and then I wanna make sure I sort these by name so that they're in order. And if you have images that weren't shot on a tripod aren't rock solid, you can click attempt to automatically align source images. You can also create smart objects. We're not gonna do either one of those things for this exercise, cause we haven't learned about smart objects yet. So let's just go ahead and say, okay, now Photoshop is gonna run some scripts in the background. It's gonna load each of these images. It's gonna put one on top of the other until you have a giant Photoshop document. And then you have all of these layers on top of each other and you can play with these yourself. Now it's up to you to go in here, add a layer mask. And then on that layer mask start painting in and painting out. So for this one, I'm gonna get you started. We're just gonna go in here and we're gonna use our selection tool. We're gonna use the lasso tool. Why not? First I need to select, and then I can go add that layer mask. And poof, you can see if I do that you can see that we've masked out all this other area. And I can go in here and do this for this layer so I can select her. Something like this. Doesn't have to be perfect. Mask that out. Okay. Then we go to the next layer. We don't want that one. We maybe want this one. Then maybe I can go in there, add a layer mask, get a brush, start brushing in and out. And so on this one, I need to brush out the layer on top, which would be this layer mask. And so there we go. Let's brush this out and now we're starting to work on that. So I want you to do this on your own time in your own pace and play with it. Don't forget to add the shadows, do a bunch of stuff. Take a really close look that you're not doing things like I just did where I made a ghost arm right here things like that. So this is an exercise that you can do to really play with layer masks. You can go in and do different things to check on the styles and all kinds of things. I want you to really play with this and make it your own. That's what these files are for.
Class Materials
Bonus Materials with Purchase