Lessons
Class Introduction: What is Light Painting?
03:45 2Camera Considerations
16:18 3Camera Settings and Initial Exposures
09:26 4Light Painting Accessories
04:05 5The Color of Light
05:21 6Focusing in the Dark
03:13 7Light Painting Techniques
08:30 8Lightroom: Basic Panel
14:14Lightroom: Presence Panel Adjustments
06:05 10Lightroom: Hue, Saturation, Luminance
05:17 11Lightroom: Local Adjustments
16:46 12From Lightroom to Photoshop
11:55 13Photoshop: Lighten Blending Mode
04:31 14Photoshop: Star Stacking
03:17 15Photoshop: Layer Opacity
03:25 16Photoshop: Selection and Masks
05:55 17Photoshop: Mask Adjustments
05:46Lesson Info
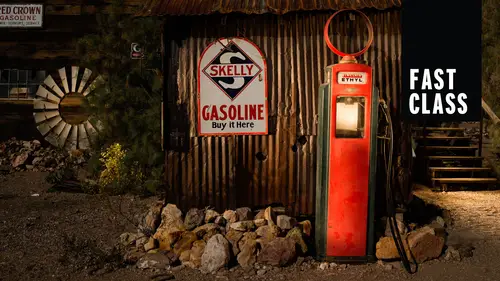
The Color of Light
So next up is the color of light. This is a pretty important topic when it comes to light painting. Uh, if you're photographing in color, right? So what we want to think about is the different sources that we're going to encounter. Number one, the ambient light that could be anything from the full moon to household lights, toe city lights, whatever the ambient light sources the continuous light source. Next up, we've got flashlights and we've got flash, and each one of these is gonna have a different color to them. And the way that photographers described color is by using a unit called Kelvin. And you can see here that regular daylight says electronic flash and daylight. Here is 5500 K That is what our camera launch. That is what our cameras generally tuned to. If you put your camera the default setting, the default white balance setting of daylight, it's going to shoot roughly 5500 k Some cameras are a little more some of the less, but it's it's in that area. So what this means is wh...
en we walk out on a bright, sunny, clear blue sky day, the sunlight that comes through can be measured at about 5500 K We consider that as photographers just sort of neutral or no color cast to our light at all. So that's kind of our benchmark. But for now, let's think about our white balance setting on our camera and how that's gonna affect the overall look of our image, depending on the ambient light. So when we're and something like, um, that's a city environments with lots of what they call sodium vapor lights, you're going to see that we have a massive orange color caste. Now, in some situations, this could be okay, but most times it's pretty overpowering. So when I stepped out and shot through this window downtown Denver, my camera was set on white balance of daylight, and you can see the orange resulting image. Changing My white balance to tungsten clears that color caste, and this is sort of important to think of kind of clearing that cast because that orange is really sort of polluting all of the other colors in the image. So when you start to get the correct white balance in your camera, other colors will start to pop out and that gives us color separation, which gives us a little bit of color contrast and makes our images look like they have a little bit more life. If you find that tungsten and I often dio is not quite the mark we need to hit, we can begin to set our white balance manually in our camera. So while we have those presets of daylight fluorescent shade, cloudy, tungsten, we also can manually set the kelvin temperature to exactly what you wanted to be. So something like this daylight is 5500 k That tungsten white balance setting is 3200 k But if you want to go to a Calvin setting and again, you're gonna goto a K and I'll show you guys how to do this When we get out in the field, Uh, you'll see how I set my Kelvin temperature here. We're gonna go from anywhere from 12,000 cases. This gives us a really broad spectrum of what we of how we can dial in our color. So let's take a quick peek here at, uh, downtown Seattle. I shot the first shot just right around just a little bit before sunset slightly overcast day, and I want you all to see is you scan from right to left how the color gets warmer and warmer and warmer. So I'm shooting this from right around sunset to Oh, I don't know, maybe 45 minutes after sunset. So in these first initial image is on the upper left, the light is being influenced by sort of the overcast sky, which tends to be a little bit more blue, Um, and the setting sun. But as it gets darker and darker, what starts to take over is the city lights, the sodium vapor. So by the time we get to hear that is a very, uh, muted blue, it's almost no longer blue anymore. It's almost like a gray, so by dialling in 3200 K or starting on left 47 than 37 then down to 32 you can see I can adjust my colors to get them to be just where I want. So in this case, I ended up stopping at 3200 K to color. Correct my image. You can alter your weight balance. You can alter your filtration to change the different colors in your photograph, and that's a ton of fun. But people remember there's always black and white and black and white is awesome, and you can forget all about that color. If you don't deal with a bunch of K's and a bunch of numbers, your may be afraid of the alphabet and math both at the same time. Go with black and white, right? I love black and white, and I think light painting for black and white could produce a really stellar images. All right, so again, much like exposure in our initial camera settings don't get held up here. People just set the white balance on something, take a picture, look at it and then we can adjust it afterwards. All right, so in the next lesson, what we're gonna start to get into is, how do we focus in the dark? Um, it can be maybe a little daunting at first as you're thinking about it, But believe me, it's super easy going to show you a couple cool tricks
Class Materials
Bonus Materials with Purchase