Lessons
Class Introduction: What is Light Painting?
03:45 2Camera Considerations
16:18 3Camera Settings and Initial Exposures
09:26 4Light Painting Accessories
04:05 5The Color of Light
05:21 6Focusing in the Dark
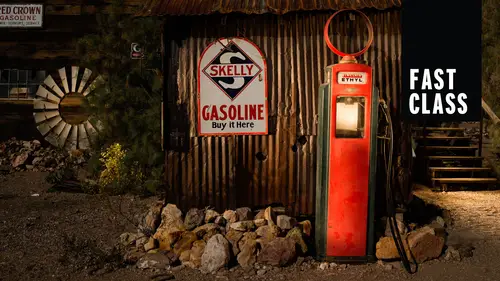
03:13 7Light Painting Techniques
08:30 8Lightroom: Basic Panel
14:14Lightroom: Presence Panel Adjustments
06:05 10Lightroom: Hue, Saturation, Luminance
05:17 11Lightroom: Local Adjustments
16:46 12From Lightroom to Photoshop
11:55 13Photoshop: Lighten Blending Mode
04:31 14Photoshop: Star Stacking
03:17 15Photoshop: Layer Opacity
03:25 16Photoshop: Selection and Masks
05:55 17Photoshop: Mask Adjustments
05:46Lesson Info
Lightroom: Local Adjustments
When's corrections? This isn't something I do a whole lot of in night photography, but it can be important. Um, in the lens correction panel, one of the most important things is removing chromatic aberration. So if you're looking into here, you can see check removed chromatic aberration, and you could check that box and never see anything happen to your image. But what is doing is very important. If you're shooting a lot with wide angle lenses, which we tend to do for, you know, Astro feet are, you know, for shooting star trails and start points and things like that, then we're very likely toe, uh, encounter something called chromatic aberration and chromatic aberration is when the colors don't all line up on the same point of your sensor from where they entered on the lens, meaning that when light comes through a piece of through the lens, it's gonna break up into separate colors, and they should all line directly on a point on our sensor. And if they're off a little bit, it's gonna b...
e miss registered, and that's going to produce like a magenta or a green halo owing around our image. But the other part is something called enable profile corrections. And when you check that, this should have popped up for can. And there we go. Um, when you when you check that box, what's gonna happen is it's going to alter the shape of the image. And what it's doing is it's accounting for the light fall off that happens on the lens edges. And it's also affecting our taking into account. Um, the way that the the image is shaped the way that the glass has altered that not really a perspective, but a distortion thing so you can check a noble profile correction. Sometimes I like the look of that. Sometimes they don't if I'm shooting architectural photography without a doubt, I check that every time. But if I'm doing general landscape photography in General Night photography, I might not go there because sometimes that wide angle look is what I'm shooting for. And by checking that, I'm actually ruining that look now in late room, see, see what they've. Or maybe it's like room six. I can't recall, but they've separated out lens corrections and our transform controls and are transformed controls is the reason I've come to this because, as you can see, it was dark out and I didn't get quite the perfect alignment on the building. So I want to be straight on right there is the North Star directly above this steeple. I'm sure that was not by accident by the builders of this church. Um, but but we can see that the building is not quite square. So we have here under a transformed panel a way to fix that. There's a couple ways number one. I could do it manually by clicking and, you know, the rotating rotating my image left and right until it's squared up. If I wasn't perfectly aligned with the building straight on, I could use my horizontal left and right. And that's going to square up the building in that way, and you could get more square that way. Also, if you're looking up the building, um, you may get a look that looks like something like that and so you can fix it with the vertical distortion until it becomes nice and straight. So now kind of looking at these lines, making sure they're straight, and you could definitely do all that. But click double transform here DoubleClick Transform, reset everything. What you can also do is use these and these could be really great. You guys click on auto and Bone. Look at that. It just completely in line my building and made it wonderfully straight. Awesome tool. Super handy. Especially when you're shooting straight lines. Okay, so next up, um, we've got our local adjustments. So at this point, you guys, I'm going to assume that as we're working through an image, we're beginning in our basic panel dealing with our white balance were going through and adjusting exposure whites and blacks, shadows and highlights That's going to get our good contrast, perhaps even a little vibrance and saturation next up hs cell for fine tuning some of those colors on. Then if we really need to, um, we've got our lens corrections to deal with, certainly enabling our I'm sorry, certainly fixing chromatic aberration. That's super important. And then, if need be, you can go in and do enable profile corrections. But that's only going to get us so far. That's only going to get us so far. That's our basic global overall adjustments. Ultimately, and almost every single image I've ever made. I'm gonna go in and do some local work. All right, So to do our local adjustments, what we're what we need to do is go to our develop module and look to the bar just below the hissed A gram here, of course, is our crop here. We've got our spot removal tool, red eye tool. But these tools right here are our local adjustment tools. And the 1st 1 we're gonna talk about is the graduated filter. Now, the way this works is that when I click on this out, pops Ah, whole bunch of sliders. Do you realize, however, this looks suspiciously familiar? Similar to this down here. This is my basic panel notice. I've got this black panel up in here when I click on that almost looks exactly the same. So don't get confused here. A lot of times you'll start adjusting things in here and not seeing it happen on your image. And ask yourself why I just realized you might actually be on the brush itself. Now the only indication that we have is when you're not on the brush. None of these air highlighted. When I click on that, it becomes highlighted. I personally think that is not quite enough. Indication. I'd like to see a little bit more. Maybe bright yellow or red or something. Some big change, but But that's our indication. All right, now, once I click on a local, uh, my graduated tool, the sliders pop out and nothing has happened yet. I haven't made any changes. And, um, the way we're gonna proceed is we're gonna draw out a mask or an overlay. And at that point, whatever is inside of that overlay will be influenced by the sliders here. So let me just double click the word effect here to resettle those sliders. All right, Now I'm gonna click and drag out my Grady in, and nothing has happened to the image simply because I have made no change here. So let me delete this and started again If I came here and made a change first. And the change, by the way, You guys that want to dark in this down notice notice how bright this is up in here and it gets darker as we go here. I want it to be darker and get lighter as we go out. So I want to darken down this whole area. And now they're looking at. These highlights are blown out too. Before you go any further, I think we need to deal with those. Let me pull us highlights back down. There we go. That's looking a little better. All right, So we go to our graduated tool, I can just take my exposure and can't get down. But again, nothing happens because my overlay isn't drawn out. So whether you go to this slider first and then draw your overlay or whether you draw your overly first and then go to your sliders, it makes no difference. I usually start, though, by going to the area that I think I need to. In this case, I'm gonna darken it down, so I'll pull that down, and then I'm gonna click and drag over. And what I want you guys to realise is this is where I clicked. And that's where Ian clicked. So from here over gets 100% of this adjustment from this line to this line. Is the Grady in from 100% down to zero. And then this whole area, the image gets none of this adjustment here. So what we're drawing out is basically the Grady in itself. And you could make that Grady in really small. Let me just adjust this. You can see now we've got a small Grady, and now I've got a bigger, bigger, bigger And in this way, you can really adjust where that, uh, exactly where and how much of this adjustment is going to come through now that we've drawn this greedy int, I'll just double click on that were exposure here. But I still feel like this area and here could be a little bit brighter. So what we could then do is turn to the next, um, local adjustment tool. And that's the radial tool. And the radio tools gonna work pretty similar. All of these tools work by drawing out an overlay and then making an adjustment to what's gonna happen with India. Overly. So click on my radio tool. And in this case, I want Brighton. So I'll double click the highlights. And let's see, What is that gonna be? I would lighten the shadows in here because I don't want to necessarily breaking these highlights too much. Um, just move those down. Um, so we go to our radio tool and I will lift my shadows up a little bit. Now when I draw my radio tour, I'm just gonna click and drag outwards and you could see it comes right from the center where I started and I drag out and I can change the shape anywhere I want. Don't try to make this exact just from the beginning. It's like the radio that's like the graduated filter doesn't have to be exact because you can always grab this and moving around and make adjustments. Um, now you can see what's happening is even though I drew the circle this way, what it's actually dealing with is the outside of that circle. So what I can do is come down here and invert that mask. Now it's going Teoh. Any change that happens over here is going to occur within that circle. So I will take my shadows in this case and Brighton those up a little bit. Here we go and now we've got this area being a little bit brighter, this area being a little bit darker with our graduated filter, and overall, when we go to the before and after view, we should see a significant change notice. Here. You're drawn into this area where in this image you're drawn past the dark area and you go right out to the whites. You're not just limited to one Grady int one radial tool or one adjustment brush I name, and you could do multiple. So, like here, for example, this little selfie and Bruges, this area of the sidewalk is, well, it's just brighter, and that's just the natural. Later the scene. There's not a lot I can do about that, but I want to darken it down. So I grabbed my graduated neutral density filter. I know I want it darkens all. Start with exposure. Then I click and drag upwards. And again. Don't worry about whether you unclip and it's not exact, because you can always grab this in the center and move it. You can always grab and extend out your, uh, your Grady in and do whatever you want there. And so let's get that to about there, and then we're just going to readjust this until it looks good. And at this point, I feel like that looks pretty good. But there's still this corner down here that's a little bit too bright. So what I'm gonna do is actually go over here to the word new click on that word. And now I'm starting a new Grady int notice. Now that I see this grape in that grey pin indicates the previous overlay that I just created. When it's gray, it tells me it's inactive the moment that I draw another overlay. So I'll just click and drag here and make that the 2nd They're now noticed. This pin is black in the centre. That's telling me it's the active one. So whatever I do there is gonna happen within that Grady in. So in this case, I want to darken it down and just try to even that out with the rest of that image, maybe even slightly darker, and maybe even pull that up just a little bit. All right, now we've got two pins on here, but only one can be active. So if I'm on this pin, I could make adjustments. But if I want to go to the other pen, what I'm going to do is actually click on that one. And now that's the active pin, and I can readjust that an overall darken or lighten to get that anywhere I wanted to be. And so, through the use of two different Grady Int tools, I was able to very naturally make this light. You know, this corner a little bit darker, but without having that hard break that the light itself caused, so you can use more than one overlay on any given image. All right, now, let's talk about our local adjustment brush. So our local adjustment brush is again when we click on, it's gonna be very similar to every other local adjustment that we've just used. Um, the only difference is is we've got a brush now, and we're painting an overlay versus just drawing it out by clicking and dragging a radio or clicking and graduate. They're dragging a graduated tool. So let's explore first what this brush can do. All right, Number one, I'll just crank up my exposure here, and what I'm gonna do is make my, um, feather really small. 400. Okay, now, what comes next is the edges. Do we want a soft edge? Do we want a hard edge on? And this is where the adjustment brush could be pretty cool. Um, there's a thing called auto mask here, And auto Mask is going to try to keep the paint that you lay down, which is creating our overlay. It's gonna try to keep that within the edges itself. So my goal here is I don't I feel that I over painted this this pipe a little bit too much and got really quite bright. So what I want to do is I want to paint that in, um, and then come up here and lower my highlight value to kind of bring this more in line with the rest of the image. So what I'll do is lower my highlights a little bit. And now I'm gonna move my cursor over the image, and I'm gonna take my size slider moving down a little bit. But I gotta be honest with you. If you're over here going all the way over here to change your size, Sliders. A real drag. So, folks, you can use your track pad. Bring that up and down the scroll were scroll wheel on your mouse. Bring that up and down. You can use your right bracket key to make a bigger left bracket key to make it smaller. Um, there's lots of ways that you can alter the size of the brush. I'm just using my track pad and now is a paint. What I should be doing is painting in, um, the area that I wanted dark and down. So just continue to paint in here, and ultimately you could see it's, ah, it's darkening and changing a color, a little bits turning into a green. But ultimately, my my issue is I don't want to go outside the lines. So if I paint this and they go outside the lines, it's gonna start affecting the other parts of the image, and that's going to be problematic. We don't want to see this sort of thing in our photograph. So that's where we can turn to something called our Auto Mask, and the auto mask will try to keep it within the lines. And now, as a paint, what I'm gonna do is I'm gonna turn on my show selected mask overlay, and that as a paint will show me where I'm actually painting. I can't go down that big. So we click in here and notice I'm getting that red value. Even though my brush is outside of the of the pipe, it's on Lee painting within that area of the pipe that the cross hair touches. So in this way, if I just stay within that if I keep that cross hair within the pipe boundaries, then what's happening is it won't go outside of their and I can create a very accurate mask. Okay, so that's your basic local adjustments. You guys, we talked about our graduated tool. We talked about a radio tool and ended up with our local adjustment brush. And these are all fine tuning your images. So just to step back a little bit, we began this whole talk, of course, inside of our basic panel. So remember everything in the basic panel and then coming down to H. S L Lens corrections camera calibration those air, all global adjustments and we want to do is many as much global adjusting as we can inside of late room. Now, next up, if we need to find tune a little bit, we can turn to our radial tool are graduated tool and our local adjustment brush to fine tune in localized adjustments. But really, where the power actually lies is in photo shop. You guys, I do a lot of work in light room, but as you can see, it's a little bit tedious doing some of this painting s so and so forth. Photoshopped makes that a latte a lot easier. So global adjustments occur in light room. Some fine tuning, local adjustments in light room as well. But if you really need the power, you're gonna move to photo shop.
Class Materials
Bonus Materials with Purchase