Lessons
Class Introduction: What is Light Painting?
03:45 2Camera Considerations
16:18 3Camera Settings and Initial Exposures
09:26 4Light Painting Accessories
04:05 5The Color of Light
05:21 6Focusing in the Dark
03:13 7Light Painting Techniques
08:30 8Lightroom: Basic Panel
14:14Lightroom: Presence Panel Adjustments
06:05 10Lightroom: Hue, Saturation, Luminance
05:17 11Lightroom: Local Adjustments
16:46 12From Lightroom to Photoshop
11:55 13Photoshop: Lighten Blending Mode
04:31 14Photoshop: Star Stacking
03:17 15Photoshop: Layer Opacity
03:25 16Photoshop: Selection and Masks
05:55 17Photoshop: Mask Adjustments
05:46Lesson Info
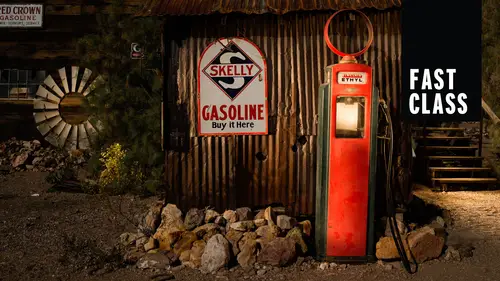
Light Painting Techniques
so light painting techniques. How do we go about all this? Well, the first thing and the most common thing, I Here's why don't you appear in the picture. You're walking all around right in front of your photograph or right in front of your camera. How come you don't appear in the picture? You know, this is a really interesting thing. Um, you don't, because the the amount of time you're in front of the camera, it's so short. So, yeah, if you're constantly moving through the photograph and you don't stand still and you're wearing dark clothing, you will not appear in the shot. All right, So what will appear in the shot, however, is your flesh late? Even if you just show it the camera, a momentary glimpse of your flashlight, it will show. So the trick people is if you are the camera and this is the flashlight. The flashlight has got to be behind. You've got to hide the light of the flashlight from the camera so you can't see it. And when we go up the gasworks, you're going to be seeing th...
is in the in the live video shoot. I'm constantly hiding that flashlight from the camera. The moment that flashlight is in visit, you know the camera can see it. That's it. It's going to appear. So that's one of our constant concerns hiding the flashlight. But if you hide the flashlight and you're wearing dark, you're not going to appear in the photograph, and then you can end up making the photograph much better. All right again. That's a beautiful thing of image review on the back. Even though I started here paying close attention to what I'm doing, I can see I've made a mistake and move on to the next shot. We start with the exposure guys. So here's a little sort of workflow for you all. Of course, this is not set in stone, but this is a generalized way to think of about approaching your scene. Um, we want to start off with a composition. I know that kind of sounds stupid, but it really determines everything else you guys. So we first come up with our composition. Rough it out, set your tripod up, you know, look through it. If there's not enough light to look through the viewfinder or look through live, you grab your flashlight. Put a big broad beam and you can scan the whole scene and scan the edges so that you can see what you're what? You're composed. But but that's gonna be a great start. You guys knowing what focal length here that you're using for this composition is gonna be super important? Next up, we're gonna gain focus. We've now talked about that. We can use our live. You focus. We can use our our auto focus. We can use our flashlight to assist are focusing. All right, then, once that happens, once we've focused our camera and we've got our composition, we're gonna try to get a good Ambien exposure. And this is where there's no fear, right? You guys are just setting your aperture shutter speed your eyes. So at some of those settings that I mentioned earlier, just go for it, see what happens. Take a shot. Once you come up and dial in your good ambient exposure, we're gonna find tune our white bounce. Is it to oranges it to blue? Is it? Whatever. And then we can alter that. Then that's it. We start walking with her flashlight. All right, I know you have No idea. How long should you put that flashlight on that thing? How close should you be to that thing? I can't tell you. I can't tell you because everything is different. If you shine your flashlight, that metal, it's gonna reflect the tunnel light back compared to this barn wood, which is gonna absorb a love that light. But we have to remember that the closer we are to a subject, the bride of the beam light is going to be all right. Um, the longer you paint one area, the brighter that's going to be the shiner, the object, the brighter it's going to be. So as far as the amount of time actually putting your flashlight on something, it's really an unknown. And you will never know until you simply go out an experiment. Don't be afraid of failure. Just grab that flashlight, paint it for a little bit. You get back in the curial city. Oh, my gosh. Didn't even make a dent. All right, well, I painted that for three seconds. Next time, I'm gonna paint it for 15 seconds. Okay? It's getting there. Oh, now I paint it for 30 seconds. Ah, Brilliant. That's Okay, That's the way this goes. All right, So the angle of light is really what this is all about. This is one of the great aspects of light painting is to be able to change the angle of light midstream. All right, we can go from lots of different angles, and we will go from lots of different angles. But, um, the worst thing that you can possibly dio is to stand at the back of your camera and illuminate your scene from right there. That is the worst. You may as well put on a on camera flash and pop it. It's just it's gonna do nothing for you. You consume your, you know, flat. If you If you get a good flashing light coast, you can the flashlight, you consume that head in and out, and you can change the pattern of the flash itself. And so that's going to alter the look of the photograph. In addition to the intensity right, the more you resumed out, the more intense that light is going to be. But it's also going to change the look. So here's a little bit more of a broad pattern, and you can see, each one of these is evenly illuminated wherever the light hits. All right, well, when you zoom the flashlight head in a little bit, suddenly it starts to look a little bit different. Notice how there's fall off. It's brighter here, but it falls off brighter here, falls off brighter here, falls off. That's one of the really cool things about using a very narrow beam of light. You get a different sort of look to it so you can experiment with a narrower being and moving your flashlight around a lot. And ultimately, I think that's usually gonna b'more interesting than just having a broader beam, you know, and given it one amount of light and then turning it off. Also, narrowing down the beam can really help you be more surgical with your light painting. So, you know, we don't want to just just big, broad strokes, right? We want to get in and do a little little little thing. So in this case, I was in a four point in San Francisco, and the ambient exposure is for the barrels in the back in the brick. And that's where the latest hitting. Um but now I want to come in, and I want to illuminate the front, uh, gunpowder barrels. So using that snoop that I showed you and zooming my flash head in, I literally went up to each one of these and just tap my flashlight on, tapped it off, tapped it on, capped it off, tapped it on tepid off, and some creating these little pools of light, which would be impossible to dio with any other light source. You can't do that with, You know, with you know, umbrellas are soft boxes or anything like that. This is really surgical light painting. It's super easy. Okay, so next up, flashlight filtration, What are we gonna do? How we're gonna change the color of our flash light. Um, well, this is a pretty important you guys, because we can add a lot of dimension to our photographs by doing that. Um, so in both of these cases here, what I've done is jailed my flash, and you've just seen how you congeal your flash when we did our talk on accessories. And in this case, because my white balance is instead of sodium vapor, I've turned it to tungsten. That would mean that the whole image would be overall blue and especially my led, which is already kind of slightly blue, would become even more so so on to get these warm colors out here, I've heavy jelled, my flash heavy orange color. Same thing here with the sandstone, uh, little rock in Zion National Park. My white balance is gone from daylight to slightly cooler. So therefore, a jail my flashlight with a warm gel to create that look. And, you know, it's amazing how color can really alter the way you think about were perceive an image, right? So that color contrast that color. Ah, harmony is really gonna play to, uh, to your audience. So you have to figure out what you want. The more color contrast to have, the more dissonance you have, it's gonna be wow Pau, and it's going to It's gonna be striking if you have more color harmony. The image is gonna be a little bit easier to digest, and you're gonna be able to live with it for a little bit longer. It will be less like the visual equipment on a sour ball. So not one right one wrong. Just how do you want your image to look
Class Materials
Bonus Materials with Purchase