Lessons
Lesson Info
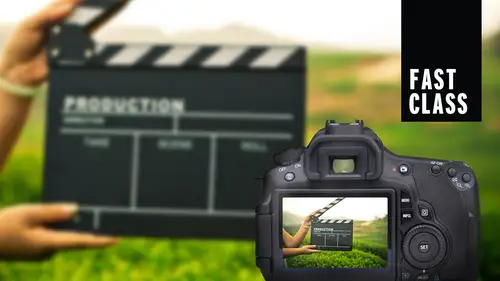
Camera Basics
Now we're going to talk about camera stuff and typically when we get to cameras, there's a lot of questions. So I promise if you have one, I'll stop and go slow. Now I'm cannon focused, so I shoot a lot of canon stuff. But I have some knowledge of Nikon. Um, if you have a question on a Nikon that I can't answer, um, they'll put my my Twitter and my instagram in the chat room. And if you give me an at reply, I'll find the answer for you. Um, I just wanna give an answer that's wrong right now. Okay, So when we talk about using a DSLR okay, I mean, we could go back to why we use it on DWhite. All of a sudden, it became just this thing that we wanted to dio Thio create films with the DSLR, but in reality, it's It's this right here we get great image quality, its depth of field interchangeable lenses, lightweight and compact. And because photographers don't like buying new things, it's a camera we already own. That's why that's the single reason why, because if you talk to any photographer ...
who's currently doing motion the reason they're doing motion is they walked into a job and the customer of the client knew that that camera shot video and said, Oh, can you capture some stills and shoot some video for me? That's the fundamental reason it's a camera we already own. It shoots video, and it's something that, for better or for worse, we now have to learn. Okay, so there are certain different types of camera DSLR types. I'm picked like a four. We're gonna break him out. So we got a full frame and a PSC and a psh and then ah, micro four thirds. So your micro four thirds like your Panasonic GH fours GH threes. Um, your a P s h r like your one d mark force. Okay, your one year mark. Threes. You're a PSC your like your 70 s and you're 70 ds and your full frames, or like you're you're five D mark threes. Your, uh, your one DCs and when the exes. Okay, now what does this all mean? A lot of numbers, letters and stuff that I don't get. The one thing you want to pay attention to out of all of this isn't the sensor size. It's the crop factor because crop factor works to our advantage when we're doing motion. Okay, Do you guys know cough actress? It's the magnification in focal length or effective depth of field between sensor sizes in relation to full frame. It's a lot of words and a lot of stuff that basically means going from a five d mark three to a seven D D. That crop factor is 1.6, which means if I have a 17 millimeter lens at F four on a five d mark three, it's gonna be 1.6 times 17 and F four times 16 in the effective depth of field aspect of it. The number stays F four, but the amount that's in focus changes. Do you get that? That's a really, really important, important topic. Here's why. Let's make believe you're rolling into an event and it's low light. Okay, it's low light, and you got to shoot wide open. We've all shot wide open and video, right, like 1.8. It's like gets kind of dicey. The one thing I do is I take my 1.8 lens. I put it on a crop camera, 1.6 at 1.8 gets multiplied by 1. for effective. That the field. I can roll at 1.8 and now have more depth of field. Okay, let's say it one more time. If I'm walking into an event and I've got a full frame camera and a crop sensor camera and it's low light and I need to shoot wide open, I'm gonna put my lens on the crop camera because I effectively get more depth of field out of that crop camera. I will lose my wide angle, but I don't care why I need depth of field and I need that aperture. Okay, so let that marinate and stew for a little bit, because that will be something that you won't remember until it need. You need to remember it and then you go, Oh my God, that's amazing. Alright, So especially for doing weddings and events, rolling with two different camera bodies in two different center formats isn't all too bad. You know, I I know a guy here rolls with ah five D and a micro four thirds, and that micro four thirds has like a crop factor of two. So it will multiply his aperture by two and given effective depth of field of two times. So in a pinch in low light, he can shoot wide open and get it. Go and get what he needs. Okay, so DSLR cameras I use So I use the fighting Mark three a. 70 d and I borrow 70 for my friends sometimes. So I'm a firm believer that our world, in terms of photography and video, will change when photographers get practical autofocus in video and it's arrived, the Canon seven D D is a phenomenal camera when it comes to being able to auto focus, I could tap the screen. I can tap it. It'll focus will tap it. It'll focus, and it tracks. It can actually track a subject. So if I'm following a bride, if I've got it on a handheld rig, if I'm doing something that requires me to pay attention to the framing but not the focus, that becomes something that becomes very, very nice for me. And here's the thing. Cannon believes in this technology so much that in their cinema cameras, you can pay for the upgrade in one of them. So that's where this is going. That's how much they believe in it. So if they believe in it that much, it works. Right? So before I move on, how we doing? Right. Okay, I lose. I generally lose people at the crop factor. It's like the first slide in I lose them such. Let's make sure we all get that. Okay, If there's any comments about that in the chat room, just please let me know. Okay? All right. So we shoot at this resolution. That's what we shoot at. Now there will be people out there that say 10 at 30 frames a second, or you can shoot at 7. 20. I want you to have the easiest experience possible shooting video. And I want you to have videos that look like they were kind of have that Hollywood feel. If you want to have it look like Hollywood, have that film cinema, look and and and not have anything. Any problems and editing. Just do this. Do this. There will be times. Just shoot it. 60 frames. There will be times you shoot it. 30 frames. There will be other times that will change your frame rate. But I'm just gonna say, if you're starting day one today capture at that resolution. Okay? Now, for those of you guys don't know what 10. 80 means this was TV back in the eighties. Okay, this is like newer TV, kind of like in the late nineties. And then full HD is here. So your image surface that you're showing on the dimensions of the image just got larger, and it could actually represent reproduce more detail. Okay, so we shoot at 10. 80 because it's the top resolution that we can capture it. And because if you ever try to scale an SD image up, it just doesn't look good. It actually looks like this in case here's SD 7 20 and 10. 80. And when you put them all side by side together, can you see the difference? So you want to shoot at the top resolutions? Just like photography guys, you shoot in the top resolution you can down raise, but you could barely ever if ever appraise effectively. Okay, so that's that's the one thing that that that I really like to stress is you shoot a 10 80 at 24 frames a second and there will be times you shoot a faster frame rates. But that's again. Once you've gotta walk for you can run. Okay, Don't worry about other frame rates started. 24 shooting 24 Edit 20 for you guys familiar with color management at all. Okay, there's something in color management called the color pathway. Okay. Color pathway is what you capture your image in the color space has to be what you edit in has to be what you out put it So therefore, if I capture in Adobe 1998 I have to edit in Adobe 1998 and I have to output in adobe 1998 if at any point I changed Madobe 1998 s RGB I've just changed my color space, which means my product won't look right in the very end frame rate works the exact same way you shoot in 24 you edit in 24 you output in 24. And if you change those numbers in any part of that chain, you're in for a world of hurt. If you don't know what you're doing, okay? There are plenty of people out there that can shoot in 60 and output in 24 know exactly what they want. But in the beginning, before anyone has ever done anything, if you're shooting 20 for editing 24 output in 24 just to make your life a lot easier. Okay, so do as I say. Mhm. Save yourselves in trouble. Okay. All right. So if we're gonna capture at this frame rate and this resolution we're gonna capture at this shutter speed, which is 1/50 of a shutter now there's a reason for it. And it dates back to cinema camera. Cinema cameras had a film reel, right? Had something called a gate That's fun perpendicular to it. And that gate, if it's was at 180 degrees, would expose a piece of film for half the amount of time. So for us to replicate that look and the look that we get in cinema, we have to shoot at 1/50 of a second. Now there's ah, rule of thumb here. All right. What's our frame rate? 24. Okay, Double 24. What do you get? 48 in order. So, technically, if I really wanted to replicate 180 degree shutter. I would shoot it. One 48th. Do our cameras have that? Gotta go 1/50. Okay, so let's make let's kick the can down the street. Six months from now, you're going to shoot 60 frames a second. What's your shutters Need 1. 21 25th? Because we don't have 1/20 okay? And all that does is it gets us back to base level. Okay, It gets us back to 100 degree shutter. It gets us back to If, Holly, if what we saw in Hollywood is shot at 60 frames a second What that would look like. Okay, Now you can change your shutter speed up or change it down based upon a stylistic choice. But we're all used to seeing footage when it's at 24 frames a second. Captured on the 50th of a second shutter speed. You follow me on that. Okay, so frames a second 50th. Watch the water fall off the rock. So what I was doing Change your shutter speed side by side. Look at the water blurry. Quickly. Mhm. Okay, let's watch it one more time. Wow. Okay. Watch that water on the rock, so it gets to be released. Academy. You could almost feel it, right. Think of an explosion. If you could see every little grain of dirt and dust inside of that explosion, that's a fast shutter speed. If it blurs together, it's a slow shutter speed. If I'm blowing stuff up and I want to see everything, I'm gonna kick my shutter speed up. It's gonna give me stylistic kind of like, ah, stylistic. Um, if you know, Button, You know, uh, so let's think about it this way outside of explosions, because we don't really blow things up at weddings. Um, metaphorically, yes, but not not practically, Um, what things do we capture? That would be benefited by a faster shutter speed. Think about wedding. Okay? Think of a bride what she wears. Think of things that move dress? Yes, dress earrings, maybe throwing, throwing, rice, throwing rice, that sort of stuff. If you use a faster shutter speed on that stuff, it will lend itself to the foot. It's gonna look better. Okay. However, during the vows would use a faster shutter speed. No, because they're gonna leave room like this. It's gonna be like they're gonna they're gonna look like they a dose of Ritalin or something. Okay, so they had too much caffeine gonna moving around too much. All right, so you pick your shutter speed in cinema in motion exactly the same way you pick your shutter speed of photography. It's just you got to think about it differently. Because why footage feels a certain way because we talked about earlier footage has to feel a certain way. And if the technique doesn't pair with a feeling, there's a disconnection right now, there's always exceptions to the rule. There's always an exception to the rule, but for me and for what we're teaching here and what we're doing, basics wise, if you kind of follow those concepts and live by those concepts, it's gonna really, really just help you along a little bit. We get to set the aperture when I say we set the aperture. That's exactly photography. I wanna get a shallow dip. The fuel epic 2.8. I want more dip the field. I'll pick up 11. You know, I I'm kind of really oh CD about certain things. So I know in my lenses what apertures are the best. I've spent the time and I photographed coke cans and made sure when it, you know, at what aperture is the length of the sharpest. You know, there's typically a sweet spot to every lens. Um, what a lot of you don't realize. Okay, so we're gonna roll back the conversation to see if you guys understood what I said earlier about crop factor in cinema. They're shooting on ah, film surface called Super 35. Okay, Super 35 is roughly the same size as a PSC, so we could just safely assume it's about 1.6 crop factor. Okay, so F eight in cinema F 56 in cinema, it's actually pretty deep in depth of field, isn't it? You're getting closer, like 88 11. Okay, so So for me when I'm shooting a five D mark three. Ah, full frame camera. I'm gonna hang at, like F 456 I could even go eight or 11. Okay, let's stop the conversation here because this flies in the face of everything that I have ever learned in photography. Photographer shoot shallow and they shoot shallow 24 7. They will shoot shallow in their grave if they could. Okay, not only do they do that, Victor, I thought you said, is beginning. The class people are using DSLR is because of shallow depth of field or yeah, kind. Yeah, yeah, yeah, but let's let's go back to letter to slide. Let's go back to the slide. Earlier, it looked like this. When you have an image service that's this small versus an image surfaces this big, the smaller the image surface, the deeper the depth of field, the larger the image surface, the shallower, the depth of field at the same aperture. So let's think about it. We in the photography world got large format sensors and shallow depth of field very quickly, whereas in the cinema world they didn't. They were still shooting very small sensors. They're getting infinite depth of field. They would actually take a contraption, put it in front of their lens so they would call. They were called depth of field adapters, and you spend thousands of dollars for it. Just so you get shuttled up the field. Okay, so So when these cameras came out when the five d mark three or two came out, it was such a. It was such an amazing thing for them that it changed the way they thought it seems with they thought, not the way we think, And that's something very different in our world. We think differently because we've always had that film surface, that image making plain and that depth of field. Okay, so to kind of bring it back full circle, I use 4568 11 16 sometimes because F 16 and F 11 still look shallow to someone who's used to cinema. Okay, And that's something we have to break a habit off because I see when I'm shooting stills. If I If I c f eight or F 56 I think, Oh, that Zalmay, that's what my my mentor does don't wanna do. My mentor does that look dumb, right? But we need to think the way we need to change the way we think, because we're not just photographers anymore. Where we captured motion, you said the ISO. Now there's some rules, you know, for ISO and and and the cameras as they These rules change daily because cameras air changing daily. So when I say like oh, shoot the lowest also possible and try to stay below 20. 500. That's just good. Because if you guys ever seen noise and video, it's bad. Okay, I've got two clips to show you. Thio kind of emphasize my problems with with, uh, kind of ISO and and and and noise in general. Okay, so the first clip here is just a isso comparison. So here's 1 60. I want you to pay attention to the shadow areas. Here's 3 20. Pay attention to this shadow area and you look the noise that starts to dance around just right here. 6. 40. And as it gets up and up and is so you're gonna start to see mawr of this start to posterized and more would start to break apart. 2500 is my cap. Okay, so I just see it dance around and you get to 5000. It starts to get more. And this is that a deep apple tree. We still got a throw in the background, right? When we said earlier 10,000, you'll see that start to break apart even more. And then now we're at 12. 80 or 12. 12,800. Okay, so the purpose is showing you This isn't to kind of say, Oh, well, Canon vs No, no, it's not that I'm just showing you that as you increase that I So there's a there's a tolerance point where it starts to break apart. There's things you could do in post to mitigate some of that noise. But in reality, if you if you if you just kind of stick below 2500, capture image in exposure. Using a meter, we'll talk about light meters later. But using a meter and actually getting the proper exposure, you're gonna do your best to mitigate that noise because there's always gonna be noise in an image because we're amplifying the signal. Okay, we're amplifying. Were taken the sensor. We're juicing it up with steroids to be more sensitive to light. There's gonna be a measure of noise that that shows up in the image at any idea. So, above like, 1 60 custom white balance. This is something that we always used to dio in photography, and then raw came along and then that just left like it exited like yesterday's trash like it just disappeared. Okay, just like light meters. But Here's the thing is I believe in not on Lee having things always be accurate, but I have it in being correct. Okay, so he's a target. Guys don't use a white shirt. Don't use a white wall. Who knows what that tone of white is on that wall. Who knows what tone of white my shirt would be if it was white? Don't white balance off the bride's white dress? Because what if it's off white? She's going to get really pissed because then that turns out off white into white in your video. And she's like, That's not my dress, Okay, there's a reason you use a target, and there's a reason these things exist. It's because it matters. All right, so here's an example. Custom. My balance. Calvin White balance auto White balance. So I profiled this morning. This morning's we can kind of sort of trust it. Okay, so custom white balance allows is a process to do inside your camera for cannons. It's a really quick process for ni cons. Its's an easy process, and they actually have ah, broader range of features to Kelvin White balance. So you all know Kelvin, you switch to Kelvin, your camera, you can dial in. I'll show you that later. And then Auto White balance is the last possible thing you will ever want to do because it will change during the shot. Okay, What auto white Balance does is a pre programmed value for white inside of the camera. And as you're kind of filming, it will identify what it thinks it needs to be white. And as you go from one thing to the next, if it feels like it needs to change its white balance to kind of make that one value white again, it's gonna change, Okay? Or it will change between clips, which is the worst. Because then you're sitting there in editing. You don't know how to grade. You just started using premier, and you're like, Okay, what do I dio? I can't just color pick it. That doesn't It doesn't work the same in premiere. Okay, so here's the thing. Do it right. Do it right to start. So when you set a custom white balance, all you do is you gonna get a reading off of that target. You're gonna take a still frame of that target. Just make sure it's full frame and you actually don't even need. You don't even need it to be like in focus. OK, so then you're gonna go ahead and access your menus. You're gonna pick your custom white balance image, set it and then set the camera itself to custom white balance. Okay, Now, what you're gonna get a chance to Dio is at this point, um, just be able Thio set the white balance for that lighting condition inside of your camera. And then here's the thing is, you're gonna need to change it. You're gonna need to change it every time the lighting situation changes. Okay. And at this point here, I want to make sure that I stop because this is crazy. This is custom. This is Kelvin. This is auto. This is the background. It wasn't lit, so it should go somewhere into this value. This is to read. This is to blue. This is just right. Right. Okay. You guys feel me this last thing or cameras, I think is one of the one things that people struggle with most. Okay, so, uh, the videos that I've shown you all today so far how is the focus on them. Okay, Right. So that should tell you something. Because when I first started Ah, lot of things. When I first started, we made and we didn't really know how to focus. Well, I wasn't really well practiced yet. There is a certain forgiveness and tolerance when it comes to motion about things being in focus. Okay, if I'm static and I'm talking, I'd better be in focus. But if I'm moving is that element of blurred to the image right? There's an element of blur. So if I'm moving from left to right and you're panting me and you've got a you're close enough, chances are no one's gonna notice. But when I stop, I'd better be in focus. Okay, So here's the thing I used to say. I never want auto focus in cameras. I now say I want the choice whether or not I use autofocus, because when I have the choice to use auto focus, I get to do this. I get to direct your eye without telling you or showing you where you're going to be. Yeah, just by using critical focus and using a shallow of the field, I can direct your eye this movement here that we started is called the focus pull that's on a tripod and that z actually just turning the barrel of the focus to the at that point Now, all this stuff, all the rest of the clips I call that focusing to appoint meaning. I set my focus to that point. I had the action. Either get into frame or have the action happened in front of it. Okay, so what, You'll see me do a lot. If you ever watch me shoot is I'll have my talent and I'll be like, Okay, Stephanie, you're going to step on that. And when you step on that, I need you to stop there So I'll pre focus here, have her go off frame. And then when she walks in, she was already in focus. So you think about your brides. You think about your groom's carry some Gaff, tape colored Gaff tape or whatever it is. Market out, get far back, tell them to hit that point. You know you're in focus. That's kind of like some tips and tricks that I'm, uh, that I've used and I continually used throughout throughout what I've done in video and, you know, it's it's easy if you practice right. So when you talk about focus, you know, you got, like, think about manual focus. It's an asset, and it takes practice. And I'm not gonna lie to you, you know? But, for example, there's some things you can do. Like this shot. Remember the shot? Okay. The camera waas here stuck it in there, but a fisheye input A, you know, supported with a girl, granola bar or whatever. It waas. But we measured from there. So there's a little indicator here, and we call it the focal plane indicator. Okay, that's where your images being actually created. All right, So what you do is you could take a tape measure measure from that to your subject. Okay, so you put your tape measure their measured out to your subject, and then you set the distance on your lens. You're such a distance. Your lens that just guarantee that you're you're in focus. That's a technique they still do in Hollywood. You see guys running on the 50 ft tapes doing that? It's still practical. It's still a thing people dio so it's not out of the room of of discussion. Especially like if you're running a low budget and you've got a camera up and you don't have a monitor, Just boom said it. You know, you're in focus. It works. We did it for that shot. Okay, Now there's an in camera functionality that involves, like, using buttons. Its a standby option. Okay, so you can zoom in on the camera, push a couple of buttons and that kind of stuff, and it really helps you get to a point where where All right I can I can see my my subject and I'm in focus, and then I record that goes away.
Class Materials
Bonus Materials with Purchase