Filters & Effects: Overview
Lesson 14 from: FAST CLASS: Adobe Premiere Pro CC Video Editing: The Complete GuideAbba Shapiro
Filters & Effects: Overview
Lesson 14 from: FAST CLASS: Adobe Premiere Pro CC Video Editing: The Complete GuideAbba Shapiro
Lessons
Understanding Editing: Overview
05:30 2Tour The Interface: Digital Video Workflow
13:59 3Tour The Interface: Project Panel
12:18 4Tour The Interface: Choosing Your Shot
07:08 5Tour The Interface: Music And Voice Over
10:20 6Tour The Interface: Video Tracks
05:16 7Tour The Interface: Edit Markers
08:06 8Building a Rough Cut: Importing Media
16:56Building a Rough Cut: The Edit
29:52 10Refining Your Edit: Making Cuts
24:56 11Working with Audio: Overview
17:29 12Working with Audio: Mixing And Syncing
14:40 13Transitions: Overview
13:24 14Filters & Effects: Overview
16:46 15Titling & Graphics: Overview
24:42 16Speed Changes: Overview
20:59 17Sharing & Exporting: Overview
27:54Lesson Info
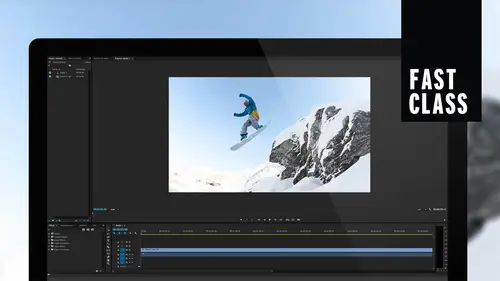
Filters & Effects: Overview
Okay, We're gonna look at filters now. We just looked at transitions And guess what if you if you got your head wrapped around transitions, filters, air easy because you don't have to worry about handles, you just put it on a clip. Now let's take a look. We're gonna look at filters and effects. They kind of fall into the same category. We're gonna look at applying filters and modifying like we did with transitions changing them over time because that's a big thing. Like maybe you want something to go from in focus to blurry. Are you wanted to fly somewhere or you wanna modify it color in or go to black and white stacking filters? Because sometimes you may wanna get in effect by putting two filters on top of each other to give something a certain look or a certain field audio filters. There's a whole slew of audio filters that come in. Premier um, we'll look at those briefly my opinion with audio filters. Unless you really know what you're doing. You tend to make audio worse. Uh, they a...
re ridiculously powerful tools, but there's only really a couple that are like Go to that I really like, Um, not that everything else is in good. It's just I am like, the average person. My audio usually sounds worse once I start playing with these audio filters. And by the way, never say audio filter to a sound engineer because of filter is something very specific. It's an effect. Ah, filter cuts out of certain bandwidth, and they will wag their ponytail at you. Um, and now I'm gonna be getting, uh, tweets from every single audio engineering. And I love you guys. Um, but, you know, you have ponytails, so it's good, uh, copying and pasting effects. You know, you build something you like. How do you move it to another clip? And also, there's something really cool called an adjustment layer. And if you've worked in Photoshop, you're probably familiar. Ah, little bit with this, but it allows you to put ah filter on a bunch of clips instead of putting them on one at a time. So with that said, let's hop in tow. Look at filters. Now, we're gonna use some of the same material that we worked with in our transitions. We're just gonna use them differently. So if I wanna put a filter on a clip? I select the clip. Once again, I would go into my effects tab. Now you can work with this a couple of ways you can work with it in your traditional editing layout and a lot of people like that because it's a comfort factor. You're familiar where everything is again. What Adobe has done is they've actually made workspaces for, say, working with effects. And what that does is it keeps pretty much the same windows, but it rearranges them to where they're a little more useful. So, for instance, we, you know, have our effects controls here where we can modify the filters. We don't usually have a big space for our project window because usually everything's in the timeline already. So they said we can push that aside. I want to see our whole timeline, and then they put the effects over here. So when you scroll down, you can see them all. So this is, you know, a nice view toe work with. I'm gonna step back to our traditional view just because you're used to looking in certain locations. But I wanted you to be aware that there are different work spaces for working with, Say, your audio, your effects. There is one specifically for color correction that we will be going to when we do look deeper into color. Color is one of the filters are effects that you will see. But we're not gonna go so deep into it here. We're just gonna do some, uh, general over arching 10, ft view off filters. So I'm gonna go back to editing much like before where we found a video transitions under the effects tab is also where we're gonna find all of our filters are our video effects. And again, these are broken down into categories. So they're easy to find what you're looking for. Ah, lot mawr of these are native to premier that are really nice, as opposed to transitions, which are more limited again. Third party stuff, great stuff out there. If you go to the adobe website and you look a third party under, you know, Premier, you could get a link for third party plug ins. That's what they call plug ins, and it will lead you to some great stuff. There's a lot of free stuff out there. Um a lot of these developers giveaway stuff to bring you to their site, and it's really good stuff in both transitions and filters, and I think you should look into that. They're very easy to install. Um, so the Adobe website, it's safe to link to that. You're not gonna get any viruses. Life is good. These things are pretty self contained. I've never had a problem. And I found some great free stuff. So I do recommend looking there. But let's go ahead and work with what we have. So if I want to apply a filter, we're gonna just apply maybe a simple black and white filter. Okay, so I have no idea where the black and white filter is, and that's okay, because I could go up here and I can search. So if I go into the search box and I type in black and white, let's see if it's under. So let's see what we see. And what's interesting is I had a feeling it wasn't gonna be under black and white. But you see these things Hero three black hair hero, three black. That's a specific GoPro. Black Magic cinema cameras. Uh, they have filters that will compensate for things such as the the, um, distortion that you would get when you're shooting with, say, a GoPro, and it automatically fixes that. Now it's very, uh, CPU intensive, but it does, like, quickly fixed distortion off that, uh, wide angle view. The thing is, it's not gonna be under black and white. It's gonna actually be under de saturate. There it is. It is under black and white. Don't listen to what I say. Listen to what the program says. So I want. Apply this Aiken. Simply grab it and drag it. Or if I already have it selected. If I double click on it, it applies the filter to whatever clip is selected. So I just applied a black and white to this beautiful video time lapse. Okay, and if you look over here, we are in the effects control tab once again to find that we were in the source area and under effects control. When you select a clip, you can now see, and there it is, black and white, and the thing with this filter is it's basically on or off. Okay, it's black and white, or it's It's not black and white. A supposed to something. You could do a degree of d saturation. So let me go over here and type in de saturate. No de saturation filter so we can't work with that. And this is the challenge I have. I probably have 600 filters in my premier library, and they're great eso. Sometimes I look for something. It won't be there because it's not native to the application, but there are other ways that we can work with that. So let's go ahead. You can apply an effect. I wanna apply something that I could do some modification to and for instance, Ah, Blur filter. Maybe you wanted to, ah, blur to this, and I'm gonna go ahead and pick the next clip. Gonna go up here, type in, blur a lot of different blurs. The Gaussian blur is kind of your go to blur. It's one of the fastest ones for the computer to calculate its what we're used to if you came from Photoshop or Light when you're probably familiar with the Gaussian Blur are Gaussian Blur. Um, if you have vision like me, everything might be a blur. So that's why I want to use this filter I put it on and isn't that wonderfully blurred? It's clear to me I can't see that, but it's not blurred to you when it goes on by default, it's blur level is zero zero amount of blurred ease. So if I wanted to make this blurry, I would simply go up here, and I could just use the slider and automatically bring it to the amount of blur that I want. Why would I want to take my beautiful, sharp photography and make it blur? You ask? Well, maybe I'm running a title over it, and I just kind of want this movement in the background, and then I want to bring it into focus. There's a lot of reasons that I may want to have a little bit of blurred or something when I'm, especially if I'm compositing or from layering. So it has a nice things. Now I wanna point out something that I really think was brilliant with the guys who designed this. When you make something really blurry and you might have done this in a video editing program, you might have done this in ah, photo editing programs such as Photoshop. Sometimes you get this blurry edge of black, and that's because what the software wants to do is blur the black outside of your image in with your image, which isn't that what necessarily what you want. And they did a nice job here. They made a little button that says, Repeat the edge pixels. And if you click on that, do you have the blur you want without having the blur distortion so you can see it's very easy. Thio. Manipulate this, but I want something more. I want to create something more dynamic. So I'm gonna go ahead and I actually want to take this scene and maybe have it go from black and white to color and from blurry to in focus. I have to do a couple of tricks here because I'm working with a very limited filter. You say that black and white filter is either on or off, right? So let's do that challenge first. I'm going to zoom it black and white. I want to go to color. What if I cut this clip in half and took the filter off in the second half and then did a dissolve think that might work. No. You don't think that'll work? I hope it works. So I'm gonna cut the clip in half. This would be great. If it doesn't work, I'll just be I'll be like, Okay, it's time for me to go home. I'm gonna cut it in half. I'm gonna do that. I could do the razor blade, which I talked about the cut C or this keyboard shortcut. Command K, the German cut cut. So I cut this in half. I'm gonna go over here and the filter stills on both sides. And I can if I want to just deactivated Hit the FX button. The filter is there, but it's turned off. You can kind of see it on the edge there. Colors should come back in. If I wanna delete it completely, I could just select it and hit delete. So now I'm in a situation where we're going from black and white color on the move, and I changed my default transition. I'm not gonna get caught in this, and I also made it six frames long, so I'm not gonna get caught on that. Let me fix those preferences from the previous lesson. Okay? preference. General, make this 30 frames. Okay, go down here under dissolve. We don't want to dip. Dwight, cross dissolve. Right click as we learn. Selected as my default transition. Cross my fingers shift D spread it out a little bit longer. Luckily, it worked. It's okay. I was scared. But that s so this is a case where I kinda I kinda faked it. It's a great way I went from and I love doing this, being able to go from, like, black and white to color, and sometimes I'll do it really, really like a long dissolve, so they don't even notice. And suddenly it's like, Wait a second. What's that? Black and white before. So that was pretty fun. It's gonna hurt me on my next thing, though, because I want to do this blurry thing right again. It's gonna create a problem. I like creating problems for myself. Is you will I don't know if I like it, but I'm very good at it. I'm going to show you how to create the blur move, and then you'll see where it breaks. So we're gonna go to this next clip here, which is a fairly long clip nice underwater stuff. We made it blurry before. As a matter of fact, are Gogean Blur is still there, set to zero. We learned in the audio lesson about key framing. We're gonna keep frame here Also. We want the Blur to change over time. And I know I can key frame something because I see these little stopwatches that I saw with the audio that says, Yes, you can key frame something and pretty much you can key frame most parameters off filters and effects. So I want this to start off fuzzy. And then I wanted to go to clear I'll probably pick where I want to clear to be working backwards so you don't have to, But it's easy to work backwards. And I'm gonna simply hit that stopwatch and you'll see a soon as I do that it has created a little diamond here, which is a key frame and has locked in this parameter at this moment in time. Okay, keep that in mind. It's a time parameter key frame, so I'm gonna go now back in time, and I can do that either in my effects panel or in the sequence you see they both the play heads move at the same time. And now because I have one key frame, if I modify that parameter, it will automatically create a new key frame in that location. So I'm gonna go over here and just make it a little bit blurry. You see, a new key frame has been created, and I think that's a good level of blurriness. So as I play it from this point to this point, it should come into focus. And I say, Well, that's great. It just took really too long, okay? And it was blurry for too long, so I can either grab these individually and move them. So now I'm moving this key frame, or if I needed to, I could actually grab a group of them and move them as a chunk. So I wanted to actually start getting in focus a lot quicker, and I could go back and I can play it and see OK, it's coming into focus and its sharp. So I'm gonna put a title over there or something. Now, this is my problem. I was really clever about the black and white thing, but if I want the black and white and focused happen at the same time. It's gonna be really hard. I could come into focus first, right? And then I could come into black and white. But I want them both the happen and like my head's about the blow up, trying to figure out a solution. Ah, a third party plug in would let me have done maybe the black and white another way, and there's actually some built in ones where you can do it. But I'm creating a challenge here. I want to be able to put something else on top of this effect, and I have a couple of choices. I could do something called nesting, which we talked about earlier lesson where you could you could literally put this into a container, and then I could put the filter on that container. So if I want a nest this because right now, if I put that dissolve on, it would stop it. This edit point. I would select them right click it and there's an option to say ness, and it's gonna ask me what I want to call the nest. I'm gonna call this my open time Lapse. It looks like a clip now, Okay? And it works like a single clip. But I still have that effect happening. It should go to color. Here we go. And now, if I want, I can go ahead and I could do that. Fade that dissolve. And I'm really lazy, and I've already built it here. So guess what? I could go over to that Gaussian Blur. Copy, Command C Control C. Go over here, Command the and I just pasted that effect from the first one onto the second one so you can copy and paste in effect. And I just achieved the trick that I want and hopefully taught you a couple of tricks. I'm gonna repeat that again because you know, I'm moving pretty fast, right? I can tell because everybody's eyes got much bigger than their heads. So what I did the nesting was actually pretty cool. You could do a single clip. Multiple clip, and you're not committed once you build a nest, guess what? You can step inside of a nest by simply double clicking on it, so I just It actually creates a new sequence that is inside the old Arnold puts the old sequence inside of the new sequence, and there's actually a new element. So I could go in and I could change anything I want with that, and you'll notice when I double click that it actually opened a new sequence in my timeline area. And then there's my original one so I could go in if I want to make a change. Maybe I wanted the the timing of the cross dissolved to change, do a role at it. There happens a little bit sooner. It's gonna roll up. Now it's gonna update. And then what I did is on my nest. I put any filter. I want it and I was lazy. I wanted to use what was there. So I copied and pasted. And I wanna show you how I did that again because there's a couple different rules you need to follow. If I just want to copy a single filter with all the parameters, I would open that filter up in the effects control tab, hit copy and then paste it on to another clip, and it will paste with all those parameters
Class Materials
Bonus Materials with Purchase
Ratings and Reviews
Annette Rose-Shapiro
What a great class! I learned so much from this "Fast Class" and Abba is a wonderful teacher. He explains things very clearly, and he adds humor and playfulness that helps what could be very dry and technical subject matter (I've taken courses like that!). He really knows his stuff and gives lots of tips from different ways to do things. That's important because we all have different ways we approach things. From one Shapiro to another, great job, Abba! I will definitely take some of your other courses.
Nev Steer
Rewatchedasarefresher.Super
Student Work
Related Classes
Adobe Premiere Pro