Adding a Pin Back to a Hollow Fab Form
Lesson 20 from: Explorations in Metalsmithing: Hollow FabricationMegan Auman
Adding a Pin Back to a Hollow Fab Form
Lesson 20 from: Explorations in Metalsmithing: Hollow FabricationMegan Auman
Lesson Info
20. Adding a Pin Back to a Hollow Fab Form
Lessons
Prerequisite #1: Basic Metalsmithing Tools
18:08 2Prerequisite #2: Tools for Soldering
14:21 3Prerequisite #3: Soldering Basics
21:14 4Class Introduction
07:42 5Design Considerations: Making Paper Models and Thinking Three Dimensionally
14:40 6Creating Non-Soldered Forms: Bending and Folding
18:38 7Creating Non-Soldered Forms: Dapping and Sinking
17:19 8Pendant Preparation & Soldering Basic Forms
22:56Creating a Soldered Cone
06:29 10Hollow Fabricated Ring: Sizing and Making the Internal Ring Band
09:05 11Hollow Fabricated Ring: Making the External Shape
37:59 12Hollow Fabricated Ring: Constructing the Ring Part 1
22:05 13Hollow Fabricated Ring: Constructing the Ring Part 2
38:06 14Hollow Fabricated Ring: Finishing the Ring
04:18 15Variations on the Hollow Fabricated Ring
05:02 16Building a Locket
08:06 17Making a Tube Rivet Hinge
11:45 18Creating a Hinge & Clasp from Tubing: Part 1
14:26 19Creating a Hinge & Clasp from Tubing: Part 2
21:32 20Adding a Pin Back to a Hollow Fab Form
14:32 21Finishing Your Hollow Fabricated Jewelry
07:59 22Turning Your Hollow Fab Projects into a Cohesive Jewelry Line
07:54Lesson Info
Adding a Pin Back to a Hollow Fab Form
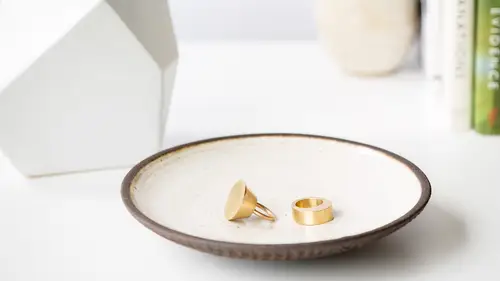
I have one more fun little soldering thing to show you guys to get you thinking about just one more possibility. Which is adding a pen back to a hollow fab form. So, you're actually so excited. You're like. So, way back in the beginning. Let's see if I can find that guy. You know, I did that little folded sample. And I, and I'm gonna throw it away. And I said, wouldn't this be fun as a broach? So hollow fabrication, you know, as I mentioned before, there's a lot of things you can do with it. Obviously you can make rings. We can make lockets. But it's a great technique for broaches as well because you can get a lot of volume. And then still have not a lot of weight. So even something as simple as this I think makes a really exciting broach. So what I want to show you guys now is a really simple way to make a pin back that's not buying a commercial pin back and gluing it on. Right? So, we are gonna start with, let me find some wire here. A little bit of wire. And depending on the size an...
d weight of your broach, you can go anywhere between like 16 and 20 gauge wire. Especially if your broach is heavier I recommend going a little bit bigger so that you've got a little bit of strength. I also recommend for broaches, I wouldn't use copper, and I wouldn't use like argentum silver. I would use something like brass, bronze, some work hard and sterling silver. You want something that's a little bit sturdy so that we've actually got some heft to it. I actually think I'm gonna go one gauge thicker on this. I think I've got some 16. That was 18. But I wanna go with 16. 'Cause this is a pretty substantial broach. The other thing you wanna figure out, is so we're gonna do what basically becomes like a fibula style broach, so we need to figure out which way we want to orient it. Typically it's oriented horizontally. Though that's not the letter of the law. I was just, I saw that amazing Georgia O'Keeffe exhibit at the Brooklyn Museum with all her clothes, and there was this broach that you actually see her wearing a lot made by Alexander Calder and she always, they had it mounted horizontally and it's actually, literally, the letters OK for the start of her name. But she always wore it vertically. Because apparently she didn't want to be that literal. As Calder wanted her to be. So there is no real rule that says you have to wear it horizontally. But generally, that's how you might wear it. So, if I thought I wanted people to wear this horizontally I would mount it that way. If I thought like, oh, people should wear it this way, then I might want to mount it across here. You don't want to usually mount a broach or a pin back straight in the center. You usually want to go about two thirds of the way up. So that way the weight kind of works for you. So I kind of like this as an actual rectangle and not a diamond. So I'm going to assume I kind of want to put it from about like, there to there. So the easiest way to do this is to actually take a loop of wire and solder it on in one piece. And then we'll cut it apart and turn it into our broach. But first things first, I wanna clean my metal a little. So I'm actually gonna go just slightly above where I put these marks. I was kinda giving myself an eyeball. And again, if you would like to be more precise, you can absolutely measure this. There's not rule that says you can't. And then what you wanna do is take whatever gauge wire you're using and make a pretty big loop for yourself. Eventually this is gonna get cut apart. I'm gonna make this a little bit smaller. This is gonna get cut apart and turned into our catch and our long piece. But it's much easier to actually solder it on in one total piece because now we can kind of solder on our little friend here like that. Does that make sense? What we're doing so far? You'll see the magic in a minute. We'll get there. So first things first, assuming this soldering actually works, if it doesn't work we'll just try it again. It's not a bit deal. So I'm gonna just file the ends of these so they're nice and flat. So when I was in school one of the things that, you know, we were always taught is, you know, the back of a broach is just as important as the front. Because it really becomes this nice like private gift to the person who's wearing it. And so, obviously if you were thinking about an actual filled in hollow form, and you didn't want to do any kind of piercing or anything on the front, the back becomes a really nice way to integrate some piercing or some drilling to give you those air escape holes. That becomes just a thing that the wearer gets to see. So, something to think about as you are working on things like broaches. You know, you can consider the back as a design element for sure. So I've got this cleaned. I filed my two ends. It would be really helpful if where I actually was putting them was where I had sanded. There we go. That's a little better. So now I'm gonna go ahead, grab my cross-locking tweezers. I thought I saw them up here somewhere. Usually the longer you let flux sit out the more it dries. And if that's the case, if the flux in your studio is feeling kind of dry, you can actually just run a little bit of water in it. And you can reconstitute it. Like I always, mine lives in a room without air conditioning, so it, it dries out really quickly. And then you just throw some water in and remix it. This for some reason is like, ridiculously runny. All right. So, let's get this guy set up here. So sometimes I find it's easier to get things in place and let the cross-locking tweezers do what they wanna do. And then kinda move the bottom piece around. Rather than trying to fight with all the angles of your third hand and your cross-locking tweezers. So I've got this guy in place. Let me go ahead and make sure that's nice and tight. That. Looks like it wants to touch. And then, since this is our final soldering operation, I'm gonna make my life easy and use easy. I'm not so worried about these big pieces even though they will actually cause considerable amount of cleanup. And, I wanna kind, this wants to be a little bit loose so I'm just gonna try to get this touching a little bit tighter if I can. So I'm just gonna put one piece of solder at each of these. That should be plenty of solder. It's gonna be way, it's gonna be more than plenty of solder. I know. But, (laughing) I don't have any smaller pieces than that. So let's go ahead and turn off our lights. For what is fingers crossed our last solder of the day. Unless it doesn't work and then we'll do it again. You guys are like, maybe it'll fail and then we can solder more. (laughing) 'Cause this is one of those where I can't show you wants coming next until we get this soldered on here. So, if we gotta do it five times, we'll do it five times. So, once again, back to our old favorite story I am just drying my flux a little bit here. Keeping an eye on my solder. I already feel like I lost the piece on that side. I did. It did move. I want, I'm not crazy. Perfect. Okay. The biggest challenge with something like this is obviously I've got a very big piece on the bottom and a very small piece of wire on top. So I really need to make sure that I'm getting the bottom up to temperature. Or all of that solder is just gonna wanna flow onto the bottom piece. And actually I'm just gonna give, I want a little bit more oomph to this flame. So I could do two things there. One, I could have just put a different torch tip on. But since I'm already in the middle of going, I just added a little bit more oomph to my regulator. I just turned it up a little bit more. And a, hopefully that should give us a little more power. All right. So now we're starting to burn off. There we go. That's a lot of solder there guys. As I said there would be. But it looks like we're good. So, unfortunately that's a lot to file off. But, whatever, we'll live with it. All right. You can turn up the lights. So I'm gonna go ahead, and look, it's actually, it worked. That's a good sign. So that was our last solder of the day. I know. But now you guys can just go home and solder on your own. Oh, that's still really hot. 'Cause that's what happens when you don't put the whole thing in the water. Parts of it stay hot. We're good. All right. So, in a perfect world I would pickle this now. Because it's a little bit gunky. But I wanna show you guys the next step. I'm too excited. So we're just gonna roll with it. And then we'll stick it in the pickle a little bit later. So now what we need to do is we need to make a hook. And we need to make the fibula part that runs across. So, I'm gonna start by cutting one side to make the hook. And we've got plenty of material here. So I'm gonna air on, like, the long side of my hook. And probably go about half an inch. As yes, I just measured half an inch with my thumb. Really useful tip that I randomly learned as a little kid. If you measure your fingers and your hand and your thumb you can use them all as impromptu measuring devises in a pinch, right. So my, this is about half an inch. This is another half an inch. So I got about an inch on my thumb. It's like six and a half inches from my palm. Really useful life skill. All right. So now what I'm gonna do, is I'm actually gonna go ahead and bend my long piece first. And this is always the part that I do badly. So let's see if we can do it. What I need to do is actually make a little bit of a coil so that we've got a little spring to this. So I'm gonna actually coil this around here. Oh look, it's not going so badly. I think except I coiled it the wrong direction. I did coil it the wrong direction. That's okay. We'll make it work. So, we'll just put out hook the other way. So in a perfect world, I would have just coiled this the other way 'cause I would want this to run on the top. But, that's okay. What I'll do instead is I'll just bend my hook the opposite direction 'cause what I want is for this to like force against my hook. I think we can make that work. Oh yeah. Look at that. We got that. We'll make that work. So if I put that here and then we'll just put our hook down. So, you're gonna coil this. Then we're just gonna go ahead and bend our hook. And now at this point we can cut of any excess. I always like to, pretty much anything that involves a hook, I like to give it that little upward bend. And kind of push it down. So now you can see I've got that little hook on there. That's a little, my coils a little giant. Let's see if I can make it a little closer. Again, these are things that I would practice before you jump onto your final piece. But the idea is kind of always the same, right? We want that little coil in there to kind of add a little give to it. So then our last step now is I'm gonna trim this guy a little bit. I'm gonna trim this guy also. So I want it to kind of overlap like that. Do you guys see what's happening there? It's a little bit shiny. And so then we wanna go in, because this is something that now has to go through clothing, I wanna go ahead and actually file this into a taper. So I don't just wanna make it, let's see where is our, so many things happening on my desk, flat file. I'm actually gonna open this up a little bit so can work with it away. So I'm gonna go ahead and I'm gonna file this into a point. Where I'm actually gonna kind of work my way from the end in nice long strokes. So that it starts to taper. Sometimes you have to go whichever direction you can go. So that it starts to taper down to a point. Because we want this, I don't need it to be crazy pointy. I'm gonna make the assumption that whoever is wearing this is gonna wear it on their sweater. That's a little more open weave. So I'm not gonna make it crazy pointy. But I am gonna make it pointier. For the record, you can also buy many different types of pin backs that you can just solder on that are pre-made. I'm sure I was, I'm sure someone was wondering that. Somewhere in their head. So you can get the tie tack backs that are just the single point that go on. Those are great for smaller broaches. But you can get longer ones that you can solder on as well. But I'm always a fan of adding your own components to things. I figure if you're going to take the time to hand make, why not take the time to hand-make your little clasp as well. So I would just keep filing that into a point. I would also just give a nice little rounding to our hook. And now we have a little pin back. I don't know if we can see that. Maybe we can go on our, our little cheat sheet there.
Class Materials
Bonus Materials
Bonus Materials with Purchase
Ratings and Reviews
user-d7f7ae
After watching Megan solder in this class, I felt like it was something I could take on. There's a lot of soldering in this class! But there's also a lot you can do without soldering that's covered. I have a better understanding of how jewelry is made from this class. I'm looking at things that I own and thinking that I now know how to recreate them!
Silvia Rossi
I liked this course, Megan explains a lot of things about techniques and materials and it's simple follow all the operations to create these types of rings. I think I'd purchase other classes of her.