Adding Texture & Adobe Camera Raw Presets
Lesson 23 from: Everyday Adobe Photoshop: From Workflow to SmartflowDave Cross
Adding Texture & Adobe Camera Raw Presets
Lesson 23 from: Everyday Adobe Photoshop: From Workflow to SmartflowDave Cross
Lesson Info
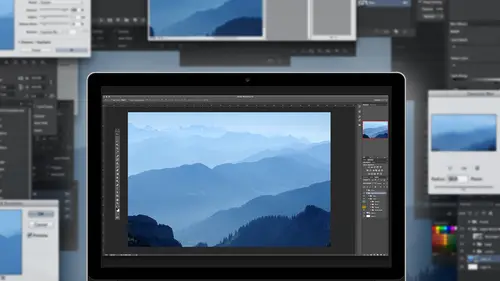
23. Adding Texture & Adobe Camera Raw Presets
Lessons
Day 1
1Why Work Smart?
33:20 2End Results and Reverse Engineering
49:07 3Make Adobe Photoshop Your Own
52:11 4Customizing Presets
20:36 5Layer Masks
38:56 6Compositing Using "Place" Command
50:36 7Adjustment Layers
35:12Blend Modes & Adjustment Layer Presets
42:39Day 2
9Not-So-Obvious Smart Techniques
24:11 10Layer Comps & Shape Options
29:31 11Creating A Series Of Objects
23:04 12Group Layers
41:40 13Scaling Masks & Masking Text
20:29 14Clipping Masks
47:11 15Student Questions & Preset Buttons
38:15 16Smart Objects
45:37 17Smart Object Tips
32:19Day 3
18Smart Filters
42:35 19Clipping Masks & Smart Retouching
36:05 20Smart Object Templates
50:02 21Template Variables
16:30 22Adobe Camera Raw and Adobe Lightroom Smart Objects
38:18 23Adding Texture & Adobe Camera Raw Presets
36:55 24Adobe Lightroom Smart Objects
17:52 25Automation & Example Projects
43:46 26Batching & Audience Q&A
35:08Lesson Info
Adding Texture & Adobe Camera Raw Presets
Another favorite way of mine of working with camera is I love to put textures over photos I just think texturizing photos can be really interesting and so I have an entire folder full of textures that I keep building on that I just walk around and like there are parts of there's a part of tampa called libor city which is an older part anyone else takes pictures of like the architecture I was like oh there's a crack in the pavement and look at that peeling paint and I've got this whole folder full of textures that I can then put on top of photographs and blend together and things like that so I've already got let's just take this for later on because that was just a demo version that really wasn't serving any purpose I'm already starting to like the way this looks but now I want to add some texture to it so the same is before there's my texture I want to use I could just choose a place and photoshopped that's gonna drive me crazy still camera raw right so it starts here first unless I k...
now from previous reputation but wanted to change the certain way my philosophy is just get it in there first and then we can go back and play if we want so I was going to click ok and so you know what just get it in there happens to be the same size but if it's, not because of the texture, is going to become very invisible, I'm ok with enlarging and if I need to or if it comes in, you know, it's, a horizontal one, you want to be vertical or whatever, those are all fine at this point. Now I have the two camera files that make up my editing for the way I want the photo looks like and this optional third layer I want experiment and see what happens with a texture on top so I might start with some kind of blend mo just like at least see where things are at and that to me is way over the top, so I don't like it. I would maybe lower the opacity on, by the way, I haven't said this out loud, but I keep doing it so I should probably mention and one of the little introduction of technique that came and suck in the photo shop a number of years ago, that I still see a lot of people miss and it's a a small thing, but it's taking you two point three seconds longer than should every single time you do it, and that is in our change, the opacity usedto have to click beside the word one hundred to get this little slider and then move it. So that is no longer necessary because that's an extra step all you do is put your mouse right on top of the world or past the end of strike the's air called scrubby sliders and they're one of the best things that ever came into photo shop because it meant no longer have to go click drag down pull over fiscal drag and anywhere in photo shop you see a number whether it's capacity pressure font size whatever just position your cursor get closer as you can see look at the cursor when I put on top see it looks like a little pointing finger with an arrow that's a scrubby slider so just go so much faster so there you go you just say two point three seconds every time you do anything with the sire uh I would say quite possibly it does and then in theory it's supposed to work anywhere where you see a number but that's the theory my bigger beef is I use in design and illustrator and they don't have scrubby sliders and that drives me crazy that such a habit. Now in those programs I go to click on a slider initially joe I just scrub the slide that but yeah that's ah nice little quick little bonus so sometimes it's a matter of blend mode and capacity will give me the result that I want sometimes and when you look at the blood most like this one, this photograph, if we go back to normal for a second, has some color in it and by nature that will be part of the equation where I when I blend it. But this is the other reason why being in a raw file is nice, because I might decide either one way or the other. I changed a blend mode, and I think either I like the color I don't care. I wish there was more or less that's, just a camera feature. So you go and say, well, let's, brighten the exposure and let's change it to gray scale so there's not color anymore. So now it's simply texture, and when I do that right away, see how the look of multiply changes completely because now colors out of the equation and it just does mohr texturizing or you say, wow, I don't know about that. Let me take that off. In fact, I liked really to make the color depending on the texture, even mohr of it. So I'm gonna crazy with ultra saturation, so that when I do a particular blend mode, it does something it complained completely different than I had before, and someone out there probably has figured out some formal says, if you use this vibrancy with this no, no one has because it would be way too complicated and that's kind of the point is that they be way too many permutations combinations and said I don't care to I know a few people one of them has been wilmar who teaches here he could explain to you every single blend mode and how it works I don't care how it works I just know what is this to looking at it like that and then on top of that I can say and what if I use soft light and change the exposure really dark wonder what that will do and an update on like ok, not what I expected I mean that's kind of the point you could just sort of see let me try this and see what happens now I would also throw in one factor and I'm always trying toe circle around two things we've done before I kind of like this texture to some degree I think it's kind of interesting but on top of blend mode and lauren the opacity I wantto I don't want to lose the ship quite as much I'd like part of that to be more visible so they were to doubleclick not on the thumbnail remember that's how we go back to camera but double click to the right it says all there's those blend if sliders again they say let's take the white parts of that underlying layer and start to poke those through do that split the triangle with the option all key and now I'm a completely different look and the only problem I have right now is my monitor is not big enough so I'd love to have the blended slider way off to the side and be moving in to see what's happening and it be even better if I could somehow adjust the blend of sliders and the camera off at the same time but that be asking too much but that's ok because I know I can still say you know, let me try some things here and when the other things by the way I think it's kind of interesting and I mentioned this before but I'll say it again is even though I'm working on the blend of sliders that blend mode in that capacity are the same as I put over here so if you figure to yourself well, now that I've done the blended slider, what would it look like in um hard light mode or whatever? So you don't have to click ok and then go back to the layers panel to try a different blend mode that's it's the same thing so I'd come in and say what if I choose darkened mode and lower the opacity and then move this slider and this is not a formula that says do these combination it's just try it that's this is thie experimental fine art portion of the program where you say I wonder what happens if and that's one of my favorite things is I don't want every photo look the same as much as I love smart object templates for certain things for cases like this I want to treat each one as a separate case but still give myself tons of room to experiment and this is what I was referring to before and I'll say the games I think it's so crucially important by nature photoshopped wants to have been a very linear apply this filter done now do this done now do this done and if you realize ten minutes wanted that filter, I wish I'd use different settings usually that's a big problem here it's not I haven't happens I'm gonna smart filter in this case but each of these camera smart option though I tried five or ten different things at any level even though I've got this one in darkened mode and fifty percent capacity with blended sliders I console ultimately go back to this other thing and say, well, maybe it's a little overexposed click ok and that is kind of this woman let me update everything for you that's something you just could not do if you'd use the more typical apply a filter move on and do like one, two, three, four, five and also just to reiterate because some people out there are watching this kind of thing and they say because I used the history panel, couldn't I do that? Well, no, because here's the problem besides the fact that's only got twenty steps in here and I can't see some things if I decided back when I changed the blend I want to go back to that step I lose everything else I've done, you can't just remove just that step, it says, but I'll have to go through and take everything else before that, so I would much rather not have to worry about that by taking history out of the equation and do it this way. The difference is this panel history is history while this documents open and no further this structure is endless history forever. I could open this two years from now, see how I did it and go now they look at it, I wish I had and probably be able to go back and fix it if I'm on top of that had smart filters, a smart obviously would just keep building on the same thing I was going to say I'm loving this it's one of my favorite parts cause I as much as its work flow is often about I've got eighteen photographs and to finish there's a portion that at a certain point you allow yourself to say I'm going experiment for a while and be creative and try things and create the one that I really want a print and frame and or print on canvas or you know, if I'm doing it for a client, this is the one who's going to sell them maura I mean, the album is nice, but this is like the the fine art that they're going toe print bacon stick above their fireplace kind of stuff, you know, but still doing in a way that doesn't cause you heartache to where they say, oh, that looks great, but can you just in your like guy in this case, hopefully pretty much you should be able to do almost any of those things because of the way you built it now, it's also worth remembering that camera is this sort of semi standalone little program, but as we talked about throughout these three days, I'm a big fan of anything with the name preset in it because a preset often means do some work ahead of time and save yourself time so camera also has preset so I have a lot of these frankly are just little demo things that I did in passing, but I could see, for example, let's say for the sake of argument that I had a series of photos taken from this photo shoot and I wanted to do something with the background which have involved masking each one of these so if every time I don't do that method I showed you where I deliberately you know change the exposure try and make a mask in functional easier or whatever it might be that's a lot of moving sliders if I found well that's a really good combination that gives me the effect I want I would go in and make a preset and call it like temporary mask or something so that with every subsequent photo I wouldn't be doing that same operation so presets can be either I really like this effect and that's it I apply a preset the end or I apply a preset to help me in some other procedure and then move on from there so let's revisit another thing that we talked about before and I want to show it to you again in more detail now and then we'll get into some light room stuff as well so this is a very typical photograph that I find myself taking is interesting alleyway with a brick wall that eventually someone could be standing in front of so I have a lot of these because you know that's what you can so why why not but I don't really know yes like let's look at the as shot photo and it's it's okay but it's you know could be better it's got a bit of camera stuff going on here just cancel this were second easier this way okay so ultimately, I want to do that compositing thing or I want to make it look like someone standing in front of there, but I don't know quite yet color scheme like shouldn't be darker lighter because it will depend entirely on the photo that I want to you so for now I'm just gonna open it and say let's just get it open but open and as a camera smart object, so that means the ability to edit it as much as I want then I look at the photo that I want to put on there and I'm gonna in here just clear any setting so I'm starting off with the way this photo was shocked I could either double click and open it as a separate file and start doing all the extraction work on it which I do not recommend b and I always use myself as the example of this the day that it hit home for me is I had a photo and was my own fault because I decided let's put the fan on and have the hair blowing in the wind thing and I had I was open the photograph and I was like taking forever trying to get every little hair is taking me forever and eventually I was saying that doesn't look bad and I drag her on the new background and the hair was so close to the background you could even tell it's like ok, I just wasted three hours of my life trying to make this perfect selection of hair where it wasn't necessary. So from that day forward I said, okay, note to self always put the person on the new background before you make any decision about how much time should I spend on this. So any time I'm talking about compositing, of putting someone or something onto new background, that should always be step one, get them over there first and then start doing all the rest of the work. So in this case, because I know in photoshopped my other document is already there in bridge I could choose place in the photo shop, it will take a pit stop in camera robin this case again just to sort of get me started, I'm gonna click ok? It will bring her in and scale her to fit I want her to be just a little bigger, so it looks like she's standing more in the foreground in front of this wall, so I hit enter so first step it just kind of get the pieces in here now I want to take advantage of this ability to ongoing edit to try and make it all look good together, so I'm going to start off a second let me talk through my thought process this is a photo that I deliberately took dark on a black background because I wanted to be dramatic, but then later on, I thought five new us inducing compositing probably should have used gray or white or something where there's more contrast, but as I mentioned before, that would be too easy. So I want to show you what happens when you have to do the hard thing, so I'm going to ultimately use this thing. We've talked about a couple times called refined edge and refine edges really good, but it's not magic, so I always find it what's the word I should use distracting, somewhat frustrating when I watch someone do a demonstration of refined edge and it works perfectly and I'm like, I bet you any money they spent hours finding the perfect photograph to make it look just right, because in my experience doesn't work that way all the time, tio say to any function like in photo shop, I would like you to automatically figure out the difference when hair and her shoulder and make them both look perfect and sometime maybe sometimes it works for people. I haven't had that experience of it happening all that often, so my philosophy is I want to give myself a better shot, so I'm gonna do it into pieces, and we talked about this a little bit of ongoing, more detail here. So I'm before we do anything else I'm going to duplicate this case I do want to duplicate not new via copy because I want them both update at the same time all I'm going to be doing is masking them separately, but ultimately I still want to be able to say make her darker or lighter whatever on the fly for both so first step for me would be to say, well, even though I want her to end up this dramatic exposure it's going to be hard to select her hair because I can't see where her hair is, so I'm gonna push up the exposure and maybe the shadows and blacks a little bit now needless to say, I'm doing this with a photograph of a person on a background this could be even as we saw before two exposures of the same image we're trying to combine them. The theory doesn't change that much and because I did copy of this camera smart object, as you will see if you look at the thumbnails they're both going to update and that's important because eventually I'm gonna while I'm going to do this in two pieces I want the two pieces to look correct when they match up so it's important in this case I want them both to update the same time so let's take the bottom of these two and use the quick selection tool this one should be relatively simple because all I'm worrying about is the parts of her that have very definite edges I arms, body legs whatever it is where there's nothing that is challenging so I'm either can do the challenging part first on this case just do the easy part first I would still do refine edge you just have to get past the fact that we look at like headless bodies and things like that because eventually it will all pull together I'm doing this relatively at the speed I would but in the real world a project I would be getting closer zooming in a little bit to make sure that I'm not missing anything obvious what refine edge does is it takes your existing edge and tries to make it better what it doesn't do is I missed a whole chunk of her arm by mistake that won't be can't help that so if you look at refinancing go oops I missed a whole bit of something cancel and go back and make your selection better so we're finances literally means take a very accurate edge and improve it not hey you missed a whole bunch of her arm I mean with hair is a little different because you can adjust it but for something with hard edges if you notice like right there something's missing I would hit cancel and go back and make sure that I have that part with the quick selection tool and then do refinance and that's going to give me a better result in a case like this, I often don't do anything as I look at and go that looks pretty good and the tool did a good enough selection and the recent it good enough selection is because I temporarily pushed the camera settings to give it a better shot at working the quick selection to looks for edges so as long as I can help it create edges before it would've been harder to do like the glove because the black background kind of melded right into that now I might not know in fact I don't want her to stay this exposure but for making the extraction away I want this is a simple way to do it if anything, I might do feather here just a little hair in fact no, actually I wouldn't sorry I'll come back to that later because I like feathering a different way. All I'm gonna do is how yes make a layer mass because I want to be able to tweak this if necessary then we move up here and I started off the same way make the quick selection tool now the quick selection was going to struggle more here because in the first case they were very definite edges and here there's a lot of hair that's kind of like kind of hard to see kind of fly away little detail stuff can't write really tell I'm still trying to get as relatively close, but it and it varies a little bit with each image, but I found if I had to generalize I would say I'd rather be a little bit inside and miss a bit than too much the other way, so I'd rather have to add a little bit more than take away too much so usually when I'm making a selection if I have to ares one way or the other I try and stop a little short of the edge other than getting too much of the background have to try and get rid of it now not that's not always the case, but jen has a general of thumb I would say that's probably where I start then I go to refine edge once again now you may or may not have noticed all pointed out in the first case I didn't touch this slider called radius radius and smart radius or the big feature that adobe shows they look you can pull the siren automatically distinguishes putting hair and shoulder. I'm like a kind of my problem my feeling has been enough times I've had this happen where the hair looks really good, but suddenly this shoulder doesn't look so good on a rather just eliminate that from the conversation, but because of that the theory of the edge detection is supposed to distinguish between soft and hard edges, so that's how you have to worry about where to put that radius cider because all I'm really worried about his entirely soft because I've already got the hard edges, I would feel ok about saying, well, let's, try pushing this pretty far and just by doing that, look at how much hair just found if I had done that in one shot of the whole part of her, probably what would have happened is the hair would look like that and the shoulder you see kind of a weird edge happening because that's pushing it pretty far if you do smart radio, sometimes it will help other times it will not, but I tend not to do this if I'm trying to do it in one shot because I find and this is my opinion that soft and hard edges, at least in the photos I take it doesn't work so well across the board in this way, I just not taking that worry out of out of it, so play around with it. I can't tell you a number to put in here. It'll entirely depend sometimes you might say not that raises not working at all ultimately remember, my goal here is to make a layer mask. So at first, I like to view it on this view called on layers, so that way I'm seeing the brick wall and behind, so it gives me a good idea of what's gonna look like, but if you want to get an idea of what will the mask actually look like? One of the views is called black and white, which is basically a preview of your mask, so sometimes I look at that if I can see little tiny bits of gray, sometimes you'll see things on this mask you that don't even look visible in person because they're so light gray, so switching to this view temporarily can allow you to at least see do I have something to work with? So if I start moving this around, you can see the difference when here's the original selection, when I move that radius up, what is starting to get and I don't care at all see that part down there with the glove, that doesn't matter. I already have that I'm just worried about edges by turn on smart does that help or not? Maybe not sure, in this case, I'd almost rather be somewhere around here and see little bits of grade that I can use and for those people that are really keyboard junkies like me, there's, even keyboard shortcuts to go between like reveal layers and black and white and that's for the rial keyboard junkies in the crowd, but once you do it a few times and as always, I'd like to make sure this one is also a layer mask. I would hardly ever expect it to be perfect out of the box like say, look that I did two layers! It looks fantastic looks amazing, it's perfect it's not perfect, but at the same time is not bad considering how long it's taken me so far, I'm quite happy with it so far. Now I've got to this point, I'm thinking, ok, but I before I make too many more decisions, I don't want her to be that level of brightness, nor do I want the background probably so let's, take a time out and say let's, get this looking a little more like I'm picturing I want this to be darker update the back when I also want her to be darker that, and because they're copies, they'll update each other, and now I can start looking more critically at how does her hair look here? Do I need to do any further tweaks to it? And this is all possible because of the camera raw starting point and doing a copies of their two versions of the same one, it hasn't happened that often but I've had rare cases now and then where I have three copies of that person because it makes sense to say the hair on that side of her head is really blowing in the wind versus over here so I mean whatever it takes that will end up with I want to end up with it looking the way that looks realistic to me so back at one hundred percent you you know even that is that's not bad considering I'm kind of going through this pretty quickly certainly better than it was like six years ago before or financial um and I've said this before I'm sure as well because it's a thing I suggest people all the time I really feel that most of us our own worst critics so I thought times where I'm like obsessing over and like going out and then it's just time to stop so I closed the file and save it I look at the next time like that's actually pretty good but at that time I was so and because I'm picturing well before it looked like this and now it looks like that that you start thinking too much about that so it's not a bad theory to say get to this point and if you can put it aside for a second when you come back you're like that's actually not bad and then I could still can you know, work on a police I'm not assuming I have to jump in and start painting with overlaying and doing all those other things on her to make her look more realist well it depends because in in real life depends where the light source there wouldn't be a shadow unnecessarily I mean I would if it called for it and I'll I'll give you a secret that's not really a secret and that is I deliberately to make life simpler for today since this wasn't a full blown compositing class took a photo where you don't see her legs or her feet because that's way harder and that's why most composites you see it looked just like this waist up because then you have to worry about are their legs casting a shadow you can do it but that's much more challenging because now you may be very rare for someone to stand somewhere and have no shot I mean it could happen but so to answer your question I would it would depend if I decided the light source is coming from over here and maybe there is a shadow back on the wall I might consider that but it would depend on the situation one other little trick that in this case when I took the photo I didn't have any backlighting because I was deliberately trying to go really dark black on black but sometimes that can help and you can also fake it after the fact by artificially add another layer with light here and then sort of painting in here to kind. I feel like there's light coming from behind her, and then you don't have to worry quite so much about getting every little single hair, because it's just looks like it's live differently, so finishing it off to make it look more realistic that will depend entirely on the situation. But for me, the key point I want talk about right now is the fact that at any point along the way, the fact that I have to layer mass means I can edit the background, the two layers with her and continue to tweet this mask if I need to. So when I look at the mask, I would see this situation where I've got little bits of gray in here and now should I necessarily fix those? This is the much asai like the idea of looking at the layer mass to see what I've got it used to distract me, and instantly if I saw gray, I assumed I need to fix it. But now I have to keep reminding myself, but look it in the context of the background on this background, I might not need to fix it if I put her suddenly in front of a white brick wall, michaela yikes, that looks horrible, so context is everything so and this is why I'm not a big one of saying you must always follow these steps. At this point, you must paint an overlay mode no, if it makes sense to do that otherwise don't. Now, even though this is not a class on compositing, I have to show you my favorite little trick, because this khun save so much time. And that is whenever someone thinks it's a composite image, the first place they look his hair, because that's the giveaway. So the tip is really simple. Shave your head, then there's no that's, not the tip. Some of us don't have that problem, jim, it just makes weaken be composite into any photo, no, but seriously that's often think people look at so you can obsess over every little hair and make sure it looks perfect and or you, khun full people's eye by adding in more hair to make it look like it's matched in. Now that the way you do that, it's it's, a fun little joe. I love this trick, and I'll tell you a quick little story about this. So I worked in this office full of photo shop people, and often, if we're working on some technique, you want their opinion to say, what do you think of this and often if you showed them the before and after they go oh you know your eyes are drawn to it because you're seeing that before so I called a couple dozen will you think of this so far and it was clearly it was a composite that they could just tell from they knew the original photo and I'm like oh my gosh you did an amazing how did you select all that hair and I was like I didn't I painted some or in but I fooled them because their eyes just thought cost there the hair looks great so the way I do it at a blank layer take good old paintbrush and you have to this once use a regular hard edge brush of anywhere from one to two to three pixels very very small now first if I just paint that would not be a very effective looking hair because it's just the big black stroke so the two things you want to do are in the brush settings there's a thing called shape dynamics and I have a pressure sensitive pen so I could do it based on penn pressure but just to show you that the imf you don't there is a function called fayed and look down here see the little preview she was just fading out. This is a weird number though, and this is a good example where under wife is not a scrubby slider anyway um for some reason this fate command on like ok twenty five what twenty five pixels know twenty five percent no it's twenty five steps what is a step no one really knows except whoever created this effect so the bottom line is put in a number and see what it looks like so I'm gonna try forty five and now you can see it goes that far okay and that's not that what about seventy I'm not sure let me look at it in context ok that's actually not bad because he fades out really quickly so you can do a quick little test and see and I'm just painting and that's not me doing that that's just that fayed amount automatically having it fade out to nothing because hair does that it starts a little thicker and I'm I've made my brush a little thicker so you can see it I would generally be not quite so thick but I want you to see what's happening so once you've got the fade happening and even though you can preview it here I still like to paint it in context to kind of see we're on a blank layer and then I just find a place where and what I try to do is I find where there's already hair going it looks to me like that should continue a little further and it doesn't so I hold down option called and that lets me sample the existing hair sure I'm way go and then as I paint along, I'm just sort of adding strokes you can barely even see them because there fading in, but let me show you that's what I'm creating is a bunch of little hairs like that and these air thicker than I normally was, so this is not I want just one it's really hard to see otherwise, but in a case like this but so that's, all you do is go through and where you see parts like that looks like should be more hair, you hold down optional to sample that hair and then paints a more in just following what's already there are adding little speeds here, and they're like this that's amazing to me how you can fool the eye and I do is every so often because you get to different place option or all to sample to make sure the color you're using matches in with whatever is there already keeping in mind that I for this demonstration of deliberately thicker than I normally would? Because I want you to see it normally, I wouldn't be quite this thing, but I wanted to kind of get the idea so just that little thing is just as that actual thing that makes it look like you've taken all this time to make sure everyone here is in there and case you hadn't already possibly guessed this whenever you're doing a thing like this, you could make this a brush preset instead of every time going out and have to make that little faded hair brush and do it once hairbrush that sounded weird, I would make two or three with different fate amounts, soto and randomize little bit, and the way I looked at it is especially once I already had that brush preset made it took me much less time to add a layer and paint some artificial hair that to spend forever trying to get hair that I think is there somewhere, and especially the way I found it works the best that you see a hair that's like that should follow, and it kind of just fades out because of the masks start following the shape of the hair and then kind of continue, so you're not just randomly going here here, you're looking at things going there's, a piece of hair, there's another one and kind of following the shape, and I do that all the time now and I again, I wish there was some photo shop counter to say, well, you just saved eighteen minutes by doing that, but because I really feel that both help sells it, but also has cut down on the amount of time and the on ly only only catch of this was due this last because if I did all this work on the hair and then decided to adjust the camera settings now, the new hair might would match up with the the existing one so that's about the on ly sort of trick to this is do that part last. Ok, that makes sense so that's in that that was sort of an aside it's not completely related to what we're talking about with doing this from camera rob. But it kind of is because it's the finishing touch that makes it work, and the rial catch, of course. So here's the story joel grimes has taught on creative lied before he's like one of the masters of of this compositing. And he told me the story once that I thought was really funny how people's perception influences what they think. Because joel started posting photos before he was as famous as he is now, he would post photos on flicker and places like that and say here's a composite I was working on here's a composite is working on people comment go well, that's, that's really impressive how did you made asked for, you know, input and give them how we did it on one time he no, he shoots a lot of composites, but like anyone, occasionally he takes a model outside and takes a photo of them in one case he did exactly that he had a model outside somewhere took the photo and have people like this is not one of your better composites she really doesn't look like she's standing there and he's like, well, that's interesting since she actually wass but in your mind you're thinking that's a composite, so I'm looking for bombs like that's actually just the way it was that day. So I think sometimes if you say to someone who anything of this composite, they're going to look more critically at it than here's a photo and on as long as they don't see the layers panel to know this was built up of a whole bunch of these pieces then doesn't matter and now the good news is it's I have this philosophy for a lot of things where any time it's something new the first time it takes you an hour the second time for him is the third time twelve minutes because by the third time I'm like ok, that makes sense you know the first thing that kind of check notes and the way what was that? But then once you do it the first time I tried that compositing split thing I kind of think it through now I can do it I think a pretty accurate composite and very little time because I just know go in by deliberately darkening or lightning, you know, always thinking towards the end result, but making my life easier. It's cut down so much time, and I think they look more realistic than they used. And now, even him have enough nerve to even try full composite someone standing in front of something and have cast shadows, which is much more challenging. David, I I just want to say, I've been waiting two and a half days for the segment, and and now I see it all coming together, and I'm just running back in my mind about all photos that I have that now I have another method to apply to them to, you know, bring a little life. Great, glad to hear that.
Class Materials
bonus material with purchase
Ratings and Reviews
Roni Chas
DAVE CROSS IS AN EXCELLENT INSTRUCTOR. HE EXPLAINS TECHNIQUES SO THAT I CLEARLY UNDERSTAND WHAT HE IS DOING. I LOVE HIS TIPS, AND I LEARN SOMETHING EV!!ERY TIME I HEAR DAVE. I DID BUY THIS PROGRAM, I WANTED TO BE ABLE TO REVIEW IT AND GET IT ALL. I HAVE HEARD DAVE TEACH BEFORE AT NECCC CONFERENCE AND WAS SO HAPPY TO WATCH AND PURCHASE THIS COURSE. I CONSIDER MYSELF PROFICIENT IN PHOTOSHOP YET I CONTINUE TO LEARN NEW THINGS WATCHING DAVES PROGRAM! HUGE THANKS DAVE!!!
a Creativelive Student
I enjoyed this class by Dave Cross. I like his method of teaching and found him very easy to follow and I learned lots of good tips on smart objects and working non destructively. I have just made the move from PS Elements to Photoshop CC 2014 so have lots to learn so I look forward to more from Dave in the future. Thanks Dave, I thoroughly enjoyed this class.
a Creativelive Student
Dave Cross is a wonderful instructor! He has a fantastic teaching style and has great mastery of his subjects!