How To Create Custom Brushes
Lesson 8 from: Essential Compositing Tips & Techniques In PhotoshopJesús Ramirez
How To Create Custom Brushes
Lesson 8 from: Essential Compositing Tips & Techniques In PhotoshopJesús Ramirez
Lessons
Class Introduction
01:04 2How To Match Perspective
13:01 3How To Create Atmospheric Perspective
11:27 4How To Match Luminance And Saturation
04:42 5How To Apply Ambient Color
03:57 6How To Replace Skied With Blend If
08:58 7How To Composite With Group Blending Modes
06:00 8How To Create Custom Brushes
06:01Lesson Info
How To Create Custom Brushes
We're gonna have this clouds layer, and I'm gonna select the lasso tool and make a selection around the areas that I want to convert into a brush. I'm gonna duplicate it, command J, it's in a new layer. I can right click on it, go into duplicate layer, and click on the new button there. I don't need to name it, press okay, and that opens it up in a new tab. And what I'm gonna do is I'm gonna command click on the layer thumbnail to make a selection around it. Then I'm gonna crop the image, and I'm gonna use the black solid to sort of help me out as I'm masking it, so there it is. And what I'm gonna do is, in this case I'm gonna use the eraser tool just to decide what I'm gonna keep and what I'm gonna delete in terms of the clouds. There it is, and if I go into the channels panel, I can look into the channels with the most contrast. In this case it's the red channel. I can click and drag into the new layer icon there, a new alpha channel layer, and there it is. If I go into image adjustm...
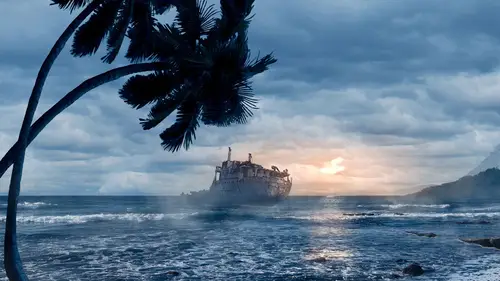
ent levels, I can essentially delete anything that was blue, which is the sky, and just keep whatever's bright, which are the clouds. So something like this, and now that it's, now that I have this, I can hit command, click on the channel thumbnail to make a selection, layers, create a new layer, and fill that with black. Black is our foreground color. I'm sorry, our background color, so it's back here, see that? So command backspace to fill with background color. You can sort of see that, and if we go into edit, define brush preset, we can name the brush whatever we want. We can just call it Clouds. And it's already selected, so I'm gonna go into this layer here, and I'm just gonna create a blank layer, and I'm also gonna create a solid. We'll make it black just so we can see how we're gonna work with this. And what I'm gonna do is just paint with what we just created here with the brush tool, the brush tool selected, and I'm gonna be painting with white, and actually, let me select that brush. It should be the last one. There it is, and that doesn't look much like clouds. So we can adjust it to make it look more like clouds, so I'm gonna click on this icon here, which brings up the brushes panel and we can adjust the spacing and then we can see how that works. All right, that's looking a little bit more like clouds, and actually just so we can see better, I'm gonna zoom in, go back into the brush tool, so that's what that looks like. All right, so the spacing seems to be fine. Now we can adjust the shape dynamics, and we're gonna adjust their size jitter, so now we're gonna have clouds that are different sizes. And we can have the control off, or if you have a Wacom tablet, you can have pen pressure, so when you paint softly they're small, and if you push really hard, they're big, so you can sort of control how big those clouds are. And I'm just gonna undo so I could get rid of those, and the cloud still looks good, and I can also adjust the angle jitter. Notice that when I paint, all the clouds have the same angle, but if I change the angle jitter, notice here in the preview they start rotating. And when they rotate, and I paint, now it starts looking more like real clouds. I can also adjust the scattering to make them scatter a little bit, and also the count so we can have more. So that will probably work now, so now I'm gonna save all these layers, go back into the composite, create a new layer, and then we're gonna maybe bring down the opacity so it's not too strong, and maybe even bring down the flow, and we can start adding more mist and fog onto the scene. And that's essentially what I did to create the fog that you see on that composite. And one thing that you may want to do after you create the fog in your scene, is maybe bring down the opacity a little bit if need be, and also apply a color to it. Notice that the fog here has a blue tint to it, and the way I did that was by simply creating a hue and saturation adjustment layer, clipping it to the layer below it, so you can do the keyboard shortcut or the properties panel, click on this icon here. I don't think I've mentioned that earlier, so another way of creating a clipping mask. And you can move the slider over to the right. Actually click on colorize first, and when you click on colorize you'll see the bar here at the bottom. Notice this bar here at the bottom. That's the color that we're gonna be applying to it, so I want to make it blue, so click and drag this over to the right. You can see this bar is blue. Increase the saturation and bring down the lightness. Notice that when we bring down the lightness, the fog starts turning blue, so we can maybe even move it to the left to make it this yellow-brownish color, and now it's more like dust. So I guess the whole point of this particular example is always think about how you can create brushes to help your composite. You can create grass brushes, you can create leaves. I mean, all these little elements that help your composite come together can be created by the photographs that you already have. You just have to look at them and think of how you can turn those into brushes.
Class Materials
Bonus Materials with Purchase
Ratings and Reviews
Arlette Hatcher
A great course full of useful information and helpful tips. I would really recommend this course to anyone interested in compositing in photoshop. Will look for more like it in Creative Live. Thank you.
Jo Moolenschot
This short course is packed full of incredibly useful tips! I've been working with Photoshop for years and I did not know some of these excellent techniques. I highly recommend this course to anyone interested in refining their compositing techniques, understanding why things work the way they do with compositing or simply refreshing their technical compositing knowledge. Thank you Jesus, much appreciated!
gingermegs
Jesus is amazing a true guru of PS and an fabulous instructor very clear in his instruction method and details ... been watching him for years and he's improved 10 fold.