LRC Cleanup and Archive Workflow
Lesson 35 from: Editing and Organizing your Photography in Lightroom ClassicJared Platt
LRC Cleanup and Archive Workflow
Lesson 35 from: Editing and Organizing your Photography in Lightroom ClassicJared Platt
Lesson Info
35. LRC Cleanup and Archive Workflow
Lessons
Introduction
05:51 2A Tour of Lightroom Classic
28:03 3Importing Images into Lightroom Classic
23:14 4Selecting Images in Lightroom Classic
19:32 5Importing Metadata and Catalogs into A Catalog
03:01 6Organizing Images in Lightroom Classic
10:13 7Adding Metadata to Your Images in Lightroom Classic
09:21 8Bonus: Impossible Things AI Plugin
10:26Adjusting Images in Lightroom Classic with Synchronization
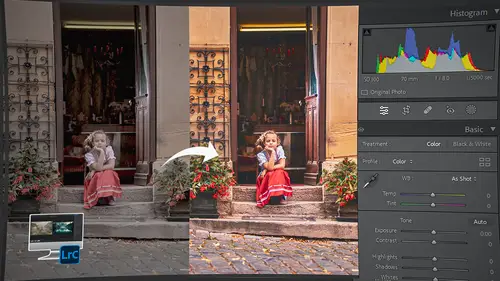
14:15 10LRC Adjustments: The Histogram and The Basic Panel
14:54 11LRC Adjustments: Profiles
07:39 12LRC Adjustments: The Transform Panel
05:38 13LRC Adjustments: The Crop Tool
04:25 14LRC Local Adjustments: Masking
12:35 15LRC Adjustments: The B&W Panel
06:02 16LRC Adjustments: Grain in the Effects Panel
08:17 17LRC Adjustments: The Point Color Tool
05:24 18LRC Adjustments: The Color Mixer Panel
01:15 19LRC Adjustments: The Tone Curve Panel
05:29 20LRC Adjustments: The Lens Blur Tool
07:59 21LRC Adjustments: More Masking
10:10 22LRC Adjustments: More Masking with Color Effects
05:14 23LRC Adjustments: Color Grading
15:42 24LRC Adjustments: Complex Masking
15:39 25LRC Adjustments: Masking and Retouching People
06:55 26LRC Adjustments: Creating AI Presets
11:39 27LRC Adjustments: Sharing, Installing, and Managing Presets
02:15 28LRC Adjustments: The Details Panel
16:20 29LRC Adjustments: The Lens Correction Panel
09:44 30LRC Adjustments: Retouching a Family Portrait
08:20 31LRC Enhance: Super Resolution
05:58 32LRC Merge: HDR
29:23 33LRC Round Trip to Photoshop Beta
11:36 34LRC Merge: Making Panoramic Images
13:59 35LRC Cleanup and Archive Workflow
20:20 36LRC Workflow Overview
02:47 37Finding Your Images from Lightroom Classic
13:35 38Conclusion
01:45Lesson Info
LRC Cleanup and Archive Workflow
1 Once we're all finished 2 and we've done a lot of different things 3 and we've gone through the process of importing 4 and selecting and adding metadata 5 and adjusting our images, retouching images, 6 taking images to Photoshop. 7 But once all of that is done, the question is, 8 how do you organize 9 and get rid of images that you no longer need 10 inside of Lightroom? 11 So, we don't wanna lose anything we've ever done. 12 If I spent more than 10 seconds on something, 13 I never wanna lose it. 14 But I don't necessarily need all of my images hogging up all 15 of my space in my current catalog. 16 And I've told you that I bring all 17 of my images into one major catalog, 18 but now I wanna get rid of those images 19 that I'm not going to be using. 20 So the way I do that is I'm gonna go 21 to the folder where these exist. 22 Now right now, I'm in the collections 23 and I'm gonna right click an image in that collection 24 and go to the folder in the library. 25 That takes me to the...
actual job itself. 26 So now I have all of the images here. 27 What I need to do is I need to wrap this up. 28 I need to clean up. 29 I need to make sure that all the information is 30 where it's supposed to be. 31 I need to make sure that I've put my keywords in, make sure 32 that I've renamed the images the way I want them. 33 Anything that I'm going to do 34 to these images, I want to do to it now. 35 Probably I've already done it, 36 but it's a good idea to just kind 37 of look through the images. 38 Make sure that when you click on an image 39 and you go up to the keywording area 40 that it does have keywords in it. 41 If it has keywords, 42 that means all the images have some keywords on 'em. 43 That's good. Make sure that the image numbers make sense. 44 And once you've done all of that, then it's a matter 45 of figuring out how am I going 46 to save all the metadata that I made changes to. 47 That way, if I ever bring it back in, I have it. 48 So the way that you're gonna do that is, 49 there's multiple ways you can do it, actually. 50 The first way you can do it is just simply 51 by selecting all 52 and then going up to the metadata menu 53 and hitting save metadata to files, 54 or like in most programs, command S. 55 So if you're just here, highlight everything 56 and then hit command S. 57 It's saving the metadata to the files. 58 What it's doing is it's taking every file 59 and it's writing an XMP sidecar file next to it. 60 So image number one has one dot XMP. 61 So one dot CR3, one dot XMP, they go together as a file 62 and the printing instructions for that file, already done. 63 It doesn't take very long to do it 64 and if all you did was that, 65 you would have all the information, all the keywords, 66 all the flags, all the stars, all the adjustments, 67 everything to do with that file. 68 And then at that point, 69 you could conceivably just remove this from Lightroom. 70 It would still be on the hard drive. 71 And if you ever re-imported it into Lightroom, 72 it would look at those XMP files 73 and it would bring in the changes that you made. 74 If you ever went to one of these files, 75 so I'm just gonna show this to you in the Finder, 76 because it has the XMP file right next 77 to the original file, 78 if I were to open this up with Photoshop beta 79 or Photoshop, when it opens, it's opening up in camera raw. 80 And when I look at the exposure, look, there it is. 81 That's all the adjustments that I made to the file 82 before I got rid of it out of Lightroom, 83 and that's because of the XMP information 84 that we put into the file 85 and saved by hitting command S. 86 So very simple, very fast. 87 I prefer another method which is 88 to highlight all the images 89 and then go up to the library menu 90 and click on convert photo to DNG. 91 So convert photo to DNG is gonna open a dialogue box, 92 and it's gonna ask you a few things. 93 First of all, I'll only wanna convert raw files. 94 I don't need to convert PSD files to a raw DNG 95 because it's no longer a raw file anyway, 96 so only convert the raw files. 97 I can delete the originals after a successful conversion. 98 That totally makes sense. 99 I'm not gonna do that simply 100 because I want to keep these for future use 101 for teaching purposes and stuff like that. 102 But if you're gonna do this, it's fine 103 to delete the originals 104 after they've been successfully converted 105 because they're still raw images 106 and they're open source raw images. 107 So there's no reason why you wouldn't do that. 108 And then there's file extension, a capital DNG, small DNG, 109 either one's fine. 110 Compatibility, I just always do it to the latest one. 111 And then JPEG preview medium is absolutely fine. 112 This one's important. Embed the fast load data. 113 That helps the DNG serve the information up faster. 114 So make sure you check that. 115 Don't check the lossy compression. That's a dumb idea. 116 There's no reason to have lossy compression on a file. 117 I want the best quality possible. 118 And then embed original raw. 119 If you do this, every file's gonna be twice as big. 120 If you've gotta open lots of storage 121 and you wanna have both 122 and you wanna have 'em both in the same file, way to go. 123 But if that's what you're gonna do, you might 124 as well just not delete the original. 125 And now you have the original 126 and the new DNG side by side, 127 as opposed to in a confusing like, 128 interchanged locked together file. 129 That's not good. 130 So I would prefer to leave these 131 so that they're not deleted. 132 So don't delete the originals 133 and then just don't use this option here. 134 When I do that and hit okay, it's going to build DNGs 135 for all of these files. 136 And once it's done, all of the originals will 137 either if you told it to delete 'em, it'll just delete 'em. 138 If you told them not to delete 'em, 139 they will disappear from Lightroom, 140 but they will be inside the original folder right next 141 to the new DNG. 142 But in Lightroom, you'll only see the DNG. 143 Okay, once you've chosen which direction you want to go, 144 whether it's write the XMP data by hitting command S 145 and save it out, that's the fastest way. 146 But you can also lose the XMP data 147 if somehow it got separated, 148 you lose the information as to what you did to the file, 149 or make a DNG which actually puts that XMP file 150 into the DNG so that you have all the printing instructions 151 in with the file itself. 152 That's my preference. 153 Once you've chosen what to do there, 154 either way, it doesn't matter, then you want 155 to do one final fail safe, keep all of your data, 156 and that is by right clicking the folder itself of the job 157 or of the trip. 158 And you're gonna go down to export this folder as a catalog. 159 Once you go to the dialogue box, you're gonna go 160 to the actual drive where that job exists 161 or where that pot of photos exists. 162 You're gonna click on the the pot of photos 163 and you're going to name this catalog. 164 And for me, I'm gonna say Creative Live 2024 165 so I know what that catalog is from. 166 I don't necessarily need to include any of this stuff 167 because I'm putting the catalog right next 168 to the original images. 169 So they're already there, no problem. 170 I don't need to deal with any of that. 171 So I'm gonna hit export catalog. 172 It's gonna export that catalog. 173 Once the catalog has been exported to that folder, 174 I have the original images, 175 I have the XMP sidecar files, or I have the DNG files 176 and I have a catalog that is just of this set of images. 177 So it's a small catalog with 240 images in it. 178 So at that point, I can right click this 179 and I can remove this job, hit remove. 180 This is just confirming that I wanna remove all 181 of these images. 182 So it's removing the images from Lightroom, 183 but it is leaving them on the hard drive. 184 So when I go to the hard drive itself, they're still there. 185 All of my images are in the hard drive. 186 They're just not in Lightroom anymore, 187 which means it takes it out of Lightroom, 188 it takes it out of my purview. 189 I don't have to look at 'em anymore, 190 and it's not costing me space. 191 And at this point, then I can take this folder of images 192 and do whatever I want with it. 193 I can put it on a cloud server as storage. 194 I can put it in a drive 195 that is completely due for archives. 196 The way I do it is I have an archive drive for each year. 197 So each year I go out 198 and buy an archive drive that's about four terabytes. 199 That's about all I need. 200 Six terabytes, four terabytes, something like that. 201 And four is kinda hard to find now. 202 Now it's usually eight or something like that. 203 So go get yourself a archive, drive, plug it in 204 and put all of your archives onto it. 205 That's it. That's all you gotta do. 206 And now you've gotten rid of all of the images 207 that you no longer want to see. 208 Now, if you are doing something like travel photography 209 and you wanna keep some of the images for yourself, 210 that's a whole 'nother ball of wax 211 because now you gotta keep some of 'em in Lightroom 212 because you want to be able to access them 213 and look at them on a regular basis. 214 So if that's the case, what you're gonna do is you're going 215 to do everything I just told you to do. 216 You're gonna save 'em, you're gonna convert 'em to DNGs, 217 you're gonna do all that. 218 But then before you remove them from Lightroom, 219 you're simply gonna go through 220 and find the images, usually 221 by clicking on attribute on the library filter 222 and sorting for like the five star images. 223 So here are all my five star images from this travel. 224 So I would highlight all 225 of these images from the folder where they are. 226 And right now, we're looking at 'em in a collection. 227 But I can right click this 228 and I can say, show this to me in the folder in the library. 229 That's where they are. 230 Again, I'm gonna sort by attribute five stars, highlight all 231 of these images, 232 and then I'm going to go to wherever I want 233 to keep my portfolio work. 234 That might be on a separate drive. 235 That could be on your computer itself, 236 like in the hard drive of your computer. 237 It could be in a lot of different places. 238 But I take those images 239 and I can make a copy of those images into that drive. 240 And the way I would do that is by exporting. 241 So I'm making a copy because I want the originals to stay 242 with the entire collection. 243 So I want all of those images to go 244 to that collection, but I want to keep a copy 245 for myself for my portfolio. 246 And the way I would do that is hit shift command E, 247 or I could go down to the export button. 248 And when I do that, I get an export dialogue box. 249 And these are the settings that I wanna use. 250 I want to choose a specific folder. 251 I'm gonna click the choose button 252 and go to the folder where I want to keep these. 253 So let's say that I'm keeping all 254 of my portfolio images in the educational archive drive. 255 And if that's the case, 256 let's say I have a folder in there called Portfolio Images. 257 So now I wanna keep 'em in that folder. 258 I'm not gonna put 'em in a sub folder, 259 but I am gonna put 'em in this catalog. 260 So they're gonna show up back in the catalog. 261 After they get exported, they get put back into the catalog. 262 So now you'll have two versions of the same file, 263 one of 'em in the job folder 264 and one of 'em in the portfolio folder. 265 So once I've done that, I'm gonna rename these 266 because if I don't rename them, 267 I'll probably have a 00073 come up again. 268 And so I don't want 'em to override each other. 269 So I'm gonna choose the file name to be something special. 270 And the easiest way to do a special file name is simply 271 to take the file name itself and then add something to it. 272 So I'm gonna show you how to change the renaming. 273 So I'm gonna go in and click edit on this menu 274 of presets for naming, and I'm going to say file name, 275 so that's the name that currently exists on the file dash, 276 and then I'm just gonna add a date 277 but the date is gonna be the month, the day and the year, 278 but in this order, just like this, year, month, day. 279 So it's a reverse year, month, day order. 280 I'm gonna insert that. See how I just inserted that? 281 Then I'm gonna hit another dash, 282 and then I'm going to choose the hour and then the minute, 283 and then the second that photo was taken. 284 So if you look at the name that it's gonna create, 285 it's number 73, then the actual day, 286 then the actual second that it occurred. 287 And by doing that, 288 that name will never be repeated ever. 289 In the history of mankind, 290 you will never have that same exact name 291 for any of your photos. 292 So that's the perfect name for your photos. 293 And you're going to go up to the preset area here 294 and save it as a preset. 295 And we're just gonna call this portfolio naming. 296 There we go. And hit done. 297 So portfolio naming is gonna give us 298 that really unique name. 299 And then we're gonna go down to image format. 300 And what we wanna do is say original. 301 So whatever form it's in, it's gonna make a copy of that. 302 If it's PSD with a bunch of layers, 303 it's just gonna make a copy of it. 304 If it's a CR3, it's gonna make a copy of it with the XMP. 305 If it's a DNG, it's gonna make a DNG. 306 So it's gonna be exactly what you made of it. 307 And then notice that there's none 308 of these sizing settings are available 309 because it's just making a copy of the original. 310 And then I am going to leave the metadata alone 311 because again, it's just making a copy 312 of it, no watermarking. 313 And then post-processing, 314 you could have it do something with the image. 315 Like for instance, you could say, show it in the finder, 316 but we don't really need to do that. 317 So that's it. 318 Once we've actually made that, the best thing 319 for you to do would be go over to this side here 320 and click add, and then type in a preset name, 321 called Portfolio Originals Knowles, 322 and put it inside of your portfolio images. 323 You could put it anywhere. 324 Let's put it in user presets and hit create. 325 And now if I go to my user presets here, 326 there's one that says Portfolio Originals. 327 If I click on it, it automatically sets up that condition, 328 and then I hit export. 329 Now I'm just gonna do this to one image 330 so that you can see what happens to it. 331 That way you don't have to wait for all of 'em. 332 I'm gonna hit export. 333 I'm gonna go down to my user presets 334 and click on portfolio originals. 335 Don't check box it. 336 That's if you wanna do multiple things. 337 Just click on it so that it's blue. 338 And now everything's set up the way it should be. 339 I'm gonna hit export. 340 It's exported the one file, 341 and it's imported again into Lightroom. 342 You can see it right here inside of the portfolio images, 343 inside of the Educational Archive. 344 There it is. 345 You can see that its name has that nice, 346 long, unique name to it. 347 No one will ever repeat that name. 348 It is in my portfolio and in this catalog. 349 So now I can go back to that original folder of images. 350 And if I have done that to all of my portfolio pieces 351 that I wanna keep, now I don't need any of these 352 because I made copies of the ones I love. 353 I put them in a specific place, my portfolio folder, 354 and then I just get rid of this one. 355 Now, I'm not gonna throw it away. 356 I'm just going to remove it from Lightroom, right click 357 and remove from Lightroom. 358 When I do that, it's going to disappear from Lightroom, 359 but it's still gonna be on the hard drive. 360 I can take that folder 361 and I can either leave it on that hard drive, 362 or I can take it and put it on a different hard drive 363 and clean up my space. 364 And then I've got the five, 10, 15, 50, hundred images 365 that I wanted to keep, and I've got those in my portfolio. 366 Let me show you what that looks like. 367 So if I go to my portfolio drive, it's this one here. 368 It's not connected right now because it's quite loud 369 so when I'm recording, I hate having it on. 370 So the portfolio drive is here. 371 If I open it up, there you can see all 372 of the different years that I have portfolio work. 373 So when I export, when I go 374 to the export dialogue box, when it comes 375 to the filing of it, I just click on, put in a sub folder 376 and then put the name of the year, 2010, 377 2020, 2021, et cetera. 378 And so that's the only difference. 379 And so as a result of that, I end up with these years here. 380 So these are the exported years. 381 If I click on the images, they're all the exports from 2002. 382 Here's some scans from 2000 and before. 383 So these are my portfolio images, 384 and it looks like I have 47,000 images in my portfolio. 385 So I've done this a lot, 386 and this is how I keep a copy of all my portfolio. 387 It's just one big drive with a bunch of portfolio work, 388 and all of these have a copy in the drive 389 for that year with all of the work, 390 the entire job that I shot. 391 So I'm a professional photographer, so I keep all my images 392 and I'm very careful about the way I organize 'em 393 and make sure that I always have access to 'em, 394 and I could go back 395 and grab some for a client if I wanted to. 396 If I'm shooting stuff for myself personally, 397 ideally, a lot of stuff, 398 anything that I'm not gonna keep, I get rid of it. 399 I'm done with it. 400 So I keep a very small percentage 401 of my work that's personal, 402 but the stuff that I do professionally, I'm keeping 403 of the vast majority of it 404 because I've gotta make sure that I'm available 405 to grab it for a client, if that comes to that.
Class Materials
Bonus Materials
Ratings and Reviews
Maarten Barckhof
Wonderful. I am a (very curious) amateur photographer and for me this was all really interesting. Clearly spoken, nice examples, very educational indeed. Some doubts about making (too?) many changes in photos with generative AI, changing color, etc.: where does editing of a real word picture change into painting and creating something non-existent? And in some lessons the transcript (and subtitles) are missing. For people not having english as their mother language they are sometimes quite helpful. All in all: very recommended!
Sicily Dickenson
Great class to help you establish and understand workflow in Lightroom Classic. I also loved the presets that accompanied the class.