LRC Adjustments: The Point Color Tool
Lesson 17 from: Editing and Organizing your Photography in Lightroom ClassicJared Platt
LRC Adjustments: The Point Color Tool
Lesson 17 from: Editing and Organizing your Photography in Lightroom ClassicJared Platt
Lesson Info
17. LRC Adjustments: The Point Color Tool
Lessons
Introduction
05:51 2A Tour of Lightroom Classic
28:03 3Importing Images into Lightroom Classic
23:14 4Selecting Images in Lightroom Classic
19:32 5Importing Metadata and Catalogs into A Catalog
03:01 6Organizing Images in Lightroom Classic
10:13 7Adding Metadata to Your Images in Lightroom Classic
09:21 8Bonus: Impossible Things AI Plugin
10:26Adjusting Images in Lightroom Classic with Synchronization
14:15 10LRC Adjustments: The Histogram and The Basic Panel
14:54 11LRC Adjustments: Profiles
07:39 12LRC Adjustments: The Transform Panel
05:38 13LRC Adjustments: The Crop Tool
04:25 14LRC Local Adjustments: Masking
12:35 15LRC Adjustments: The B&W Panel
06:02 16LRC Adjustments: Grain in the Effects Panel
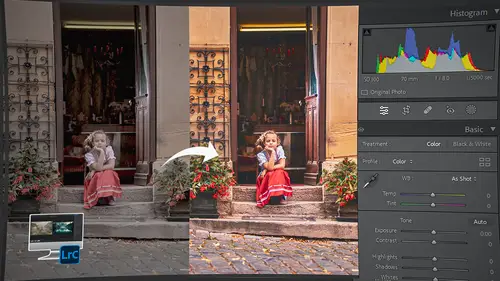
08:17 17LRC Adjustments: The Point Color Tool
05:24 18LRC Adjustments: The Color Mixer Panel
01:15 19LRC Adjustments: The Tone Curve Panel
05:29 20LRC Adjustments: The Lens Blur Tool
07:59 21LRC Adjustments: More Masking
10:10 22LRC Adjustments: More Masking with Color Effects
05:14 23LRC Adjustments: Color Grading
15:42 24LRC Adjustments: Complex Masking
15:39 25LRC Adjustments: Masking and Retouching People
06:55 26LRC Adjustments: Creating AI Presets
11:39 27LRC Adjustments: Sharing, Installing, and Managing Presets
02:15 28LRC Adjustments: The Details Panel
16:20 29LRC Adjustments: The Lens Correction Panel
09:44 30LRC Adjustments: Retouching a Family Portrait
08:20 31LRC Enhance: Super Resolution
05:58 32LRC Merge: HDR
29:23 33LRC Round Trip to Photoshop Beta
11:36 34LRC Merge: Making Panoramic Images
13:59 35LRC Cleanup and Archive Workflow
20:20 36LRC Workflow Overview
02:47 37Finding Your Images from Lightroom Classic
13:35 38Conclusion
01:45Lesson Info
LRC Adjustments: The Point Color Tool
1 So the tone curve is a new tool that well, 2 it's not new to Lightroom, it's new to our class here. 3 And I want to describe what the tone curve has to offer. 4 So if you look at the very top left hand corner 5 of the tone curve, you'll see that it has 6 that target adjustment tool, just like the other 7 target adjustment tool that we've already talked about. 8 And I can click on that target 9 and then I have the same target up 10 and down scrolling option here, 11 and I can just point at any given tone. 12 So like look at the highlights in the clouds here, 13 and if I grab that tone and just start scrolling up 14 or down, I am creating a curve based 15 on a pin that is stuck in that specific tone. 16 And you can see that the tone was registered here in the 17 tone curve way up at the top. 18 So that's the highlight. 19 So it's really easy to see 20 and I'm gonna hit Command Z to undo, it's really easy to see 21 where your tones are on the tone curve. 22 I can also point down in th...
e shadows 23 and you can see that the shadows in the trees, 24 if you look over at the tone curve, the little point is kind 25 of hovering wherever the tones are, I'm pointing at. 26 And so even these darker tones on the trees here are just 27 mid tones, which is great for fog. 28 So that's wonderful, that's what we want them to be. 29 You'll notice here though, 30 that these shadows in these trees are a little too deep. 31 And so I can just grab this and roll them up a little bit 32 and that helps to soften those really deep shadows. 33 And then I can go to the highlights 34 and roll them down just a little bit. 35 And that kind of even more creates a lack of contrast 36 so that it looks even more foggy. 37 And I can see what I've done so far just 38 by clicking on the backslash key. 39 So I'm just gonna go like this 40 and this, you can see it's a little bit more snappy when 41 this is the before. 42 And then this is the after. 43 So I've got a little bit more foggy nature going on here. 44 And I like that, the other thing that we can do is instead 45 of just looking at the tone curve as shadows 46 and highlights, we can also look at it in the red, 47 the green, and the blue channels. 48 So if I go to the red channel 49 and I grab onto the middle of the tone curve 50 and drag it, you'll see that I'm changing the curve 51 of the red channel, which means 52 that I'm getting either more cyan or I'm getting more red. 53 So I can control each individual channel. 54 I'm gonna hit the undo. 55 If I go to green, then it's green or magenta, green 56 or magenta undo. 57 If I go to the blue channel, it's blue or yellow. 58 And this is where this channel would be useful to us 59 because these are kind of natural colors 60 that we might find in this scene. 61 So I can grab onto the bottom of the curve and grab that 62 and bring it up. 63 See, I'm bringing up the curve itself. 64 I'm not making it a curve. 65 I'm just taking the straight line up so that 66 black doesn't equal black. 67 And let me explain it a little bit easier in 68 the actual tone curve. 69 So if I right click and reset this channel 70 and just grab the black point here on this curve 71 and I bring it up. 72 Now black can only equal 50% gray. 73 So the deepest black can only be 50% gray. 74 It kind of puts a level on it puts a block 75 so it can't go below that. 76 And then I can take the white 77 and say, white can only equal 50% gray. 78 And now we have 50% gray. 79 So that gives you a really good idea of what you can do 80 with these little points at the front 81 and the end of the curve. 82 We don't necessarily have to only be working on a curve 83 where we bring up, you know, the shadows 84 and bring down the highlights. 85 We can also go into the blue 86 and I can say I want all of the shadows to be more blue. 87 So now the deepest shadows are going 88 to be more blue than they are yellow. 89 And then I can take the highlights 90 and I could say, I want the highlights 91 to be a little bit more yellow than they are blue 92 'cause presumably the sun coming 93 through would give you a little bit of warmth, 94 but I don't want to go overboard on that. 95 So I would take it down just a click or two. 96 So I went from 255 to 251 97 and it just gives a hint of warmth coming through 98 these shadows and I can actually take my shadows 99 up even more. 100 See that, so this is a really nice way 101 to add a color effect over the top 102 of your color image rather than just going into the basics 103 and playing with temperature intent. 104 You have a lot more control 105 here in the color channels 106 of the tone curve over very specific gradations of color.
Class Materials
Bonus Materials
Ratings and Reviews
Maarten Barckhof
Wonderful. I am a (very curious) amateur photographer and for me this was all really interesting. Clearly spoken, nice examples, very educational indeed. Some doubts about making (too?) many changes in photos with generative AI, changing color, etc.: where does editing of a real word picture change into painting and creating something non-existent? And in some lessons the transcript (and subtitles) are missing. For people not having english as their mother language they are sometimes quite helpful. All in all: very recommended!
Sicily Dickenson
Great class to help you establish and understand workflow in Lightroom Classic. I also loved the presets that accompanied the class.