Lessons
Introduction
01:14 2Materials and Tools to Use when Drawing
14:27 3Preliminary Furniture Plans on a Floor Plan
07:45 4Using a Scale Ruler and Templates
05:36 5Rendering Furniture on Floor Plan to give Volume and Depth
06:06 6Line Weights and Adding Texture
04:24 7Architectural Lettering
08:11 8Complete House Floor Plan
03:23Isometric Perspective
03:42 10Why 3-Point Perspective Doesn't Work
04:05 11Benefits of Two-Point Perspective
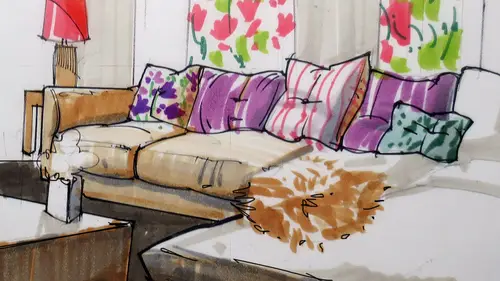
03:06 12Preliminary Sketches for a Living Room
11:29 13Using Different Textures of Materials in your Drawing
03:51 14Adding Color to the Couch to Create Shiny Leather
11:26 15Rendering Soft and Shiny Textures
09:09 16Starting Elevation for the Kitchen
07:54 17Full Rendering Elevation of the Kitchen
07:28 18Putting the Elevation at a Different Scale
10:33 19Two-Point Perspective for Kitchen
10:04 20Canson Paper with Pastels
05:35 21Transfer Line and Heights
08:27 22Finishing the Rendering Using Canson Paper
08:48 23Creating Chrome and Color Reflections
10:43Lesson Info
Two-Point Perspective for Kitchen
all right. On this next phase, we're going to be working on two point perspective two point perspective. Similar to one point perspective can be exhilarating if we understood 1.2 point follows the same rules with just a couple of differences. Let me get through that Showing your packet. You have something like this. I am using the same scale. 3/16 of an inch equals one foot. So I did in this case, I placed over here my full elevation and my persons that I have a sense off reference what I did over here. Iss Let's follow what I did instead of drawing the full square my elevation Remember this box that I drove before? This was one. My one point perspective. My starting off a room at this point. Now I am doing it slightly different. I am standing at a corner looking diagonally into it. It's rescue these guy. I am standing here but looking for example at that corner looking this way. So what I what I have over here iss my ground line on my horizon line and we already know these distance be...
cause I worked with my 3 16 scale. Okay, We covered that before, but I only draw a corner of the room from floor to ceiling. That's my only true dimension. So now what I need to do here. Remember how I had placed my ruler like this in my previous exercise Over here. I'm gonna kind of rotate it slightly when I bring this line down to a distance that I find comfortable enough to work with far enough So I don't get too much of a tunnel vision too close. Then I draw these two lines. Those would give me the two vanishing points. And what I do there ISS, this is a compass. Take this distance over here and you bring it this distance from here to there. And you bring it to that point from this point to that point I extended and bring it here. That gives me these two reference points. Remember how I was measuring two feet from, um my previous exercise from this edge Over here. I am measuring two feet and I am connecting this point with these and extend. All right, so what I have over here is I have these two vanishing points and what I have is The only true dimension is this wall. This corner over here. Just these two points. Follow me on this one, guys. We're almost there. Connect this point to V P. R. Two that vanishing point, this two points that makes the edge of the room and then connect them to this point. And then this point connected to that one and extend this one connected to this one and extend so I would get this room if I use tracing paper. Remember tracing paper. It's a great time saver because you can clean up your drawing nicely. We have your interior. Just two walls right from there. I draw this horse on this. This line over here And this is when I measure my to feet increments using my scale ruler just to make sure that I am accurate. Remember these point over here? They drag their this when I drag it here. Cornick this point with this guy and extend this point with this one and extend this one with this one and extend and you see how I have extended them on. I get these points over here, right? I marked them in in pink and then connect them to these vanishing point. Then do the opposite for the other wall. This guy connected with this one and extend connects to hear this one with this one and extend this one with this one and extend. All right. And once I get this points on this edge, which is the statue over here. Well, that is just to get these points right here. Bear with me, class. Um, they're with me. So I have these points. And once I have this, I connect them to my vanishing points, which is what I did. This one with this one and extend. And this is how I get my grid in perspective. So to recap, so to recap, this is the technical way of doing perspective. But let me tell you one thing. Most of the times, if you use the grids that I provided in the packet the grace that I use for the living room and I included some for the kitchen trained or not trained, you'll do fine. In fact, you'll do great, But in case you ever wonder how to do a perspective, you with very specific points of view, this is the way to do them, and just to prove it, that it can be done. This is very funny here. We'll see how this can actually be extended. If you see the same thing that I did over there is done over here. Let me just remove some of this so that we have I can flatten my work. This is just to prove one thing, guys. When you started perspective from zero, it takes a lot of room. Um, I remember in college I actually end up purchasing two doors and I Portis you know, sore horses. And I had a very long table so that I could do my perspectives. That was the easiest way I could find just really getting done. But you see, this is just to prove one thing toe the class if you wanted to. A perspective from zero. Have a lot of room. And don't put your vanishing points on the page because otherwise you'll get you know, when you get sometimes these photographs of the poppies with the big head, the big nose, because everything is kind of distorted use of fish islands, right? You want to avoid that as much as possible. You wanna have if not the two vanishing points far away from the drawing, you're drawing at least one of them out. So that you would have you wouldn't have much of a distortion. All right, so this is exactly this is following the same thing that I did hear Small. It has done big. The only difference is that I am using a different scale. This is half inch equals one foot, which I can breathe now because I can draw a lot bigger. So this replaces that, um, and is the same thing. You see how I added a person over here? This is five Ford six measured with my half scale ruler this time around my half scale. So this is zero. And this is two feet, four feet, 5.5. That's my guy right there. That's my height. And I added the beginning off my elevation. All right, then. Look what a big triangle I had to use first from the horizon line, you draw a line down, and then you get I chose over here like a random angle that I think would look good. I am in the center of the room, but favoring more one side. Then I took this dimension. Who? And I bring it up Her brought it up. And then this one here I brew, They brought it up. That's gave me L on our all our prime until l prime that I connect my points. Okay, from here, I think I missed. Okay, I have my dimensions here. I connect them to our and extend this point connected to that one and extend this one and connected to that one. And extend, that gives me the great on this direction. And then from here, I joined them to VPL the same thing that we have covered before. Okay? And then this point, bring it over here. Connected this distance from here to there. Bring it over here, connect this point to this and extend on you get degreed on the other direction.
Class Materials
Bonus Materials with Purchase
Ratings and Reviews
user-8adf9d
It's difficult to find a class like this -- but that's exactly why it may be best to start with some sort of quick foundation in perspective drawing. This class puts together the process at a level that is not easily available outside of formal study and while it's not difficult, it is involved.
user-d2a6ef
Creative LIve Why don't you re-do this class! Its a great subject.....get a new camera operator, who knows the concept of learning from watching.