Lesson Info
4. Lens Corrections
Lessons
Lesson Info
Lens Corrections
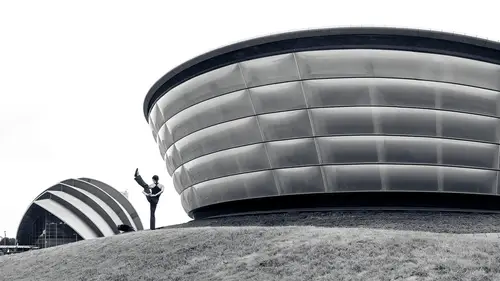
Now let's take a look at how we can correct for tilting of the lens because most of the time I don't want verticals on the building to be just the littlest bit off. If they're close to being vertical, I want to get them to be perfectly vertical. And here's how you do that in adobe camera. Raw in this image, I was pretty careful to not tilt my camera but I ended up with a slight tilt. And so if you were to actually look at the verticals in this building, they're not perfectly straight. Well here in camera raw, we have controls for that. If you close up some of these, you're going to find an area called geometry. In in geometry is where you find a feature called upright. An upright will attempt to make vertical lines perfectly straight or horizontal lines perfectly straight. Therefore if you have just the slightest angle to them, this hopefully can fix it. We have the setting on the left which is to disable it and then we have five settings to the right. Let's take a brief look at those.
The letter A is auto and it tries to just determine what would be best for your image. And so if I click on it, you do see it change but it's not always going to give you the best because it might think that this should be a horizontal line and perfectly straighten it. Whereas it's just like this line and should be at a slight angle. So I'm going to choose undo By typing command Z. This next choice tries to only correct horizontal lines. Lines that are very close to being horizontal. It's going to straighten so therefore it's going to find this line that's here. That's the most prominent horizontal line and most likely try to rotate and it's going to try to make it perfectly straight, choose undo. The next one only concentrates on vertical lines and that might be best for this image because there are some rather obvious vertical lines that are very close to being perfectly vertical in this should straighten them uh choose undo. Then this tries to do both. Both horizontal and vertical lines will try to be corrected. In this case it was a little extreme. It cropped in quite a bit. So many choose undo by typing command Z. The final choice and the one that will usually give you the highest quality result because you're in control of it is this one. And that's known as a guided upright. When I choose that I can move my mouse on top of the image and when I'm on top I can find a line that is supposed to be perfectly vertical. I click on it near the bottom and then I drag while I keep my mouse held down and I get right lined up with it near the top and let go And it's not gonna do anything when I just make one of these lines it needs to so I need to find something on the other side of the frame and that should also be vertical, click on its edge and dragged the top of it and get that to be parallel with it. And only then when I let go will it actually make those areas straight? Now? You can put in a 3rd and 4th line. If you have the top of the building and the bottom of a building in there you don't need two lines. I think I could just go to this and if this should be horizontal, let's just say this was, it'll make it look ridiculous. But a single line though you can see how it is attempting to correct for it, choose undo if you want to see before and after. You have an eyeball and if you just click and hold it down, you'll see what it looked like before the correction and turn it back on and you see it uh afterwards another adjustment that I always apply to my image is under here called optics and there are two check boxes remove chromatic aberration, gets rid of any little color halos on the edge which is not terribly important for black and white but does help you can get a little slightly crispier edges but this one right here will usually correct for curvature if you have straight lines and they seem to curve a little bit. This will get rid of any distortion that was caused by the optics in your lens
Ratings and Reviews
ehab ghobara
Good content Ben. Thanks a lot
Chris Lonardo
Ben's course is concise, practical, and packed with useful info. I've already recommended it to several NYC photographer friends. Well done!
Tom Hackett
Thanks for stressing the position of the photographer (perspective) rather than the focal length of the lens.
Student Work
Related Classes
Architectural & Real Estate Photography