Lessons
Day 1
1Class Introduction & Styles of Photography
29:07 2Finding Inspiration
24:33 3Natural vs Studio Lighting
24:41 4Mood Boards
14:12 5Your Creative Team
17:43 6Finding and Working with Models
19:36 7Do It Yourself
14:16Shoot: Ethereal Part 1
39:20 9Shoot: Ethereal Part 2
34:16 10Shoot: Conceptual - Butterflies
36:08 11Shoot: Conceptual - Feathers
32:02 12Sourcing DIY Fashion Materials
11:05 13Negativity & Criticism
21:49 14How To Deal With Negativity
22:53 15Prepping a DIY Shoot
26:31 16Shoot: DIY Shoot
30:36 17Shoot - DIY Shoot Continued
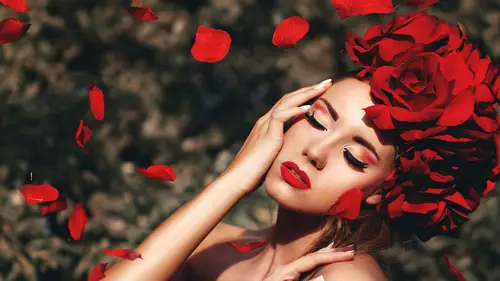
16:33 18Shoot: Painterly Portrait - Flowers
24:51 19Shoot: Painterly Portrait - Sequins
37:07 20Getting Your Work Noticed
30:16 21Submitting Your Work
38:19 22Shoot: Leather and Spikes Beauty
37:42 23Prep for the Victorian Beauty Shoot
29:39 24Shoot: Victorian Beauty
13:49 25Post Processing: Skin Retouching
28:31 26Post Processing: Details
28:08 27Post Processing: Ethereal Shoot Image
31:51 28Post Processing: Beauty Shot
20:03 29Post Processing: Darken Lashes and White Skin
23:28 30Post Processing: Fashion
31:25 31Consistency In Your Images
27:48Day 2
Day 3
Lesson Info
Post Processing: Skin Retouching
So normally when I edit at home I'm trying to get used to back this little screen I usually have a big monitor connected to the laptop so just bear with me here so I've last night I went through some of the images and called through them and narrow them down like I had mentioned before when I'm editing I can't wait a few days to look through them again so I've narrowed them down and I'm just going to edit shots in the order as I've taken them so we're going to start probably with a shot of the girl with the pea any dress that large pink dress and I'm going teo just play around with it and uh and show you guys some little tips and tricks of first right now I'm in light room and I always open up in light room because I want to just make sure my exposure's right or the temperature, the color tones and what not I don't do very much editing in light room I have pre sets that I've made on dh I'll test a couple of them on the shot itself you guys could just see how I do things step by step so...
I'm just quickly trying to select a photo that I'd like to edit and oh you're seeing it right now, okay, so but maybe something more of like a portrait or a close up um this was like my favorite outfit ever she was just like a princess let's see, we'll start with sorry I have a hard time choosing stuff sometimes um maybe one of these because this way I can edit her face look a little more of a shuttled to this one so this one I applied at preset onto we'll do this one, I just reset it back to the way it wass so now I'm in the shot it looks fine the exposure to be I like to zoom in and make sure that she's sharp enough on the face sometimes it looks good even in the cat in the light room, but it's not always, you know, sharp enough on their face and so I'm going to yeah, I think, well, I have some preset cesar, some of the process that I've created and they're all available on my online store on my web sight and usually all play around with my presets just to see the kind of effect it would do and it saves me a lot of time when editing so this's called blue tent, I usually go through them like this I don't ever really have something specific in mind when I'm first starting out with the edit, so I'd just like to play around and experiment and I'll probably I might not pick any I don't know yet and even from the presets in light room you can choose something I like this one I think it's already created a vintage feel this one's called prince charming it's like one of my favorites um I like this one so I'll stick with this for the edit and I'll just play with the sliders have just adjusted back to a little bit of more of a warm tone because of the color is that she's got on the flowers behind her I'll probably bumped the contrast up a tiny bit pretty much it's like finished unedited now but I really need to do too much on her um you can talk a little bit about the effect that they are having just so that the folks who don't have the presets can can I understand that the process is yeah, the flight room light room is I think they're just so much more simplified version of photo shop it's a lot less steps seem to take everything is sort of more of it instant with the exposure and all that kind of thing I have opened up the image in photo shop and I will always when it's images like this if I'm not doing for you frequency separation for sale just create a new layer so that there's always the bottom layer the original later there so now I will start with the skin and with skin I I usually start off with the healing brush tool or spot healing rush tool it just depends on the skin right and soul just hold on hopes picked the wrong one here so now I'm just going tio go over to the little tiny blemishes she has good skin but there's just some little spots on there that I want to clean up and I just go over them really quickly I'm just getting rid of all the little blemishes on her face first so if anyone's wanting what that priest it was it was my prince charming one see spot healing russia's and always work uh sometimes it's a little wonky when you're going over an area where the texture is too close to the texture of color is too close to another part of skin so you have to either do with a clone stamp or the patch tool it just depends there's so many ways to do things when you're editing I guess it's just preference it took me so long to get away from the clone stamp tool I was using that's for such a long time for mostly like all my skin retouching but gotten better now okay and so here just some little lines right there I'm just going to get rid of those guys it's nothing major causes this image is more focused on the body and the overall look rather than the skin the close ups so there's not a lot of detailed story of all in the shot and I might you know what I because of discoloration like in here, I think I'll do a little bit of frequency separation just just to even out the skin I'll show you guys how I do that there's a little bit of stray here is here she's got a lot of little beauty marks on her beauty moles whatever I'm not going to remove them, I kind of like them they're like little freckles all over and I I liked them and I'm going to leave them there. So so now one question on that really quick that we do get a lot is do you ever ask the model or the subject about their preferences for beauty marks four freckles for a cz faras keeping or removing them? Or do you just use your own judgment? I just use my own I don't know if it's a client usually I'll ask you know because you know you never know if they whoops what did I just tell you? Never know if they want wanted in there taking out some people they could both have something like a beauty mark on their face one person wants it removed when the next person expects you to keep it there, so if your dealing with clients I guess it's good to ask, but when it's stuff like this sometimes I even add more freckles and if I want but yeah, I like freckles so all right, so now that is good and I'll just d select that layer see if you can see there's really not much of a difference, you can tell but when you're zoomed in you can skate a little bit better there wasn't a lot to clean up on her see there's just nothing really there so next thing I'll do is I will just gonna flatten this because I when I said it, I know a lot of people like to have their like layers and layers and layers I don't I just it confuses me I'm not I don't like editing that way, and so once I'm happy with what I've just done, I will usually flatten it I know it bad, but I do it and I it works for me it's fine that I'm not and I always still have the original file if I ever have to go back to it anyways so now okay? So frequency separation this is the most simple way that I do it and how this works. The point of this is that when you're editing skin and your I'm trying to smooth out like discoloration sometimes it's difficult because the texture versus the color will not you cannot edit it more a smooth as you'd like to sew up here around her forehead there's a lot of there's a shadow casting and I don't like that it just looks like there's like a piece of makeup there which is it isn't but it's probably the way the light was hitting her under here under the eyes I don't like this patch of shadow right here you guys can see when I'm tracing around they're right I don't like that and so I like to clean those parts up so that just look a lot more smooth transition over the face and the body if it's you could do that over the body if you want if there's too many shadows and whatnot it's a little bit different than dodging burning so how I do that is I just hit control j command jay on a mac I think you and I make two layers and so the middle ear you can do this two ways you can name this layer color or you could name it blur because I'm going to blur it I name it color so that I just know that's what I'm changing is the color so that's color I double click this guy the top layer and the top layer will be texture or you would name the top layer high so are actually sorry so some people call it the middle layer blur and then the top layer think it's sharpened or something and then and then the other way to do is like high and low I don't because it's like high frequency low low frequency right? So anyways this sky I would name it texture just so I know that I'm dealing with the texture of the skin okay so now we go back to this guy and I'm gonna d select the top player so I can see what I'm doing now we go to filter blur gazi and blur and that's way too blurry I've lost all detail my photo shop went a little long qi on me so um it's gotta get things back to normal so with the blur it depends how much you need it depends on the image itself how close up it is I don't need too much too much of a blur because this is um I don't have a cz much details I would have it the beauty report your chart because it's a four full by so anyways I'm just going to play around probably put the blur down to maybe like two point three two point four that looks blurry enough I think and so you don't worry about that you've lost detail but that's okay and then I select the top layer again it's back to sharp and then we go to image apply image and okay so the source is this psd that I'm working on that stays as it is the next thing would be the layer you're choosing the layer that I'm choosing to based off of is the color layer and then blending reward would be subtract confined that guy and now everything is gone gray so that's okay um this is just where it's act uh adding extra sharpness to the image like I just blurred the first layer and now this is doing extra sharpening to the top layer and scaled capacity is a hundred percent scale is it to an offset usually people like when you watch other people doing it it's usually a one twenty eight and I usually keep it there sometimes I bring it up even more to like one thirty but it depends but it set the way it is and I'm fine with that so I'm going to leave it there and then once you've done that you go you will make sure the top players selected and you go over to, uh linear light or lying your linear light from a saint right that's when everything looks normal again okay and now how this works is that I will go back to my color and it's selected and I go into the clone stamp tool and the brush size will varias I'm editing so I'm going to start here under her eyes um sometimes when I'm doing things like this I will actually rotate the image because their faces sideways it's a little hard for me to actually see it the way I want to so I'm gonna actually just rotate the whole image the way I need it to be so that she's more in a better position for me to look at her. I don't use my my tablet toe rotate because when I do that, uh, it gets on my nerves, I can't get it back to the right spot for some reason have our time, so I just use the manual way in photo shop, and so now I have selected the clone stamp tool. The mod is normal, you can actually go over to I think it's lighten. Maybe we'll goto lightened first because so it's not as heavy by opacity usually sits between forty to fifty percent with this and it could even gold down mohr or up. It just depends really, always depends, but I start there, so I'm goingto bring my brush down a little bit more and just select the area I'm going to sample, so if you look here, I'm targeting this spot of her face or the color is lighter versus right here under her eye. Okay, so the brush is a little bit too small. I want a little bit more. Um, we'll see how that looks so now I've sampled here, and I'm just gonna go over top here, and I'm just, um, clicking over top and that aligned check is on here if it wasn't what ends up happening is if I sample here it keep sampling from over there if you see it staying in that spot and I don't want that I need the brush to follow me so make sure you're aligned his check so I'm just gonna go back up here start off there, okay? And so I'm just going to do some of this and if you have any questions for me while I'm doing it because I'm going to do this for a couple minutes resigned pulling from the going up front from rio are working an eight bit or sixteen sixteen okay, yeah okay keep a little bit about why I you know what it's just the setting it's on and like, I actually don't really know the real answer to that because it's just it's always the way like with photo shop I think it's because of the detail the size of the file and everything right? Like I I don't know it's always there, but yeah sorry um so yeah, so if you guys you know what I should have did sorry I should I forgot a step sorry. So what I'm going to do here before I keep going as I've selected both of the texture of the color layers I've highlighted them both and I'm going to drag them into their own folder so that I can switch off and on and see the progress that I'm making without de selecting each layer every time and said they're they're going to be in their own little groups I'm just dragging them down now they're in a group and so I will rename that um frequency separation okay, so I know that's that and if you see the little bit of progress we've made just doing that on dh I'm gonna make sure that I can still see what layer I'm working on so I'm still on the cul earlier even though I'm on the color layer I'm still seeing what's happening the texture layer because of the blending won't we chose is letting me see what's going on just gonna keep going also when I added I zoom in and out a lot I just look it's really important not to stay stuck on one part of a photo come in and out a lot as you read it so you can see the difference because their eye becomes used to something and then you zoom out you're like well what did I just do? It looks like crazy so um just gonna zoom out of it and put my brush up and I'm just going to try to lighten up this little area of her forehead I've left a little bit there's some blemishes left on her skin but that's ok, I could go back and fix that later the pass is a little bit strong up here I want it a little bit less, so I'm bringing it down to like thirty two looks fine on I don't want it to lighten anymore I wanted to just kind of blend the color together so I'm gonna put my blending more back to normal I go back back and forth to normal toe um lighten so we'll go back to normal just going to go a few steps back because I feel like I lightened up that corner a little too much I'm just kidding keep going there there's a lot more complicated ways to do frequency separation there's like you have way more layers to work on and stuff, but I like to keep things simple it's possible, so um, yeah, so I'm gonna I'm just gonna go under here, lighten some of that brush a little bit it's a habit for me to go over here because for years I on ly edited with my finger and the mouth just like you do it. Um I've only been actually using a tablet for about a year, so I seem to like, just I go back and forth, I will rotate this way or I'll go right up here, I don't know, I just depends on whatever calls me to do it, so um I'm just doing the same thing I'm still on clone stamp the opacity is still at thirty two and I'm just going to see how this is going to look bring the brush oh and sorry also hardness is it zero you don't want it too hard you needed to blend properly? I'm just if you see I'm just I keep sampling over here in this little patch of skin to lighten up all that shadow under her eye under the eyes like a big a big thing and especially when you wantto lighten under the eye if their shadows um you don't want to change the texture under the eye the skin under the eyes different compared to the rest of skin there's a different kind of ah uhm texture there so just make sure when you're working on to the eye you got to be very like careful with the editing parts and this shadow here right here by her lips turn away and I'm all right here um there's a lot of it like shadow right there too. So I just want to smooth out the color see how that looks and so now we will de select this guy and you see the little bit of a difference that it makes by smoothing out the colors it's a lot more smoother on her face and it's so subtle it's nothing crazy but it it helps a lot and I'm just going to fix a little bit over here more I feel like it needs a little more color change slow down it's just kind of hard there when I bring a bigger brush now and I'm just gonna had a little bit more in there looks um I can actually one time when I do some more dodging and what when I do dodging and burning I can create put some more shadow back in there if I need to go for right now I just want to get rid of that color that's patching over her skin the rest looks good I don't think I need to do too much there and so I'm fine with the color changes now when I d select it has not much changes but it's it's made a big difference on her and now I will select the texture layer and so with the texture layer this is the same thing that I would do again with the either the clone stamp or the healing brush and when I d select color which is the blurred layer underneath, it looks extremely sharp it's not very nice so I keep that selected so I can see both layers happening at once and now this is selected and I'm going to just go back in and find anymore blemishes that need to be erased see how that looks opacity backto one hundred percent and that's still what the clone stamp I'm on the colon stamp right now but you can use healing brush spot him brush patch too like if I select the patch tool you can also do it that way my sources all but um I am sorry my selection is always on destination a lot of people do it through from source so when the circle in area they circle the let me see here how can I explain it so I circle the clean spot and I drag it to the spot I want to cover a lot of people do it the opposite way but it's just the way I do it you could do it either way so instead you would circle the bad spot and drag it to a smooth spot but I just do it this way so I've got some destination checked so kind of kind of do it that way and then what happens is it doesn't always look right like it's creating little patches on there. So this is where I just rotate through my brushes and through different ways of doing it see what will work best. I don't get stuck too much on one specific tool I just want to find the tool that's going to work the best for me on dh harken back to the healing brush tools here that course, any questions anybody ask while I'm doing this there was one question from genius photography and then a couple of people who are asking why you applied the preset in light room first before you did the retouching, wondering whether it makes sense to retouch first and then apply filter after yeah, I do it either way it doesn't really matter, but usually I like to see from the beginning like an overall tone or feel to it because it helps me with my editing after um sometimes I don't have sometimes I try my presets and I don't want any of them I'd rather use like an action or something so it just depends like it's never always a preset first it has to be a pre set and then I go toe like photoshopped I just wanted to just kind of play around and last night I did go through them and I was I was really liking certain presets on it so I thought, okay, I have to make sure and applied for so I remember that I use that and then also you can mix the preset with a, um action later too so yeah just depends everyone has their preferences I guess right they kind of do things certain way so got rid of a lot of that. Those patches there there was some discussion of of course, the standard question when it comes to retouching of how much is too much as faras imperfections go do you like even when it's not a beauty image do you go to the extent of creating perfect skin or does it depend on the image for you? It depends on the image um for things like this I like I said, I leave little beauty marks behind things like that for for beauty edits I do I want to perfect the skin yeah and beauty in beauty work you kind of everything is sort of expect it to be perfect, right? But all right sold I'm just going to change fix little bit of the texture under here and there was like a little blemish just honor knows so I'm just gonna carry that on. All I'm doing is constantly selecting as I'm editing and making sure that I'm selecting from parts of the skin that is in the same texture is now not color but more about the texture so just kind of fix a little bit of both on the forehead the brush hardness was that like really high and I was one of what was going on there so it's simple back and look at that when you're doing this when I'm doing this I keep spacing it as low as it goes toe one percent and hardness zero barce eyes always depends did you ask yes, cliff has recently no I thought you put your hand up amanda are you going to do anything with her eyes or even a yeah, I will yeah it's the skin that I target first yeah how to get that all cleaned up and then I can start seeing things all over the rest of the image so yeah so if you guys see I just continually re sample before head is just driving me a little bonkers I don't know what it is but I keep seeing patches maybe it's the color I'm going to go back in there and play with that for a second from the opacity back down and also remember it's my I'm not used to this small screen anymore, so I'm kind of trying to get used to that I don't know it's just weird might have to fix it another way after all right? So I'm I'm good with that and I think I think she's good for that so here's the here's the start you know off before we started the frequency separation so if you're looking right here says right I'm frightened this backup even the skin tone colors right here under the eye here and hear a lot of times the shadows that fall here and here I clean it up around the mouth just to smooth the whole thing out so there it is without are added to it so so that's good and um I will get that flattened, so it was no people, right? We're like, oh, my god, she's. Flattening them is what I just do it this way, and I I like to just have it with little least layers that I need, so I usually content, um, sorry, create a new layer just to keep working on that. So I always have a starting point as I'm going there's, always more work that I've progressed on, and it's always kind of saved, so we just saved that, just in case, too, always remember to save in between. I've luckily now photoshopped as this, like rescue thing, like my photo shop was shut down on me a few times and miraculously, it's like that. It saves itself somehow, but before that, oh, my goodness, I would lose like hours of work sometimes, and I would just be so devastated.
Class Materials
bonus material with purchase
Ratings and Reviews
Dan ilicak
Amanda diaz has given me inspiration and purpose. I wake up everyday inspired to create a beautiful image, atleast enough to hold your "aww" for a few seconds. I can relate to Amanda on so many levels as I also found myself in photography and never planned for it. Just like Amanda, I also started from scratch with nobody to help or assist me. If I had found this tutorial a few years ago, it would have speeded up the process of learning. Even today I call myself a professional photographer, this course still had a lot to offer me. I can blab on and on about how much I love and support Amanda diaz, however I will make it short and sweet by saying three simple words, "Thank you, thank you, thank you!" www.snipershotsphotography.com https://www.facebook.com/danssnipershots
a Creativelive Student
This was the best creative and most prolific 3 days of a tutorial. Amanda covered the entire spectrum of what every photographer who's trying to become better and bigger go through. I loved the part where she spoke about how to shoot in any lighting situation outdoors and a few indoors. She not only spoke about them, she went into full detail to help the novice or advanced level photog. Despite the tethering issues CL had with Lightroom, Amanda poetically commanded every day of her 3 days. Another point is that she did everything "her way", and not the traditional textbook style of teaching and editing. One prolific point is that NONE of the previous CL instructors touched the issue of drama, unwanted criticisms, or unprofessional things that happen in the industry, however with a brilliant stroke of quiet humility, and courage, Amanda did. I believe it helped everyone realize that no matter what level of photography you're on that it happens and you have to oftentimes "bite your tongue", or "turn the other cheek". It also pointed out that as photographers we should be doing everything to help one another to build our industry, vice tear it down by hurting one another because of the mindset of "competition". Amanda Diaz, and CL I salute and thank you dearly! Semper Fi! Mike www.mikeconphoto.com www.facebook.com/mikeconphotography
Student Work
Related Classes
Commercial