Lessons
One Light Outdoor Portrait
17:01 2Focus Umbrella Outdoor Portrait
09:49 3Outdoor Athlete Hero Image
10:17 4Cross Light Outdoor Portrait
04:37 5Edge Light Outdoor Action Image
10:21 6Clamshell Light Outdoor Portrait
17:50 7Mid-Air Basketball Action Poses
13:24 8Refine Mid-Air Basketball Action Image
06:44Dynamic Mid-Air Basketball Image
16:02 10Natural Light Indoor Portrait
12:18 11Action Image With Shadows
18:30 12Stroboscopic Action Image
21:11 13Backlit Indoor Portrait
07:39 14Environmental Portrait
06:11 15Incorporate Architecture Into a Portrait
09:30 16Mixed Light Athletic Portrait
10:12 17Cyclist Action Image
17:45 18Adding Motion to
09:47 19Environmental Light for Runner Action Image
17:19 20Add Haze to Runner Action Image
11:11 21Create Your Own Environment
14:50 22Swim Outdoor Portrait Poses
05:18 23Action Images in Water
11:40 24Freeze Motion in Water
06:45 25Selection Process: Basketball
23:49 26Camera Raw Post Production: Basketball
11:47 27Finalize Images in Photoshop CC: Basketball
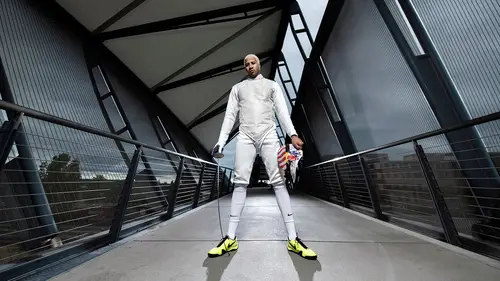
13:15 28Selection Process: Fencing
13:17 29Capture One Post Production: Fencing
07:05 30Finalize Images in Photoshop CC: Fencing
15:13 31Selection Process: Triathlete
13:43 32Camera Raw Post Production: Triathlete
07:47 33Finalize Images in Photoshop CC: Triathlete
27:42Lesson Info
Cross Light Outdoor Portrait
Okay, so now that we had our one light in there, we're just gonna add another on in there. And this is mostly to to really make him stand out from the background and just add another element of interest in there. So, we have this light over on the left side of him and that's really just hitting his face right now. We're trying to keep it off of his shoulders, 'cause we really want a dark shadow right down this middle. Again, we're still in the same theme of being very dramatic in these shots. And then we're adding another light on the other side, where we can just hit the backside of his head. So we can show that a little bit more. And get it out of the shadow. Illuminate the subject a little bit better. We switched up our modifiers before we had a big, big really focused umbrella that was kind of hard. And we switched it over to a beauty box. Which is just basically a portable beauty dish. Beauty dish is kind of a soft, hard light. And it's kind of almost directional as well too. We'r...
e gonna use these two lights and see what we can get out of it. Yeah, so, yeah keep that same pose we had from the first light. Look back just a little bit more. Perfect, yeah. Just keep back. Try to replicate the same shot. (camera clicking) So I'm gonna lay back down on the ground to get a much lower angle, try to get sky. And just him in there. We're gonna shoot this same shot. Yep, I like that arm out there so really separates from your body, good. Pull your hand just a little bit back, though. In towards your, towards your leg. There you go, right there. A little separation is always good when you're working with arms around body. Especially in a very dramatic situation. Because otherwise you could end up losing limbs, a lot of the times. So, a little separation is very great. Okay, great. Couple more of these. One second. Pull your left shoulder a little bit more towards me. Fantastic. (camera clicking) Good. Pull our hand out just a little bit more on your right. On your right side, grip the ball with your left. Yep, good. (camera clicking) Perfect, one more. (camera clicking) All right, so now we have, we have a lot more light, we have a separation light on the right side. I think I want a little bit more, more shadow on his backside. Right now we have a shadow, oh thank you. We have a shadow right here if you can look off again. We have a shadow here. His shirt's a little bit more lit 'cause obviously he's facing towards the light. So we're gonna have Ken scoot this over to your, yep. Perfect right there. We're just really aiming for this side. And this one is obviously just aiming right here. We have a diffusion on this front side for his face to make it a little bit softer. And then the back side is going to be a little bit harder because it doesn't have one. So I'm at the same settings, 2500th of a second. 3.2 and ISO 50. So I'm gonna lay back down, shoot the same shot. (camera clicking) Great. (camera clicking) Good, one more. Breathe. (camera clicking) Great, let me see here. I really like what's going on right now. It's really lighting his face fully. But we can even move the light a little bit more that way and get a little bit more shadow on this side of his face as well. So, we're gonna have Caleb move it a few inches over, just to get a little bit more. This nose is gonna create a shadow right here. It's gonna kinda create this sort of a shadow and define his face a little bit more as opposed to just throwing all the light directly on it. He's not moving from his position, but we're changing up the mood of the photo. I'm gonna lay right back down where I was. My settings are still exactly the same as they were before. 2500th of a second, 3.2 and 50 ISO. And I'm still using a 24 to 70 millimeter lens. (camera clicking) (camera clicking) (camera clicking) Great, one more. (camera clicking) Perfect, yeah. Little progression there. We might not be able to go back to the first one. But this is the last shot here. So basically just added that edge lighting right there. This is the harder light. So you can see on the face, when we go back a few, and then you can see that's the fuller light I believe. So there's more of a shine when you get to the harder one. It's a little bit more like a hard white light on it. And you see a lot more shadow, you don't see the side light on that one.
Ratings and Reviews
awynterphotos
Loved all the ideas and why he's positioned his athletes the way he did, and positioned the lighting. I met Dustin a few years ago at and NPAC conference. It's nice to see him doing these teaching videos. His work is very inspiring to me.
a Creativelive Student
Less talk and all action.. This is the best no mumbo jumbo talks and straight to practical work..
Alexandra Schaede
I really enjoyed the multiple exposure video, the pity is that they are no videos to talk about the post processing of this image.