Lessons
One Light Outdoor Portrait
17:01 2Focus Umbrella Outdoor Portrait
09:49 3Outdoor Athlete Hero Image
10:17 4Cross Light Outdoor Portrait
04:37 5Edge Light Outdoor Action Image
10:21 6Clamshell Light Outdoor Portrait
17:50 7Mid-Air Basketball Action Poses
13:24 8Refine Mid-Air Basketball Action Image
06:44Dynamic Mid-Air Basketball Image
16:02 10Natural Light Indoor Portrait
12:18 11Action Image With Shadows
18:30 12Stroboscopic Action Image
21:11 13Backlit Indoor Portrait
07:39 14Environmental Portrait
06:11 15Incorporate Architecture Into a Portrait
09:30 16Mixed Light Athletic Portrait
10:12 17Cyclist Action Image
17:45 18Adding Motion to
09:47 19Environmental Light for Runner Action Image
17:19 20Add Haze to Runner Action Image
11:11 21Create Your Own Environment
14:50 22Swim Outdoor Portrait Poses
05:18 23Action Images in Water
11:40 24Freeze Motion in Water
06:45 25Selection Process: Basketball
23:49 26Camera Raw Post Production: Basketball
11:47 27Finalize Images in Photoshop CC: Basketball
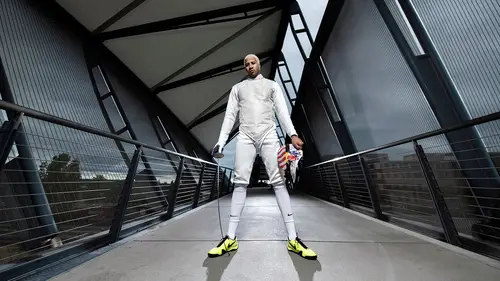
13:15 28Selection Process: Fencing
13:17 29Capture One Post Production: Fencing
07:05 30Finalize Images in Photoshop CC: Fencing
15:13 31Selection Process: Triathlete
13:43 32Camera Raw Post Production: Triathlete
07:47 33Finalize Images in Photoshop CC: Triathlete
27:42Lesson Info
Adding Motion to
We're gonna try a motion shot. So, how we're gonna do that is we're gonna track along with Kierston here, and we're gonna go and try to communicate and go at the exact same speed. I'm gonna have a slow shutter on my camera and we're gonna pop a light right at the end so we could freeze her. So, the slow shutter's really gonna drag the lights and kinda make some cool streaks and lines right behind her. We're gonna square her up right in the middle, and hopefully some of these murals on the wall will provide a little bit of extra color swipe along the way, as well. To do that we are gonna use this flat bed right here. We have Ken and Caleb here holding a light for us. We're still on that same light as we had before. Still a half CTO, which changes the color back so it balances a little bit nicer on her skin. And we're also using a grid so we're not bouncing off the walls everywhere. Really, again it's the same thing as we've been doing. We really want to utilize this locations color and ...
everything it has to offer here. So, now we're gonna head on down this way. Kierston and I are gonna talk a little bit about how fast we're gonna go and what we need to do to maintain on the same page, and then we're gonna do some shots. Cool, let's do it. So lets ride down. So, I'm just gonna follow whatever speed you guys go. Okay, cool. I'm at 25th of a second right now, ISO: 200 and 5.6 I kinda wanna keep my aperture up pretty high on this because we are gonna be moving a little bit. I wanna keep somethings in focus. Hopefully this is fast enough, where we can get a nice streak. I might change it up as we go along, but we're gonna try it out on this one first. So, again, we're riding on this fancy scooter that is electric. You don't need something like this to do a shot like this. Again, you can use something like a skate board. Somebody can pull you in a wagon. You could ride on another bike. I've clamped a camera to the back of a bike before and rode in front and just triggered it from the front from a remote camera, and there's just many, many ways you could do this. I just wanted to do this because, honestly I think it's pretty fun. So, let's head on down that way and try to get this shot. So, yeah, we'll even try some sideways ones. Like, when you're coming up this way but first I think middle and yeah, kinda maintain a little closer even. Yeah, get right there. Perfect, that's kinda cool, actually. Well no, that's good and then when you're looking I want you to look right over me if you can and then, if you ride in your... Do you want to go faster? Yeah, oh, yeah, we can go faster. I mean, well, I was gonna say how would you get down? Like, how fast do you need to do? Cause I wanna see that intensity kinda look, too. Yeah, cool, great, perfect. (man speaking faintly) What? Okay. Go a little faster then. Yeah, 'cause I can't pedal. (camera shutter clicking) Yeah, I think faster works better anyway 'cause I need to slow down my shutter a little bit more. Yeah, we can go faster. So, yeah, try to go fast, to how fast you were gonna go, Caleb, and I'll try to see. (camera shutter clicking) It does throw me off a little shakiness because of it. The faster I go, the straighter I can go. Okay, yeah. That's a good speed. Yeah, I need a brighter pop. Okay. What's the power at? Okay, go up to six, 'cause I need to speed up my shutter. Okay, let me try a test really fast. Sorry, it's a lot brighter now. Okay, hopefully, this will be good enough It's really hard to keep this steady. Let me a do a test on this one. So, I'm gonna have you start out, we're gonna do the first time straight at me. Like I said, and the other time I want you kinda be right here. Like right by me. Okay, just tell me when. Yeah, for sure. So first lap we'll just go back and do one more after this. So we're just gonna shoot this one. Whenever you're ready Caleb. Alrighty. (camera shutter clicking) Look up and over, perfect. Right there, good. Do you need to go faster? Oh yeah. Go faster. (camera shutter clicking) Come closer. (camera shutter clicking) I'm just gonna be testing, so try to keep as straight as possible. Try to keep right in the middle for a second. Get up to full speed. Is this full? Hang back a little. (camera shutter clicks) I'm gonna turn this up. Go off to the side a little bit. Come up closer, pan with her. Got it, got it, got it. Come up even closer. Try to feather off, though. Off her? Yeah. Closer. There you go, right there. (camera shutter clicking) Now we're at the end. Okay, let's turn around (man speaking faintly) Yeah, you wanna try to, I mean the wall, try not to hit the wall too much, but, you know, try to hit her. So this time if we do it, we want you on this side, okay?. So, we'll come over a little bit this way. You know what, Caleb, when I tell you to, kinda hang over more to your left, okay? So, we have a little bit more space. Yeah, no worries. Okay, let's go. Okay, time to strafe back. (camera shutter clicking) Okay. (camera shutter clicking) Oh my goodness. Halfway! Halfway. Okay get to the side. Go to the side! (camera shutter clicking) (chattering) So, we just finished our tracking shot. We found a good speed that worked. I think that gave us a nice streak that we needed. I ended at 1.6th of a second, at F14. I was almost on full power on this because what we really needed to do was at first I was trying to really blend in the light with it and that was causing too much motion blur on her face, and it wasn't freezing her enough with the lower power on the light. So, I decided to over power all the ambient with that. Then open it up again with the shutter, and start a drag. So, now we have some nice streaks with these lights, and moving in and out of the blue and the orange looks really cool with all the lighting. I can show you a couple of these, actually, 'cause you haven't seen any of them yet, but you can see, like, now that we have a little nice light trail. You can see where we're bumping around. Back and forth but you also see color shifts and things. Which I think is very cool. We took some from the side and we also took some from straight on. Over all, I think it was pretty fun. I just like riding on the back of this thing. So, hey you guys wanna take a look? Let's show y'all some of these pictures over here. Thank you so much for that, you're so easy to work with. So we ended with something like this. Some nice motion. The color's still in there a little bit. What I was really afraid of was having the light higher and freezing the wall. Because we wanted to have that sort of streak in the color. These murals are great. Like, I would rather have, I mean obviously, there's a lot in here and I could probably go through all of them but this is pretty much the gist of it, and a majority of what I wanted is having that two tone color with the orange and the more blue light. Which is really fun and then just utilizing these. You can see early on, they're just getting blurred. It wasn't freezing them. And then we started to freeze them. But still it looks cool. I still like the feel of it, and if you amp it up a little bit more in the background, I think it's still a fun shot, but that's not what I was going for. I really wanted to get something with a little bit of blur. So, we just kept slowing it down, powering it up, and seeing what really works, and sometimes when you have never tried a shot, that's all you can do. You just go in, have a vision in your head, try to stick with that and just try to troubleshoot it as you go because again, we had a limited amount of time to do this. But if I had all day, I would just dial it in, and dial it in and dial it in. Make everything work perfectly, but sometimes you just gotta throw in the towel and say this was actually, this is pretty close and you know what, honestly, it's actually a pretty cool shot. So, I'm pretty happy with what came out.
Ratings and Reviews
awynterphotos
Loved all the ideas and why he's positioned his athletes the way he did, and positioned the lighting. I met Dustin a few years ago at and NPAC conference. It's nice to see him doing these teaching videos. His work is very inspiring to me.
a Creativelive Student
Less talk and all action.. This is the best no mumbo jumbo talks and straight to practical work..
Alexandra Schaede
I really enjoyed the multiple exposure video, the pity is that they are no videos to talk about the post processing of this image.