2:30 pm - Creating Cards With Digi-Kit Elements
Lesson 9 from: Digital Scrapbooking for BeginnersMichelle Stelling
2:30 pm - Creating Cards With Digi-Kit Elements
Lesson 9 from: Digital Scrapbooking for BeginnersMichelle Stelling
Lesson Info
9. 2:30 pm - Creating Cards With Digi-Kit Elements
Lessons
Day 1
19:00 am - Intro & Michelle's History
38:59 29:45 am - Intro to PS Elements & Organization
44:46 310:50 am - Using Quick Pages
36:10 411:30 am - Second Quick Page Example
15:42 511:45 am - Useful Tools
12:08 6FreePreview: Red Eye, Feathering & Collages
34:33 71:30 pm - Creating a Simple Cluster Page
16:301:45 pm - Different Modes & Making a Bookmark
31:54 92:30 pm - Creating Cards With Digi-Kit Elements
41:29 103:15 pm - Constructing Cards Without Digi-Kits
33:30Day 2
119:15 am - Collaging: Alignment, Guides & Grids
23:50 129:45 am - Paint Bucket, Brushes, Gradients & Text Effects
45:13 1310:45 am - Cookie Cutters, and Personalized Background
22:38 1411:15 am - Frames, Filters, & Blurred Backgrounds
42:12 1512:45 pm - Photo Restoration: B&W and Color
37:22 161:30 pm - Photo Retouching
44:41 172:30 pm - How to Use a Pre-made Template
37:02 183:15 pm - Creating your Own Templates
38:31Day 3
199:00 am - Creating Your Own Paper
36:09 209:45 am - Photomerge: Panoramic & Style Match
21:18 2110:15 am - Text Clipping & Guided Modes
17:05 2210:45 am - Postcards from Digi-Kit
50:20 2311:30 am - Postcards from Scratch
17:40 2412:45 pm - Creating a 12x12 With a DigiKit
34:01 251:30 pm - Creating a 2 Page Spread
44:18 262:30 pm - Creating A Collage
48:47 273:30 pm - Second Collage Example
21:25Lesson Info
2:30 pm - Creating Cards With Digi-Kit Elements
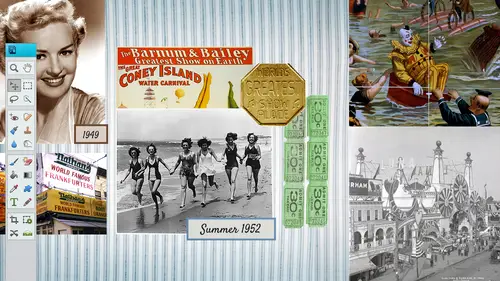
So the last segment, we're going to tie everything together, okay? You guys learned about layers you've learned a little bit about field, we're going to go into more on the filter area, but we're going to create some cards, so basically you could do it all kinds of ways you, khun dio, you could go to michael's and purchase the not the template cards, but just basic playing cards and then do your five by seven or four by six and just pasted onto the outside and then put your own little notes inside of there. And so that's, why we're gonna go ahead and tie everything together? We're probably going to start out with this one right here, it's a little bit easier of a card, and then we'll do that happy valentine's day card, but I wanted to kind of pull them up, so you had a visual of what we're going to be creating and those of you on the internet. I really want you guys to get busy tonight, do something fund posted on facebook and see what you've learned because I really want to see how fa...
r you've come from the beginning, all the way to the end as well. Police don't love those twelve facebook page, facebook, dot com slash creative live our moderators are looking at those they're really excited to see him we are another thing I wanted to mention real quickly if you are doing that three day trial at an a o d s to check out the organizer theirs, they're going to you're going to get a funky little password, so if it doesn't let you in the first time, copy and paste it and then a luxury and vicky, you know about those crazy passwords, but yeah, because I had one person say, I'm trying to get in to look at the organizer, but just copy and paste it worked just like a charm, so wanted to make sure that everybody knew about that, so what we're gonna do is we're gonna start out by talking about the difference various sizes that you can make as faras the cards go now, you could just I usually what I normally do is I'll go straight to michael's or hobby lobby, and I'll go ahead and get the size that I want, and then I'll make it that size in photo film, it's a whole lot easier to go find the end result first and then teo created in photoshopped the size that you wanted to be, so this is a fairly basic layout, but I thought it would be good to do this at the end because it ties everything together, it's using a dj page and it's also were going I'm going to try some filters with this photo so you can we can start a step into the filter area and puts him text in there, so we'll probably probably only take us about twenty minutes or so to create and then we'll follow it up by if there's any questions that anybody has feel free to stop me if I do something too quickly and then we'll get started so what I normally do is I'll have an end in mind so I will get out a blank sheet of paper, get out my pencil and do a really quick sketch before I even get started because like I said earlier, the worst thing about this is if you sit there and you're looking at a blank sheet of paper and if you're not creative, you just sit there and you sit there and you get frustrated so what I really recommend is to take out up a blank sheet of paper, get your pencil out and do a really quick thumbnail on it first this one's going to be easy because it only involves one one photo has a couple lines of text, a couple different elements, but with this photo I think it'll be fun to do something different filters so first of all I am going to open this photo up and just kind of try different filters out with it this was taken up in aspen, colorado it mate might need a little bit of a little bit of enhancing in this one, so I'm going to right click on it and I'm going to duplicate that several times because I want to do a couple different tests on these different filters and then we'll end up with one that we liked the best I'm gonna duplicate that a few times what I'm doing is I'm right clicking on the layer itself and choosing duplicate that layer or control j on the keyboard will also do the same thing control j that will also bring up another layer that is exactly like the layer below it another way you can do it because I want to show you all different ways is you drag it and drop it to the very first icon that will duplicate it as well. So now we got a ton of them there, okay? I just wanted to let you know all the different ways you can do it if you want subtract mohr of those war than one at a time, you just go ahead and hold the shifty down highlight them all right click and she was delete layers okay, now we're just back to four all right? So we got the top layer we're on the top layer it, we know that we're on the top layer because it is in blue we're gonna go into filter and here is a bunch of different filters that you can start kind of playing around with um I like the artistic there's the sketch which is kind of fun the graphic novel is a lot of fun as well with this particular photo I don't know which one is going to end up looking the best but that's the beauty of it we can go in try it out if we don't like it control lead okay let's go into artistic first because I think that's where we might find some really cool filters so I'm gonna go to filter artistic and color pencil normally this one doesn't work out so good so I like to kind of bounce around I'm going to see what the film gray looks like fresco might look kind of cool um a palette knife that doesn't look so good at all and another thing to it kind of sometimes depends on what resolution you're at a cz well, so let's just kind of look at some of these other ones watercolor I think the fresco one might um what's this cancel out of that I wonder if I have the highest version are highest that is, uh card pull this one out right now keep that one up, okay, someone back into filter artistic and let's just look at that frisco one let's, just go ahead and kind of play around with the brush size because that will determine whether or not you have hi um, high levels of detail or not. So you can kind of play around with these different sliders here and sometimes it takes a little bit of time because it does have to go through the process of taking that filter and putting it through and then there's the texture and then you just click on okay, so now we have one version of the filter let's go down to the next layer turned this layer off so that we can see it and go back into filter and let's go back into sketch let's, see what we have in here. Let's, go into graphic novel graphic novel tends to work better, kind of with photos that are just one or two people and you can get more detail in there. Let's, just try the hard edges and again, come down here. This is going to determine whether or not it's gonna work out kind of slide him little by little let's just take this down a bit more sickness. Well, it down a little bit it's kind of given it a weird, weird effect, but it might be kind of fun to kind of play around with that let's, go down to the next level are late layer and I'm going to go ahead with this one and this one here, the filter we're gonna go with let's, go with adjustments. This might look kind of funny in there, but now I work with let's go with you know what I'm going to go into in the enhanced area just quickly because I wanna brighten this up a little bit. I want to go into levels and you can push these levels from different sides all the way in just a kind of brighten it up looks pretty bright on here, but all my my screen it's not so sometimes before you go into filters, you might want to go into the enhancement levels just to kind of pull it up just a little bit, so we got a couple of filters in there. We'll talk about filters in the next one as well, but I think that for the most part, I'm going to go with a very basic one in this one here, which we're going to be using for the final, or we could use this bottom one too, but let's, just go with this one. Once you have the one that you want to use, which you're going to do is you're gonna want to throw either throw those away, or you could just drag and drop this one into the page itself. So I'm going to go in let's go ahead and button this up let's bring it into a background so I'm gonna open up a new background here go ahead and use this one this will be our background and I'm going to think what size do I want this card to end up let's say I wanted to be a five by seven all I need to do is take the crop tool let's pull this over here get my crop tool and say okay I do want a restriction I do want five by seven I do want to go ahead and type in three hundred resolution and I'm just gonna pick a space out of this it is not the right it's I needed to be landscaped so what I need to do is either I could rotate it later or I can just escape out of that and go down here to where it is the width and the height I can just go ahead and switch those back and now it will be the wit of seven and in the height of five so if you don't have it set up right, you can just switch those and you're good to go so I'm just going to find an area that I want to cut out of cut this out of here you can do it small as you want to but normally I'm gonna go almost half the size at least, and then click on commit current operation and now we have the background piece that we're going to be using for the card. Now we can go back in over to the photo and we can take our move tool and drag it and drop it into the page, and then we can close out of this one because we are all set and it doesn't matter if we don't save any of those because we don't need them. We were just kind of playing around with the filters to see what that was kind of work has now it automatically goes straight in the middle, which is pretty are if you hold down the shift key, don't go straight in the middle or if you just drag and drop, it should go in the middle. I'm gonna pull this up a little bit and make it a little bit bigger, and I'm gonna I usually bring in the photo and then I worked with all the other stuff, and then I kind of button up the photo after the fact, because I don't know for sure if I want there to be a, uh, effect and a drop shadow and all that, so I'll keep that there. And next they want to do is I want to pull in. I'm gonna use the paint bucket, which we haven't really talked about much today at all. I don't believe maybe for the background, phil, but you can fill a whole entire area with a solid color, and I usually use the paint bucket tool for that, so I'm gonna go ahead and I'm gonna go to the background layer. I'm going to add a new layer in between that those two layers, so I go to the very first icon, which is create a new layer, and now we have a layer sandwiched in between both of them, and I want to bring in just a block of maybe a dark, deep red I'm gonna go ahead and get my rectangle marquis tool, I'm going to drag and drop a big square down at the bottom, and then I'm going to go ahead and fill that with the color. Now what color do we want to use? We can go into our, uh, set foreground color, go into our page, click I'm going to get a deep red here from this photo. This is the photo that we're using remember, you can choose from any of these, uh, colors here, if you know the rgb values, you can type that in. Or if you know the hex hex decimal numbers you can type that in a swell and normally you just go ahead and pull something from your photo so that it all kind of lines up in matches go ahead and get my pay packet and just click inside and now you have an area that's solid is a solid um two d select you just go select and d select or control d will also get you out of that mode as well. So now you have it's kind of like a little piece of paper that sandwiched in between their you can move it wherever you want. Teo I'm just gonna go ahead and put it down at the bottom here and just slide it right here and you can nudge it into place if you need teo well, again, if you want to work with the guides and grades a lot of people do I just don't for some reason unless I'm gonna be lining things up but normally I don't turn them on until maybe at the very end and then I'll go ahead and pull them in. All right? Uh, the next step is I'm gonna go ahead and bring in some text and actually let's bring in some in depth embellishment, so they're really cute little little elves made by sneak original designs here sd h h e l f f e l f to png I'm gonna bring this one in go ahead and drag and drop here is the page and because I was not on the top layer he came sandwiched in between those two layers which is no big deal you just drag and drop it above and then you can go ahead and shrink him down and then position him what you want. Teo and I always just kind of put him there and then I will kind of play around with it after I get everything into my page down he doesn't know you spent all over the room around if you want teo, which is kind of fun having incoming the corner like that, his hands kind of like this but for the most part now you khun totally. You can rotate him however you want, teo one question I do really getting into it, but just a backtrack. Where again were the backgrounds located? Denise rose, this particular one is snickerdoodle designs one. Okay, but you had already saved it and it is in your kit, right? Yes. Okay. Like you, when you purchased the kid, you're going to get tons of different elements and you and we'll talk about that because I think somebody said, but where do you put your kids and how do you organize them? In fact, let me just pull up a kid so you can kind of well, you know what? I'm gonna wait on that but just did come from a kit so it was a whole twelve by twelve. I just cut it down. It was a piece of paper that came with the kit and I think it's called happy holidays sd h h p fourteen it's the happy holidays when I think in snickerdoodles section and this will actually come with the purchase of the class to this kit thes pieces so anything that I'm using you can use because we're getting a lot of requests for holiday seemed yeah, ground line, tons of them ok, anything else from the internet to keep going? I'm gonna go ahead and place this one now because I'm using the open method a lot. So I'm gonna place this one. This is another little elf. They're gonna go ahead and place him in here and it's kind of big let's go ahead and shrink him down. Thank you. Let's put him on this side. So he's looking in let's, put this one on this side. Get over there. Look, I where you're not going over there so weird hey, kids bouncing back kind of weird my photo shop is getting mad at me for some reason, okay, don't mess with me now all right and I'm going to kind of push this overto left I think I just moved it without knowing its move him back over here he's wanting to go over there if all else fails whenever you try to do something tried a different way and animal shit work so I'm just pushing him over my mouth was pulling him over and then he was moving back over so I'm just going to use my arrow keys to push him over here's another little thing about arrow keys if you hold down the shift key and you push him over it it shifts five pixels at a time whereas if you just use the arrow keys it'll ships want like one picks little time so you if you want to move it faster could hold on that shift key it'll it'll move a little bit faster for you alright shut this down make sure whenever you are shrinking something if this constrained proportions is not checked, it might alter the shape of that. So just make sure that if it does alter the shape that you go back and you make sure that that constrained proportions is is checked when you are moving on ds shrinking pieces down all right he's old you're really not supposed to enlarge and go back but I'm large in just a little bit so notice here remember when I placed an object when I placed it it comes in as a smart object, but when I drag and drop it over, it doesn't, so we will probably have to go ahead and create a simp apple layer from that simplify that layer just so we can use those effects and different things if we need teo, we wantto do that, so you just right? Click on there now we need to make this pop a little bit more it's looking really kind of flat, so we need to kind of play around with that and then add the text so I'm gonna go ahead and click on the actual photo itself, and we're going to go into the effects panel and I'm just going to put a little drop shadow on there and let's go into the devil's and see what we have here going to kind of put a little bit of a bevel on there just so that it kind of gives it a little bit more pop and that's kind of taking shape. It kind of looks like a little, um frame for that, and then these guys probably maybe might need a little bit of a job shadow so let's, go back in, go into our drop shadows and then put a drop shadow there, drop shadow here. All right so now it's kind of popping just little bit now you're gonna want to save every so often so I'm going to go file save as and I'm just gonna call this holiday card and it's going to be a psd which stands for photo shop document so now I've got that psd with all the layers just in case and when we do save it we're going to save it as a j pegs that you can upload it teo whatever print area that you're going to be printing it teo I move this over just a bit go back into my layers okay I'm gonna use it there we go so this would be a perfect place for texas in the bottom area right in here so we're just going to go ahead and say from our home to yours happy holidays two thousand thirteen something like that down here so we'll work a little bit more with text so I will probably put my text on the top layers that we can see it so you do want to go to the top layer but before that we're going to go ahead and name these layers so I'm going to go left l and this one here is going to be right elf okay and then we got the background there we're just going to call this photo the main photo this one down here double click on that we're gonna call this bob ox just keep it simple. You don't have to get crazy with your names if he unless you want teo, right? See these that's, the fx right next to that means that there is an effect on that particular layer and you can always go back in there and change it if you need teo. Another cool thing about this is you can go into graphics and if you don't have, if you haven't purchased a did you can't or anything like that, you can go into crack graphics and check out what they have available because all this stuff comes in photoshopped elements for free so you can pull some of these elements out. We'll talk a little bit more about this, but since we're talking about car design, you can pull some of these pieces out and use them in that as well. So you don't have to be purchasing did you kids, but, um, I encourage that you do if you if you want teo kind of find things that are more tailored mean, they have so many different digits out there, like they have, uh, disney disney to do kids they have, um, holiday, did you kids birthdays, anything that you can think of all you gotta do is type in the theme, go to google and say digital scrapbook kit whatever it is and then your public and find find it if you can't find it let me know and I'll try to find it for you all right go to the very top layer you get my text tool I don't think I want the text to be this color because it won't show up so I'm going to go ahead and click on the color and of course I'm going to click on the color wheel again and maybe I'm gonna pull in this color from the layout so I'm gonna go ahead and do that and you can always close up these panels by just clicking on little arrow that points up or down that'll close it up gonna go ahead and get my text tool click one time and type go ahead and put um happy holidays twenty thirty all right so it is left justified and and I'm okay with that we're going to go ahead and center that we're gonna go back to our text tool I'm going to go ahead and choose center text move it on into place and I'm going to kind of pull it around you get around here go back to text and I don't really particularly like this fonts uh so I'm going to go ahead and try to choose a different font and I'm probably going to go ahead and in large are not in large but do in upper case on all of the words you just there? Another thing I didn't really mention is you can change the size from line to line, so if I wanted this from our home to yours to be a little bit smaller, I can just highlight that go down here and you go ahead and take what I want teo as faras the text and make it a different size. So just because this size here is because it's set all the same, you can highlight pieces and in large text that way as well and let's just kind of go through some of the different fonts that we have, so if I click inside of my faut area, you can use the arrow keys that points down to toggle zoom in a little bit more so you can see the difference you can toggle down throughout the different bonds that you have, so this is where you can kind of gets tricky sometimes you just keep going and going, you're like never satisfied with the font you can't you don't have to have the same font for all of it. You can highlight happy holidays and change that to something different. But like I said, I sometimes you know anybody on the internet no, you sit there and you go so that's not it no that's, not it just pick up on it, just get it done so one might look good to you and the other might uh look kind of funky and really have to focus on to this one might be too thin for this so you want to make sure that it's a thick enough font when you print it that you can actually read it because that is heartbreaking when you spend a lot of time on it maybe you make fifty copies of something comes back in texas too small sure it's happened to some of you out there where you spend some money and it's like I can't even read that well too bad I'm not anyway or you know, you know maybe you you've dialed into your process maybe others are out there trying to figure out how they build it and how the layers come into play and maybe if they're getting stuck on the front part maybe they figure out a place to put it in the process there may be at the very end and maybe on on the following day when you had your rest and you can just really yes election exactly exactly so I'm gonna go pick one and I'm going teo that happy holidays in the bottom that font and then I'm going to go back in and maybe do something different for the top font maybe something I don't know script you're are a little bit more fancy so I do like to put ah, fancy font. And then maybe a plane font like, you know, like I was saying, a sand sara font and a sara font in there. And there are so many cool scrapbook fonts out there just to scrapbook fonts, free scrapbook, fonts or whatever you can find out there. There's a lot of really fun, fun fonts. Alright, I think I'm gonna make now that now they have to button it up now. It's a little bit too close. The leading is too tight, so I'm gonna go ahead and double click on this one again. I'm gonna make it a little bit smaller and then let's just see what that looks like. It's. Not looking bad, but I think that the leading is still a little too tight. Someone go back to the text. I'm going to push the leading to the right. Just a bit, but we're getting a little bit close down here. I don't like to get too close to the bottom. Okay? I usually leave about a quarter of an inch down there and, um, let's, pull it up a little bit. Same with this's gonna bleed isn't brain know what a bleed is, where it goes off the page. So this is going to be one where it bleeds off the page we're not gonna have any kind of border or anything so it'll it'll be fine whenever you pasted onto your you know michael's cards just the generic ones you can go out there and buy fifty a package of fifty for a few dollars and then print these off four by six is's or five by sevens whatever size you need and then you just go ahead and paste on there and another cool thing is those of you who have all these embellishments that air sitting around you could actually glue some of those embellishments onto the card if you want to kind of take it a step further those of you who are traditional scrap booker's who just cringe because they have a lot of money and all of these embellishments like well that's what I did for to get rid of all my embellishments is not get rid of but to use them and make them a home is go ahead and start attaching them to these digital design layouts all right so like I said quarter of an inch around you want to stick away from especially with text because you don't want the text to bleed now the other things it's it's fine because that's what you wanted to dio but I go in there and I make sure it's going zoom down here a little bit more and I'm going to go ahead teo view and rulers and looks like yeah looks like we have a good quarter of an inch down there so I'm just looking at my ruler down here see how this this is one inch right here so fourth of that might need to grow up just like one hair but we should be good and pretty much it took it well I I worked on it slowly but if you're if you start getting good with this and you really know howto pull in photos and stuff it would only take you a few minutes to do your own card so I think it's it's kind of fun what you do at the very end you make sure that you are organized over here and that you have all the layers are named so you want to go ahead and name those layers and everything looks good I'm gonna go file and save and it saved us holiday card over the top of the old version which is fine it is a psd which is a photoshopped document and then I want to go ahead and do file save as and I'm just going to say that his holiday card okay actually sorry I did not save it as a jpeg so I'm gonna pick j peg for my list of drop downs holiday card fine save now another thing too I'm gonna boost up this quality then click on okay, another thing too if you wanted to post this on facebook, you could take that file flies down and um post on facebook or keep it up I think facebook automatically might convert it down anyway so you know if you don't want to send out all the holiday cards you could just post on facebook which I might I did d'oh the real version but for that you know if you have five hundred facebook fans and you can send it out that way as well that's very that's another advantage of digital, right? Yes it's digital way have just a quick clarification crumb just on the workflow and where to put the font because wendy amato says that that when they ordered through costco they seem to in life enlarge their files lightly and they learned ah hard lesson of keeping that text away from the edges. So sometimes whenever you upload to costco I don't know if they would do this a persnickety because they are there more well focused individually so what you would I would probably then teo pull it even further away if costco's kind of tending to do that they're just not individualized so you might want to go ahead and pull it away a little bit more I don't know if she has it happened all the time or if it was just that one time deal but sometimes if if you're sending in a four by six and then you tell it to print out as a five by seven it's not the same proportionately I've run into that before so make sure you're creating at the exact size that you wanted to be and you're not going in there and saying okay, I want this four by six to be f five by seven because then it will death I've had that happen before it'll definitely cut more on I don't know if it's this way or this way one of the ways it's going to cut mohr off so it kind of pay attention to what size you're actually working with and make sure it's the size that she wanted to be that you're not like sink because I could upload this and say ok costco I want five five by sevens and five four by six is because you could just do that well, like I said it's not proportionate so somewhere it's gonna have to cut off and it could be decide that the text is on this side if it was on thes two signs it wouldn't be such a big deal but it was on the top of the bottom it could cut off some of that so yeah, I would be interesting to know if if she definitely had the exact size or not any other questions good awful to spend that much money and and then not be using well, I know it's scary sometimes I can't remember what I did. This was like, what of this first started out? But it was when I was doing those twelve by eighteen and I would shrink him down to six by six is and I was not thinking I should have been thinking, but it took the little journaling and it shrunk it down like, oh no, I get it, reed does luckily, it was only, like five or six of the layouts, but if you were making like, whatever, I don't know how many would make for christmas cards, you could make up to one hundred of them if you're sending out a hundred and you get him back and they're they're kind of cut off. So, um just kind of make sure that it's a least a quarter of an inch away some people put it really close like, oh, that's, way too close. In fact, this is closer than what I normally do, but this is right at about a quarter, but I usually over overdo it, pull it up a little bit more just to be safe and then you can always pull this up. It's not a big deal, you know you can always or here's another cool thing you could do I could cut this photo because there's really not a whole lot down here. I'm going to go on this layer I could clip a little bit off a here the bottom see if you can see this I'm gonna clip some of that photo off hit the delete key and then I have enough room for sure so I can take this move it on down and, uh then I can move this up a couple hairs if you need teo just over overly compensate for that, you know, that looks fine too. So now we're gonna do and say ok spelled everything right from our home to yours that's another thing? Happy holidays. Okay, we're good. We're gonna go ahead and save that one last time as a jape, eh? Because we did do some changes and then we're gonna go file save ass and then just save it as a as a j pick again. Sometimes you forget that you made a change and you don't re save it and you don't send the right one and next kind of a bummer too. And that that's what that's a really simple card. I think most of you that have been here all day today can make one of these tonight, right? Well, I don't know my case most people's yes e had a question very quickly about card do you have a print directly onto card stock? Is that some audio strains and then sort of cut and paste? Yeah, I know a lot of people have really nice printers and my printer's pretty nice too, but I just find it so much easier for me just to go ahead and send it to the printer, but yeah, if you if your printer allows card stock, just be careful because you don't want to ruin your printer by sending the thick card stock through there, but most mostly everybody knows what you are allowed to do with your printer, but just be careful, it doesn't get stuck in there and ruin your printer and I always think, well, it's not worth me running my printer and I'm just going to go ahead and by the way they're kind of like just template cards. I should have those out of the hotel, but there just you could find man cream color or you combine them in white and really inexpensive they come with the actual envelope as well. So you got the envelope you got that you just take that you put your little maybe four glue dots I think you call him blue dots in the corners pasted onto your card and then in the inside you can go ahead and personalize it if you want teo as well more chatter about fonts, people also sharing information on judy mason she's got hundreds of her blogger gal saying she goes to kevin and amanda dot com well on that site says they're all free on this challenge and amanda, you know I love that site actually a few of them that I'm using here uh abusing tomorrow are from that side as well and they're very scrapbook related so that's the cool part about that and that saffron cell was asking when you're using pierce elements will pierce elements find all the fonts you have already downloaded another program such as office such as words such as excellent should I believe it because they all come from they all pull from the same location you don't just install the font into that particular program so it should pull you just don't have so many fonts on your computer that bog get down that's what a lot of people get carried away with and oh gosh I wonder if care and still out there from snickerdoodle design she has a good program if you're out there, karen, let us know what font organizer you use it's on the tip of my tongue but I'll em are hard to her tonight and see because she she's got a lot of fonts and shoes is a font organizer number sure there's mac organizer's for fun I just don't keep a whole lot of them I just know the ones I really like and I and then I'll sometimes save the other ones off into a folder if I want to use it all this pull it in then take it back out so that doesn't, you know, bog down my system, so yeah, I know I used stefan stefan de et mon dot com and they have a lot of like they teach you things to like some they're like oh, that this is like a movie title type things you want to get crazy with that kind of stuff I know yeah, good refund that's awesome. Duff on yeah that's awesome that you mentioned that free fonts dot com is another one brush brush is we talk about brushes, you can download brushes I think it's brushed easy or easy brush or something like that is easier it's spelled differently than easy, but to scougall everything can be found in google search, but brushes can be downloaded as well as fonts and that's a huge thing in a digital scrapbook world because we're going to be talking about papers and all that kind of stuff and creating them and using brushes and filters and textures and all that in the next few segments but um there's one other font place that I had on I'll figure it out but you know, just google search free fonts on dh free scrapbook fonts maybe to be more specific to get the funky ones oh I know what I was going to say that it was either on de font or somewhere where they had like a halloween font and they have christmas fonts and they have all the holiday bonds that you can imagine you know there was one other thing I was going to show you while we're talking about cars as well this is actually hard I make a lot of my cards this is this was taken up in aspen it's nothing spectacular really only has text on it and a filter on it but this is this is what I use for michaels and it's basically put it on here pulled it over and then I do birthday card make all my birthday cards all the thank you cards pretty much every card I sent out is something personalized and it doesn't take that much time and when I make him I usually make five or six of time and then so I have all my cards ready to go for about a year or two thiss one here was printed off at my publisher so that's another way of getting your car like they were saying do you ever have them printed off this one here is that twelve by eighteen that my son did we're going to talk about this with interlacing I scanned it in and four different quadrants shrunk it down and then created this car to here's a little thing that I did it's embarrassing but I made this for the side is too small it's the story that he wrote about the kid lost cowboy boot and here's where I made a mistake I didn't think it was a free card but just be careful of that I should have known better but I mean you can read it you have to like you know get your glasses out but it can be read but that's that's what I think here's another one teo I think did I make this one was this one's food shutterfly so basically you just upload it and it's cool because you can like do a little personalized back here and this is also cool this is a cute little thing he drew this self portrait when he was four years old is that the best that I just love that I have this in my eye scan to scan it in or take a picture of it and I think I scanned it in but I have for this one's framed and uh love the eyes but four years old see things like that which funda personalize your cars with you yeah she said that she uses x sponsored to organize and then there's another follow up your thing you were trying to remember was brush easy he brushes you guys all know it out there brush easy out ride cool all right, so everybody got followed along with that. When that was fairly easy card. We'll do one more car to tie up the day can be a little bit more. Um, a few more pieces involved with it probably bring in some more filters and tie it up and bring in some of the graphics from the graphics area over here. So we got that all buttoned up. It is saved as a j peg and remember which one's bigger j pay or psd all no, psst. Psst is bigger because it has the layers, and the file size is just like five or six times bigger than the jpeg.
Class Materials
bonus material with purchase
bonus material with enrollment
Ratings and Reviews
PJ
I really enjoyed Michelle's teaching style. I'm new to digital scrapbooking and am on my way to becoming an die-hard convert. Thank you so much for explaining everything so clearly. I'm so glad I bought the course and all the extras you gave me were wonderful - a quick way to get started. Hope to see you again on CreativeLive soon!