Lessons
Introduction
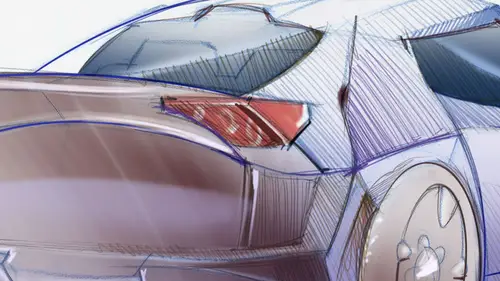
01:18 2Digital Rendering Overview
07:00 3Photoshop Settings for Digital Rendering
03:31 4Using Layers in Photoshop for Digital Rendering
04:46 5Using Masks in Photoshop
07:23 6Using Filters in Photoshop
19:59 7Using Selection Tools in Photoshop
07:19 8Retouching Sketches in Adobe Camera Raw
05:16Retouching Sketches in Photoshop
03:45 10Rendering a Coffee Maker Start to Finish
21:54 11Non-Destructive Rendering in Photoshop
07:09 12Intro to Sketchbook Pro
18:16 13Rendering A Car Start to Finish in Sketchbook Pro
19:49 14Adding Logos and Graphics in SketchBook Pro
02:36 15Rendering Interiors using Photoshop
15:53 16Adding Shadows with Burn Tool and Lasso and Feather
09:32 17How to Create Highlights and Add People to the Scene
12:05Lesson Info
Using Masks in Photoshop
All right. So in this face, I am going to be talking about a backpack. Um, we're gonna be talking about understanding masks. Um, in order to do a better job, I thought we could do the backpack and then show you with some examples how these really happens. So this file is shared, um, with the class. So a layer, this is my layer to which is the light work. I'm gonna put it over here. This would be my line work layer. And this is my background layer, which I want to rename in case I have somebody else coming. Call it color one, but one I'll get into that later. This is my line work, layer. Nothing more than just my scanned freehand drawing placed directly over here. How to work with masks is a very important part in the rendering process. Usually you would have to go on the Internet, or you can take your own pictures off a texture that you would want to work with. For example, in this case, we have this very interesting mesh what we have over here. Let's imagine that I would want to just ...
apply to one particular area in the drawing. Not on the whole thing. Had it looks flat. It doesn't look that interesting. Visually, we need to make it work. Um, So what I would have to do over here would be to in this icon over here. So I click on it and I create a mask. What I'm gonna do now is click on my keyboard, the backslash button, and that creates that would allow me to see my mask when you work. When you create a mask by clicking here, you get, like, a white, um, box over here. And you see your colors that you had picked initially they go, it goes into black and white mode. That means that you have to work either with black or white. I'm going to go to 100% opacity and what I am going to be doing. You see, you can paint. You can pick any brush, want this case. We can go over here. Um, 60 can make a very large brush, and we can mask out departs that we don't want. All right, so we can do something like this. Say, hey, well, that's roughly the shape that I want to mask out. If you want to remove the radius the mask. If you want to remove it, you click the back slash button and then it shows you the parts that you have. It shows you how you can really mask everything out. But still it's not perfect, right? You see, How can I get the ages just perfectly? What you would have to do here is go to click on the layer and reduced the capacity. Once you reduce the capacity, you can do a much better job cleaning up the area that you want to cover. If you want to reduce the size of your brush and you can you see, I can actually masking out too much right now. You see, I'm asking Whoops. I am painting. I shouldn't have done that. Let's go back a little bit. This is my history, Palate. You can go back a bunch of steps. This one over here comes very handy if you want to trace your steps back. All right, so we have this mask, it's do it one more time. How can I get better at masking you reduced capacity so you can see what you have and then what? You have to dio groups wrong again. You have to click on the mask. All right. If you paint with what with black, you add to the mosque. If you switch this to you are removing the mask You see Now you can do a much better job placing your mask exactly in the area that you want. All right. You can also reduce the size of your brush. A short cut to go from black and white over here to add or remove to the mask would be to click X. So what I end up doing is having one thing are always on X, so I can go from adding or removing that can go back and forth between the two. So this is really the trick off working with masks and you see, you can get quite good had making the mask just fit exactly the area that you need. All right. So what are these other files about? So what I have over here is my mask that I have applied for the smash. The only difference over here Would you see how you see the difference between this mask and the next one All right. This one here is flat. This one here is slightly curving. And I also made sure that show them ask again by clicking on the back slash button. This is my mask. You see how I have masked out these two strips so that I can see that better. All right, The only thing that I did over here chest who make the mask a little bit more interesting would be to, um, storm. That awful is go to this layer. I went to filter lens correction, and this is super fun. Um, you can in bulge it out. You see how it is bulging. So it gets you like the round shape that you want to take. Okay, it's punching it out. You see? Were bulging it so much that it actually escaping the mask that I have done, I would have to mask the rest out. You can also go to edit, transform, warp, and using this edges the sorrel. Live edges. You can bring your edges in and make it more like, um, that gets soft type of material. All right, so play with that. We have this in this. Well, you have your different layers to play with can apply the transformation. Let's see. Let's go over here. You would have to add to the original mask, Click on the mask off course, and then you see your block that out. You see how fast you can work? Actually. All right, so click over here and now I would just have to add to the mask, right? So that I would show the entire thing. All right. So masks are quite convenient toe work very quickly.
Class Materials
Bonus Materials with Purchase
Ratings and Reviews
Gigi
This is actually the course I was looking for. This is DIGITAL rendering, which in an odd way makes you appreciate hand drawn rendering. Great! Thanks!
Heather
awesome!