Lesson Info
9. Retouching Sketches in Photoshop
Lessons
Introduction
01:18 2Digital Rendering Overview
07:00 3Photoshop Settings for Digital Rendering
03:31 4Using Layers in Photoshop for Digital Rendering
04:46 5Using Masks in Photoshop
07:23 6Using Filters in Photoshop
19:59 7Using Selection Tools in Photoshop
07:19 8Retouching Sketches in Adobe Camera Raw
05:16Retouching Sketches in Photoshop
03:45 10Rendering a Coffee Maker Start to Finish
21:54 11Non-Destructive Rendering in Photoshop
07:09 12Intro to Sketchbook Pro
18:16 13Rendering A Car Start to Finish in Sketchbook Pro
19:49 14Adding Logos and Graphics in SketchBook Pro
02:36 15Rendering Interiors using Photoshop
15:53 16Adding Shadows with Burn Tool and Lasso and Feather
09:32 17How to Create Highlights and Add People to the Scene
12:05Lesson Info
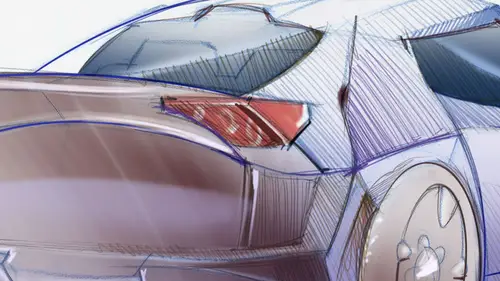
Retouching Sketches in Photoshop
Now, the second option here would be to open up your files in photo shop and retouch them on that program. Let's get started with that. So, um, in this case, I can just open it up over here and dio just, um, the process. But in this case, he would be different. I'll show you. So first, what you need to do is go to image de Saturate. If you have some traces of color, an image, adjustments, levels what you can do now it's played. You see this triangle that we have over here, You bring it towards the white, you're bringing the blacks, you're bumping up your black colors, your black tones, and then these are your gray levels. Do you want to show them more or less? Well, I like them like that and white somewhere here. You see, if I bring it too much, then I lose detail. You know, somewhere here that looks very good. And then a little bit here, this over here. Not so much for these catches, but this this white Pickar would allow you to select the white. What would be your whitest white? That...
's too much. I don't if I want that. Remember, if you don't like that, you can go back to the history to the history and start again. The good shortcut would be controlled. L So this is where we had left it somewhere here. But then we had to De saturated, which is image adjustments de saturate in for a shop. You have also the shortcuts. All right, if you think you're gonna be de saturating a lot, your drawings constantly, then remember it. Shift control. You. Um so this is similar to what we would have done in bridge. All right, Two different ways of working. I like bridge better because you can. You can retouch things in matches, so it works a lot faster. If you want to retouch one or two images, it wouldn't really matter one or the other. But if you have 10 15 sketches, then bridge would be better. But you still you still see, we have a little bit off color over a little bit of gray on the edges. What we would have to do now is go to Dutch tool, get a large brush. Were here very large brush even bigger. Well, not so big. Something like this. Exposure and then we remove that great home. This is a very large file to the computer is thinking about it. All right, Who I overdid that. Do I want to trace my steps back? Yeah, Somewhere here. Well, I still see some graver here. How should I fix that? Well, maybe it's time to make a smaller brush, pick a smaller brush, larger exposure, and then just cleaned that up that way. All right, that looks good. Now again, control L for levels. I can bring my black lines yet one more time. Play with my three triangles until I get a good outline. Okay, That looks good. And that's how you would work with the other two sketches, right?
Class Materials
Bonus Materials with Purchase
Ratings and Reviews
Gigi
This is actually the course I was looking for. This is DIGITAL rendering, which in an odd way makes you appreciate hand drawn rendering. Great! Thanks!
Heather
awesome!