Lesson Info
12. Intro to Sketchbook Pro
Lessons
Introduction
01:18 2Digital Rendering Overview
07:00 3Photoshop Settings for Digital Rendering
03:31 4Using Layers in Photoshop for Digital Rendering
04:46 5Using Masks in Photoshop
07:23 6Using Filters in Photoshop
19:59 7Using Selection Tools in Photoshop
07:19 8Retouching Sketches in Adobe Camera Raw
05:16Retouching Sketches in Photoshop
03:45 10Rendering a Coffee Maker Start to Finish
21:54 11Non-Destructive Rendering in Photoshop
07:09 12Intro to Sketchbook Pro
18:16 13Rendering A Car Start to Finish in Sketchbook Pro
19:49 14Adding Logos and Graphics in SketchBook Pro
02:36 15Rendering Interiors using Photoshop
15:53 16Adding Shadows with Burn Tool and Lasso and Feather
09:32 17How to Create Highlights and Add People to the Scene
12:05Lesson Info
Intro to Sketchbook Pro
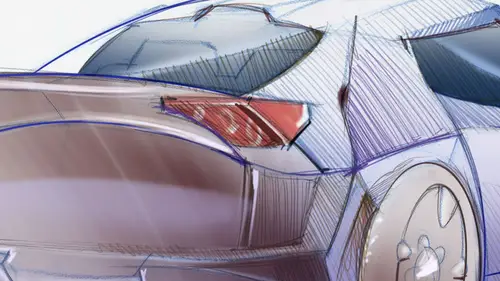
In this next phase, we're going to be rendering a car. But the difference between what we have learned before for what we're going to be doing now would be that we're gonna be using a new software. All together. The software is called sketchbook. Now sketchbook is a different option in for a shock. Both are good rendering programs. Two years, a different price ranges suggest. Explore which one of the two would be more interesting or more, um, better for you to use, right? The difference, though, would be that, um, this sketchbook pro program. It's a bit more affordable. Both programs, though, allow you to test them of the beginning for a month. You can test them and see which one works best on. Then you would have to the site. So before we go in detail and start drawing and rendering in sketchbook Pro, I'll give you the layout, Um, a tour of the layout so that we have a better understanding on what we have left on right top and bottom. So what you see over here is just our initial sket...
ch of a car. But first, let's go back to a new document altogether. All right, let's study what we have over here Askew. See, the layout is very different than for a shop. The nice thing about for a shop that would be that all the adobe products are similar to each other. If you have worked in in design or illustrator or for a shop, you learn it pretty much once, and you can apply a lot of that knowledge to the different programs. Sketchbook Pro has its own way of working, but with some similarities with water shop. The first thing that you will notice is that we have very different color selection tools over here very different once, and it's a lot more finding a way. It's more a tool done by designers for designers. Um, rendering artists. You can really do a lot of interesting things. Pick a lot off colors this way. So this would be your main way of working groups. Yellow red, remembering for a shop, how we were working with your different brushes, making it bigger or smaller. The shortcut is the same, actually in photo shop and sketchbook pro, which is the brackets that are to the right of the letter P open and close bracket to make your brush bigger or smaller. So that would be a great thing to have. And you see what a great kind of sense off sketching you can get in this program. So colors be great thing to know. And you can choose your color here on this color wheel. And you can also choose right here from light to very dark within the same red, very saturated or less saturated. You know, you have really a good sense off picking your colors. You can also work. This is very interesting. What does this mean? Coptic library. This point. I want to say that, um kopeck is this brand off markers that we have, um, Cho picks and we have to tips with them very thin and a thicker tip. All right, so this two tips are actually shown in the software. All right, so it is great. We can actually pick the same colors that we have over here. All right, So and it has the same the same names. C four. We can go over here and pick, say, for under Your Grace, see, for he would be right here. So this color that I am using right now is the Samos, this one. So it is a great way for designers to really make sure that they're using the same colors one way or another. All right, so we have learned already how to work with the co pick over here. This guy, this is the tool you click. Once it shows you click another one, it disappears. It gives you a sense off all the different tools that you can use. And it's very visual. This is an airbrush now, airbrush is wouldn't use them anymore, or at least not that often anymore. Because you need to have a compressor. You need to have the host you need to clean. Actually, the ink container every time you change the color states a very elaborate process. But in a way we still use our markers. I mean, our air brushes, but differently. We actually just paint with them. I am now fear brushing in blue, my background. This is a regular pencil tool, and we can use reducing the brackets. We can make your brush bigger or smaller, change my callers this way. So it's very effective. Very fun. Two years marker. We have very broad tip the same way that we would be using a regular marker. Who would want to use vertical strokes to entire to filling I Anton entire surface. This is a different type of marker with a broader tip. And, uh, we have a pen. We have a brush, a tiny brush, super tiny or different type of brush. Over here, we have two different types of erasers. Ah, hard eraser and a softer racer here. Both of them. Very fun. Remember, you have the free the option off downloading the software and try it for a while until you decide to purchase it. Sketchbook also has a free version of this program with limited resource is what we are reviewing here is just a sketchbook pro. So I just want to make sure that you don't get confused between the two. You have a pan over here, very thin pen. You have a different type of pen, different markers. You know, you can just explore all this. All of them very fun. Look at this one. How fun this is right. So now we have covered thes thes. Are your layers very different than for a shop? One thing that is the same, though, would be the Remember how I made a point to make your layers almost all of the time in multiply mode so that you would have the clearest tacking off your layers so you can see what you have done underneath that. Remember, that's multiply. We have that here, too. Instead of normal, you can go to multiply. All right, so the same thing that we have done before, all right, it's just the same thing. And it's easier to find, though it's easier to find it over here. It's less buried under more dialogue boxes, right? One thing that you need to learn about this so far would be how to work with your layers. It's this little circle over here. It's very fun. Two years, but very different than any other software. You click over here and drag, and you add on the layer. Click over here and your drag. So basically, you use the layer that you're very work on to create a new layer. It's almost like a stepping stool. You need one step to advance to the next one. That's how you would be able to work with this things. One over here must be the most Not difficult but challenging tool to use, remember is called steady stroke. What it does is it allows you to work with it, but you see, kind of gives you some sort of a guideline working here in the bottom. Let's make a new layer over here. Let's pick a color that would be very visible and large. We're going to be using this later when we're under the car. It's a different type of stroke. Actually, that's a different type of stroke over here, you see, kind of follows with a little bit of a delay. You see, this is without you can work freely. This is with the steady stroke. Why would we want to do something like this? This is to clean up your lines, all right. And this is particularly suited for illustrators. Or if you want to do like a very precise work, let's have rendering. For example, a car which we will dough. This will allows you to really the very precise And remember, when you use a synthetic tablet or a tablet with a pen like this, it is pressure sensitive. Okay, so if I use it very lightly. I am barely touching the scream. I get very light stroke marks. If I press very hard, I get a very dark stroke. All right, so keep that in mind. It's pressure sensitive. The next one here is very fun to use. Um, making a layer, It gives you a, um, centrepoint. And whatever you do in one side, it's repeated on the other. So, for example, see how easy I would be able to do, for example, of aces, right? Whatever you do in one side, he would be repeated on the other. Another thing that I have to mention the differences between this program and for a shop ISS For a shop you can dio you can undo many times, but you need to go to your history. Pull it over here. You can just click control Z, and you wouldn't do, um, many times. Your work, all right, and this guy over here would allow you to work would allow you to work. Let's see, let's make in a layer here. Whoops. That's full of hairs. It's making a layer here, working with the vanishing point working in perspective. You see, we have one vanishing point here, another vanishing point over there and vertical lines over here. So you can very quickly identify lines in perspective. And they would automatically go to your vanishing point That works great when you want to do, for example, architectural drawing. And you want to make sure that you get your lines exactly going to the to vanishing points left and right. Right. So great tool to use Um, this one here the French curves works really well too. It would allow you to, um, work with different templates. You can scale it up on down. This is how you move it. And then you can just use that as a guide to draw different ages, different curves. You can flip it, you can rotate it. Let's say you can flip it this way the opposite way. You can go from one to the other. This works great when you need to trace your outlines again with precision, right. Fantastic tool to have these one is very good to use when you render a car which we will dough right. You can, for example, draw your wheel very precisely using this template, you can make it bigger or smaller and then create a sense off a wheel very quickly can scale it down, for example on do another line like this and then partially draw this one here. You see, I'm starting to get a sense of we have some sort of a donna door A wheel going on. We can turn that off now and do a line over here. And then, hey, that's starting to look like something right in three D. So very fun to use. Don't forget that we have this and again we can rotate it, scale it or change the angles. Like, for example, if you see a car for for from a very side from a side profile and you barely see the wheel but you still see it, that's call. Instead of a circle, it would be in the lips. You can draw that with this. We can rotate it and, for example, draw the Ellipse for the car well, somewhere here and then connect. Whoops. I would have to turn that off, connect these two points, and I would have a wheel in perspective. You see how fast I can draw that right? This is a regular templates or guideline to use a straight line. These two guys over here would allow you to modify your ruler, make it bigger or smaller. Let's change color over here. Um, you see, you can move it any way you want. You can use the entire length from point to point or just bring it shorter. Thesis works. Great. This works very good, because off the following If you use the marker tool, let's go back to the original copy markers that we have discussed. This are used widely in art schools to teach how to render in product design or in interior design. This is the tip. Usually use parallel strokes to cover a large surface. You know, Palin strokes to cover your area with color, you would do the same thing here. You would pick a color that you want. Then you would use one line. Move it slightly. You do another one. Move it slightly. You do another one. Move it, move it and someone so you can cover an area making sure that you are always using parallel strokes. So this is a great tool to really uncover an entire surface, making it look as if you were actually using a marker by hand, and you are using it by hand. But just this is your hint, your hand and your digital tablet. Here, the T. You can just work with the text, you know, There you go. Very easy. Dump. This is your color tool. You can just dump a color directly on it self explanatory, and you can have tolerance, and you can just dump your color that way. This is very fun to use to. Okay, I need to pick a layer. They would allow you whatever you have worked on to distort it. All right. For example, if you want to work on a grill when I called on a the grill of a car, for example, and you have the car at an angle or let's say an interior, you have a window. You can work flat on a new layer on the window, with all the millions right, all the divisions right of the window. You can work flat, but let's say your perspective. You have the window that is placed on a corner at an angle on in has a vanishing point. You would draw it flat, and then, as long as you have it on one layer on a separate layer, you take this tool and you distorted to fit exactly in your perspective. So this great tool to use to for very specific reasons. All right, so now let's continue working on this things. One takes a little bit of practice. It can make your layer bigger or smaller. Everything that fits on that layer. Uh, this guy over here, it depends from where you're hovering. You would get different sub menus. All right, if you hover over here, it would lower. You go higher, go to the left, go to the right. This would distorted this guy over here would scale it, but keeping the same proportions. So, um, in photo shop, though, when you scale things up, you would find them under edit transform scale. When you scale things in for a shop, everything that fits on that layer on one layer, if you don't hold shift down, you would scale. You know, you would stretch it like a rubber band in different directions. If you hold ship down, you should be able to scale it proportionately keeping the X and Y axis intact. So everything would have the same size, bigger or smaller, but it wouldn't be distorted. That's how a sketchbook worst with it instead of having to hold shift. You have these two separate options, and this guy over here obviously rotates it. This is your crop toe. Same icon is for a shop. This guy over here would allow you to work bigger or smaller. This is your page on. You can rotate your page, and this is your rotation point, which you can modify and someone so And this is your undue on your redux. All right, so now we have the layout. We know pretty much how the whole software works. And you see, in just a few minutes, we have covered everything from beginning to end.
Class Materials
Bonus Materials with Purchase
Ratings and Reviews
Gigi
This is actually the course I was looking for. This is DIGITAL rendering, which in an odd way makes you appreciate hand drawn rendering. Great! Thanks!
Heather
awesome!