Adding Logos and Graphics in SketchBook Pro
Lesson 14 from: Digital Rendering for DesignersJorge Paricio
Adding Logos and Graphics in SketchBook Pro
Lesson 14 from: Digital Rendering for DesignersJorge Paricio
Lesson Info
14. Adding Logos and Graphics in SketchBook Pro
Lessons
Introduction
01:18 2Digital Rendering Overview
07:00 3Photoshop Settings for Digital Rendering
03:31 4Using Layers in Photoshop for Digital Rendering
04:46 5Using Masks in Photoshop
07:23 6Using Filters in Photoshop
19:59 7Using Selection Tools in Photoshop
07:19 8Retouching Sketches in Adobe Camera Raw
05:16Retouching Sketches in Photoshop
03:45 10Rendering a Coffee Maker Start to Finish
21:54 11Non-Destructive Rendering in Photoshop
07:09 12Intro to Sketchbook Pro
18:16 13Rendering A Car Start to Finish in Sketchbook Pro
19:49 14Adding Logos and Graphics in SketchBook Pro
02:36 15Rendering Interiors using Photoshop
15:53 16Adding Shadows with Burn Tool and Lasso and Feather
09:32 17How to Create Highlights and Add People to the Scene
12:05Lesson Info
Adding Logos and Graphics in SketchBook Pro
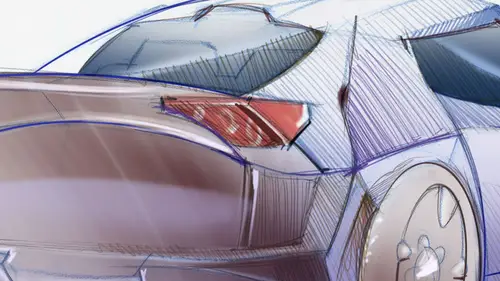
one less thing that we need to cover in this program would be the addition off the addition of logo's, um, over here just for the fun of it. I went to tea for text, and then I added a name. In this case, this is going to be a Paris your car, so I would have to do would be to just zoom in. Um, obviously, if you're working with a particular brand, you would have to or invent a brand for yourself. You would just have to create that logo. It's a graphic. And then go to file at image over here. Okay, In this case, I have clicked over here to add a text layer. And I have my, um, logo over here. If you don't like it or you don't like the position of it, you can always make it bigger or smaller. All right, so in this case, I'm going to center, maybe over here, make it very large. And then over here you would just have to make sure that you're on the correct layer. You would have to scale it bigger or smaller. All right, but this is a text layer. We would have to would not be able to scale it r...
ight now, but because it is a text layer, if you scale it, you would not be able to edit it. So let's imagine, then, that instead of that, we would have Let's make a new layer here. Let's imagine that this is my logo. All right. Um, we would have to go over here just to show you how we can scale and distort a logo to place it exactly where you wanted. Remember, this is your scale tool. If you want to keep it in intact the proportions whole shift down again, make sure that you don't hold shift down for more than a second to avoid locking your keyboard. This that distort tool is great. It would allow you to distorted to fit your perspective. And the four corners are released so you can really stretch it from any corner you want to fit better in your perspective. All right. Something like this
Class Materials
Bonus Materials with Purchase
Ratings and Reviews
Gigi
This is actually the course I was looking for. This is DIGITAL rendering, which in an odd way makes you appreciate hand drawn rendering. Great! Thanks!
Heather
awesome!