Work with the Pixel Grid, Live Shapes, Pixel Precision
Lesson 5 from: Designing Websites in Illustrator: Effective WorkflowBrian Wood
Work with the Pixel Grid, Live Shapes, Pixel Precision
Lesson 5 from: Designing Websites in Illustrator: Effective WorkflowBrian Wood
Lesson Info
5. Work with the Pixel Grid, Live Shapes, Pixel Precision
Lessons
Understanding the "Responsive" Web Today
15:26 2Getting Started
08:03 3Set up your Design Document and Layout Grid
11:58 4Setting up Artboards to Mock up Device Sizes
05:51 5Work with the Pixel Grid, Live Shapes, Pixel Precision
10:44 6Design with Web Fonts
21:47 7Using Styles and Symbols to Make your Life Easier
22:46 8Mocking up Dynamic Buttons
12:09Lesson Info
Work with the Pixel Grid, Live Shapes, Pixel Precision
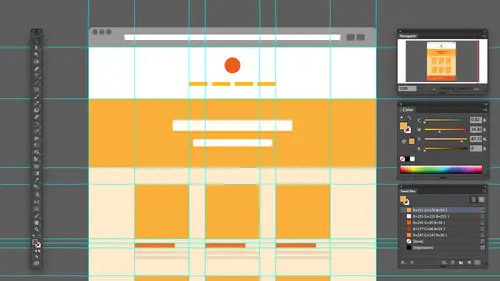
All right, So now that we got this content set, what I want to do is I want to start to talk about working with a little bit more with shapes, starting a set content out here, starting to get some things going. We talked about the pixel grid snapping to that. And like I said before in pixel preview, with that turned on, we can kind of see what's happening. What I'm gonna do is this. I'm gonna zoom in a bit on our desktop size over here just so we can kind of see what we're doing. And once I go far enough, let me get in there. I'm a 400 to 600%. I'll see that pixel grid. You see my guys'll off. It's fine. What I'm going to start to add content. I want to talk about snapping and making sure that things are aligned and look good. If you look at a lot of the shape tools over here we've got, you know, we got tons and a lot of times what I tend to do is I tend to tear these off or make their own toolbar, which is kind of neat and that way we can kind of see him. You can either create all you...
r own shapes and on your own content. Or you can use libraries that are already out there. There's a ton of wear framing libraries and both u Y element libraries that we can work with and one of the ways that we're gonna look at that. I guess you can say in Ah, a little bit later on is we're gonna look at what are called libraries and show you how toe pull in that kind of context, You have to reinvent the wheel. But if I go out here and I'm like, Okay, let me create a header, Objects. So I'm gonna zoom in a little bit here so we can see this thing. And what I'm gonna do is I'm gonna click and drag, and you're gonna see that as a click and drag here. I'm not actually going to see any alignment methods here. It's just gonna start to snap. If I come out of pixel preview mode and take a look, you're going to see that the smart guys start to kick in. Unfortunately, smart guides don't work in pixel preview mode, and I tend to use them a lot. So a toggle between this and pixel preview. Okay, So if I come up in turn pixel preview off if I drag, let's say to create our header or hitter area to create neighbor or naff bar, that type of thing, I'm gonna make sure we snap and were all the right size. One of the biggest things I think that we need to concern ourselves with is that content is going to snap to the pixel grid now, which is awesome. And the way to tell that things air snapped and nice and neat, if you will, is if I have a shape selected and I go under transform, you're going to see that we have aligned to pixel bread. Now you're gonna notice it's not turned on, okay? And this is kind of annoying. But if I drag something out like I critic, an object way need to do is we need to make sure we hit toe hold values or keep it toe hole rounded values. You're gonna notice that we have a partial value here. Okay, so we can either change that visually or we can do it here if we want. Like 66 1 of the problems is a reference point. If we've already snapped in certain sides, it might be hard. It might move it in different sides. So a lot of times I say I snapped it on the top. I'm gonna set my reference point to the top, which means moved the bottom part. Okay, so say All right, let's make it 66 around. Number a whole number, which is good. Now, I'm gonna put a color in this just to show you. And let me just slap a color in there just to get an idea. And I've got a horrible stroke on this one. Remove that. And what I'm gonna do is kind of show you the edge out here. We're gonna take a look at this. Let me zoom in a little bit further here, OK? At 64 we don't know about that fat far. I'm gonna turn on pixel preview and just take a look at it and you're gonna notice that the edge the object is a little blurred. Okay? This is something we have to watch out for in something All of us have struggled with over time. We need to make sure that we're snapping content. Okay, so if I select an object and I come under transform here, you're gonna see we have what's called a line to pixel watch. What happens when I turn it on with the box selected, you'll see what it does. Okay, So it's allowing us to to make sure that we have a nice, crisp, clean edge, if you will. I want to make sure that this is actually the right size and it's all snapped and set and ready to go. So what I'm gonna do is I'm gonna make sure I get it set. Ah, lot of us, myself included, will actually use the alignment methods built in to make it easier. So I use a lot of times appear aligned Art board, so we can easily make sure it's snapping. I use left top, get it done. And then what we can do is we can set the sizes in the transform panel if we want or drag it. However you want to do it. And we're just trying to make sure that we actually hit the right sizing. Okay. All right, let me zoom out just a little bit here, Make sure I can see everything. And if you notice you're going to see that it's not all the way to the edge over here so I can drag out to snap and you'll see it's snapping to the great itself. There we go and making sure we're hitting 12. 80. Okay, so as we design content, like I said, we need to make sure we're snapping in the pixel grid in most cases. And the interesting thing about the pixel grid is that if we draw a circle like this, let's say and I'm like, Awesome, I'm gonna snap that bad boy to the pixel grid. No. Okay, we're talking straight edges. Okay. If you snapped this picture, read it would make it into a box. So there are certain objects. We just just do not snap. Then that's just the nature of the beast. Okay, Alright, so I've got my my main object appear. What I'm gonna do is I'm just gonna quickly switch color. If we were doing something like wire framing, for instance, we may actually just use a series of gray's If we're gonna go and do our full on design. We're going to start to generator work with the colors we want to work with in our design. We're gonna talk a little bit more about colors coming up here and some of the best practices. But for right now, I'm just going to set a few out there. We have when we get rid of this one in that one. There we go. Okay, Now I'm using. I use a lot of shortcuts and illustrator, and I'm just What I did was I just removed the stroke. Just a few shortcuts to quickly help out. If you have an object selected, you can actually press. Just like showed it. Photo shop. You can press the X key to switch between stroke and fill. So if I have an object selected, I hit the excuse. You'll notice that it says Okay, Philip, front stroke up front. Just toggles constantly. You'll also see that there are three boxes down here. These are awesome. Uh, we have color. Radiant and none. I used the none all the time, but you're going to see these little shortcuts here. They're actually just calm a period in question. Mark. So you just hit comma, and it's actually going to do the last color used fill or stroke. And if you period, you're gonna get Grady int. And if you question Mark, you're gonna get none That's awesome for removing something like a stroke or Phil makes you work a little faster. Helps out. Okay, so we've got that set. That's good. Kind of gone through and talk a little bit about that. I want to talk about rounding corners now and what we call live shapes because this is this is super important. I'm gonna set up an object here. And if you look at my shapes here, you'll see that we've got to get a bunch. If you use the rectangle or the rounded rectangle, you're actually creating a live shape and illustrator, which could be really good. It used to be such a pain in the butt. Before, if you wanted to create a rounded rectangle, you had to use keyboard commands. And then if you have screwed it up, you'd like, delete it or try another way. In this case, if I'm gonna go out, I'm gonna snap to the guides out here and generate an object. Let's say this is gonna be an object I have. You'll notice that it's gonna automatically round the corners of I. D. Select that now to change these. The census is what's called a live shape. If I want to change them. What I can do is if I click on the shape with the Black Arrow. I actually have these little widgets in the corner. Okay? And I could just simply not do that. I can simply drag a little widget in and you'll notice that allows me to set an ark on the corner. The problem with this is it. It can set a partial pixel value, which is kind of annoying and something we really don't want on the Web. Because if you hand us the Web developer, they're gonna pick one or the other up or down. So what we can do if we want to, is you can actually double click on that. It will open the transform panel in the transform panel. We now have all of the rectangle properties down here so we can go in and say, let's set this at a whole pixel value if we want, so you kind of do whatever you want. And I'm using my shift key once again to kind of change that value. These are all linked, which means that if we wanted to change one or the other, you could unlinked thes. You could go in and start to change them independently, using the values here. I love to do this. If I use my white arrow, the direct selection tool, you can go in and select like, let's say, a corner, grab the widget. And I got to be careful. My guides were not locked. Let me lock these things. Okay, hold on one second when they actually locked those. There we go. If I go into a corner with the white arrow and I select the corner, you notice I can just drag that one corner, okay? And I can also, if you want to get rid of a rounded, you can either set the value on it or just drag it all the way past. And you've got the other corner so we can go in and kind of set these independently if we want to do that, which is really good. So I could set this one here to pull that out. We could also shift Select multiple corner points and you can adjust those together if you want to, which is kind of cool. So there we go. All right. So the great thing about the pixel grid is snapping wise. It is actually snapping this left edge top right and bottom. But the corner is not stamped, so that's a good thing. So all horizontal vertical parts of an object are snapped Essentially. Okay, So live objects are great unless you start to distort them and do different things. If you grab the actual corner points to start moving them around separately, like with the pen tool or other tools, then it's no longer alive shape the life corners kind of go away. Okay. The thing about live shapes like this is that when we work in here to do Web design as we scale objects, you'll see Look, what's gonna happen in the corner point here. So if I start here, most snapped. I wanna go half the sides. If I shift drag to to constrain look at the corner radius, you know, So it's not changing, okay? It's staying constant, which is good and bad. I guess you could say if we want to weaken Set. So if you look here, there's a value we can set here called Scale Rectangle corners. That is a great feature because if we have to scale for certain instances icons, small, large, etcetera that maybe are gonna be converted to Ping or some raster format and you need to make a retina version or bigger version of it, they're gonna have to scale the artwork. Okay, so I can see scale rectangle corners and it's going to scale proportionally. You're gonna see it's gonna maintain the same proportion, which is really pretty cool. Okay, let me undo that. So that's that's a good thing. As faras live shapes and Skilling and all that kind of thing, you will notice that I need to make sure that I have a line to pixel grid turned on that one right there. There are a couple settings I just want to quickly mention for this aligned to pixel. Good thing. If you're going to transform panel and you go to the panel menu, this little aero deal, there's tons of stuff hidden under here. They're awesome. You're going to see that we have a line. New objects to pixel grid, which is good. We can turn that on and have it happen. But you're also going to see that. You know, we can actually say Let's convert all objects that are not aligned to the pixel grid. Let's align them to the pixel grid. There's a couple of the ways to do that, but this is a good setting to have set up, so we can do that automatically, okay?
Class Materials
Bonus Materials with Purchase
Ratings and Reviews
user-ef521b
Quick introduction to Illustrator's website prototyping use. What I needed for better understanding of designing for retina screens, designing at pixel level, smart guides, and wireframes. I like the real-world suggestions for how to show website plan to clients efficiently. Hope to find the next course on best practices in exporting website from AI.
a Creativelive Student
wonderful thank you
DaVita Lynette
I haven't been able to catch the whole class yet but I've heard lots of good information with some new resources I hadn't used before. Thanks!