Add Text Styles to the Document
Lesson 6 from: Design Your First Newsletter with Adobe InDesign CCErica Gamet
Add Text Styles to the Document
Lesson 6 from: Design Your First Newsletter with Adobe InDesign CCErica Gamet
Lessons
Class Introduction
03:41 2Set up the Document
12:15 3Add Structure with Guides to the Document
11:14 4Edit Master Page for the Document
15:41 5Add Text to the Document
15:43 6Add Text Styles to the Document
17:29 7Work with Color in the Document
18:12 8Edit the Header, Footer & Columns
16:03Lesson Info
Add Text Styles to the Document
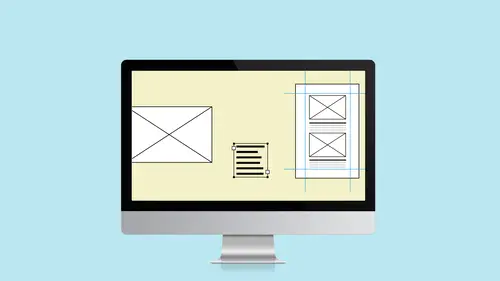
So let's talk a little bit about style and the different text formatting that we can put on here and also fonts. Where do fonts come from and how do we choose fonts that are available as well? So I'm going to start with the font question because that's always everybody's thing. Where do I get fonts? For a lot of it now I use Typekit because if you're using Creative Cloud, which most people are on, I know a lot of people can't upgrade and they're still on CS6. But what you get with Creative Cloud is you get something called Typekit and that's something that's been around for a long time. It's now part of Adobe. But basically what that allows you to do is go shopping for fonts that you've already paid for because they're part of your subscription although Typekit now offers Premium Fonts I think it's called. You actually purchase the licensing for those separate but basically it means I can say, "Oh I want a really cool decorative font," I can go out to Typekit and check that out. In fac...
t, I'm going to go ahead I think I have it open. I do. Here's Typekit and you'll log in with your Adobe account and then I can go shopping for fonts. So like let's just go here to Fonts in the beginning. Let's actually look at the fonts that are available. And I can look by just, I don't know, decorative, let's just do decorative fonts. I can just scroll through until I find a font that I like. And we just keep scrolling and scrolling and then we say, "Oh great, I really like this one." I can go ahead and look at the fonts that are available. And I can go ahead and sync those. Now we are limited to 100 at a time so if you get full like mine, I've got 100 of them already synced, to sync a new one, I have to unsync another one. It doesn't cost anything. Just a find one I'm not using and sync that up, but I can just say, "Oh, I really like this font here. I'm going to sync it." And when I do that and go back to InDesign, it's there and available for me. So that's how I shop for fonts basically. And the reason that that's so great is that if I'm working with other people let's say you're working on this newsletter, but you might be working on it one day then somebody else on a different machine you know if it's a volunteer thing like this, you might be working on your home machine, right? You've got your Creative Cloud. Somebody else has Creative Cloud. If I use a Typekit font and I send it off to somebody else, then I know that they have those same fonts available to them because I'm using Typekit and they're using Typekit. So a lot of those type hassles are kind of you know not even an issue anymore. So if you're using Creative Cloud, I really suggest you use Typekit because it's there and then you know that you've got them. You're not going to lose them because you're not actually trying to download fonts. It's all being synced magically in the background. So that's kind of where a lot of fonts come from. Otherwise you can buy them things like that. But I'm going to use the Typekit ones that are here. And so when I go to choose a font I want to make sure I'm using Typekit fonts. So in this case, I am going to select this text. Now, when you're working with paragraph style options or paragraph options, you only need to have your cursor sitting in the paragraph. But if you're actually styling text itself, individual characters, you have to have all those characters selected. So I know that I want this to be the headline and so I'm going to select all the text that's on here and I'm going to go up to the control panel because again this duplicates what's in the character panel. But if I wanted to I could just go to the character panel and all of this in the character panel is basically what I see up here. Depending on the size of your screen, you might have to go to the menu over here to get access to a lot more stuff. But for the most part, we should be all right. So when I click on this little a and I get character styling that's here, I can see things like my font, my size, things like underlined, strikethroughs. We're not going to go through all those right now. We're going to keep it pretty basic. We're going to choose a font. So I'm going to click the little pull-down menu and choose a font. Now I can go over to this little Tk that's here. And that means the only ones that show up are Typekit ones. So again, if I want to make sure I'm really using Typekit, I can turn that on. If there's ones I want to add, I can add them right here. It launches me to that website we were just on. I can add them, sync them, and when I come back, give it a minute or two sometimes, it will show up that's on here. But this case, let's use what we have available to us. Let's just choose something like Bree if I do this little twirl down menu, a little twirl down icon that's here, I can see all the different typefaces that are available to me, so I can do things like bold. Let's do bold. Bree, bold, and let's make that a little bit bigger. So I'm just going to come in here and let's just make that 18 point. Now when I do that, it, of course, wrapped around to that column. I've got that set in this two column, and now my headline is two column, but I'm going to show you a trick in a minute. How to get a headline to span across multiple columns. And that's something that came in I want to say in CC 20... or even the first CC which was 2014-ish. I don't think we called it that, but it was CC. It may have even come in in CS 6, but I don't remember. But you used to not be able to get headlines that spanned those multiple columns, so this is huge to be able to do this. Still one of those things that it's like, "Oh, remember the good old days when you couldn't do that?" I love that it's there. Which is great. So as I make this bigger, I realize that I can get that to span all the way across and we'll do that in a minute. But right now, I'm just going to make that big and bold and then I might want this to be...let's do this. Yeah. Keep that and we'll make this a little bit bigger as well but maybe not bold or maybe we will make it bold. Yeah, both bold and then let's make this text a little bit smaller. Now if you notice, I have a little plus over here. And that means I have overset text. I have too much text to fit my frame so I have a couple different options with that. I can make my frame bigger if that's an option. Maybe it's not for this newsletter or maybe this is how much space you have period and you don't have any place to work with it. So you need to make that frame bigger or I can click on this little plus and I get the rest of the story and I can place this story elsewhere. So for instance, I could go to page two and then I can click and drag out. Let's say we're going to make that two columns and let go. And again, I have to tell it this frame actually is two columns. Cmd or Ctrl+B to bring up the options and then tell it two columns and quarter inch gutter again. So have the rest of that there. It's not very much to have in there but we'll make it anyway just for fun. All right. So that's actually where that continues to now I need to be able to see that that continues somewhere else. I can see that text goes out there and I've got this little blue arrow that says text started here and goes somewhere else. I need to be able to see where that is. So under the View menu, under Extras I want to say show text threads so that when I click on a frame it shows me where that text goes to. In fact, if I scroll down, I can see that that text continues there. I can also, once I click off of that, those lines aren't there, so it's nice that I have that turned on so when I click on a frame it shows me where that connects to. So that's a way to jump your text from one page of your newsletter to the next. All right so let's go back to our headline here and I want this to apply all the way across. So I'm going to go ahead and put my cursor in the line but I don't need to select it all because I'm going to work with paragraph settings now. So I'm going to go ahead to the paragraph panel so in this case, I'll open the paragraph panel. I'm still using the control panel and this is where I get things like how the alignment is. So let's actually select all this text to show you really quick. I can do things like centered, left justified, right justified, then I can do fully justified and then the last line is left justified. A lot of different options there. These two aligned to and away from the spine goes back to if we had Facing Pages turned on, it would know what the spine is and you can tell it align it towards the spine. And then if the text frame jumps from the left side to the right side, the alignment will switch as well. But again, you have to have Facing Pages for that to work. Let's put this back to left justified. I'm going to put my cursor in here because I want to make a change to this particular line only, this paragraph. So any time you hit return, that's a whole new paragraph. So time I've actually hit the hard return key. So in this case, this paragraph which includes the name Bart that's here that all needs to go on one line. So I'm going to go to the Paragraph Panel to the Paragraph Panel menu and I'm going to go down to Span Columns. Now, there's another option in here called Split Columns, but it all lives in the Span Columns menu so I'm going to do Span Columns. I'm going to turn on the preview so we can see what's happening and I'm going to tell it to span the columns, and I can tell it how many columns one, two, or all of them. In this case, there are only two, but I'm going to choose all. So it jumps across that gutter that we've set up for columns because I've told it it's a headline. I want it to jump across. I can also do things like a little bit of space after that so it just gives me a little bit of breathing room. It just pushes away from that, which is really nice. Let's just bring this back a little bit. There we go. So I can say okay and now I have that. Even if we made this bigger, make this 24 point, you can keep making it bigger. It's going to go ahead and keep spanning across the whole set of columns that are there in that text frame. Oops. And now it says I don't have that. There we go. I accidentally changed the font on it, and it was to something it didn't. So all right so we're going to go ahead and take this that we've created. It's you know it's not looking great. I'm not gonna worry about crafting it, making it so beautiful. I want to make sure everybody has the tools because I'm going to jump back into our finished one and show you how I created a lot of that but I want to make sure that everybody kind of understands how to put text together and also the text frame options that are there. So that's something that we're going to be working a lot when you're trying to fit something in because it might be that you've got all this space like you can have it as long as you want. I have to fit all this text in or it might be I have this much space for the text. I need you to go back and cut the text down and make it fit. So again, it's what's driving what option. So that's just something to always keep in mind. Am I limited to number of pages, or do I have to just get all the information regardless of how many pages? So hopefully, some of the things that I've shown you in the text will make a difference. Also, just the style of text itself. So some of the things that we can talk about in the text frame. If I'm working with individual text. So this case, I'm going to take the headline again and you notice it says nothing. And that's because when I first selected it I only selected this much text. So the return has a different font. We want to try to avoid that. So I'm triple clicking to get the whole line including that return because I don't want that return having some weird font and then having missing font issues only to find out the font is only that one missing space. So let's make this Bree and we made it bold. So there we go, we got everything there, so things in the character panel that we can look at, and I am just going to open this up, drag this up next to it. So I've got the character panel here. Things that we need to be worried about really size like this is the type size we can use from the pull down menu or we can put in our own value. Here's something that I always tell people, instead of trying to double click or triple click and get everything that's in that box, anytime there's a value box, click the icon or the words to the left of it just once and it automatically selects everything in there just saves you a lot of clicking. Your wrists will thank me. So I'm come in here and this is where I choose the font size and also the letting or line spacing if you're more familiar with that, and sometimes you'll see it in parentheses and that just means that that's set to automatic so it's a percentage of it. In fact, by default, it's 120%. So if you have 10 point type, you have 12 point letting, so you can set that it auto if you want which is what it's set at and it will change depending on what size font or type size you've created. You've also got something called kerning and kerning is the space between letter pairs and this is something I like to point out and I tend to have this set at Optical. You've got two choices Optical and Metric and then you've got actual values. Optical just looks at how everything fits together and kind of nests things differently so that you don't have kind of the chunky white space in between text that you might get depending on the font that you have chosen. So this case, I'm going to select all, so I just clicked in the text. Did a Cmd or Ctrl +A to select everything and I'm going to choose Optical on this. So when I do that, it just changed a little bit. If you were to look at how each pair of letters fits together it fits together a little bit nicer I think with Optical. Now, you might think, "Okay, this is a pain. Now I'm going to sit there and I'm going to drill in every time." Wel, I'll give you a little hint on how to do this so that Optical is set up and you only need to change it to the other if it doesn't look good Optical which I'd say probably 98% of the time, Optical looks better for the fonts that I use. You can with no document open so I would close all the documents. I don't want to because I've got bunch that were working on open here but if I did that I would close all the documents, go in and choose my typed tool. I have nothing on here. No type selected no document even open, but I'll go over to my character panel and choose Optical and set that so that now every new document I open from that point forward automatically has Optical kerning turned on. So every time I create new text no matter how I do it type it in, import it whatever it automatically has the Optical kerning turned on so I don't have to worry about that again. And again, going back to styles then every new style I create will also have that built in. So while it seems like a pain to be that you know just worried about how the pairs fit together, by setting it up ahead of time, it's always there and you don't have to think about it again but it just makes your text look better and it flows better so maybe we won't have as much to play with trying to even out the columns and and having too much text for the page. And again we can jump our text from page to page to page by using the overflow outport that's here when I clicked on the plus and then dragged out a new text from somewhere else. Back to the text that's here. Select all this again and I can do things like scaling, horizontal and vertical scaling. Don't use those very often. Tracking. You're going to put some extra space between all the letters, not just individual pairs but extra space amongst the letter throughout the entire paragraph that's there. And we also have things like let's just grab one item here. I'm going to select one letter just that r and turn on the baseline shift and just what I'm doing is just moving that off the baseline. So where would you use that? If you wanted something superscript or are you just want something to float a little bit higher maybe a trademark symbol that's there and it's not quite high enough for you, you can push it up a little bit. And it gives you some interesting text effects as well using the baseline shift. Instead of having individual text frames for every character that you want to have sort of you know playfully strewn across the page, you can just play with the baseline shift and it will actually move it up and down as well. That's the character panel most of it. Again there's a lot of little minutia in here we could worry about, not too worried about everything that's in here. Paragraph stuff. Put your cursor inside the paragraph and that will affect that entire paragraph. You don't have to have all the text selected. Also if you wanted to select or you wanted to affect to say two paragraphs only maybe just these last two as long as you select a little bit of each of the paragraphs, you will be working with those paragraphs specifically. So for instance, if I change the alignment on that that's centered and that's centered but these are untouched because I didn't select any of that paragraph at all. Things that we might also want to worry about things like the left margin and the right margin of the paragraph so maybe we want this paragraph to be set in a little bit. Let's select these here and we want maybe the left side of that margin to just come in a little bit. So this way this looks like it's hanging out or hanging punctuation or hanging text that way but it's not really. It's within that frame because you can't hang the text outside the frame and so you have to push everything else in using the margins. So I'm going to select all that and bring that margin back to zero. So we got that margin. We've got a right margin so if you're doing things like pull quotes you can have those sitting in the same text frame instead of separate text frames that you have to maintain separately. And you can have the whole thing and just move that in using the the left and right margins on there. And we have things like drop caps, so I can make everything have a drop cap so I'm going to come down here and tell it it's two lines or three lines thick and one character, two characters whatever. Something like that. So I have drop caps. Not going to go into everything but that kind of gives you a little idea of something we do to make it look a little bit different. We've got some bolding. We've got different alignment. In this case, we've got drop caps and a lot of different paragraphs. We probably wouldn't do that. Let's turn this back up to one so just the first paragraph has that. So again, we've started putting some styling inside our document that way.
Class Materials
Bonus Materials
Ratings and Reviews
karlafornia
There are a lot of excellent instructors on Creative Live, but I think Erica's teaching style is the best. She is very easy to follow, completely thorough and methodical, and very pleasant to watch and listen to. Everytime I watch one of Erica's classes, I am inspired and feel confident to create something with the program tools she explains so well.
R. Best
Love classes like this. Straight to the meat of the topic so that I can get started on a project right away. Now I feel comfortable enough to tackle a newsletter from scratch! YAY. Erica explains things in an easy to follow style that is perfect for my style of learning. I don't have to weed through minutes of dialogue to get to points that I need to revisit! THANK YOU!
Marsha
Tons of info and she presented it in a manner that without ANY knowledge of InDesign I was able to follow along and felt I could design a newsletter myself! Erica is a fantastic instructor and I will watch any class that she offers! Thanks to CL.
Student Work
Related Classes
Design Projects