Particle Systems in After Effects
Lesson 6 from: Creating Cinemagraphs with Photoshop and After EffectsChris Converse
Particle Systems in After Effects
Lesson 6 from: Creating Cinemagraphs with Photoshop and After EffectsChris Converse
Lessons
Lesson Info
Particle Systems in After Effects
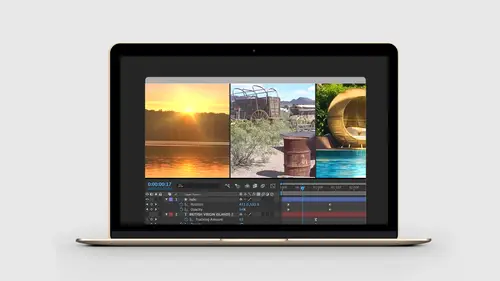
Particles can be incredibly powerful. They're a little intimidating when you first start playing with them. I would say after maybe three or four hours of kinda playing around with them and you get the hand of them, they're awesome. They are my favorite thing to do in AfterFX, because you can just do so many fun and interesting things with them. So I wanna, first show a couple of examples of places where we've used particles to create simulations for cinemagraphs. So this is a photograph taken by Matt Hayward. He does photography for Super Geek League which is this band here. And so this is a cinemagraph that was created completely from a static photo. And there's a bunch of different things going on here. We have two looping particle systems running. There's looping particle down here which is the fog, which is these particles that sort of loop around with a lot of Gaussian blur on them. And then we have particles that are moving behind the people on stage with the light burst effect ...
which is giving us this sort of spotlight effect. And then we have sort of the concert dust that's moving around. So these are all just particles that are on the stage, and just sort of moving and adding some sort of interest to a photo that wasn't originally a video. And the same group is starting to work on a, on a graphic novel so this is a sort of animated poster that we did for them. Again, we have the fog in the background. We've got these sort of light rays at the top. Same exact technique, and then using other things in AfterFX like lightning to make the headbands and the lightning piece. Animated the clock. Doing all that kinda stuff. Again, to go back to when we were first talking about what cinemagraphs are. Some folks would argue this is not a cinemagraph. Some would argue that it is. Again, that's sort of a blurry line. The idea here is, there's no starting and stopping of telling that story. It's just, it's moving, it's animated, it's interesting to look at. But there's no timing to the whole thing. You get the entire story immediately and then there's just things to sort of watch and look at. And then finally, this was the first piece we did, where we used all of the particle systems, and we used this to simulate light shining up from the bottom of the ocean. So there's a whole bunch of particles that are moving across the bottom with the light rays. Some are moving to the right, some move to the left. I did some masking here so we see a little bit on the belly of the whale. This is a photograph by David Fleetham. And then we just did displacement map up here with the water. And actually, this water is from the pool, from the island resort. Yep. So you can just keep reusing all that stuff. And just again, you can just start to create all of these really interesting effects. So those are all made possible by using particle systems. So, what I wanna do is, I wanna show you how to make particle systems. We're gonna make it snow, and put snow on a sign. But I also wanna show you a technique for looping a particle system. The great thing about that Fractal Noise was, there was a setting that said, yes I wanna loop this, every time you rotate one or two or three times and, AfterFX did all the work for us. However, with particle systems, because they're so random, we need a way to make them loop, and because they're so random, we have to come up with techniques for making that happen. So the first thing I wanna do is, show you how to create a looping system. So we're gonna start in AfterFX. And in our project files, we're gonna be adding some snow to this Photoshop file here, this significant for Frisco. But to begin, let's go to AfterFX. We're in a brand new project. So the first thing I'll do is save it. I'll call this snowy sign. Put it on the desktop. Go to the Composition menu, choose new comp, and we're gonna do 1000 by 562. And we'll call this snowy sign. Okay. Just like with the Fractal Noise, I need something to attach my particles to, so I need some sort of a blank layer. So we're gonna do a new solid. You can hit command or ctrl+y to create a new solid. So we're gonna name this particles. Let's choose OK. Here's our new solid. Next we're gonna go to the effects in presets. I'm gonna search for the word particles. We're gonna look for CC Particle Systems 2. Notice this is under simulation because we are simulating this effect. And we'll just click and drag and drop this onto the solid. So some effects AfterFX, when you apply them to a solid or your artwork, they're actually animations. So if you ever apply an effect and you don't see anything right away, go down to the timeline panel and just start jogging the timelines. Chances are, the effect that you applied is part of an animation. So if I click and drag or hit play on here, we can see what this particle system's doing by default. So this is the default setting for this particle system. So it looks like a bunch of sparklers all put together and just creating all of these individual sparks. In the Effect Controls, we can see all of the different properties for this. So the idea behind a particle system, is we have this point in space that is generating something. Little lines or stars or whatever shapes we wanna define, we'll pick those in a moment. And they get generated at a certain rate, a certain number of them per second, and each one has a birth time, an amount of time that it lives for and then a time that it dies. So all of those things together, create these individual particles. AfterFX generates all of these randomly. And so to begin working with these, we just start playing with these different settings. So in the particle systems, if I come down to birth rate, if I decrease this, from the default of four, down to let's say .2, and hit play, I'm only getting .2 particles per second. Now every second, we're getting .2 more particles that are getting generated. So the longer it plays, the more of these that come out. There's also under the birth rate, the longevity. This is how long each particle lives. And this becomes really important creating a loop, because depending on the duration of the loop, I need to make sure that my particles don't live longer than the loop. Otherwise they'll just sort of disappear off the stage. If I increase the life of the particles, they will be on the stage longer and if I decrease these, they'll stay on the stage shorter. So if I bring this down to .3 and hit play, now I've got a bunch of particles that are being born and dying almost immediately. So this is a nice little sparkler. More so than having the longevity be higher, giving them time to be born and fall all the way down off the stage. So we'll leave these alone for the moment. If you come down tot he producer, the producer is the little point here that creates these. And I can drag and move this around. Wherever this is is where the particles are born from. So, I'll just leave it in the middle for now. We can also choose the x and y radius. So right now the particles are being born from a three pixel point. So I can put zeros in here and they will all be born from exactly the same little tiny point. The singularity, or we can increase this. So if I come down and make the radius wider, for the x, all the particles are gonna be born along the line. So we're gonna do something similar to this to create our snow effect. Let's come down to the Physics. This controls the sort of environment that the particles exist in. By default, the Adobe engineers picked explosive. So let's come in here and change this. Let's change this to fire. So now the particles are going to rise. Let's go back to the producer. Let's bring this thing down to zero. So as you can imagine, this is really a lot of fun just to sort of play with. And I'll just move this down a little bit. Okay, so now that we have some of these in place, let's create a looping system for this. So under the particles, let's come down here and change this. I don't want lines. Just to show this example, I'll choose stars, 'cause these are a little bit larger. So we have all these stars that are being born and moving around. We have a birth and death color. We'll talk about all these later when we create our snow. But the first thing we need to do is decide, how long of an animation do we want to have this loop happen for? So let's say we wanna have this happen for, let's say 10 seconds, so we can make this, I'm sorry, let's do six seconds. We wanna make sure it plays on Facebook. So, we'll do six seconds. So I wanna double that for the duration of my main timeline. Because, what we need to do to make the particles loop, is we have to have particles being born for the duration of our animation and we also have to have the same amount of time for the particles to die. And then we're gonna mix the two together. So particles that are dying, will be sort of blended in with the particles that are being born. And since we're gonna use the same clip, the particles being born at that six second mark, are the same as the ones that are gonna die. So we create this nice, seamless loop. And the nice thing about this is, you can set this up one time and then you can reuse your looping particle system, in any number of other projects. So I don't do this every single time I need looping particles. I have my looping particle AfterFX file that I go to and just change my durations in there. Okay, so we're gonna go to the Composition menu. We're gonna come down to Composition Settings. We're gonna come down and choose our duration, so we'll come down here. We wanna do six seconds so I need at least 12 seconds, so I'm gonna put 15 in here and then choose OK. So that's gonna give me a fifteen second timeline down here. Lemme increase the solid to make sure the solid takes the full amount of time. So now, we're gonna come down and let's open up the timeline. I'm sorry, let's open up the properties in here. So we can see all of the different effects here. So what I wanna do is, let's come up to the birth rate. Let's set the birth rate to zero. Let's activate the stopwatch. Come down to the timeline, let's hit the u key. We can now see that birth rate is set to zero here. Let's come out to six seconds. And at the six second mark, let's add another key frame. So now we have zero and zero. Now we go back to the beginning, and this is where I can pick the birth rate I wanna start with. So I'll come back here and I'll hit .5. Just so I have a bunch of stars that are being born. So now if I jog the timeline, we'll see that this is actually animation on the birth rate. The birth rate starts at .5, but as I move across, it goes down to .3, .2, .1 then zero. I need to have the birth rate be constant, in order for this effect to work. So I'm gonna marquee select both key frames. We're gonna right click, and I'm gonna come down and choose Toggle Hold Keyframe. What that means, is in my animation, the value of the birth keyframe will not change, until we get to this frame here. Once we get to six seconds, we will stop birthing particles, and these will start to die off. So now if I play this we have particles being born. They're born at a constant rate for six seconds. Once we get to six seconds, the birth rate goes to zero, and then we see all the particles, sort of fade out. Okay, so with this in place, now what I wanna do is wrap this into a composition. Because I wanna duplicate this. And one little sorta gotcha with AfterFX, is if I take this composition and move it off to the left, the first keyframe, even though it's at a negative number, won't start generating the particles. So to get around that, what I need to do is, let's select this. I'm gonna hit command ctrl+c. We're gonna call this our particles. Click OK. Now I have all of these in a pre-comp. We're gonna come out to the six second mark. When we're at six seconds, I'm gonna hit ctrl+8, put a marker here, command d, I'm gonna duplicate this. Let's drag the marker so that it comes over here to the beginning. And then let's get our cursor to the, I'm sorry the playhead timeline to the six second mark. I'll hit the n key for end. And now that's all I have to do. Just those 85 steps. No, just kidding. So just those two comps. So now if we watch this, we have all the random particles being generated, but when the playhead gets to the end and loops back, we can't see a seam. We have a perfectly seamless particle system. Now again, what's great about this is I can come back at any time and now I can change these properties. If I wanna change the birth rate, I do, I can only change the birth rate on the first frame, 'cause it's constant. So if I wanna bring this up, or down, let's say .4, I have to change it at the zero mark. Anything else that's not animated, I can come in and change the properties of this. So let's change this from fire to direction. So by making that change, now all these guys are sort of falling down. I'm gonna change it for the properties. So we've got our velocity, we've got the amount of gravity. The less gravity we have, the particles can actually begin to float. So again this stuff's a lot of fun to play with. So let's go into the Producer. Let's increase the x axis. Let's come into the velocity. Let's move that down a little bit and again you just keep playing with these to see if these look at all close to what we're after. For the resistance, let's add a little bit more resistance, as you're gonna make these sort of move in space. And let's grab the producer. Let's move it up above. You can start to see where this is going? Let's increase the longevity, so these last and live longer. I can increase these all the way up to six seconds. So if I do four seconds, every particle that's born will now live for four seconds. Start animating down. I see some smiles. Is this not cool? This is totally cool. So now let's go in to the particles themselves. Let's change this from a star. Let's choose the faded and shaded spear. For the birth color, I want these to be born, the color white and die the color white. For the maximum opacity, maybe these never get darker than maybe 60%. For the birth and death size, let's make the birth size small. Like .08. And I don't want these to get too much bigger, so maybe we just bring this down to about 10 or 15. Then we hit play, we've got our snow. Now we're in that particle zoom, so if I go back to the snowy sign, main group and play this, now we have seamlessly looping particles that are creating snow. I don't have to go back and change any of those properties. Once I set this up, it's already in place. And, of course, if you have the project files, I'm giving you this final project, so you don't even have to do this. Okay, so now, with these two particles, I'm gonna hold the shift key, select both of these. Command shift+c make one more pre-comp. And this is going to be particles space loop. Oh yes, question? Can you copy and paste the pre-comps from one AfterFX to another? Oh that's a great question. You can not. However, you can import an AfterFX file into another AfterFX file. However, you will get all of the content, so if there's 20 comps and 50 layers, you're gonna get all that, and you gotta go and remove it all. I really wish that they would, they'd fix that. Just for me, maybe they will. Okay so now here is our looping particle, so, it's all wrapped up into one pre-comp. It's just on my main layer. Now we can go back to our project file. Let's grab our sign. I'm gonna bring this in. Just for this demo I'll bring this in as just footage. So just one piece of art. Let's drag this in. Command left bracket, let's move it to the back. And if we click play, we've got our snow on top of there. Kind of cool, but this could be cooler. So let's grab the particles loop. Let's duplicate this. Zoom out a little bit, then we hit s for the scaling tool. Let's scale this up. So now I have two copies of my particles. Let's move this down so this touches the top here. And just to make these aa little bit darker I'm gonna hit command d on both of these just to increase the opacity of these. So now when I play these, I have basically two particle systems. Same snow. The ones in the front move faster than the ones in the back. And then the last thing that I'll do is, the ones in the back, the smaller ones, I don't wanna see them in front of the sign. So with the particle loop selected, both of these, I'll make these a pre-comp. Choose OK, grab my masking tool and I'll just come in here and just mask it so I don't see, let's do subtract, I don't wanna see the particles, in front of the sign, if they're tiny. I only wanna see them in front of the sign if they're big, and in front of the tree. Pretty cool. Wow, so particles are definitely a little more challenging when you first start playing with them but, once you get the hang of them you can do anything with these. These can become rain and show and fog. Anything. The more particles you create, you can create solid shapes and patterns with all of these things. And most likely if you really get into particles, there are third party particle systems, my favorite is particular, from Trapcode, which adds additional things like wind and different velocities and everything. And once you see this, you'll start noticing this on TV and in movies all the time. Tons of TV shows and movies will use particle systems to create all of these different effects.
Class Materials
Bonus Materials with Purchase
Ratings and Reviews
Jeff S
Fascinating course for anyone who wants to know how to make a cinemagraph. I thought Chris went a little fast for me but I could replay those parts over and over until I got it. This is not a general knowledge course but more of a niche course for obtaining specific know-how on making a cinemagraph. Overall very good!
Teresa Piccioni
Chris is really a great teacher: the after effects tricks explained in this class are very interesting indeed!
Randy Spears
For anyone having to create a poster or a book cover or anything creative with Photoshop, this is a great course. I refer back to it again and again when I start some of my projects.