Understanding Aperture Priority And When to Use It
Lesson 23 from: Craft Photography FundamentalsCandice Stringham
Understanding Aperture Priority And When to Use It
Lesson 23 from: Craft Photography FundamentalsCandice Stringham
Lesson Info
23. Understanding Aperture Priority And When to Use It
Lessons
Session 1
1Introduction to Craft Photography Fundamentals
04:59 2What Your Visuals Say About Your Brand
04:56 3How to Become a Photographic Author
10:44 4How to Use Natural Light for Your Product Photography
10:00 5Setting Up Your Photo: The Basic Rules
09:07 6Becoming the Viewer to Take Better Photos
10:30 7Shooting 3 Setups: Creating the Backstory with Images
34:32Shooting from Top Down with an iPhone
19:49 9Shooting Paper Products with an iPhone
10:54 10Shooting Jewelry with an iPhone
19:01 11Editing on your iPhone
15:28 12Finding Your Brand's Aesthetic
18:39 13Find Your Product and Customer Target: Exercises
11:12 14Figuring Out Your Audience
08:46 15Interview with Gilit Cooper of The Bannerie
08:45 16Branding Beyond Instagram
19:47 17Looking for Natural Light in Your Home
19:36 18Building a Styling Prop Collection
08:22 19Creative Backdrops
13:52 20The Essential Product Photography Props
11:18 21DSLR Basics
02:39 22Understanding Shutter Priority And When To Use It
26:29 23Understanding Aperture Priority And When to Use It
37:16 24The Basics of White Balance
12:52 25Photographing Jewelry
37:27 26Setting Up a Bedroom Set and Photographing Pillows
19:59 27Photographing Greeting Cards
06:53 28Shooting Products on a White Background
17:24 29Top Down Photography on a White Background
13:06 30Shooting Products on a Black Background
07:23 31Shooting Reflective Items
12:20 32Shooting with Backlight
04:01 33Top Down Photography: Shine & Reflection
24:50 34Basic Editing in Lightroom
31:37 35Batch Editing in Lightroom
06:00 36Editing Jewelry in Lightroom
10:01 37Editing White on White in Lightroom
06:54 38Editing Shine and Reflection in Lightroom
17:03Session 2
Lesson Info
Understanding Aperture Priority And When to Use It
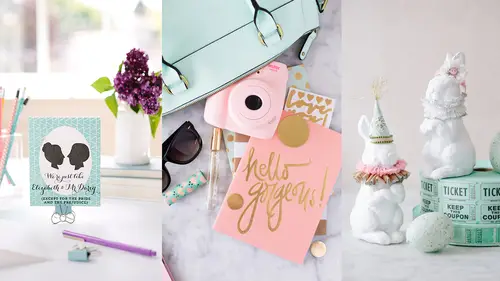
We're gonna talk about aperture priority. So aperture priority you can find on your dial as AV, aperture value on a Canon; or A, aperture, on a Nikon. The aperture, like we just mentioned, is the size of the hole or the opening that let's light come in on to your sensor. So a shutter goes across when an aperture is circular generally, okay? You have different kinds, but in your camera, your aperture just opens and closes like this, little blades opening and closing. And basically what that means is if I have it really open, I'm letting in a lot of light, right? And if I have it really closed, I'm not letting in very much light. Have you ever looked at lenses and gone to one store and one guy's like, this is a fast lens, okay? That was so confusing to me when I first started photography because I thought he meant it could have a fast shutter speed because it was fast, right? Well, your shutter is a part of your camera. So no matter what lens you put on the front of your camera, you're g...
oing to have the same shutter speed, okay? The reason they call it a fast lens is because when you have a really open aperture and you can let in a lot of light that way, it means your shutter speed can also be fast, right? Because you're letting in more light with this opening, so then you don't have to let it in for as long. So now it's a fast lens. And a fast lens means it has very open apertures. So hopefully that cleared up some misconceptions because I know for me that was a challenging one. Apertures are a part of your lens, okay? So different lenses will have different apertures available to you. And the way they list apertures is by the most open aperture available on that lens. So they generally only list one aperture or two. And if you see two apertures, so it'll say 3.5 - 5. and if you bought your camera with a kit, that is what your lens is. Highly likely that's what your lens is. 3.5 to 5.6. What that means is you bought an 18 to 55 millimeter lens with your kit camera, okay? And when you're at its widest, at 18, it can open up to 3.5. And when you're zoomed all the way out, it can only open up to 5.6. Why is that important? Okay. Because the more open your aperture is, the larger that opening, the more light you're letting in and the less depth of field you have. And we talked about what depth of field meant in a previous lesson, but let's go over that one more time. Cameras can only focus on one plane at a time. So let's leave this out so that it's perpendicular hopefully. Okay, so if I am taking a picture from this side and I take a picture of the front of these soaps, that front is a plane. The plane goes across the entire image, okay? But it's just one plane. So I can focus on whatever plane I choose, but I can only focus on one plane. Then after that, the depth of field is how much of that image is in focus before it falls off and it's soft or blurry. And the same goes in front of it, because I'm only focusing on one plane. So if I have an item up here, I can make it sharp by using a closed aperture, or I can blur it out by using an open aperture. So that's why I think aperture priority is the most important, or using your aperture is the most important in product photography because I wanna control where my viewer looks within my image. If I only have 8.5 seconds to tell my viewer what's the most important within my image, what's the easiest way to do that? Focus, by making it sharp and blurring everything else out. Because the human eye will go to whatever is sharpest first. That's what we, we all do it, every person does it. Whatever is sharpest, that's what we look at. And if it's blurred out, we probably will barely even recognize it's there, okay? And so aperture priority, so important in product photography because I don't really care about my shutter speed if I'm on a tripod. What I care about is what's in focus and what isn't in focus, okay? And I personally, it's a personal preference, but I love having a product sharp and the other things out, okay? Because when everything's in focus, it looks like a snapshot. I want people to know I know how to use my camera or that my images were professionally taken. I've taken time to invest in my images to make them good because I value my product. And by using depth of field, I feel like I can create that aesthetic and that look, okay? So let's get more into it. I started at 2.8, but there are actually a lot more below that. Generally, when you start getting into lenses, I should've had 1.8 on here. But generally, the lower you go in your aperture, the more expensive the lens gets, okay? So for most of us, a 1.20 lens, professional lens, is maybe a little out of price strange if it's two or three or four or $5,000 dollars, right? But there is a lens that I always recommend to everyone just for general photography, which is a 50 millimeter 1.8 lens. That tells you the most open aperture, 1.8. That's about $100, okay? That's something that everyone can get. That's a reasonable, maybe you have to save a little bit, but it's doable, right? And it's a really great starting lens. You can use it in low light because it has an open aperture, and it's a great little basic lens. So these are each a stop, and what a stop means is between here and here, I double the amount of light. Or actually, this way. I double the amount of light, okay? Between each of these numbers. So obviously, that's super important. If I can double the amount of light coming into my camera just by opening up to a more open aperture, that means I can let in more light. I don't need more light, I can let in more light. So just keep that in mind. So because these numbers start to get really super confusing, I think, I wanted to give you a visual. So here we are with a more closed aperture, okay? Not all the way closed, but can you see how you can see the bricks in the background? And there's a lot more of, her hands are in focus. There's a lot more in focus here versus the image on the right. And which one feels more professional to you? The one on the right, yeah. Because I've placed my focus exactly where I wanted to be, on her eyes, and everything else goes away. So we look right there, and the rest of it is just fun. But here, it looks more like a snapshot because there's more things in focus, I don't know what the point was. Am I supposed to look at her hands, am I supposed to look at her eyes? Is it the background that's important, what's important? So I really love being able to control that. So because the numbers got so confusing to me as I first started in photography, I'm not gonna lie, it's overwhelming at first. In fact I will tell you an embarrassing story about that. When I first started out as a photography major, the entire first semester I shot in auto. Of my beginning photography class. My professors would ask me the settings and I'd be like, uh, uhm... I don't know. And finally, obviously, they figured it out, I was shooting in auto because I did not know the settings. It was just so confusing to me to match up these numbers, figure out exposures, what they all meant, and I just kind of ignored it. I was like, ooh, photography for me is more about being pretty and like doing cool setups and having a great concept. And that's good, it's good to have that, but it's not good if it's holding you back from creating beautiful images. So it may not be fun to memorize these numbers or to figure out these numbers. But if it can help you achieve the look that you want, it's definitely worth a little bit of investment and time and memorizing them. So for me, when I first started, I was super confused. I decided to just put Post-it notes on everything so that I can remember. So I had Post-it notes on the back of my camera, one was telling me, okay, below 60 it's gonna start being blurry; the other was that the smaller the number, the less in focus. The larger the number, the more in focus. It just made sense to me in my mind. Small, less; bigger, more. And for me, that made a world of difference as I first started out, figuring out do I want a smaller number aperture or a bigger number aperture? Do I want more in my image in focus or do I want less in focus? So don't feel bad like writing yourself notes, helping yourself out as you go along. So I went ahead and I took some photographs of a set of three cards, and this is why apertures become so very important in product photography. If I wanted the viewer just to look at one of those cards, not all three of them, then I would open up my aperture, focus on the middle card, and then these two, because they're behind, they're on a different plane of focus and I can blur them out. So I could choose where I wanted, if I wanted this card to be in focus, I would put my focal point over that, focus, and these two would be out of focus because they're on different planes. So we can do that by closing our aperture. Let's say though it's a series of three cards and I want them all to be shown but I don't want to just put them in a line because that's boring, right? So I have to learn how to get all of them in focus, and I do that by my aperture. So here at 2.8, you can see how blurry the background cards are. Now they're getting a little bit more in focus at four, then I jumped to the far end apertures. So here we're at 16. And you can see it's much sharper. And then here, we go all the way to 22, and that's the most closed most of your lenses will go. So your lens will list the most open aperture on the front, but what's confusing to people is you have all of the other apertures no matter what, okay? You just don't have any lower than whatever's listed on the front of your lens. Okay, and I just wanted to put those side by side so that you could really see the difference in the apertures. So this is all in aperture priority. So what that means is when I pick my aperture, my camera then is picking the shutter speed and the ISO for me. So I can just focus on my aperture setting, what I want in focus, put my camera on the tripod so I don't even have to worry about how slow the shutter speed is getting and I can have the focus I want every time. Okay. So again, the human eye is drawn to whatever is sharpest in the image. So whatever my product is, whatever my main character is, whatever's most important in that image, I wanna make sure that it is sharp and that other things aren't quite as sharp. If they're not important to my story, then they don't need to be sharp and in focus, okay? So there are factors that can affect your depth of field besides just apertures. This is one of my biggest pet peeevs because you go on all these blogs of all these different photographers and they're telling you it's only your aperture that affects depth of field, so just worry about your aperture, and that's not true. There's actually three things, and I've added a fourth that's just personal opinion, that affect your depth of field within your image. So the first one is your aperture for sure, okay? It's got the greatest effect on your depth of field. So having a lens that has an open aperture, not just your kit lens, is really important to invest in. Whatever lens that is, okay? The next is your distance to the subject. So if I'm standing really far away from my subject and I'm shooting at an aperture of 2.8, and then I stand really, really close to my subject and I'm still shooting in n aperture of 2.8, my depth of field, my focus, will look different. So it becomes more and more shallow the closer I get to an object. So if you're farther away, you're gonna have more in focus at the same aperture than if you're up close. Does that make sense? The next one is your lens's focal length. So if I'm using 100 millimeter lens versus a 18 millimeter lens, I'm going to get a very different effect with the same aperture. We're gonna show you all of this, we'll do it so you can actually see it, okay? And then the distance from the background. So if I had a wall right here and I put my product right here, which is what I see people do over and over and over again, even if I have a super open aperture, there's just not very much room for a fall off. there's not very much room to start getting blur. So it's going to look like it a lot more in focus than if I put my item up here, because I knocked it all over it. Then if I put my item up here, I focus, and there's all this room for the background to start to blur out for my focus, my depth of field to start to fall off. So that's why I get that question a lot, like why are you putting everything up in the front? Why wouldn't you put it back more? That's why, because I want that. And so we're gonna look, we're gonna do some of that. Okay, really quick before we do that. Because we're talking about different focal lengths, these are the three lenses that I traditionally use. The 50 millimeter 1.4, the 100 millimeter macro 2.8 L. Now it's a pricey one and it is the I use the most for products, but they have a non L version. So if you see at the end of Canon, it's a professional lens and it basically just means it's gonna cost a lot more money. And it is higher quality. But for the average person, the other version of this lens that's not L is gonna work just as well. It just focuses a little bit slower. That's one of the differences. And you're on a tripod and you're shooting something not moving, so it's not a big deal. So there are different versions of that lens. And then I have a zoom lens that I really love, it's the 20 to 70 2.8 L. But again, for the average person starting, I recommend getting the 50 millimeter 1.8. It's about $100. Depends on what brand of camera you have. So it's gonna range from 100 to and you'll be able to take really, really amazing photographs with that lens. Okay, so here we moved our item closer and farther away from the background. So do you see how much the tiles stand out here? And then there, do you even see the tile? Okay, so I actually don't think either of those options were that great. I want you to know that this is in a bathroom, right? We know it's not now from yesterday or from our previous lessons. But I want people to think that. And if I blur out the background completely, my subject really stands out and that's great, but it's not the story or the setting that I want. So then we get a little bit better, and it's a little hard to see on the screen because it's high key, but you see we can still see the tile back there, but it's definitely not the focus. So you're gonna wanna play around, and this is all playing. And I do say playing and not stressing around, right? It's playing around. So we're moving our subject closer and farther away, we're changing our aperture slightly until we get the look that we really want. Okay, really quick before we move into white balance I wanna shoot a couple of examples so that you can see in real time what that's doing. Can we get the title board? You guys have any questions while we're in the midst of it? Yeah, I'm actually gonna turn this. I just wanted to check. So you're choosing to either photograph in TV or AV if you have Canon? Yes. But maybe I missed it, how do you decide which one to start with, or if you play around with both of them and decide what you like? Okay, so for product I would always start in AV. I just wanted to show you TV so you understood what the shutter speed does and why you may be getting blurry images inside your house, because I know that's a really big frustration for people. But again, if I'm on a tripod... If I'm not on a tripod, I do have to be concerned that my shutter speed stays above the 60th. But if I'm on a tripod, then I'm not worried about that at all. And if you don't have a tripod, use a table. Use your stool, use something that you can set the camera on that keeps it nice and still. And so for me, I'm on a tripod and what's most important to me when I'm creating an image is making sure that my subject stands out. My shutter speed doesn't control that, right? But my aperture does. So for me, aperture priority is the most important. So for product, yeah. Always aperture. Do you wanna tell us again what you're using to keep that? Yes, I do. Okay, so we are holding up this board using frogs. Those are florals, I'm trying to see if we have our extra one around. I'll show you again. Oh there you go, we don't what that in there really. It's a floral item that holds flowers in place in the vase. And so there's tiny little nails on the top of this. So don't leave it out. But it's great for foam core boards because you can just push them right in and now you have an assistant without paying the same fee, whether that's emotional or financial. So all we've done here, in a previous lesson, we showed you these were sticker tiles. Sticker subway tiles. We've stuck them on to a foam core board. So for a really inexpensive price, we now have the look of a beautiful subway tiled bathroom or kitchen, and this could work for either, right? Because they use subway tiles in both. So that's one of the reasons why I love subway tiles so much. And they're really in style right now too. So we're gonna go ahead and photograph these using a closed aperture and then using an open aperture. And I'm gonna be really close to you guys so... Maybe not so much. No we're good, we're good, I think right here is just about right. Okay. So I'm gonna start out by using a really open aperture of 2.8. Candice? Yes. Do you normally shoot tethered like this into your computer? There are some folks asking why you're doing that and if that's something you normally do. How do you do that? I do not. At home, I'm just using the back of my camera and my computer. I'll go and check, plug my card in and check every once in a while just to make sure that I'm getting what I really want. I'm experienced with tethering just because I've worked with higher end commercial clients and there's a whole team of people that need to see what's happening, and you guys are my team today so you need to see what's happening and so that's why we're shooting tethered. But at home, no. And probably just mainly because I'm too lazy and I don't wanna spend money. So if I can do it without that, then I'm going to. And what are you adjusting for at this point? just moved the camera a little bit closer because I noticed that I was seeing the edge where the tiles weren't. Thank you. Okay, let's see if we've got it now. Maybe. Yes, there we go, okay. So that's super bright. And so let me correct that. Because I had my exposure compensation over exposing from last time when we were letting in a bunch of light. There we go. Okay, so there's something I noticed that really, really bothers me about this image. Do you guys know what it is? The tiles aren't lined up. The tiles are crooked. That would bug me so much. And I actually think it's because my camera is crooked. It's not because the titles are crooked. So I would have to fix that because... And it's actually because my legs aren't even on my tripod. What did you do to change from what you were shooting before to this blown out image? Oh, okay, so it was on aperture priority, or sorry, exposure compensation, which we're gonna be talking about in a minute; but I had set the camera to overexpose. So it was letting in way too much light. So ignore that because your camera won't do that unless you change it. So now I'm just readjusting to try and get straight lines again. And it's funny because a lot of times, what you see through your camera isn't exactly what you're going to get. So always look at the image and don't just assume that you lined up all your lines. Okay, that's better right, a little bit? Still needs to be a little bit more. Okay, let's try one more time. So we would keep adjusting till we got that, but I wanna show you what the apertures do in this scene. So let's take one more with an open aperture because I do think we've fixed it though. (shutter clicks) I made it worse. Good job. There we go, okay. And then I would do another where I close my aperture. And let's close it all the way down just to 22 so you can see it. So when I close my aperture, when I say close it means I'm going to a higher number, okay? And as I go to a higher number, it means that aperture is getting smaller and smaller and smaller. And at 22, it's like the size of a pinhead. So that's how much light I'm letting in. So then what happens, to compensate, my camera makes my shutter speed longer and longer and longer. So when I look through here, it was telling me my shutter speed was one second. So there's no way I could hold my camera and get an aperture of 22 in here. But on a tripod, I can. (shutter clicks) So here, you heard how long that was. Okay. And do you see the difference? It's a huge difference in the way that my overall image feels. That feels much less professional to me than the last image. But I would probably, and let's scroll through, see that? So I would probably go somewhere in the middle. Again, I want the tiles to show. I want them to know my setting, but I don't want them, I don't want it to be the focus, those lines, like they are here. And I really don't want them to be crooked. (chuckles) All right. So instead of going to my most open aperture or my most closed aperture, I am now going to go to an aperture of four. And let's see. (mumbles) All right. So an aperture of four, my camera's picking the other settings. I like that, and our lines are getting better, thank you. But it's still maybe a little bit too blurred for me. So I can do two things. What would make it less blurry? It's a quiz. Bring you product closer to the background? Yes, yes. So I can bring my product closer to the background, or I can change my aperture. But just so that you guys can see, let's just move the product as opposed to changing the aperture. And I'm not gonna move my camera but it is gonna make my product farther away, smaller. So normally, I would get in closer. But because distance also affects, I don't wanna do that. I want you to just fully see what moving my product closer to the background did. Okay? So let's go there. We're at an aperture of f/4. There. We're still in an aperture of f/4, but do you see the difference in the quality of the background? Right. So this is where I just start to play until I get exactly what I want. Now I know pretty well what an aperture is going to do at a different lens and closer or farther away, but that's something that I've done for 20 years. So as you play, you'll start to learn oh I love the look of this set when my product is two feet away. And when I'm using an aperture of four. Or when I'm using an aperture of eight or whatever it is. But you really start to like get more and more comfortable with using different apertures and different settings as you play. So what I highly recommend as an exercise is to set up something like this and to take a photo with every aperture, okay? And then open them up and look at them and see what you like, because from then on, you have a general place to start when I'm using this set. And for me, I will use one set over and over again, right, because I'm branding, I want that same look; and so once I become familiar with that set up, it's super easy and take down is super easy because I know exactly what I wanna do before I even start. But it takes that initial minute to really play around, try new things too, and some time to really figure out the look that I want. Let's see this, and there we go. That's what I want, okay? That's what I want. I think that is beautiful. Yes. I notice that you don't zoom with the lens. Yes. Is it better to move yourself back and forth rather than zooming? So this is a fixed lens. This is that 100 millimeter macro, so it doesn't zoom. And lenses like this that don't zoom, that have one focal length, are generally sharper, a little bit higher quality than a zoom lens. So in product photography, because I have worked with really high-end commercial, I need the best. So I have the best. But it's completely doable with other lenses as well. I could do the same thing with a 50 millimeter. It's going to give me a little bit of a different look because it's a little bit wider, but I can. Yes. So Candice, we do, thank you, great question; we do have some other questions about lenses and I know you said this one is 100 millimeter macro lens. The question is from Paintings by KE Gilmore. Candice, would a 50 millimeter macro Canon lens give a similar effect to the regular 50 millimeter macro when used far away from the product? Or do I need both lenses? And I think maybe she meant a 50 millimeter not a macro versus a 50 millimeter if you're in the same place or if you're farther away. No. So the reason you would need or want a macro is because if you're shooting something where you do wanna get really close detail, so let's say she wants to show the texture on her painting, maybe she uses a lot of paint and it really like sits and there's a deep texture from it, then she would want a macro lens so she can have a detail shot in her shop. Here's my image, here's my painting, here's what the texture and the richness of it is. So she would want a macro for that, but she can still use that macro from far away and it will be fine. So you don't need both. If you need a macro, you wanna get the macro but you can use it for other things. So this 100 millimeter lens I use for portraits all the time. It's a long focal length, it's very flattering. And then I also use it for product. But you can see, like I'm not trying, I can literally move like an inch away and show you that joy part of the word if I wanted to. I don't need to for this, but I'm still using that lens because I love the focal quality. It's a longer focal length and it really compresses, which means it can blur out more. Remember how we just talked about, in depth of field, your focal length is one of the things that affects. So I do love using a longer focal length personally, because I feel like it fixes a lot of the distortion problems. So like if I was photographing a card, sometimes it'll feel like the card is getting bigger or smaller. Using a longer focal length will help correct some of that. Okay, I wanna take one more photo so we have this later to edit. I'm just gonna get in a little bit closer. And I'm just stopping down because I got closer by one stop to five. Well actually not a full stop but close. Okay. So I think that's great. I actually really like the shadows on this. I don't normally love shadows on a high key background, but because it's already black and white, I sort of like it adding in that depth. If I didn't want that, I would add in the reflector on this side. So I do wanna just take a photo with the reflector so that you can see it. I know we talked about light yesterday. Yeah. I could add this in with a frog if I had some more but I'm gonna have Kate come hold this for me. Now it's good just like that. So now the reason I put that in there is it's opposite of my light source, and so I'm just bouncing in some light into where the shadows are on the side of the soap. Do you see the difference? Okay, let's do it one more time. I'm gonna open up my aperture just a little to get a little more blur, and actually I want to be a little bit farther away. I like having a little bit of extra room. And actually, one little tip about that is generally, when I'm shooting a photo, I will take some close and then I will take one or two steps back in case I wanna add text later for an ad. So then I just have one that just has some extra open space. So I might even, if I knew I wanted text at the top, I might even come back like a little bit more and take one more. And do you see, so now I have that extra room. Again, actually, if I knew I wanted text, I would blur out the background a little bit more too because then there's not anything distracting from the text because those lines could really like mess up the text. Okay, and then let's take away the reflector. And I just wanna show you what that looks like. There we go. So I actually like it both ways. I like high key and I like it with the shadows, so I might just keep both of those. Candice? Yes. Can you reiterate for folks what you mean when you say high key? High key just means a light, bright photo. So it's basically all highlights. So we've got a white piece of marble, we have a white background, it's a very light image. Low key is a very deep or dark image. So we have a lot of blacks or rich deep tones. So it's all about tones. I was just wondering if you usually shoot vertically or if you don't know how you're going to use the photo if you shoot vertically versus horizontal or which one. Yeah, okay. So I mostly shoot vertical. This is the reason why. I really... Most of the usage of our images are vertical. So like for a blog, on Pinterest. Those are all much better oriented vertical because it makes them bigger when you're looking at them on the screen. And also, with our magazine ads and things like that. It has to be a little bit more vertically oriented. But if I didn't know, I would try and shoot a horizontal and a vertical because it's really hard to crop down to a horizontal from a vertical and make it look good. Now if it's square like for Instagram, I just prefer to have like slightly more space. That's always why I take that step back and take a second image so that I know that I have some room to crop later if I want it to be square. I need that extra space on the sides.
Class Materials
Bonus Materials with Purchase
Ratings and Reviews
a Creativelive Student
This class taught by Candice was amazing. She teaches in such a step-by-step, easy to understand pace. She shares so much of her own tips and tricks she uses to create beautiful images without spending a fortune or having all kinds of expensive equipment. Having the DSLR lessons included was really great for anyone who wants to do more than the camera phones are capable of. Learning the basics of how to use a DSLR is confusing for most people, but Candice broke it down in the simplest way possible. Social media is all about imagery, so if you want to put out the most beautiful eye-catching photos, then you want to learn how to use more than the camera phone. I don't have a business where I need to take photos of things I sell and I still enjoyed her class so much. As a photographer, I am going to use her ideas and insight when I photograph things for fun. There is so much to gain from this class. I would highly recommend taking her class. She is a wealth of great ideas and information and has that friendly personality of someone you'd want to sit and have coffee with.
yomichaela
A wonderful class to get you going with craft/product photography. Candice provides (and shows) fantastic examples and it's really fun to watch her work through a shoot, moving items, etc. to create the final image. She also covers some basic photography tips which is very helpful. Great class! I definitely recommend to others!
Melinda Malamoco
I loved this class! Candice is so personable, clear and relatable. I would want to hang out with her and be creative! I have been taking pictures for YEARS, and for my Etsy store for over two years, and I still learned a lot in her class. The lessons are set up in a way that you can follow, take what you want and don't worry about what you don't need. I will say that I got a TON of ideas for how to better display my brand, what my personal style is and how to be consistent with it. I so recommend this class for anyone who has small business or just wants to be able to take better pictures of their products. Okay, off to build a prop kit!