Top Down Photography on a White Background
Lesson 29 from: Craft Photography FundamentalsCandice Stringham
Top Down Photography on a White Background
Lesson 29 from: Craft Photography FundamentalsCandice Stringham
Lesson Info
29. Top Down Photography on a White Background
Lessons
Session 1
1Introduction to Craft Photography Fundamentals
04:59 2What Your Visuals Say About Your Brand
04:56 3How to Become a Photographic Author
10:44 4How to Use Natural Light for Your Product Photography
10:00 5Setting Up Your Photo: The Basic Rules
09:07 6Becoming the Viewer to Take Better Photos
10:30 7Shooting 3 Setups: Creating the Backstory with Images
34:32Shooting from Top Down with an iPhone
19:49 9Shooting Paper Products with an iPhone
10:54 10Shooting Jewelry with an iPhone
19:01 11Editing on your iPhone
15:28 12Finding Your Brand's Aesthetic
18:39 13Find Your Product and Customer Target: Exercises
11:12 14Figuring Out Your Audience
08:46 15Interview with Gilit Cooper of The Bannerie
08:45 16Branding Beyond Instagram
19:47 17Looking for Natural Light in Your Home
19:36 18Building a Styling Prop Collection
08:22 19Creative Backdrops
13:52 20The Essential Product Photography Props
11:18 21DSLR Basics
02:39 22Understanding Shutter Priority And When To Use It
26:29 23Understanding Aperture Priority And When to Use It
37:16 24The Basics of White Balance
12:52 25Photographing Jewelry
37:27 26Setting Up a Bedroom Set and Photographing Pillows
19:59 27Photographing Greeting Cards
06:53 28Shooting Products on a White Background
17:24 29Top Down Photography on a White Background
13:06 30Shooting Products on a Black Background
07:23 31Shooting Reflective Items
12:20 32Shooting with Backlight
04:01 33Top Down Photography: Shine & Reflection
24:50 34Basic Editing in Lightroom
31:37 35Batch Editing in Lightroom
06:00 36Editing Jewelry in Lightroom
10:01 37Editing White on White in Lightroom
06:54 38Editing Shine and Reflection in Lightroom
17:03Session 2
Lesson Info
Top Down Photography on a White Background
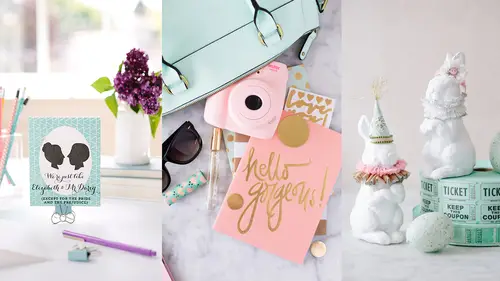
We are gonna do top downs. That's in particular how I like to photograph on white if at all possible. For some items it's not possible and so you would shoot straight up and in that case, I would invest in a roll of white seamless. You can get it from any online photo shop and you could tape it up to your wall if you didn't wanna buy a stand or you could buy a stand. It just rolls down and that makes it so you don't have a horizon line so everything can just stay nice and white. I don't mind a horizon line a lot of times like with this card that we photographed earlier. There was a little bit of a line. I'm okay with that, but if you didn't want that, a white seamless would solve that issue. But for me, most of the time, I'm shooting flat objects. Our party supplies for My Mind's Eye are usually, even though they have some dimension, it's easy to photograph top down and so I prefer, if I have the option on white, to shoot top down. We're gonna photograph this card from Paper Bennett Pr...
ess, my parent's letter press company. What I like to do generally if it comes with a colored card, is even for like the product shots, make sure it's just a little offset so people know exactly what they're getting when they buy this card. So I'll just set it up, keep my lines nice and straight. And I'm actually gonna move it closer to where... Let's shoot it this way so I'm not standing in front of you again today. So I'll just face it to me and I scoot it fairly close to me because remember I need to be able to shoot over. So one of the things I really love about shooting top downs with my DSLR is using live view. I don't know if it works with the tether, does it? Okay, so we will not do that. But I wanna at least offer that as an option so that you know that it's available. What live view is, is for all of your DSLR's that shoot video as well, it'll have a live view button. You can press that button and it means instead of having to look through my view finder, I can see everything on the screen of my camera. I already know I need to change lenses because I'm not tall enough on a top down to be far enough away to photograph my items. So I'm gonna switch to my 50 millimeter lens just because I don't have to be as far away so I can stand right above it and takes pictures with it. We'll try one without the reflector and then we'll add the reflector in. So the other thing I would do is tape down the card so that it doesn't come up and I keep the shape of it that I need. And if I had live view, I could just hold my camera right here and see it. So why I like that is so I don't have to be leaning over, I'm not hurting my back at the end of the day 'cause we are shooting 100 cards in a day. That's a long time leaning over. And it just makes it much easier to shoot top downs. So live view it's really wonderful thing. I really love it. Stand on the top step today. So I have my exposure (mumbles). Let's just let the camera meter it first so you can see what that looks like. And we're gonna see a few things as that comes up. Okay, it's gonna show it to us sideways. Do you see how blue it is and how gray it is? That's what happens just using it at exactly where my camera is telling me to. So now I'm gonna overexpose by two. So I'm going to the plus two. My exposure compensation on my camera is the back dial, but it could be different for yours depending on what camera you have. Look at that. Do you see the difference just changing that made? I didn't even change my white balance. I didn't change anything. If I feel like it's a little too bright on the actual subject matter, I can change that. And I would put my hair in a bun or a ponytail so that it doesn't get in my shots. (clicking) And then the other thing I would do is again add in a reflector because I don't want a deep dark shadow that I have to try and edit out later when I am shooting. I don't know why it's going around in circles. Let's grab that. Oops wrong one. I might even use the little one. Sometimes I actually like the bigger ones because I can in a situation like this hold it myself by just leaning it against myself. I don't even like need a frog or anything. I can just lean it right here. Thank you. Let's look at the difference. See that? So we're not pure white, but we're really close. I won't go any lighter if I notice that I'm starting to lose detail on my card. So on my actual product. So I'll go as light as I can before I lose that detail. (clicking) Okay. And then I stop. The rest of it I can get out in editing really simply. So that's all you need to do to shoot on white. Do you have to consider where you're standing relative to the light to avoid a shadow because you are right over it? Okay, look at this. The camera is here. I can literally put my hand right in front of it where the light's coming from and because we're getting indirect light here, it's just gonna wrap around. So if I don't have direct hard light, I can be right over something and it's not gonna do anything to the light. If I'm getting direct light, I'll see my shadow on the item and I know that that light is a little bit hard and I need to alter it in some way like we talked about in an earlier lesson, either with a pair of curtains or some sheer fabric or something like that. I still, even in this case, as opposed to doing direct front light, I still like side light because I like a little hint of shadow to separate from the white even when I'm going pure white, especially if I'm photographing a white item on white, having that little edge of shadow helps to separate it out and show me where the edges of the card are. So I sometimes will add in shadows to a white image specifically because I wanna see the edge. I need to see the shape of the item. I'm gonna shoot one more 'cause I feel like my perspective was off a little bit. And see how I am trying to be right directly over it as opposed to a little bit farther or a little bit behind? I'm always, when I'm shooting something square, trying to be directly over it. (clicking) Okay, I think we got it. Does anyone have questions about shooting on white? Yes. So, I noticed that the yellow gets a little bit muted with increasing the brightness of the white. Are you gonna be able to edit that in with saturation 'cause I noticed with my product sometimes the flower petals, like you lose the vibrancy and it looks almost fake when you try to add it back in in the editing software. Like I said, I really watch and pay attention to the detail. If I start losing detail in any area of my product, I stop the exposure. Like I'm not gonna keep going brighter and I think that's a big part of it. Sometimes if you get a little bit too bright and you try and bring it back in, it does get like a fake look. When I'm shooting raw especially, as long as I have that color there, I can add in a little bit of contrast and a tiny bit of vibrancy and a tiny bit of saturation and it's gonna bring it right back in. And so yeah, it's an editing process and I try really hard to edit things back to exactly how they looked. So realize this is definitely like the hack job way to do this, right? This is not the most technical or precise. I'm sure if a commercial photographer was watching this they would be horrified, right? Even I know this is not like the proper way to do it, but guess what, I don't care 'cause no one in the end is gonna know. They're going to look at it and think it's beautiful and they're going to buy it and that's what I care about. It doesn't matter how I get it done, it matters that I get it done in a way that works for me. So is it the most proper scientific way of lighting? No and really what a lot of people would do is and especially with some of our party goods, is they would light their white background completely separately than their item. So my item would actually be on plexiglass and so it looks like it's on the white, but I'm lighting the white completely separately and that's why it takes so many lights 'cause you're like lighting your product and you're lighting the background separately because I overexpose my white by two softs, just like we're doing with compensation, but I'm not overexposing my item, so that's the proper way to do it. The proper way, the expensive way. But this is the way that you can get it done at home using what you have and it works 'cause I do it. Thank you. Thank you for allowing us to be hacks as well. Okay, so a question about is there a particular reason why you're using the table versus could you just put the phone core setup on the floor when doing these top down images? Yes, you could. It makes you farther away from the light source. So it'll make the light source a little bit harder. So a lot of times if I have like a really big spread. So with My Mind's Eye, we'll photograph an entire line of products together top down and I have to use like four of these boards or really I use a big piece of paper that's like nine foot by nine foot. Obviously, I am not tall enough to have that on a table and then get above it and photograph it, so we will put it on the floor when we do that and we'll use lower windows. Like if you have a patio door, a backdoor that has the window from all the way down, so then my light source isn't so far above my product. So I prefer if I can be tall enough just with a stepstool, that is how I will do it. So that's a preference, but I do think it helps to be closer to your light source and give you that soft light.
Class Materials
Bonus Materials with Purchase
Ratings and Reviews
a Creativelive Student
This class taught by Candice was amazing. She teaches in such a step-by-step, easy to understand pace. She shares so much of her own tips and tricks she uses to create beautiful images without spending a fortune or having all kinds of expensive equipment. Having the DSLR lessons included was really great for anyone who wants to do more than the camera phones are capable of. Learning the basics of how to use a DSLR is confusing for most people, but Candice broke it down in the simplest way possible. Social media is all about imagery, so if you want to put out the most beautiful eye-catching photos, then you want to learn how to use more than the camera phone. I don't have a business where I need to take photos of things I sell and I still enjoyed her class so much. As a photographer, I am going to use her ideas and insight when I photograph things for fun. There is so much to gain from this class. I would highly recommend taking her class. She is a wealth of great ideas and information and has that friendly personality of someone you'd want to sit and have coffee with.
yomichaela
A wonderful class to get you going with craft/product photography. Candice provides (and shows) fantastic examples and it's really fun to watch her work through a shoot, moving items, etc. to create the final image. She also covers some basic photography tips which is very helpful. Great class! I definitely recommend to others!
Melinda Malamoco
I loved this class! Candice is so personable, clear and relatable. I would want to hang out with her and be creative! I have been taking pictures for YEARS, and for my Etsy store for over two years, and I still learned a lot in her class. The lessons are set up in a way that you can follow, take what you want and don't worry about what you don't need. I will say that I got a TON of ideas for how to better display my brand, what my personal style is and how to be consistent with it. I so recommend this class for anyone who has small business or just wants to be able to take better pictures of their products. Okay, off to build a prop kit!