Lessons
Day 1
1Class Introduction
32:47 2Crappy Lighting Conditions: Direct Sunlight
27:47 3Crappy Lighting Conditions: Fluorescent and Mixed
21:00 4Crappy Lighting Conditions: Low Light
29:21 5Crappy Lighting: Dappled, Backlit, and Overcast
12:32 6Setting Your Camera Up for Crappy Light
27:43 7Shoot: Fixing Fluorescent Lighting
06:16Focusing and Shooting Modes
18:35 9Shoot: Mixing Daylight and Tungsten
23:16 10Getting Started with Flash
43:30 11Shoot: Low Light without Flash
19:43 12Shoot: Low Light with Flash
16:49 13Recap and Q&A
16:37 14Crappy Lighting Condition: Backlight
33:16 15Crappy Lighting Condition: Low Light Outdoors
24:10 16Shoot: Direct Sunlight
37:20 17Shoot: Direct Sunlight with Shade
05:47 18Shoot: Direct Sunlight with Flash and High Speed Sync
25:35 19Shoot: Dappled Light with and without Flash
28:57 20Shoot: Open and Covered Shade
11:29 21Shoot: Overcast without Flash
23:50 22Shoot: Overcast with Flash
30:04 23Recap of Shoot
1:40:16 24Scenario Kit: Event
27:44 25Scenario Kit: Wedding
20:56 26The Next Step Slideshow
24:52 27File Managment and DNGs
12:02 28Creating Color Profiles
27:56 29Noise Reduction in Lightroom
12:59 30Using a Color Checker
23:32 31Post Production: Basic Adjustments
25:19 32Post Production: Smart Objects and Color Processing
25:29Day 2
Day 3
Lesson Info
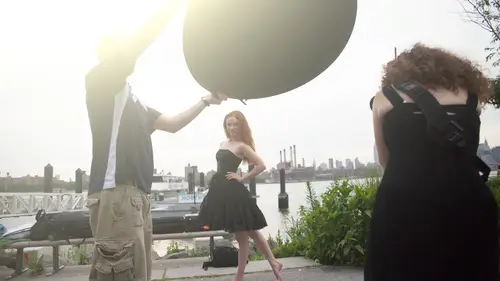
Shoot: Overcast with Flash
Uh a couple years ago I moved the detroit from florida and you guys from seattle or anyone that's from the north deals with seasonal depression thing when you go through like the whole winter experience where there's no sunshine for a long time so my favorite thing to do after moving to detroit with stuff like this walking out in a very depressing, drab, overcast kind of winner that I wasn't accustomed to and making it look beautiful and sunny like I was back on the beach it was a little bit of make believe is like like edit photos later that afternoon and be like, oh man, isn't it nice here like I live in florida still, um I'm in new york two now and do a lot of traveling so we deal with this all the time or if you're in seattle I mean it's rains often so we have to overcome this now except for now it's I swear this is like I just left l a and well with the weather didn't change but what we're gonna do is use one flash you kind of just my general really super easy quick approach to th...
is and then I'm gonna bring in one or two flashes and we're really just gonna kind of change this whole environment all around um so first off I want to show how we would take something like this and just add some direction to it and then using one flash and then our shutter speed like we discussed a little bit earlier kind of lift up this whole environment give some direction to the light so let's toss this up here jonah figured the sixty inch umbrella will probably do that bounce umbrella again I must set this flash up in the meanwhile we're gonna use one off camera light we're going to use on our pocket wizard triggers here to trigger it and what you have seen camera say it's probably one hundred two point eight somewhere round there I can tell you look two point eight I saw one hundred almost always and one two hundredth of a second okay cool but that's when I had her underneath the overhang do you want that's fine so basically I'm asking because I want to get us ah similar starting point okay so let's go ahead and get this umbrella set up thank you very much giving you guys a similar starting point you can see how this would normally be a seamless process for us I mean lindsay make sure the natural light and be like okay I wanted mix it up a little bit and bring in a flash and a lot of the times you still see me or my hide behind this hiding raise this up really quick a lot of the times I like to start with the natural light solution too if you looked in our kids I've got a couple prime lenses that I absolutely love the thirty five in the eighty five signal, one force, so I've been in the habit now of trying to use natural had a lot more not going to say it isn't because I've been hanging out lindsay a lot more over the last couple years and working on stuff, but, um, natural light is a really easy way to go if you understand it, and you saw how quickly we're able to take to reflectors and get the job done, no worrying about light stands or near this stuff, but when you get to your off camera lights, you just have a million times more control and that's what really draws me over to this, I'm gonna turn this guy on, not getting any gels or anything just turned on, and we're gonna take on initial shot, so I'm gonna have you come out here, I'm gonna pretend like we aren't even lucky enough to have shaped this is your scenario where you're photographing in florida somewhere beautiful location or rain cloud comes over, and your client still expects you to get beautiful area pictures like this on your portfolio, and they're hiring you for, so what do you d'oh? Overexposed! You telling me to come back tomorrow? You're done. All right, we'll take this shot right here. Beautiful. We already know what it's gonna look like. It's gonna look pretty good, but really bad on her face. So we have an environment. We've got a pretty model at the same time. Now we have the shadows underneath the eyes and it's just not very flattering. We don't have the hot spots, but we need to change the direction. So overall, our quality is good it's soft, the directions not so much working for us. So I'm gonna go ahead and turn on my flash. We're gonna go in manual mode here just to see what this looks like. So I'm just picking a shot with you one more way. Go, go! We got a fire out of its way did okay, that's one one eighth power. I want a little more juice. Somebody turn it up, some here go up another stop in maybe a third to a calibration shot. Beautiful. And we're gonna get a little background there. That's our calibration shots. The next one's going to come through is what we wanted to look like. Now we've basically taken control, we've got the light pushing in from a different direction here. Just like when you were blocking off the stuff on the top we were forcing the light to come under, but we've got a little more direction there I might get a little more light out of it actually do this and would you comment on why you chose that side for the umbrella? Ah, good idea a good a good question I chose this side because we've been talking about the direction of light so far and this is generally where our direction of light was already coming from even an overcast day but a white wall it's still gonna balance more like I still have a direction of life there we go that's what we're looking for, you've always got a direction of light and by in this case I kind of want to let all the natural I do the heavy lifting and just kind of augmented a little, so I chose to put my light on the direction of the already existing light we're just amplifying it a little bit, so we took the shots earlier with no extra light and we were just kind of funneling it threw this way, but I want to kind of keep that direction and just kind of get a little more control and add to it a little bit like this there we go our flash was turned all the way up in the first couple shots looks good so now we've got the direction that we're looking for this is ideally the kind of whether you look for as a speed like photographer if you want to use your off camera flashes this is the kind of stuff you're gonna look for because you don't have the power earlier we used three of them on high speed sync to overpower the sun you don't always want to have to do that because it's hard on batteries and you need a lot more flashes so I really enjoy overcast light like this because it gives you a lower starting point you're not combating bright sun you're combating nice soft kind of ah very much lower intensity lights so your flashes don't have toe work is hard this flashes maybe on one eighth power right now and I'm shooting at one hundred so that's bottomed out I could be shooting out two hundred four hundred esso and my flash wouldn't be working at all yet it's still giving me control cycle means I can shoot all day like this so this is a good starting point and I didn't have to have anyone hold anything but we can really kind of amplify this up if you want to come over here maybe give us a little more filler catch light from the side we can really start tweaking this there you go and I'm not so much worried about her bounce the light from the ambient because we really don't have a lot of light to work with, but she's gonna be catching light coming from my flash and she's gonna be able to fill in that side there, so we get that silver maybe looks a little too much. Maybe we can switch over to the white think the whites back over there in the corner, and then we can really kind of get that's more of like that flat look lindsey was looking for in the door, so by having to use the white pulling it off a little bit, we'll just kind of open up those shadows, some beautiful, just like that, so you can see I really quickly with one flash, maybe a reflector or no reflector at all. We can take this existing soft light and just add direction to the face because really, when you look to shoot out on location, you want a light for your subject and light for your environment separately, just like lindsay was purposely putting something over the top so that her background would go up and down intensity. Now we control that by this allowing to delight our subjects face and using our shutter speed to allow the background to go up and down in intensity, so I'll slow down my shutter speed a whole bunch here, let's take another shot. There we go. So I went from one, two hundred fiftieth of a second down to one, eightieth of a second. See, if that brings up our background, some look at how much more light we have in our background now, so very quickly. I basically turned up the power on the entire day so it could be those dark over a dark, dark clouds we were dealing with now we just basically turned them up like they're super super light clouds like an afternoon shower, about to blow over so we can make it look like a bunch of things. But I want to take this a step further. So do we have, like, one question from the audience out there? If not, I want to add another flash and really start to change the environment here, keep going. All right, so it's gonna grab that back? One there. We're going to kind of mix this up. I'm gonna see if we can do this right off the bat with one flash and see what we get and then we're going to work in a two flash scenario. We're gonna work in some gels and this is when it really really gets fun, so okay, cool, so while he's doing that, I'm gonna bring in our male model, actually for this shot I could have you step out for just one second then I'll probably bring you both and we'll do like some couple shots to just end this out with and this would be one of the reasons that I would recommend using a flash over natural light is this is going to be this control thing because you can change the height of late the direction angle and that's what he's going to demo here because there's you could definitely really manipulate your natural light but it's only so far so let's say I wanted a really dramatic moody photo and it's an overcast day I could get it a little bit but I probably playing more with exposure than anything else so if you wanna like the very first picture that we that we were sitting the first day and the picture of lindsay's with the girl I call her the miley cyrus and the twisted tree the girl with the twisted trees put it behind us that was all natural life so it was really cool to see that you can't get that dramatic stuff um but we've both done it where it's a lot easier to pop in a flash and then all of a sudden you can knock down your ambien and get that really really kind of kind of gritty look so this let's turn this make sure it's on channel got on channel one that guy on channel one and I'm gonna go to group b on this. So another cool thing about these pocket wizards as they allow me to set my flashes up in different groups. So this is group a that is group b. They all live on the same channel, though, so they'll all fire at the same time. Or I can turn them off individually. One group at a time or I can set them different power levels. So for now, I'm gonna turn off group a I'm only gonna be using group b over here. So let me get my framing here and then I'm gonna have john kind of move that move that flash around for may first. We're gonna take one shot without anything. I think toss into the side, have you step over this way just a little bit perfect. Alright, alright. So we're gonna get one shot, just a normal exposure. Get a bass exposure that were to start adding flash. The first thing you noticed, maybe from today. Because I always try to get a bass bass exposure before doing anything else. And then you add flash because you don't wanna have to troubleshoot multiple variables all at once, I get my base exposure shooting man. Remote it'll stay that way until I change it and then I can start adding my flash in beautiful someone open up just a little bit the two point eight and I'm gonna go ahead and turn that back flash on all right way to fire off that backlash alright cool when this pops up you might be surprised why the heck did I put that there okay we've got this flash from coming from behind him I am basically going to be adding a son to this scene now because the sun that we have is way high straight up in the air and is very very soft non directional not speculate not do anything fancy for us so I'm gonna add my own son so I have some more control over it right now my white balance is set to sonny my cloudy day is kind of a neutral cool white light my speed light we know is an exact science white light so I want a warm this up so it's more of that sum that I'm looking for so I'm gonna ask john to apply um probably let's get daring here let's do two full cuts that one full stop there may be too old to one and a half well have you put one and a half up there so I'm gonna keep my wife out set for sonny so all this existing light in the scene remains true but I'm gonna have that be super super warm like a setting sun so rather than being one o'clock in the afternoon or almost high noon on a cloudy overcast cool day my goal is to get a photo that looks like we have a beautiful warm sunset somewhere on the beach right behind this guy's shoulder when in reality that's not what's going on at all so this was my way to amuse myself when I was cold of north and the mean you always want to be careful as you think wiggle they're gonna they're gonna like start popping off you like whenever you're doing this trying not to look towards the light almost blinded myself a number of times doing this okay so now I'm gonna take one more shop remember that when you put a gel on your flash it's going to absorb some of that light when it comes through it so if you look on our gels this is a full cut of cto let's zoom in there on the bottom it'll say f stop loss equals one so we lost one stop of light shooting through here means I should compensate so let me see if I have a half cut here quarter cut half cut is going to be a half a stop a light loss so basically looking at these it's telling me already that I need to add one and one half stop more light to my flash let's go ahead and do that if you look on the top here one third two thirds one stop we'll do like one and a third to get us there we'll take a calibration shot so now I know my manual flash setting is going to be just as bright as our last shot this time it's gonna have the warm color that we're going for and nothing else changed in the scene because I'm shooting manual saw me other setting stayed the same let's go ahead take the shot one more time beautiful and when this comes through now is gonna start looking a little more like we have that setting sun that we're looking for and that we wish we could always shoot a golden hour with beautiful skies in a nice sunset so let this guy show up here there's one more thing I want to do I'm gonna have this big silver reflector too beautiful so now we've got that sunset we've got that lens flare but we haven't really fixed the problem with the nasty overhead drab light on the face we're still at square one we just have a lot more flair not to wear fashion flare going on and get it a little bit so if we could grab that big silver reflector over there and pass that through overto lindsay I'm gonna hope she doesn't blow away through our background working on it here thank you and with this direction it's not gonna do much good, okay, but if she catches our son it's going to do a lot of good so she's going to get this up here and it might be a little one or two shots but she's gonna try to catch the light from our fake son and redirected onto our model's gonna turn your face slightly into this excellent that perfect, beautiful and now we're playing pool with life really warm, beautiful light that were totally in control of when this guy fires over awesome we're getting a little more I'd have you bringing in a little bit closer right there. Perfect. All right, excellent. So let's also try the white side. Maybe the whiteside will help us out a little bit. One thing about oh, there we go. That was awesome. Okay, so the thing about the white of the silver is the silver is very much playing pool. You have to bank the light off perfectly and have it hit. You'll notice in the behind the scenes when we were you tracon turns using reflectors for each other that we were looking for a specific pocket of light now with the white side it's not his directional you basically bring it in look at how it just fills out her face there as I pull it in a way where is the silver it's a spot like that I have to move around so but given her the white I'm hoping that she could bring this in and we don't have to worry about direction at all we can just kind of buttered up right against him and if you did have, um if you don't have the depth of field preview but and set so that it would trigger a flash, you could also try with the silver have it pop off so you could kind of see where it was going. Perfect. All right, we'll bring that white and really, really, really close right there. Perfect. All right, beautiful. You got some of these shots coming in now we're starting to get a little more of that, phil. Excellent. So this doesn't look like a normal dr overcast day, does it? Not a little bit different. Looks like a sunset. Oh, in a little bit of light, try to sneak some of it through there in the background so we can take this a step farther. Well, have you popped it back up there again? Absolutely like we did before we even add the flash slowing down our shutter speed remember, turns off all that ambient light so let's slow down our shutter speed, we'll go to one twenty fifth of a second that's another stop of light I'm gonna go toe one eightieth the seconds of having to stop in one third of light, it would take another shot here. Excellent. So as these come through, move over just a little bit. We'll get that sun flare coming back to the photo in this next one one. Mohr I got sugar happy. I know here we go. Now we've got that coming through a notice how we brought up all that lights. If you compare this oneto one of the ones with the faster shutter speed, you can show how we're really kind of control in like that one. Yeah, one of those. Yeah, that will do like an autumn. So control right there so we can change the time of day if I wanted to. I could do this with our slower shutter speed. Kind of just barely put it over there in the corner. So the lighter shot looks like it's kind of earlier in the day as the sun's higher and then the more dramatic shot as we speed up our shutter speed would be the light lower down there. So this is with one flash. If you've got two rather than breaking lindsay's arms over here having to try to play pool with a beam of light, we could just go ahead and turn on this other flash so that's what we're gonna do here for the last shot I'm gonna take a half cut of cto because I don't want to necessarily be a swarm is everything else because the source of our warmth is behind him so if I had it is even warmer up front would look kind of weird that's what's motivating my choice of a half cutesy tio we'll bring this over and I want it more dramatic so like you guys saw on the video we're gonna break this down so if I could swap you with this just maybe have you watch it so doesn't go anywhere alright perfect lindsay if I could have you hang onto this for me absolutely you got so many things flying overhead only thing blown anywhere ok a little bit higher with it this time cool now I like to think of this umbrellas are great because they have this umbrella shaft right here that's basically the laser beam that's gonna direct where your lights going so just ask your model where that were they hitting you so if this is hitting our models probably write about on his chest we're gonna go a little bit higher still that's kind of hitting him in the chin neck area middle of the face now we've got the direction of that light that ate up what do we say a half stop of life by putting that on there so I'm gonna go ahead and compensate turn this up, turn it back on. Take a calibration shot to make sure they're both firing. They're both firing. All right, so I have you kind of take a half step over this way. Perfect. All right. If I can get your face kind of down in a way over this direction. Beautiful. Really kind of serious. Contemplated. Maybe a little bit of squint. Excellent. Beautiful. So easy shots to come shot start to come in but we got a fast shutter speed I'm gonna slow it down now I want a little more mood in there. I don't want so much light. So what happens when we take this photograph now and speed up our shutter speed again? And where did you go with your shutter speed? Two one, two hundred fiftieth of a second from right at the maximum sink speed so I don't want you guys to even have to think about high speeds, things, anything to show, but we don't really use it all the time to see where this one come through. There we go, that's the mood we're looking for. We're looking for the contrast. We're looking for the sunset. We're looking for the direction of light and if I really wanted to get maybe some more catch lights or something in there I could just go ahead and have you kind of hold that just below not so much for phil but like just for a little bit of a catch light so I kind of have your face like right here perfect beautiful so just take that shot and we'll shoot around a little bit so I'll shoot like with right behind beautiful they're like it looks very catalog we gotta keep it clean there we go we got john of background I'll cover him there you make cameos also then we'll go away off of it excellent so you could really really play around with this you could get the lens flare if you want you can hide it behind your model like we talked about the backlighting um you can also just turn it off altogether and just use this is our key light but with one or two lights and some gels you can really change the look so mike can you compare that to the very first crappy shot of him with no lights nothing just kind of where we started there you go yeah so that's what we started with and a very dim overcast day and that's what we ended with with some colored plastic in a flasher to know how would you feel this star is difficulty level to try to accomplish with detail with studio for this particular he wants right out let's see it our attempt were tempting fate here because of what I would do is I would set my ambien using, uh priority explosion exposure compensation to be however dark I wanted to be and then with my two flashes I would set a ratio and that would be something that I feel like I'd have to feel out what it was appropriate tough exactly. So this is one of those situations where it be better if I could have exact control? Do I want the back twice is right in the front but let's see what you so that makes up a good question question was basically doing tl eric like, suck it up, do it in teo, we know you could do it. Emanuel um let's start off first with our base exposure, I'm going to stay in manual mode for this, so we keep that element controlled and then we'll go ahead and start bringing our flashes in now a disclaimer like she said with that backlight, this might be one of the few times when he's going to say, screw it! I'm gonna go into manual mode because what tt l'm eatery is relying on is some light bouncing off your subject into the lens and if you think about it, if I have the light behind and I'm taking a photograph of my subject it's on ly seen the little sliver of light wrapping around his head so I've got one hundred percent of my frame here, and I'm only giving the computer that's doing my t t l like five percent of that frame to work with, so the computers are good, but that's automatically gonna be something difficult to work with. So let's, see how this was handled that I have done this successfully, so oh, we're teetsi on exposure compensation. All right, there's, our first shot crossing our fingers, the gauntlet has been thrown down. I'll be here to see you could do this faster than oh, no, that would not being right. Maybe not right now. This is when, um I was, uh, shooting senior portrait so I would do this awesome. So here's our tio what I basically did there that's the first shot with no compensation here's the second shot with plus two compensation for my t t l so see what kind of love it gives us there gonna hang for a second, so I'm just gonna go ahead and shoot one mohr alright, see how much light we're giving it to work with over there. And tcl again is not is there you go that's perfect. So it took us two shots, probably took us two shots to get it done manually took us two shots of tl, so they're really is no right or wrong way. It's just cool to see what works better for you. Lots of times. This is a difficult situation for tea. Tea? Oh, but the cameras are getting incredibly good. All right, so the last two images are where we just kind of cranked it up. Plus two, this is the piece of cake shot right here. The computer has all the data in the world when I turned this guy on for ti tl because it's lighting up my model space, we'll take this shot one more time. All right, so this shocking I trust my tio by the end of the day totally trusted. I know this next shot is gonna be spot on, so I'm going to go ahead and keep tempting fate and go over to aperture priority now, okay? Okay, so that's what it thinks is the normal good exposure we're turning that down manually, so I'm gonna go ahead and turn it down because I want a little more mood out of it. So I'm gonna cut a stop light off of that and can we lower it down just a little bit? Just get a little bit more of that light in the eye, probably bring it down like a foot right there, all right, so I'm after your priority those are both on tio let's not do that yeah hang on one second all right so we take the shot one more time after priority all right we've got these dialed in I think I'm gonna have to dial in some exposure compensation because I'm dialed over for some reason in my camera I never used your compensation an aperture priority so I didn't even realize they had this thing dialed in so I'm gonna go under one in one in two thirds okay? We're pretty cautious to point to hear what want to go there we go we're going to wait two stops underexposed still letting my t t I'll do its own thing so the flashes are on their own way we dial it down again where this flash go all right we'll take the shot one more time perfect so that dies then everything I think I remember nikon might be tying the camera expose everything that might be one of the things so let's pump them up one two cup a bunch there we go. All right. Calibration shot all right everyone cross your fingers for tt ellen icon beautiful all right that's it aperture priority we're under exposing our camera by two stops I've got t t l plus three on the background and I've got it plus one on that main flash so let's try to go a little bit lower their we're going all the way down yours looks looks better so far not bad so we did it both ways. Yeah, so it is doable both west fake sunset let's bring that in there really quickly went way just because we'll go ahead and I'm trying to think maybe john if I could have you called this one right over here right there right here have you kind of kind of cut it right? Right like that costs a little bit of that on a beautiful day for the last rites so this last night coming up right now is t l let's see how quickly we can remember where manu alone all right, there we are alright, one more shot beautiful actually kind of looking really hard over this direction look really pretty awesome. So there we go. We got her two shots and that quickly I'm sure the man you will now. Two seconds ago we were shooting teo, so we gotta totally doubt in back and forth turned up are back round last a whole bunch and basically what I was having over here. So the black was doing that negative phil kind of cutting in some or edge over on the side because we have so much light coming in remember we're talking about that lens flare can cut down on contrast so sometimes it can make the photo muddy by still bringing in that black phil we're building a little more contrast. This is my catch light under the eyes that's our key light. We've got that going the back roads. We got a lot going on. And if you want to compare that to the last resort that we had before he went, t l and then the very first photo that we came out with way kind of like, talk on all those maybe grab one or two of the before and afters of our lovely lady there too. Pretty one and an ugly one. Okay, and then I meet my end wins. Yeah. It's getting so there's our natural light approach and our flash approach to the same crappy light. And if you guys look up, this is kind of really world bigger commercial production scenario to I mean, it was amazing to see the creative life crew build this thing in twenty minutes while you guys were like, let's, run to the fridge to grab a drink. These guys are, like, let's build an entire commercial set out in the heat. So hats off to you. Access incredible. Thank you very much. Ish minutes. Right. Very sort of created rainforest in twenty minutes, we're all getting drinks, thank you very much. I like you you think that's awesome news. So buddy scenarios and you gave us so many different options between the two of you and I think I keep saying that over and over and over in the global thankyou card on facebook and also in the chat rooms is that they love that two of you shooting nikon and camera totally different like approaches to lighting technique. Uh, photography and you're giving everyone a solution and so there's something for everybody out there, and I hope you guys are all taking a lot of notes because this is awesome. All right, we have time for a couple of questions from the internet, so the first one is from paul in seattle asking if you live in a cloudy area like seattle. Yeah, right, right on and you're getting started. Do you recommend getting one reflector er and learning that first or getting a speed light and modifier and learned that what would be your biggest recommendation will start in doctor, you get one piece of gary learned it inside now at a time because I mean reflectors like your bass like you, you've got to start with understanding how to modify the natural light because then you build on top of that, but if you don't know how to modify what's already there, then you shouldn't be adding additional lights once you understand how to modify that, then sure go ahead and add lights yeah that's why he's so good and I mean, if you look at these shots they're all have reflectors in it so yeah, okay, awesome and ah, another one someone another person another someone the best eric how or when do you decide to use reflectors a natural light versus balancing the ambient with flash on a cloudy day? Just preference it is a feeling that it was most the time we'll use flash because it's consistent results you can dial it in and if you put it on manual motor detail with compensation you know that you're gonna have that nice direction nice quality of light every single photo where I just shot a lookbook over in new york in central park it was came out when I was like, ok let's shoot the entire thing natural light well, it needed some consistency to it and I had cloud directs on that cloud direct sunlight the entire time so it was a little more difficult than it would have been had I brought out big strobes. Um so strobes give you the consistency and you're not at the mercy of what the weather is doing, and one thing that I would add to that as well is if you're using a stroke, for example, for phil sometimes you don't get that sense of environment as much. So if you drag the shutter a little bit and let the ambien interact with that subject, they feel like they're in that scene in that environment versus just tryingto light them and do the phil and the key light with a stroke. So sometimes it feels a little more realistic to do that. If you're really good, you can fake it. But sometimes it takes more effort than just allowing some than the ambient light to record on the subject.
Class Materials
bonus material with purchase
Ratings and Reviews
Victor van Dijk
Besides all the more or less 'technical, theoretical stuff', the greatest thing I'm taking away with this outstanding course is the plain joy and FUN of trying all sorts of (crappy) lighting solutions!! Speaking for myself, and I suppose also many others, as an 'advanced beginner', I strongly tend to end up to my eyeballs in all technical nitty-gritty, gear 'n' stuff, that I totally mis out on all the sheer FUN of trying out, and often 'muddling through' all kinds of lighting setups! Such a joy to see the fun exchange between Lindsay and Erik! Really catchy. There should be more classes and courses like this, redirecting students to what it's actually all about: sheer creativity and fun! Having said that, Lindsay and Erik demonstrate that there is hardly any crappy light situation that can't be overcome by creative thinking. And more often than not, it doesn't have to be high-tech or difficult! They really showed an exhaustive list of crappy light situations AND their solutions. And I highly commend Lindsay and Erik for their fun energy, and even more important, pragmatism and frankness. I recommend this course to ANY photographer AND videographer, no matter 'beginner' or 'highly advanced'! Lighting is the basis of it all, and most of the time, it isn't perfect...! I highly re
Julie Addison
I thought I understood about light before I took this course. How wrong could I be? I have re-watched this course over and over and I just love it. Quality of light, direction of light - so many crappy light situations. Learning how to actually set a white balance instead of purely relying on the camera presets and learning colour correction by the color checker was also invaluable to me. This course is so affordable. I would recommend it to anyone from beginner to advanced as you will get more out of it than you think. I love the way Lindsay and Erik work together. No right or wrong way - just showing the differences in their styles to accomplish the same end result. Well done guys. Now to have more courses by Erik would be great. Again, can't' thank creative live enough and Erik and Lindsay for this course. Love, Love, Love It!!!!
a Creativelive Student
I hope I can tune in tomorrow. Erik and Lindsay, you guys were awesome today. Some of the things I needed some refreshing on but you definitely had a way of educating. I thought the demos were great and really validating. Light is a difficult thing to keep on your good side, especially with me, someone who primarily uses ambient and available lighting scenarios. This course is great and I'm planning to tune in tomorrow because I really want to see what you have in store for outside. Best of luck guys!! -Sim