Lessons
Day 1
1Class Introduction
32:47 2Crappy Lighting Conditions: Direct Sunlight
27:47 3Crappy Lighting Conditions: Fluorescent and Mixed
21:00 4Crappy Lighting Conditions: Low Light
29:21 5Crappy Lighting: Dappled, Backlit, and Overcast
12:32 6Setting Your Camera Up for Crappy Light
27:43 7Shoot: Fixing Fluorescent Lighting
06:16Focusing and Shooting Modes
18:35 9Shoot: Mixing Daylight and Tungsten
23:16 10Getting Started with Flash
43:30 11Shoot: Low Light without Flash
19:43 12Shoot: Low Light with Flash
16:49 13Recap and Q&A
16:37 14Crappy Lighting Condition: Backlight
33:16 15Crappy Lighting Condition: Low Light Outdoors
24:10 16Shoot: Direct Sunlight
37:20 17Shoot: Direct Sunlight with Shade
05:47 18Shoot: Direct Sunlight with Flash and High Speed Sync
25:35 19Shoot: Dappled Light with and without Flash
28:57 20Shoot: Open and Covered Shade
11:29 21Shoot: Overcast without Flash
23:50 22Shoot: Overcast with Flash
30:04 23Recap of Shoot
1:40:16 24Scenario Kit: Event
27:44 25Scenario Kit: Wedding
20:56 26The Next Step Slideshow
24:52 27File Managment and DNGs
12:02 28Creating Color Profiles
27:56 29Noise Reduction in Lightroom
12:59 30Using a Color Checker
23:32 31Post Production: Basic Adjustments
25:19 32Post Production: Smart Objects and Color Processing
25:29Day 2
Day 3
Lesson Info
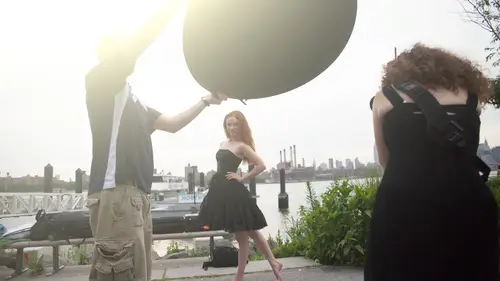
Shoot: Direct Sunlight
This is not nice at all it feels nice, but it doesn't look so nice and so I'm going to break down how it would approach direct sunlight when I don't have shade and so we've got like, some low foliage here a little bit, but you're photographing a group of people especially you couldn't get them all in the shade easily and so what we're going to do is we're going to break apart the steps that I would take with dealing with direct sunlight with no shades so let me see your models doing high, all right? Lovely. I'm just going to bring you right out here perfect and take one step to the right and I'm gonna have actually face me. Okay, so the idea here is I'm trying to work actually take two steps back to make sure the cameras can see you okay camera's already good. All right, so the idea is a horrible light on her face, although I will say from the fashion photographer and me, I have photographed plenty of times or of a shooting in direct sunlight. I changed the high contrast black and whit...
e I'm actually going to take a shot of that, you'll see okay, I'm gonna take a shot of it just you guys conceal later in post what I would do it, but if her portrait especially if they're not young and beautiful and fresh skin might be a little bit too harsh. Let me grab my camera here. Okay. Right now I'm going to shoot the sigma eighty five millimeter. One point four lens. I'm gonna be nice will give me a pretty tight head shots so I can have nice, consistent distance in my photos and I usually will shoe at, like, two point two, two point. Oh, but for the sake of our presentation, maybe I'll shoot at but to pointing something that I know most people's lenses can shoot at, so you don't feel like, oh, I can't have that look. Is she shooting at one point for no two point eight? Um, and I do recommend if you can investing in lenses, I go to two point eight you'll thank yourself in the future. I know that all my early lenses were three, five, five, six and then later on it spending the money again to just get a better lens. So you actually save yourself money in the long term if you can. So we'll start off with this and skit directs perfect and I ve turned sideways and put your hand on your faith and just a little bit towards the sun that way perfect and close your eyes and hands up perfect in one more okay, so this is my super super crazy over exposed shot that I would never shoot for a portrait what I might do for a fashion shot so let's from then on not shoot that anymore so let's make this look good all right? So the first thing that I need to dio has changed the quality of that light it is crazy crazy crazy harsh um I mean, the shadows if anybody has even a little bit of wrinkles in their skin it will bring out every wrinkle or for example, if a guy hasn't shaved in a few days it's going to look even more intense if somebody has blemishes this really bright contrast the sky is going to bring that all out so what it might do to change the quality could be a simple as turning her around so let's start there I'm just gonna have you turn around stand right here perfect. Great. And so what I'm looking for when I turned her around is now the sun is at the back of her head and so at least I got the quality of the light on her face significantly better now since she is blonde right now if I photographed this without any phil that is absolutely going to mean her harold basically disappear it'll be become extremely overexposed and light but if you had no other solution okay at least that's a solution something else to be careful of is when somebody tell them to put their back to the sun some people have sides of their face that they favor so let's say that I'm assuming she prefers that side of her face because that's where the party is and she does kind of till her face towards me that way go a little more extreme it turn your head ok, what? You need to be careful of our people that really have a favorite side of their face because if they keep if you put them to the son of the back of their head and I keep favoring it, their noses in the side of their face are going to catch those highlights and really, really bright sunny situations that's just going to go completely overexposed you won't be able to save it in post is not something that you can fix, so be aware of that right now right now attention this way perfect right now actually we're running into a situation that's not such crafty light because if if cameras can take a look at the ground here, what we have on the ground is kind of this but it's neutral ish it's more or less neutral isn't really a color cast to it pebbled cement and it's not really light but it's light toned and so the sun hitting that ground is actually bouncing phil back into her face and if you can't tell that something you would look at is when I take a picture is looking at the catch lights in her eyes you'll be able to see the shape of the end of the pattern of the concrete in her eyes and that's what the phyllis so we'll take a couple shots just like that and that's perfect and you could look right at me take a look at these shots all right? So if you look at the back of my camera I'm shooting um africa priority and exposure compensation if I look at the back of my camera here, her face will look a little dark because the cameron doesn't quite know what to do because she's got her hair lit by the sun that is just out of control bright and then she's got decent light on her face what kind of cuts them in the inn to kind of puts him in the middle of your face is going to be a little dark, so if I don't have another choice, what I'll do is I'll pump up my exposure compensation in this point I'm going to do two thirds of a stop focus again and shoot again and see you'll see that the highlights go even more overexposed or I could go toe one and one thirds over for really high uh contrast light skin beautiful light on her face with hair is a little bit too intense so one thing that I could do is I could put a diffuser behind her head but what I'm going to do right now is actually try to compress the exposure what that means is right now her face is a little bit dim and the highlights behind her head or so bright there's such a huge difference that hair is going to be really, really bright the other thing is right now this is pretty for girl on it looks great for her that kind of nice flat even light weapons if I want to add a little contrast in direction of light, the other thing is in truly bad light where we don't have this reflective floor just turning her her face around she'll get reflected off of green grass or a blue building or whatever's around or maybe no reflection at all so we're going to try to build that back in eric would you assist me? All right so let's talk about how to use reflectors uh yes. So one thing that you might dio and you actually may have run into the situation before have you ever been somewhere where you're like oh look the ground looks nice it looks like night nice natural phil I like that natural reflector with them their chin is right so they have monster like it'll be a highlight underneath their nose ah highlight underneath your chin and it's not really flattering so what I would do in that instance is actually negative phil, which you usually I mean, I have traditionally thought of negative phil um in the studio we'll what we'll do is eat of that light so it prevents the light from the ground underneath her from bouncing up and it also eats up some of the late underneath her chin, which is good if you're trying to define someone's jaw line and so much cheekbones so I'm gonna take two shots take one right there and erik drop it good perfect. All right, so I took one with the negative sil and one without the negative fill it fixes a little bit, but let's talk about using a reflector so there's two main reflectors that I'll use on location and it's actually this is the reflector that I usually use maybe some varying sizes I would use silver and white here's the differences between the two the silver catches a lot more like it's a lot more reflective, which means that if it's a little bit of a dim day or you're trying to compress that scene ah lot and pump a lot of light into her face you might use a silver downside is and also it could be a good thing is it's a little bit more contrast a lot more contrast. Um and so the problem is that you come back to that problem with the sun where it's really contrast. So it brings out people's wrinkles and their blemishes and things like that. And so it's good if you need a lot of light and a lot of phil, but it doesn't usually look natural. Depends on what you what you really need. The white, however, is a lot more forgiving. The white just doesn't catch as much light and let's say that you can't be right next to her it's a group of people and you've got to catch light from further away. A lot of times, the white isn't enough light to kick back over a long distance, so I used the white a lot of times report because it's more forgiving, it has less contrasts. Um, but if I don't have a lot of light to work with what I've got to back up with my reflector, then I'll use the silver. So let's, take a look first at using the silver. Um, will you show what feathering is all about, right? This is what you see often and don't please don't be blinded, this is what you see often from people. Okay, we'll use silver reflector and think that they have to use it at full power basically they're thinking okay, I want to catch the sunlight and back it ah bounced back into her face and they just catches much as humanly possible and it's extremely bright extremely high contrast and I see that oh all the time they're they're thinking I need to reflect so I got to use the reflector as much as possible but it's not true what you actually want to dio is instead of using the full force of the light you actually use a corner of it you're using an edge of that light so that is what eric is doing here for me and so he was just using a corner and it looks significantly better you zoom in on the face really quick and we'll show like the difference of it so here's nothing further a little bit of feather and there's full power and he's only moving inches which means if you have, like a couple inches at most. So if you have somebody that's not a photographer, not your full time assistant assisting you they're just going to stand there like this and not pay attention they could go from being perfect too horrendous um so I try to educate people and I see okay see, this is good this is bad she teaching photography to whoever is assisting you, even if they're not a photographer, let them know what you're looking for. Um, the next mistake that I see with a silver reflector is people think, okay, I need to bounce light back into the face and so most commonly I see you close your eyes if you need to, um and try to feather a little, you know, no full power following lighting s o we are lighting using the reflector from below the problem with anyone you plagiarized gonna have you do that's keeping close. Okay, I'm not gonna take pictures when you do that emphasizes underneath her neck underneath her chin underneath her nose and that's emphasizing the things that you usually don't want emphasize making somebody's under chin area look larger. Which she's beautiful so it's not too bad, but somebody that let's say has a double chin will hate you forever because it was going to really emphasize that your eye goes to whatever is brightest in the picture as well. And so it's going to go right here and it's also going to make it look larger. Um, so you don't want to do that also, if you reflect exactly even straight, even with her face on too little right there a little bit lower most people like they know okay not to hold underneath her champion hold it like right there you know something's ending to the sign in the problem with that good and we'll take another picture to see link okay, close your eyes it's not oh yeah and you still see that you're using a reflector full power people are going to use c blinks every couple seconds someone for sure going to screen grab that face it is what is the hashtag talking now? Crappy light live yeah we're talking about the beyonc had to put in their contracts in seville approval pictures because she has like horrible faces all of you already got the the know nikon love facebook yes yeah okay anyway so you get a net of bad expressions from people is well um so my rule of thumb is if you're using a reflector it's try to get above their heads so you've gotta have your assistant actually being assistant I'm going to try to get from an angle downward and father just a little bit more what better good and can you pull up brown front just a little bit more for me right there perfect a little loop rembrandt there we go and exactly if you know studio lighting you can actually see and so what reason I had him move a little bit farther from the side this is supposed to be a bright sunny day and so the further off access your reflectors so if off axis from her face in the camera if the reflectors all the way over there it's going to be almost split light now okay it's still bright on the side of her face it's not exactly, but they'll be a really big ratio difference between the exposure on the left hand side of her face and exposure on the right and so it's more dramatic and it's not the high key flattering light that you usually want so the closer that the reflector comes to the camera the flatter the light gets, the less shadows you get and so it kind of depends if you want something glowing and more less flat for girl and ready open them now perfect you would have it kind of like you would in the studio for, you know, paramount lighting butterfly lighting where that light is right above their head create a little shadows under nose and that's the shots that I just got there and so for a guy sometimes on location, maybe if we're going for a little tougher manlier look, we will take the reflector off to the side but you cannot just arbitrarily place the reflector saying like then wherever you get light doesn't matter like it makes a huge difference from the side and low is not good okay, so let's take a look at argues of, uh, white reflector. So eric is actually really good reflector assistant I live by these, they're awesome. Um and so when he was using the silver, he was using it in a way that wasn't too bad he was using the edge of it, he was catching it, so it wasn't so contrast, it wasn't so bright, but for a day like this, if I could get close up shots, I will definitely use the white. It is much more flattering pretty a little bit more, eric a little lower, right? They're beautiful. We take one more, your eyes look great. Perfect, so we'll take a look there and to see the lot last contrast, but have the amount of field that I wanted because I was trying to close down my exposure just a little bit to try a darkened down her hair a little bit, he had to be like, right there now, let's say that I wanted a full length shot with the white it it's not I mean it's not gonna happen, you wouldn't be able to do it. So that's kind of where I would start, I'd say if you're looking for something that's just a little bit of a flattering phil, or maybe I just want to take a little more light in her eyes in a situation put underneath kick a little light in with white so it won't be that bottom let look that you get from using silver underneath um then that's how I would use the two of those but let's talk about if I'm tryingto light full length so can use that first and step way back okay so here's the deal if eric steps really really close to her and reflects it's only going to hit her face and it's that bucket example I've used many times before you've got your bucket of water and you're throwing from right here it doesn't have time to spread out so it on lee hit her face first if you take that bucket of water way back where he is he can like her more or less evenly on her entire body depends on how much light he's trying to kick in he's actually doing an excellent job thank you eric all right so I'm gonna grab a shot of this uh I have an eighty five on I'm just gonna back up one more step just get like a mid length shot good one more cool oh whoa I was still exposure compensating hold on straight this because my face perfectly there and open up a little bit perfect perfect okay so looks really nice he's able to step way back and use a small silver go for it you know we got like their circle in the square ones and things you'll notice that I would had it lengthwise because we're basically bringing the intensity up and down with the bottom of your reflector, usually so you can get the taller, skinnier ones to help you out a lot in that inn stints or the screaming jim's actually set up as, like a six by three if you want to have full back. Yes, absolutely it's ok, so so here's the thing. So you take something like that and you back way up in some situations, there's not enough light, and I'm sure you've run into that. Is you trying to back up tio evenly? Spread the light out, but you back up and there's not enough phil's on your friend and it's, only hitting in a party of six people it's only hitting two and then you're okay, so that's an instance where you would need a large reflector and I'm not sure there's several brands that make the tall, skinny one is, you said you've got a scrim, jim, that you could make it tall is getting for a full length for one person, there's some fold up ones that exist, but then I think a lot of times are really hard to wrangle, like the big fold up ones because my arms stretch six feet line. And so I can't really figure that out so you should what I do is I take my scream jim on location with me and the scrim jin has a number of different fabrics that you could put over it, so you do have the diffusion we're going to talk about in a little bit or you have silver, so if you wouldn't have that with john's around feel grab that this is going to give me a much larger bucket of water so I come back way, way out but I'm gonna tell you guys watch your eyes because it is nucular it's gonna be really bright okay, so he's gonna try to catch an edge okay, so and let's catch a little felt the temperature go off like that. I'm sure twenty degrees good and so he has no hopes, no problem absolutely no problem should again perfect good that's perfect a little bit sorry audience members you guys probably ended that's good and we take one more contesting out the different exposures. I like cece that case we try something like that. So as he's backed up he can either use it to like blast the whole group or he can use it to get part of her full length. The other thing you khun dio you flip it for me the other side of it is going to be kind of ah, what is that? Is that is a collective white silver kind of it's a silver. Wait. I'm sure you guys in those reflectors a kind of mixed between the two it's, not matt. Like smaller ones. Yeah. So, let's, try this again. And so this is going to give you a much gentler phil, but notice they've got to come in that's going to sound a little bit good. Something perfect. Okay, so it's going to give you much softer, phil, but they have to move in. So those air that the, uh, different, uh, things you have to sacrifice, those actually do break down decently small. Um, they break into little pieces so you can put them in a carrying bag. We fit in the back, your car and not too difficult. Um, but this is to be the approach that I would take at least get her back to the sun. If I can. Then I would either use a silver reflector if I don't have much light to work with a white reflector. If I have a lot of light and I want something softer than try to get a full length shot, I would back up and it would you silver white, depending on what I needed. And ideally, if I'm backing up, grab a bigger reflector, okay, now, something else to keep in mind as well is to his moment, mind if I move over here? So I'm just gonna bring her over here? This is our fake white wall, ok, but it actually is a white wallace is something we're doing using for later on. We'll bring you right here. So I'm gonna take a couple shots of her face, but right now, the light is heavenly and even on her face when she faces that way because what this is this is the natural reflectors I'm talking about. You're on location. Look for this, of course not a giant weight sale, but you're looking for a large white concrete wall or, uh, light colored brick or you're looking for the side of a white moving van or you're looking for anything like this hit by the sun, and what you do is you go okay, so look around. All right? Where is that large white surface being hit by the sun and you put your back to it and you stand your subject, you take a couple steps that way back up, maybe like, three more feet, double, good, perfect, all right, so when I have her further back, the light's going to be dimmer on her face if I need it to be brighter I've got to physically move her closer so I can't move the fifty foot wall and I don't have my bucket or my reflector um the eric was holding to move back and forth so now I've got to actually do it with my subjects feet so let me stand right here and turned by this way just a little bit and watch your feet for the there we go okay and let me take a shot here open just a little bit more good only move my focus point cute okay that's good open up a tiny bit more I'm trying to keep the exposure it seems you guys and see the brightness difference alright so that's what it's pretty dim on her face but if I bring her come this way will bring you closer coming this way so she's moving closer to that wall good perfect already okay that's good I would say already that's probably a stop and a half of light brighter as she moved closer and she only stepped what five six seven feet has to make a really big difference take a look and I'm gonna lighten up just a little bit that looks perfect oh that's beautiful I like that thank you um this is probably an instance if you could actually see my lens if you can see light on my lens that means I'm getting less lor it doesn't mean when I see lance where it doesn't mean like the bubble highlights in your lens or the streaks of light, it means that light is getting into your lens, bouncing around and decreasing the contrast this would be a situation where you'd want to use the lens hood um what eric and I do not recommend is I've seen a lot of these proprietary things that are the the little old monkey arms arms that you attach like you put it in your hot shoe and it puts an arm that can put shade over your lens. The problem is if you're photographing, say, where eric photographs like on the beach gets a little bit windy if you're shooting even slightly lower shutters, speed and it's getting windy that's gonna act as a sail and actually give you, um a little bit of camera motion, even at a fast shutter speed if it's a lot of wiggling, you'll see it in your image so that's going to stay away from on the other thing you can do and I have done this sometimes is sometimes your lens hood isn't enough sometimes maybe I won an angle I'm getting down low and there's like I was some kind of structure in the background, right something that I want, including my composition, so get down low here and I'm pointing back at the sun and my lens hood is not going to save me that's when I would have a lovely assistant come in and maybe hold the reflector or a piece of foam core or something like that for me to block it off. Um, it can even just be their body, like if their body blocks out the sun, they came to stand there and do this. It doesn't really matter, but tryingto watch your lens, um, gives you, like, better contrast in your frame. Perfect, beautiful. And so this would be my ideal kind of like a gigantic soft phil. All right, so I think that's pretty much everything that I would do when I cannot get the subject in the state, and I want to put the lights in the back of their head, but let's, say, if I can't get the light to the back of their head because it's high noon, so every direction is straight down on their nose, and I can't put them in the shade, we're going to take a look at that and how I would diffuse and soften the light so let's, see if there's any questions that we might have right now, okay, there are a ton of questions people love this on set, and, uh, uh, on the shutter of giants asked, how would you manage a large reflector in windy conditions? Okay, perfect. Um, question was about managing something like that and windy conditions? Um, not easily. Um, I'll see if you have any tricks. Usually what I do is either if it's people holding it it's having it so it's not catching the majority of the wind it's trying to angle it so that its aerodynamic kind of like a plane basically so that it it crests over it. Also, if you're using stands there's sand bags that have you, you don't have to be really heavy sand bags. Um, but there's a little portable ones that'll help out? Um, if you can find a way to put it up, maybe against a tree or something that stable so that your whoever your assistant as rivers help you isn't the holding the whole thing, maybe there's holding a corner of it and pushing it into that yeah, e don't with that. Last week, we were doing the hollywood sign photo that we showed in the slide show yesterday, so we're shooting up in beverly hills, and I mean, it was the wind was gusting through there, and we have that's exact six foot six, six by six panel um, and you normally have your assistant hand hold it when there's no wind it's easy enough and it's faster to work but when you have wind, they're constantly fighting it's there's gonna be a lot of inconsistency there, so when you have a bigger reflector or a bigger diffusion panel, you're and there's a lot of wind you're gonna want to make sure you put it on stands like lindsay said, whether you have sandbags or whether you have people hold it stand is going to make sure that it's staying there rather than a person fighting and giving back and forth of it so it's inconsistent the stands, the heavier the wind, the more weight or having assistant actually stand on the stand. But the stands are going to give you steady, consistent photographs versus a human being back and forth fighting it were one second it's in shaved one second it's not so in high wind, you're definitely gonna want to put on stands in sandbags. Awesome. Well, I hope mary ellen from connecticut, as well as kelly bird and a handful of others are asking about shooting the same thing with large groups. And I know yesterday we talked about using the white wall of the church or the sand you have any suggestions if you were out in the courtyard like this and you were working with a a large group, I mean, my my first go to answer would definitely be trying to find that large reflector like actually even this would work if the courtyard has anything like this ground. When I turned around, the light on my face is actually pretty decent. You just have to make sure exposing for their face and not for the background. Um, that might be an instance where, you know, if you can get a big reflector and backup or might be a flash situation, definitely five situation. Yeah, if you've got on that, be a perfect place to bring some flash and I usually don't have to go on it's most of time, I'm able to get away without that, it's just depends on the look they're going for and and that's what we're talking about two aa lot of people for family portrait will pick a photographer that has that right high key, completely blown out background it's really natural? They don't care that the hairs blown out because that's, they're not photographers or not looking at that, they're looking for the interactions other people want something that shows complete control. It looks more formal so you would have to use a flash, try to compress that dynamic range and so it's. It does fit your style, but make sure you can do both for sure said if you need to do one or the other, you have both at your disposal great uh, question from chris walt and this is referring to when you were using the reflector on our model earlier is feathering putting the centre of reflected light to go past the front of her face the part of the reflector we're putting it on her face okay, like describing my shuttering? Yeah, three questions so feathering is making sure that center or whatever is catching the most light is not on her face feathering is tilting at whatever angle so that that core beam of light is passed her or even out of your frame just not hitting their face nose going to be careful of is if you're feathering and you have your reflector and instead of feathering to the side past somebody you feather up or down if you feather down, you're like him here and so I see that all the time especially the big problem is when you're photographing brides, you'll see an assistant and the assist you'll say the assistant okay feather light off the bride's face and so instead of feathering till after right they'll tilt it down and then this bright white dress becomes completely blown out, so for me feathering is usually a slight movements till after right a lot of people haven't heard the term before think about it in photo shop where you have your brush hardness or softness you have that feathered edge so that's essentially we're talking about is using the soft feathered edge of your light rather than the hard concise theme that you wouldn't like a tight photo shop brush versus one with a rounded edge so otherwise we haven't heard the terminology that's place you've seen it every day of satin edited photos awesome uh one more question and then we'll hand it back over because jean f s um what if I've noticed that lindsay is shorter than our model and that is probably a less flattering view if someone were a little bit heavier or self conscious what would you do in this situations okay hey don't pick on me for being sure e way have apparently have an apple box on set for me being short I'm gonna show you what that means this is what an apple boxes it's basically like a stool for little kids but for an adult from photography but I actually uses all the time in the studio if I'm trying to get like a angling down photograph of someone's face or a photograph a lot of professional athletes and so what would happen is if I'm sitting on the ground photographing them up at them in my studio I used to get the ceiling and so when I'm up at more at their eye level, I can actually shoot high level, and it wasn't a problem. Um, most the time, if okay, so for someone like her skinny and tall, um, it's not as much of a problem, but another solution as well is if you're short and you can't get up higher, okay, you could have somebody sit, but also if you back up really, really far and zoom in, um, the perspective is more flattering because let's say, if I'm shooting here, being short looking up that somebody I'm shooting more of their chin versus of him at a distance further back it's not really shooting up it's kind of shooting more flat to them, so it's it's significantly less, um, exaggerating the chance you'd use a longer lands and back up an apple boxes are a studio tool. You see them in studio all the time, not so much on location, unless you're you know, you've been in a studio, you have, um I still carry around just goto, like home depot or wal mart and get a collapsible step stool or small step ladder, and I keep that in my truck, my car, I bring that on location with me all the time because I'm six, two and a lot of the models are taller than me some days on set and otherwise you just want a different perspective so I've been able to get a different vantage point isn't necessarily about hide all the time but more kind of story you're trying to tell her the angle you're tryingto have your viewer perceive the your subject so a step stool or an apple box definitely have with you all the time it's a good point I definitely didn't think that I always have a sub sel I you just think of it more for perspective versus the fact that I'm sure yeah no picking on lindsay invest in a few abba boxes way are excited to see what you're going to do now. Eric okay, awesome well first we're gonna d'oh d'oh d'oh if we can bring stuff in the shade right we're gonna create should do the objective fusion first but thinking yeah because I'll piggyback on that with um so I'm gonna keep going um and I'm actually going to show okay what we did so far as we turn her back to the sun and we use a natural um reflector although this one's not natural but natural selector using a reflector um using white using silver and we went through all of that okay, what happens if you can't use any of that or it's just not playing working? There actually are a couple of things so if you'll step a little closer perfect right here. Okay, so I'm going to put her in a very unflattering light situations if you look at me basically what I'm getting is a highlight on her nose tiny light on her eye and just basically the side of her face it's not not going to be flattering so let me just take a shot so everybody can see what that looks like. Okay, so yeah you all see not so nice. All right, well, the first problem that I want to try to tackle is the quality of light is the first day I'm like okay, so let's say for some reason I can't turn her around or a big one is if I turned her around maybe there's like a garbage can in the background I'm doing a bridal portrait and that's definitely not the background I want or her facing this way is that beautiful mountain cliff and that's got to be the way to go so what I would do is I would open up this wonderful, amazing tool that we talked about yesterday if you missed it. Okay, well, this is much nicer way should do the rest of you stand like this that's really good um this is the west cut seven foot shoot through umbrella parabolic we're looking for on the website yet and we talked one of the reasons it's so great is well it's less than a hundred dollars which is awesome I think it's about one hundred well I've seen it for a dollar shot so it's great um one of the things that's less expensive now it's still tall but it does collapse pretty it classes so it's easy to carry its light and one person can hold it okay, perfect. So one of the people was asking what do you do if you have you know these big um scream jim's or things where you need multiple people to hold it but I just need one person all this although trust me if it's windy it's not gonna be a problem you just want to make sure the winds blowing this way they're not holding it over their shoulder you maybe kind of lean into it instead of catching in the sale so it would be something to be careful as well. So the first problem that I have with her is that bad quality of light so I'm just gonna have eric hold that over her face and oh my gosh, huge difference night and day and we're still using that natural reflector though two we've got perfect well more yes great point and eric makes a great point something to keep in mind is there's a lot of nice phil on this side of her face because that's still catching light if it's not there it's not that it would look bad or anything it just would be darker would be kind of a higher ratio between so here's a great example so he's actually hold pretend that there's not reflection they're perfect and our came of you're just a little bit to the right perfect a little higher on that perfect war okay, so you're able to see the difference between those two all right, but something that people really really miss all the time is that just because you soften the light doesn't mean that it's really flattering. So for example, if you've got a client or yourself or somebody who doesn't like their nose and does not want that to be the center focus of the image right now, it would be even if you defused the light because it hasn't changed the intensity as faras the ratio meaning the nose is still gonna be the brightest it evens them out because it's often the light there won't be much contrast the nose will still be brighter and it does not change the direction. So when I look here would you open up one more time when I open this up now shoot one more time who's before they do before you met me before all right now do after if you look the highlights still on her nose, the highlights still on her cheek so you have a couple things you could do first of all do you look that way perfect a little bit more and chin up a tiny bit great I love that much better much better lay in her face so all I had her do is instead of looking straight for it at the camera I had her turn left and that meant that it wasn't just a highlight on her nose or her cheek it meant that it's kind of on this full left hand side of the face here and there also a little bit of rembrandt on this side but I still had shadows in her eyes because that were it like almost at high noon here it's not going to change the direction it just softened it soften the quality so I had her lift your chin up a little bit that would be one of my solutions and so it looks I mean, this looks beautiful this would be an ideal portrait for me. So do one looking up in a way and do one looking at me so looks great. Um something else that you could do is well, like right now I am creating this is something where I could sit somebody down um and shoot down so if you don't mind, can I sit on the stool over here, okay, so it but still I mean bench common room in distance. Okay, perfect. So something I like about this and I'll do this a lot for portrait is baby, it seems a little awkward to sell tell somebody okay, uh look up with this guy and then click your eyes back at me because you're trying to use the light for diffuse light like it might look a little weird. So I said, if you sit somebody down and then you're out slightly higher angle, maybe on the apple box or maybe just where your standing there automatically looking up at you sew their eyes will automatically catch the light. Could I have that little stool and I could do this standing ijust want exaggerated a little bit perfect, so I'm going to do one from shooting down here look right at me perfect and we do one from here and looking up at me into some perfect good and to have a little more get perfect. So as she is looking down she's got a little bit more shadow to her face. One of the problems is this isn't as crap you're late as we would like because this is still filling from below but normally let's say it's completely black there's nothing reflecting here if she's sitting down and her chin a straightforward she's gonna have shadows in her eyes at high noon, even with diffuse light what if you get up in a high angle? She has to look up at you and the diffuse light's gonna be soft, and it fills in light in her eyes. Now you want to hear one more shot, one more like this. I'm going to the three side by side, okay, here's one okay, fuse to and then three look up at me, a little more perfect, really beautiful, very flattering, and because the background goes to dark behind her, it's really nice. She definitely has a lot of contrast there, so take a look at those kind of comparing the differences.
Class Materials
bonus material with purchase
Ratings and Reviews
Victor van Dijk
Besides all the more or less 'technical, theoretical stuff', the greatest thing I'm taking away with this outstanding course is the plain joy and FUN of trying all sorts of (crappy) lighting solutions!! Speaking for myself, and I suppose also many others, as an 'advanced beginner', I strongly tend to end up to my eyeballs in all technical nitty-gritty, gear 'n' stuff, that I totally mis out on all the sheer FUN of trying out, and often 'muddling through' all kinds of lighting setups! Such a joy to see the fun exchange between Lindsay and Erik! Really catchy. There should be more classes and courses like this, redirecting students to what it's actually all about: sheer creativity and fun! Having said that, Lindsay and Erik demonstrate that there is hardly any crappy light situation that can't be overcome by creative thinking. And more often than not, it doesn't have to be high-tech or difficult! They really showed an exhaustive list of crappy light situations AND their solutions. And I highly commend Lindsay and Erik for their fun energy, and even more important, pragmatism and frankness. I recommend this course to ANY photographer AND videographer, no matter 'beginner' or 'highly advanced'! Lighting is the basis of it all, and most of the time, it isn't perfect...! I highly re
Julie Addison
I thought I understood about light before I took this course. How wrong could I be? I have re-watched this course over and over and I just love it. Quality of light, direction of light - so many crappy light situations. Learning how to actually set a white balance instead of purely relying on the camera presets and learning colour correction by the color checker was also invaluable to me. This course is so affordable. I would recommend it to anyone from beginner to advanced as you will get more out of it than you think. I love the way Lindsay and Erik work together. No right or wrong way - just showing the differences in their styles to accomplish the same end result. Well done guys. Now to have more courses by Erik would be great. Again, can't' thank creative live enough and Erik and Lindsay for this course. Love, Love, Love It!!!!
a Creativelive Student
I hope I can tune in tomorrow. Erik and Lindsay, you guys were awesome today. Some of the things I needed some refreshing on but you definitely had a way of educating. I thought the demos were great and really validating. Light is a difficult thing to keep on your good side, especially with me, someone who primarily uses ambient and available lighting scenarios. This course is great and I'm planning to tune in tomorrow because I really want to see what you have in store for outside. Best of luck guys!! -Sim