Lessons
Lesson Info
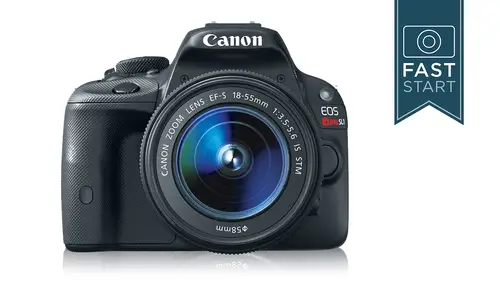
Displays
We're gonna be talking about what you see in the viewfinder and what you see on the back of the camera because this is how the camera gives us information about what settings are set and other things that are going on so the viewfinder and the lcd monitor the two areas that we're going to be looking at and first off we're going to be looking at the view finder so when you hold the camera up to your eye what you see in the frame so the frame itself is ninety five percent accurate you were actually getting five percent mohr area around the edge that you can't actually see this is kind of a safety precaution so that if you put something on the edge of the frame it is going to be there most definitely and then some so be aware that it's not one hundred percent accurate some of the top of the line cameras are one hundred percent accurate but ninety five percent accurate in this case next up are the focusing points and we've kind of already gone through the nine points and how to change them...
and we know about the centre one being the best because it is a cross type sensor it's the on ly cross types answer there is a circle in the middle which indicates a spot meter in area we haven't talked about metering yet but the way the camera reads light is usually through a multi gritted area that's looking at the entire scene, but if you wanted to just measure the area in that spot meter area, which is just two point six percent of the entire screen, you can get that tight reading in there of a light reading. Not as many people do that these days, they did it a lot more back in the days of film, when we weren't sure so sure about our exposure readings. Now, down at the bottom of the camera is the led information. Hopefully you will never see it lit up the way it is here on screen. This is kind of the entire compilation of what you might see in here, so let's just quickly do a run down of what you're seeing from left to right to start with a little asterisk is thie auto exposure lock button that we talked about on the back right shoulder of the camera, so if you're locking the exposure by pressing the button in, it will stay locked in for about six seconds. If the flashes up and it's ready to fire, then you will see a lightning bolt in there. Next up, we have something called high speed sync and if you recall a few minutes ago or how long ago was now, I told you that the top shutter speed on the cameras one two hundredth of a second I was lying to you at the time okay? The camera can actually fire it faster shutter speeds but you need to stick on a special flash and you need to put the flashing a very special mode and you can use shutter speeds like five hundred two thousand two thousandth of a second and it goes into a whole kind of special effects area that we're not going to get into but you have to have one of the higher and flashes hooked up to the camera in order to do that and we can also do something called flash exposure lock not something something else we're not going to get into very much but what happens here is the camera will fire a police pre flash and it will check the exposure and make sure it's right for the following picture for so so if you do a lot of flash photography you may want to read a little bit more about that in the instruction manual flash exposure compensation allows us to power down the flash or power up the flash if we do make a change there's a warning here to let you know that you have made some sort of change and then we're going to simply have our shutter speed and normally this is going to be the first number we see on the left so if you see five hundred it means one over five hundredth of a second when you talk about shutter speeds, in most cases they're fractions sixty means one sixteenth of a second, we then have our aperture and these air fractions as well, so you might see two point eight, four, five, six, and it really means one over two point eight or one over five point six we next have this kind of gritted area it's, the exposure level, which I like to call the light meter, and it's going to show you whether you are underexposed or over exposed. So if you are using manual exposure or you're using exposure compensation, you want to pay key attention to this to start with. As faras exposure goes, you might want to have the indicator right there in the middle, marking right between the two ones as you shoot with pictures, shoot images that are brighter and darker. You're going adjust settings on the camera, it's kind of beyond the scope of this class to go in there and explain all of that that's a lot more on my fundamentals class, but you'll be using that in the more manual modes d plus basically means there's something called highlight tone priority turned on its where the camera goes in and plays with your images and the exposure I'm going to show you some examples of that in the menu setting, where we turn that on and off we have our eyes so speed set so you see what I so you're at if you have your cameras white balance adjusted in an unusual manner you can tweak it and this lets you know that you have tweaked it we're going to be doing these adjustments in the menu in a little bit you can also shoot to black and white if you want so if you want black and white photos right out of the camera you can turn your camera to that mode but you normally wouldn't want to have it in that mode and that's why they give you a warning in here so that you can see if that is turned on the number to the far right is what's known as theme ax burst or the buffer on your camera? This is how many pictures you can shoot right away before the camera even stores the picture to the memory cards and when this camera you can shoot upwards of twenty eight photographs in a j peg format before the cameras buffer fills up yeah when you shoot pictures the can the images go into the buffer and they immediately start getting written to the memory card but you can shoot faster then the camera memory card can record all the information and this is how many images we can get in there if you shoot in the raw file format, you're going to get between seven and eight pictures depending on how fast your memory card is in there, so for a sports photographer, you'll probably want to be shooting in j peg so you could get more images. If you want the highest quality in the camera, you'd be wise to use the wrong motive. We're going to get into raw and j peg, when we get into the menu setting, where we actually make that adjustment in there and then finally there's a green dot and over on the far right hand side, and this is just basically you're focused confirmation that lets you know that you're in focus, and this also works in manual focus, so for anyone who wants to manually focus and they're trying to check to see if it's really right, and if their eyes are correct, just take a look over on the right hand side and you'll see that turn green when you have hit focusing spot on now, it is looking at what is in the focusing points that you have chosen even if you are in manual focus, so I would probably line up using the center point and then use that to point it at something and then manually focus all right, so now we're gonna be going to the back of the camera, the lcd monitor and the main control that we're going to be getting into work with this is the quick but nor the cuba and which is for the quick control screen now you're going to be using all the usual suspects here in navigating and moving around, so you're going to be using the up down left, right keys you can use the dial up on the top of the camera. Some of these kind of overlap on things that they do, but that's, how you're going to navigate through all of the things were about to talk about. All right, so on the quick control screen, the top row isn't really anything that you change it's just basic shooting information. This is your exposure mode, shutter speed, aperture eyes so the most important stuff for photographers right there, the exposure, the next line down is where you can start jumping in and making adjustments, exposure and exposure compensation. You'll see your light meter here moving back and forth as you are underexposed and overexposed. Where is this supposed to be? There's a little indicator that, well, very simply putting it under zero is a good starting point for your first picture, and you may need to go a little bit brighter, or you may need to go a little bit darker by adjusting it to the minus or the plus side from there on the right hand side is flashed exposure compensation when your flash fires on the camera it has them it's, a certain amount of power that it fires, and the cameras program is automatically figuring it out. And while it does a noble job trying to do a good job, it isn't always right. So let me show you an example here. All right, this is called t tl flash. This is what the canon camera uses and you, khun power the flash down by setting a minus one a minus two setting. Or you could be even more precise and do minus one and a third or minus two thirds. And you can see that in the t t l image on the left it's just a little bit harsh light on her face and backing the flash off a little bit to tt l minus one looks more natural but still is adding a little bit of it light into those eye sockets. I really don't notice too much difference in minus two, but in the next example, you can see that t t l really blew the exposure and over exposed her face because she's, wearing a dark sweater and there's a dark background on it. And in this example, I think t t l minus two looks more normal, so if you are somebody that does people photography, if you plan to use the built in flash I would experiment and play around with exposure compensation see what looks good for you. In some cases it'll be zero in some cases maybe minus one or minus two it's highly unlikely that will ever be on the plus side in exposure in that flash exposure compensation. All right, next line down we have picture styles for those who are going to shoot in j peg on this camera, you can have the camera change the color in contrast and saturation of your photograph it's kind of like in the old days of film where we would buy fuji or agatha or kodak film to get a different look, tow our pictures and this is where the camera is just simply adjusting some of the dials and controls of what the picture looks like. And so I'm not a big fan of this, and I just kind of leave it in the standard mode, and we're going to see this in the menu setting again, white balance is really important because your camera doesn't know what color lights it's shooting with, and so if it doesn't know what color lights it's shooting with, it doesn't know what color the picture is supposed to be, and so we need to often be aware of the color that we're getting back from our photographs and the way our cameras deal with this is through a kelvin scale and white balance your camera will have a number of settings for natural lighting situations, daylight cloudy and shader all slightly different, but there are settings for each one of those for unofficial lights. We have things like tungsten, fluorescent and flashlight. Tungsten lights are probably the most different light that you were going to shoot under on a regular basis is very orange, and if you're shooting inside your house and you have tungsten bulbs in your lamps, you're likely to end up with very orange looking people in your living room. And it is simply because you need to adjust your white balance to the tungsten setting to correct for that type of situation. So if you are getting funky color out of your camera, just simply go in and change the white balance to the most appropriate setting for the condition that you're in now. For the more advanced photographers, there are a couple of other modes that you can choose from. One of them is a custom menu, and in this mode, what you do is you actually photograph a white sheet of paper and the camera can go in and analyze that white sheet of paper and determine what color the light source is and how to counterbalance it and fix it in additional shots. There's more information in your instruction manual on how to do it. Now, despite all these modes here, which are kind of manual adjusted modes the mode that I like and this may surprise some the view is auto white balance auto white balance is where the camera automatically tries to figure out the white balance and sets it according to what it thinks is best and I like this quite a bit for a couple of reasons number one is it does a pretty good job it's not always right on the money and if it's off a little bit, I'll just adjust it by manually setting it. The other reason I don't mind it is I like to shoot in raw format, which is a format that records all of the original data from the camera and I one of the advantages of that is that it allows me to go back and adjust the white balance setting after I've taken the picture without any damage to the photograph and that's kind of a nice setting for those of us who want to shoot the highest quality possible in the raw city. Now if you do plan on shooting j peg in this camera you want to be a little bit more on top of the white balance and so you can start with auto white balance and if you're getting unusual results and you don't think they're quite right, then I would change him to the most appropriate setting and the way you change it is by simply hitting the q button navigating to the auto we're out to the white balance setting here and then pressing the set button and going in and selecting the most appropriate setting here and so it's pretty simple to dio leavitt an auto adjusted as necessary from there now they do have some additional techie things on the white balance is they have something called white balance bracketing and white balance adjustment the adjustment allows you to go in and fine tune the color of the different settings in there, so for instance, there are many different types of fluorescent lights there's cool fluorescent in warm fluorescent if you find that you don't like the look of cannons fluorescent setting, you can go in and tweak it if you want. The other thing you can do is you can shoot a bracket which is a serious of photographs shot at different white balance is this is completely unnecessary if you're shooting raw because you can go back the original data. But if you were shooting j peg and you really wanted to make sure you got the right color, you could shoot with the white balance bracketing, but I don't know if a lot of people who use that on a regular basis next up is something called an auto lightning optimizers, so I got a visual example for you on this one in this photograph, you can see that the auto lightning optimizers turned off and the shadows are a little bit dark. This is the natural, straight image out of the camera. If we were to shoot this picture with the optimizer turned on, it would try to lighten up the shadows. This is where the cameras program is going to look at your photographs and try to determine how it should tweak your photographs to make him look better and it's going to do to basic things. It's going to try to lighten up the shadows and it's going to try to hold back the highlights so that you don't have over exposed areas. And while this might be good on that particular example, it's not good on all types of photography because some photographs you want really strong contrast now this is something that you can add in later on, and so I tend to want to leave this turned off. I like to do my image mint manipulation in the computer where I have specific control over over individual images. I don't like to just turn something on and have all of my images like that one scenario. I like to keep him very straight and simple in there, and so I tend to want to leave that turned off. The next mode is theme eatery mode this is away your camera reads light all right the camera has four different modes you can see here on the left evaluative is the main one that I like what it does is it breaks the entire frame up into sixty three different zones it average is the different areas and it comes up with a good kind of recommended average for everything and it does a tremendous job in my opinion and so that is my one hundred percent pick here there is a partial mode which is a kind of medium sized circle there is a spot mode if you wanted to read in a very small portion for instance you were taking a picture of a bird in a tree and you want to just the light of the bird not the shading of the tree and so forth you could get a reading in that case with the spot and then there is a traditional system that older cameras had called center waited and it's best to think of that is just a big fat spot over the center sixty percent of the frame and so you can choose whatever you think it works well I think evaluative is fantastic with the ability to check your images on the back of the camera along with the history graham I think it's all that most people need for most of the time okay moving down to the bottom row of this we have our auto focus mode this one deceptively simple here but it's very important this is the way the camera focuses in the normal focusing system so when not in live you not in movie mode your camera has three options the basic option is called one shot this is where the camera will focus and it will stop focusing once it is achieved it on the camera let me do a little live demo here so on this camera here in front of me and let me make sure I've got it set up right got the auto focus turn on and I'm gonna hold it up kind of close to my microphone so that you can hear when it focuses it gives you a little chirp chirp and once it's given me that whole chirp chirp it has stopped focusing you could actually see on the lands it's not changing it all no matter what I do because my finger is halfway down that allows me to focus on something and then re compose a little bit and take the picture and so that's the one shot mode which is a really good system now the camera also has a I serve oh so let me switch my camera over to a I servo and I'll go down to the one shot mode and I'll just turning the top tyltyl it says aye aye servo back here and now if I press down halfway on the shed a release you can barely hear because this lenses so quite so hold it up really close to the microphone and as long as my fingers halfway down it's focusing trying to focus on anything and everything and so this is a sports mode if you're going to shoot sports this is the key thing you've got to go to a I servo so we have single for basic photography in continuous for action or sports photography now canon does include something else called a I as an artificial intelligent focus and what it does here is it kind of switches from one shot to a I servo and back and forth and most serious photographers don't like this mode because it switches back and forth and it doesn't really know what's going on for instance, if you're photographing a soccer game, players are often moving back and forth but they occasionally stop and so if you happen to focus on him while they're stopped for a fraction of a second the camera might lock on the focus and be locked here while the subject is moving towards you and then they're going to be out of focus and so I tend to avoid the focus mode basically because it's unpredictable and it doesn't get it right all the time and I think it's a pretty easy question to ask yourself are you shooting sports or not? It's really that simple and so if you are shooting sports a servo is very important if you're in the one shot mode you're going tohave about ninety nine percent of your shots out of focus when you're shooting sports because the subject's air moving after the camera has already focused so very important little thing here but it's a very important thing in the camera right next to that also something that we're going to be accessing for sports photography is the drive mode so this is what happens when you press down on the shutter elise you take one picture or does it continually take pictures now this camera has a reasonably fast motor drive for a camera of this nature so let me just make a quick change here and you can hear that we're going to fire this camera off at four frames per second all right and so that's four frames per second which is great for shooting sports we also have a silent mode and let me make a change here real quick so just for reference this is single shot and let me switch it over to the silent mode okay silent mode it's not really silent it's a little bit quieter on so if you were photographing in a theatre you might want to put it in the silent mode it makes just a smidgen less noise we also have a bunch of different modes for self timer and remote controls so if you do have one of the remote controls, the camera needs to be turned on to turn on the receiver. For that, we have two different self timers, we have a two second self timer, and I guess we have three we have a standard self timer, which is ten seconds, which is your normal run around. Get in the picture yourself. There is the two second self timer, which is good for working from a tripod so that you can fire the camera without any one more thing touching the camera when it actually fires. And then we have a continuous self timer, which allows you to shoot a syriza pictures so that when you do yourself time or sought, it won't just take one picture. It'll take up to nine pictures all at the same time. Well, not at the same time, all one right after another, so you could have a big group of friends and do something different on every picture, or at least make sure that somebody wasn't blinking on one of the ten shots that you talk or nine shots in this case. And so normally I just keep my camera in the single mode I flip it over to continuous for sports, and then to second is what I use a lot when I'm working on a tripod, so I don't have to buy the extra cable release and then the image quality. This is one of the most important settings in the camera. This is deciding what type of file type your camera records from the image coming off the sensor. The basic options. You have two basic options, either j peg images or raw images. If you want the absolute highest quality straight information off the sensor you want raw, but if you do that, you need to have the right software toe look at those images and do something with those images. Now the camera comes supplied with the cd software that allows you to work with that that those types of images aa lot of people don't like that software because it's it's, not the smoothest operating system in the world, there's. Nothing wrong with it. But a lot of people, like other programs like adobes, photoshopped light room, apple's aperture or a photo and all of those types of programs can read the information from this camera so that's not a problem. You can use wrong files with those my preference. I use adobe light room. I will shoot raw images with camera, I'll download them to my computer and I could look at him. I could work with him, I could do whatever I want with them, and I have the original data from the sensor now, if you don't have that set up and a lot of people who are just getting into this don't have that really set up yet on their computer, you're going to want to choose a jpeg image here, and so the largest jpeg images, what I would recommend so that large l on the far left top left with kind of that smooth curve indicates it's the highest quality large image possible you're using all eighteen million pixels on the camera. There are a variety of intermediate and smaller size is most people don't want to use those because it's just going to be a smaller file size. If you have a computer, you can downsize your image so that you can make a picture that's appropriate for email or facebook very easily. But if you wanted to do it in camera, you could shoot smaller file sizes and then finally there is something called rob plus j peg and this is where you get two files for every time you take a picture. I don't like this because it just clutters up the memory card with duplicate stuff. If you can handle roz, you probably don't need to shoot a j peg along with it unless you needed j peg for right away, so if you're going to shoot your friend's wedding and they wanted the highest quality pictures possible you want to get him raw images, but if they want a quick slide show at the reception, it might take too long to download all those raw images convert him to j peg put him into a slide show, and it would be easier to work with the j pegs right out of the camera, and so I don't recommend the raw plus shape, except for special exceptions for a lot of the users. I think they're going to use this in the large jpeg format, but there'll be some users who are really trying to get the most out of this camera just squeeze every bit of quality possible out of it, and they'll want to shoot with the raw, and we will touch on this again when we come through in the menu setting, because we'll be able to set it there as well. You can use all of the screen as a touch screen as well, and so this just kind of indicates the return. Let me do a little a live demo here quickly on the screen, so let me hit it into the queue mode and you can just simply touch what areas you want. You can return to standard, you hit the cuban, which allows you to go in and select any one of these and work with it, and so what I'm doing is just touching the screen. I have returned down here in the bottom right hand corner to go back to the main screen let's say I want to change the drive mode even a doubleclick will go to the motor drive turn the motor drive on get rid of that return back to the normal screen and we're ready to shoot if I want to make more changes I'll hit the cue button touch something and so it's very simple obvious touch screen in that regard and down along the bottom is going to show you how many pictures you have left and how good your battery is and maybe how much is in the burst mowed down there as well and so that is the screens and the displays on the camera and I'm ready for a few questions. Awesome. Okay, we have a couple for you. Of course as the internet always does for you jeannie is wondering how do I get to the quick menu? Okay, let me do that again. We'll do this live on camera and so uh on this let me just get this off, turn it on it's the cuba, the cuba and you just simply hit that and it activates the human you so that you can go in and either touch directly on it or you can use the little cross key multi controller to move around on it so that is a cuban okay, that's. Super simple. Next question is from birdsong. If I change from spot meeting to evaluative, then turn the camera off. Does the camera remember where I was when I turned the camera back on? Yes, it does. It keeps those in there. But if you were to switch over to the let's, say the scene intelligent auto mode well, it goes, it changes everything. But then when you come back, it will remember it. So yes, these things they're kind of sticky. They stay. Were you last left him? Okay, cool. And then last question before our lunch break from green tog says cards keep getting bigger. Is there a maximum card size the sl one can use? Right now, you can use the s d x c cards, which I think the largest on the market are two hundred fifty six gigs and it can handle it. And so there are no cards on the market as a today here in twenty thirteen that you can't use with it. You know, at some point down the road, I'm sure they'll introduce something that's incompatible with this system. But everything up to the two fifty six it can handle right now.
Class Materials
bonus material with purchase
Ratings and Reviews
Jennifer
It's a great class for people that have a long attention span, tons of time and understand greek. I wish I'd bought a plain point and shoot camera as I apparently don't understand camera speak. I'm a get right down to it kind of person. It is a great class, it's just not for me because I don't understand any of it.
Drew Kovach
John is a great teacher and I learned so much more by taking the course as opposed to reading parts and pieces of the owner's manual. Thanks for teaching me about my camera.
Julia Ensign
Learned so much from this class and the photography beginners kit, now on to fundamentals! Can't wait!
Student Work
Related Classes
Camera Guides