Lessons
Class Introduction
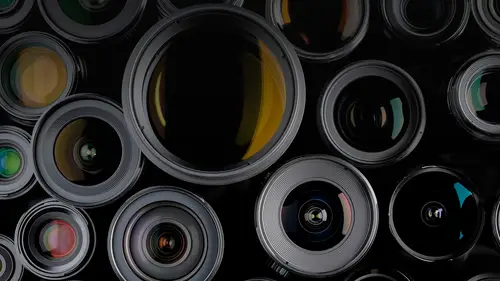
07:11 2Canon Lens Basics
14:12 3Focal Length: Angle of View
11:31 4Focal Length: Normal Lenses
09:43 5Focal Length: Wide Angle Lenses
18:15 6Focal Length: Telephoto Lens
21:27 7Focal Length Rule of Thumb
15:36 8Field of View
10:14Aperture Basics
04:41 10Aperture: Maximum Aperture
18:44 11Aperture: Equivalent Focal Length
07:48 12Aperture: Depth of Field
06:23 13Aperture: Maximum Sharpness
08:33 14Aperture: Starburst Effect
05:18 15Aperture: Flare
06:48 16Aperture: Hyperfocal Distance
19:32 17Camera Mount System
14:57 18Canon Lens Compatibility
14:26 19Canon Lens Design
12:29 20Canon Lens Composition
04:30 21Canon Lens Shape
05:50 22Canon Lens Coating
06:53 23Canon Lens Focusing
14:10 24Lens Autofocus
08:17 25Canon Lens Image Stabilization
06:57 26Canon L Lenses
10:18 27Image Quality
09:46 28Canon Zoom Lenses: Standard
17:50 29Canon Super Zooms
05:20 30Canon Wide Zooms
09:48 31Canon Telephoto Zooms
16:09 32Prime Lens: Normal Lenses
09:19 33Prime Lens: Moderate Wide
07:01 34Prime Lens: Wide Angle
05:33 35Prime Lens: Ultra-Wide
09:23 36Prime Lens: Short Telephoto
09:03 37Prime Lens: Medium Telephoto
08:59 38Prime Lens: Super Telephoto
13:59 393rd Party Lenses Overview
06:01 403rd Party Prime Lenses
15:25 413rd Party Zoom Lenses
26:28 42Lens Accessories: Filters
33:42 43Lens Accessories: Lens Hoods
09:58 44Lens Accessories: Tripod Mount
04:51 45Lens Accessories: Extension Tubes
04:30 46Lens Accessories: Extenders
13:11 47Macro Lens: Reproduction Ratio
18:59 48Macro Lens: Technique and Choices
25:59 49Fisheye: Technique and Choices
18:49 50Tilt Shift: Techniques and Choices
27:08 51Make a Lens System Choice
05:37 52Choosing A Portrait Lens
17:21 53Choosing A Sports Lens
17:31 54Choosing A Landscape Lens
10:39 55Best Lenses for You
08:46 56Lens Maintenance
11:19 57Buying and Selling Lens
11:15 58What is John Greengo's Favorite Lens?
08:37Lesson Info
Tilt Shift: Techniques and Choices
so tilt shift lenses. There's a few of them from Canon. They make four of them in four different focal links, and they're typically used for architecture or landscape and sometimes product photography, depending on the focal length of the lens. There fairly pricey lenses. These air all manual focus lenses, and they are often used and their best used from cameras that are mounted on tripods. And so there is going to be a limited collection of people that are gonna be interested in these now what this tilting and shifting means. Tilting means that you can tilt the lens up and down, and the reason that you might want to do it is to change your plane to focus to either maximize or minimize your depth of field. The shifting part of it is where the lens shifts straight up straight down, for instance, to control your perspective. For instance, when shooting a building, I'll show you examples. It can also be used for Panorama, so we have lots of visuals of examples of things in here. And to un...
derstand this, it's probably good to go back in time to the view camera. So in a view, camera we had our front standard where our lens was mounted. We have our back standard. Where are film is held and we had these two independent planes that we were able to work with And what we could do is we could shift our lens up and down. And this is what we would call a rise and fall on our large format four by five cameras, for instance, or eight by 10 or larger or a very distance different sizes. Now we can go side to side, and we're gonna call that a shift. And this is where we get the tilt shift on it going back and forth from side to side. And this is going to vary the way that we see our image and the way the images projected onto our Fillmore onto our sensor tilting is tilting the lens back or down. We can also do it from side to side, in which case we're gonna call it a swing. And each of these different movements is gonna have pretty significant impact on the final image that we shoot. So the shifting option there's going to be a little knob on the side that you can dial it up and down and you're able to move. This lands in a particular range. The greater the range, the better you can. Then rotate the lens and you can move the lands from side to side. And you will do this depending on the orientation that your camera is mounted in what you're trying to achieve in the final photograph. This shifting mechanism is to avoid these lines that get narrower towards the top of it. This is a parallax problem where we're pointing our camera up in our film Plane and the building front are not parallel to each other. And so what we want to do is we want to have the film plane and are subject parallel, and we're going to shift the lens upward to correct for. The architect and designers of buildings prefer the image on the right much more than the image on the left, because this isn't how they envisioned. They're building when they designed it. And so when you have one of these lenses on your camera, you'll be able to move the knob and you'll see the image change. Now these lenses have a very large image circle as light comes through, it's producing an image circle that would normally work with a medium format, camera or camera with a much larger central. So it's producing an image circle that covers this entire area. And you can choose which part of the image that you want Teoh capture. And so the idea is is that we have our lines falling back on us. We have a parallax problem in this photograph here. The straight lines are not straight. What we want to do is we want to point our camera straight at our subject, and then we're gonna turn the knob and we're going to straighten up our subject. Okay, so that's the theory on it. Now we end up with straight lines. Let's do this real world in a video. So same thing we're gonna do is we're gonna move the camera and pointed straight down I'm looking at what is straight ahead of me, and then I'm gonna take the knob and I'm gonna move it up. And now I have nice straight lines on my building. So when you're photographing buildings, this is a great tool tohave. And so I'm getting a lot of converging lines. I point the camera straight ahead. I'm on a tripod. I locked the tripod and I go to the knob on the lens and I start moving it up. And now I have nice straight lines. Usually you're shifting it up. In this case, I'm kind of pointing the camera down and these lines are converging, and I want them straight. And so in this case, I'm gonna point the camera up a little bit, and I'm gonna move the lens down to make sure that these lines are nice and straight and parallel parallel lines. That's what architectural firms prefer in their images of their buildings. They don't like pictures of lines tilting in like this, and so I can correct for this and make the lines perfectly straight. Now, this is kind of an unusual place, because I shot this from the street. But I was able to go up a couple stories up and shoot it from up above without any change to the lands. And then I was able to correct, for it has a very different look to it. And so shooting vertically, you get these parallax problem with tall buildings and in a rare case of proper use of vertical video. Kenna, are you listening? Vertical video? Yes, I can straighten my subject and keep it nice and straight in the frame. Now some of you who are a little bit more keen to photo shop says, Well, wait a minute. Why can't I just shoot this with a 24 millimeter lands, take that image in a photo shop and then just kind of compress and squeeze this image and transform it? Because that is one of the options that you can do. So we take our image and we transform it in photo shop. We compress these pixels down here and now we have essentially the same results. And you can do that. It's like caveat is that you are throwing away about 50% of the pixels in the frame. And so if you want the highest quality way of doing this, the tilt chef lands is the best way of doing it. You can do it in nature photography, but since it doesn't have quite as many straight lines as a building, it's not quite as noticeable. But you can get the perspective a little bit more faithful to the way it really is by doing this. So, of course we can go in and we can crop this image and we can transform it in Photoshop and stretch those pixels and fix it. And so, if you don't really need a tilt shift lands, This is something that you can fake digitally if you don't mind throwing away some of your pixels, which is perfectly fine for smaller size images, photographing buildings, getting them nice and straight around all the edges. So if you like shooting buildings, this would be a great lens. Tohave straighten up all those angles. I have a question about that last one, if you don't mind, because the person in the building shifted. But did the It didn't have impact on the person there did it? I would say no. And what it's doing is it's, you know, the person is not changing it all, so that's interesting. They're fairly small in the frame, and they haven't really moved very much. And it's it's having more impact on the top than it is at the bottom and there at the bottom. And I think that would probably be wise. All right, so we can take this lens because it's got a lend a big image circle, and we can shift it anywhere we want in there. So one of things we can do, we can shift it off to the left and we can shift off to the right and just not worry about up and down. And we can create panoramas from this. And so if you want what you can dio in this case, I want to get a wide area from side to side and you can see the video running, and I'm gonna shift it over to the left and I'm gonna take a photo. That's the left photo. I'm going to shift the lens back to the middle and I'm going to take the next photo, and then I'm gonna shift it over to the right and grab the right portion of the panorama. And by doing this, I get everything lined up perfectly and it stitches together for a seamless panorama. Really, really nicely. And so, if you want to shoot a high resolution, wide angle panorama, this is the best way of doing it. As long as you have that 10 seconds to move that lens back and forth between the shots. It works really, really well for getting a very high resolution panorama. And so if you're lens just doesn't quite reach as far as you want from side to side, you could just shift it over, grab another stop shot. And you can stitch those together in light room, photo shop and many other programs as well. So this is why it's a favorite for many different landscape photographers. So in this case, is getting a nice shot of Mount Rainier. But you know what? I'd like to have this widescreen. I want a little bit off to the left. I want a little bit off to the right, and now I have a nice widescreen high resolution shot in this case. I was shooting straight ahead, but I wanted the top of the building. So I shifted in the other direction so that I could see the top of the building. And I ended up with a square image. So you can either go alongside side by side or short side, side by side, and so squares. There is a whole different way of composing. So this is actually two vertical images. Want to get the top of the building one to get the bottom of the building. So normally what you're gonna do is you're just gonna turn this knob and you're gonna move the lens from side to side. But if you are really picky and you really want to get things right, the better technique is to move the camera body. Because what you want to do is you want to keep the lens in exactly the same position and you want to move the film plane. And so sometimes I like to be very exact. So if I know I moved five to the left, I'll move the camera five to the right on my tripod a little bit five millimeters. I have the ability to move it in small little increments like that so I can keep the lens in exactly the same position. Now, this also has one other highly specialized capability. If you do not like your own reflection and you can see this little video, I don't want my own reflection. I'm gonna move the camera off to the side, but I want to shoot the the window straight on in the middle of the frame. I get out of the way and I reposition the lens so that it looks like I'm shooting the window straight on. And this is a trick that interior design photographers, architectural photographers will use in order to get themselves out of the reflection of the window. And so you can see my reflection in the window and then in the next photo, there's been a slight little change in the angle. But I have really kind of played games with where the way the camera is pointed so that it's not getting my reflection, another case where I have found use of it. And this is one of the rare cases where I'm handheld, as I wanted to shoot straight down. But the problem right below me are my feet and there in the way, and so I'm able to shift the lens out of the weight so that it looks like I'm pointed straight down the angle. Looks like I'm pointing straight down, but I'm not. And so there's some fun little games that you can play with these tilt shift lenses, and so that's the shift function. All right, so the tilt aspect we get to talk about the Schlein blue principle on this one, which is always fine. So on a normal camera, we're gonna choose our plane of focus. And let's suppose we want to focus on a flower up close. Or maybe we want to focus on the mountains further away, and we want to get him both in focus. What we talked about F 22. We talked about hyper focal, but what if neither of us neither of those gets us all the way there? Because we just are not getting enough depth of field on our F 22. The thing that we can do with a tilting lands is we can tell the front standard of the lands. And if you tilt the front standard of the lens, it would make logic that the plane of focus would tilt the same amount as the lens plane. But that's not what happens. What happens is the plain of focus tilts all the way back, so that all three of these meat in what is known as the flying clue principle of flight shine, fluke intersection and so you're able to tilt the access of focus quite a bit from its standard. And now, with a very moderate aperture, say F 11 you're gonna be able to reach subjects in the foreground and the background. And so this has been a very popular technique for landscape photographers who want the foreground in focus and the background by tilting the lands down and changing the angle. That depth of field is in their photograph, and so a good example of it is when you have subjects close in the foreground and the far ground. Some of these shots these shots here in particular are shot with a tilt shift lens, and they enable you to get the sharpest possible photograph with subjects close and far at the same time. And so very popular technique. I'm always using it, looking for something interesting in the foreground, having a nice, beautiful mountain in the background subject in the foreground. This is a video. You can see that the background is out of focus. Let me start the video, and I'm gonna tilt the lens You're not gonna see too much happen, but the background becomes in focus along with the foreground. This would be impossible to do with a normal lens without being able to tilt this plane of focus. And so once you start knowing that you have this capability, you start looking at the landscape and subjects in a different way. Going okay, I have a new technique. I can employ this technique on this subject and that subject, and I can shoot it in this way, and it really expands the different types of shots that you can get. It's not just for nature photography. Anytime you find something in the foreground and you also want something in the background and focus, it doesn't amazing job of doing that. So lots of examples for that. My favorite photos up Rainier. One of the nice things about this is that I'm able to shoot and get everything and focus at a very moderate aperture like F 11 and not F 32. And that allows me to shoot at faster shutter speed so that everything is tack sharp and it that's one of the big reasons is that were shooting at the best apertures that our lenses have to offer on it. I don't shoot with it as much in horizontal, but you can shoot with it in horizontal as well and so another quick little video noticed the background is way out of focus. Let's give this lens a little tilt. There we go and watch the background coming into focus there, and so we still need to be refined a little bit there to get sharper and focus. But that's the idea you might be wondering. Well, is this really that big a deal? Can I just stopped down to F 32? Doesn't that give me enough depth of field? Well, here's the difference between F 32 F eight with a tilt shift lands. Take a look at these two images. Indeed, they look like they're the same sharpness to you. And so the tilt shift lens can really improve sharpness in many different types of shots. The other thing that I was just kind of mentioning with that rain earshot is, Well, I'll just stop the lens down. Well, when you stop the lens down, you have to use a fairly slow shutter speed. In this case, it's 1/8 of a second with a tilt shift lens. You could shoot this at 5.6, tilt the lens, get everything and focus at 1/60 of a second. So if something is moving in the frame, you can get nice, sharp images of that flower of branch or whatever it is moving in there. And so there's multiple reasons why this tilt shift lens will solve different types of problems. So any sort of flour photography, anything that's moving, is whether it's flowers or penguins, and they're at different distances for you. This works out really, really well. Here at Gum Wall in Seattle, second germiest tourist destination in the world. I'm getting very shallow depth of field. If I tilt this leads to the right, I'm gonna get mawr of this gum in focus. If I go the other direction, I'm going to end up with even shallower depth of field, which is our next topic that we're gonna be talking about. And so depending on where this is, how much we're going to get in focus. So let's recreate this an illustration form. So we got our brick wall, we got all our gum on our wall, and there are many different options that we have with our camera. We can take our camera and we can just point it at the wall and we're gonna get relatively shallow depth of field. At F four, for instance, we can do what I call a reverse tilt, and it's gonna cause us to get even shallower. Depth the field If we want Mawr, this gunman focus. There's a couple of options that we have. The first option is simply just to close down to F 22 we do a pretty good job of getting this gunman focus. If we were to tilt the lens towards our subject and shooted at F four, we could get almost everything and focus at maximum aperture because of the tilting effect. If we add the tilting effect to stopping the lens down just a little bit is when we're going to get the absolute sharpest of those photos. So tilting it off to the side shooting a normal photograph is going to result in an unusual plane of focus notice the plane of Focus angling through the frame. I wanted to shoot an unusual picture of Yosemite Falls, and I didn't want the trees on either side and focus. I only wanted the falls and focused, so I shifted my 90 millimeter lens to the side and I was able to keep the falls and focus. But I was able to blur out the trees on either side. Selective focus. The eyes are drawn to what is in focus. I wanted to highlight This is the fastest optical instrument I've ever found. This is the very large array, and they have the stats here. Look at the focal ratio. It's an F 0.35 and we all thought a 0.7 lens was faster. One point owes is a 1.0.35 lens equivalent for these antennas. Okay, so what? This tilting option? We're changing the plane of focus so that we get more things in focus. But if we tilted upwards in a normal fashion, we're going to do something very unusual with the plane of Focus and the plane of Focus is gonna cut through our subjects in a way that is gonna look very strange. And so are Schlein. Flu principle or intersection has now moved above the camera rather than below the camera. And our depth of field is running in this range. So things in this zone are going to be in focus, and everything else is not going to be in focus. So here's a standard shot and let's do a reverse tilt with a 90 millimeter lands, and it's gonna mimic a very shallow depth of field lands. And so if you want to get very shallow depth of field, this is a way to do it with a lens that really isn't that fast. And so this is how fake miniature photos are taken. What you do is you get yourself up to a fairly high place to shoot, and you tilt the lens up as you point down, and it's gonna cause this very shallow depth of field that's gonna cause the background to go out of focus. And it's gonna look like the set of a small Monnet, uh, model or a miniature set. And so shooting from different bridges focusing down when you look at things close up with a macro lens, you get this very shallow depth of field, and this mimics that look with a tilt shift lens by tilting the lands kind of in the opposite direction. Are these little toy cars or is this the middle of Havana? This is a normal side. This is actually just standing. I just wanted to reverse the tell just to get an unusual point of view on this car. Now, would you ever use tilting and shifting at the exact same time? Possibly in this case, I tilted the lens forward so that I could maintain all the flowers and focus, and I shifted because I wanted to create a nice wide panorama. And then I would stitch the two of these together to get a very high resolution image that is tack sharp across all the flowers up in Bam. I wanted subjects in the foreground and the background, so I was doing a tilt. But then I moved it off to the side so that I could create a large square image with everything in focus Canyon lands. I wanted the foreground and the background and focus, but I wanted a really wide shot off to the side. So I'm grabbing a shift to the left, a shift to the right, and then I'm getting a very high resolution tack, sharp panoramic image. So when it comes to the panoramic by the tilt chefs, excuse me. Canon has four different options. They have a very ultra wide 17 of wide 24 a normal 45 a short telephoto, and each one has their own fan base, depending on what type of photography you were going to dio. So this is our group of lenses here. The 17 and the 24 r l lenses. They're relatively new lenses. They've been newly redesigned. The 45 90 are an old design, and many tell chief photographers are waiting for Canon to replace those lenses. If you really need him, I'd buy him if you have a passing interest. But you would like the latest version. You might want to wait. We're all hoping that they're going to get upgraded in the next few years because they are very far behind the times compared to where the other models are. So the 17 I have used and I find it very challenging to use. I think this would be fantastic for somebody who's gonna be photographing old churches in Europe, where you have just huge spaces and you need to correct for things. This would be a great lens for that. It's a little difficult with shooting some of the landscapes. I think it's a little bit wide as a general purpose lands so large, very detailed buildings is where this would have, ah, great impact. I own the 24 tilt shift. I think it's a fantastic lands. It's a good general purpose lens for both architecture and landscape. It's ah, it's a clinic, it says. It's a sweet spot in the middle of the white angle world, and so I'm a big fan of this, especially the new design on it, which is very nice and easy to work with. I don't know if I mentioned it, but all of these lenses are manual focus on Lee. The 45 might be good for product photography. Could be good for a food photographer. Could be good for landscapes. If you like to shoot at 45 millimeters for your landscapes. Relatively small lands, it is the older design, and it doesn't have quite as many dials that you can adjust on it for controlling the direction of movement on it, but still a very good quality lens. Optically, their longest is the 90 and so this is kind of a nice option for people who have one of the wider lenses. They want something a little bit more telephoto. This is sometimes employed by portrait photographers in order to get really shallow depth of field. They take the focus, and they kind of wack it out of focus. So they get this really narrow band of focus for their subject to be in, and so you can get some interesting portrait shots. So if you were a portrait photographer and you're trying to get a look that the competition doesn't have, this might be one of those lenses that allow you to do something special and unique. There's a number of other different lenses. This is just an extremely affordable lens from Schneider, that German company who makes really high end equipment. And so, if you just want to get a bargain basement lens, this is going to make the Cannon 24 seem like a cheap lens because this lends sells for about $ and so this is a really high end till chef lands, and so they make a 50 millimeters Well, I realized most of you are not going to buy one of these lenses, but I would like to put the expensive canon tilt shift lenses in perspective. There are many others out on the market that are going to be three or four times the price of what Canon is offering. And they do also make a short telephoto as well. Very nice construction on it, Absolutely beautiful. I haven't had a chance to actually shoot with these, but they certainly look quite nice, but they are a very pretty penny in price. Now, if this tweaker piqued your interest and you thought maybe this might be something I might be liking to get into is there a way I could get into it without spending a ridiculous amount of money? And the answer is yes. With Samuel, this is a tilt shift. It's a 24 35 It looks like they have kind of copied the design of the cannon, which is a good design, And they have put in some pretty good optics, and they're selling it for a price that is far less than the cannon lands. And so the canon lenses manual focus. This is manual focus, and this would be a great way to play around with tilt shift without spending a ridiculous amount of money. I mean, it's still, you know, several hundreds of dollars, but it's a way to get into it without going nuts. And if you really liked it, yeah, you can then sell it and then upgrade to the canon lens. Okay, John, just I was just a little confused about how often do you have to stitch those images together with with the tilt shift camera? I know you did on the panoramic, but some of them it looked like some you didn't have to. In some you did write. It really depends on if you are doing a two shot image or a one shot. So most of the time I'm just tilting the lens forward so that I can get the foreground and the background and focus, and that's good enough. Sometimes I need mawr on the frame, and so I can then shifted back and forth. And so it really depends on what I'm trying to do. But most of the time, I don't need to do any stitching at all, and the latest version of Light Room has made things much easier because they in like you, haven't been able to stitch in light room. He had to go into photo shop and then bring your average back in the light room is a little bit of a hassle, and it's become much easier now. And the difference between taking just a standard lands is the distortion that you get when you shoot with a wide angle here and here. That area in between isn't quite right in. The computer needs to justify and tweak all that. When you have the your film plane parallel to where your subject is and you're just moving that lens back and forth. It is very easy, so you're going to get a cleaner stitch on that. It's It's going to be a better quality stitch. Do you automatically get to see what the depth of field is going to be like for compositional purposes? The depth of field preview will work if you have a depth of field preview, which you would on all the canon cameras. So yeah, so you can see that right in the camera. I'm often using it in live you and so you'll see that right in live you in the back of the camera
Class Materials
Bonus Materials with Purchase
Ratings and Reviews
user-b3a96c
I so appreciate what a good teacher John is. I wish I would have known this much about lenses when I first started out buying my lenses. It was hard finding information about lenses. I didn't want to spend money on a lens I wouldn't use. The better understanding we have about our gear the better photographers we will be. I have never seen a class like this. Invaluable...yes I bought the class! I am really impressed with the high quality photography classes available on Creative Live!
Abbeylynne
This was a great class not just about the lenses that Canon offers but also how each lens works. As usual, John's slides are alway informative and entertaining. There is a phrase: John has a slide for that! I am not even a Canon user and found this class to have great information for the use of each specific lens. Great work John! Thank you Creative Live for another great class!
Tami Miller
Have loved the other John Greengo classes I've watched & purchased - and this is another winner! Having been a high school/college science teacher, it is refreshing to take a course with someone who not only is extremely experienced, seems to be a computer having stored so much knowledge, but is equally concerned about making the information truly understandable to different levels. And he shares the information using every tool he can: slides, video, interactive presentations, and great quizzes. I learned so much about my Canon lenses - and lenses in general with their many components. I am excited about testing each of mine to see what macro ratio they handle, and especially appreciated the tutorial on testing each for their specific quirk that affects super sharpness. This class is great whether you own Canon lenses or not. Thanks John Greengo!