Lessons
Class Introduction
07:30 2Camera Controls Overview
06:57 3Mode Dial Operations
11:57 4Creative Filters On Mode Dial
03:34 5Movie Option On Mode Dial
06:33 6Time & Aperture Value On Mode Dial
07:17 7Manual Mode Dial
02:59 8Custom Model Dial
02:36Top Of Camera Buttons
06:42 10Viewfinder Display
08:07 11Back Side Of Camera
03:40 12Playback Menu
04:47 13Playback Menu ISO & Flash Adjustments
04:51 14Quick Menu
13:09 15Left, Right & Bottom Of Camera
04:38 16Lenses & Front Of Camera
06:13 17Menu Overview & Shooting Menu
18:02 18MF Peaking Settings Menu
06:00 19ISO Speed Menu
06:54 20Picture Style & Sound Menus
11:04 21Set Up Menu
22:05 22Custom Function Menu
04:21 23My Menu & Playback Menu
10:56 24Camera Operation
07:35Lesson Info
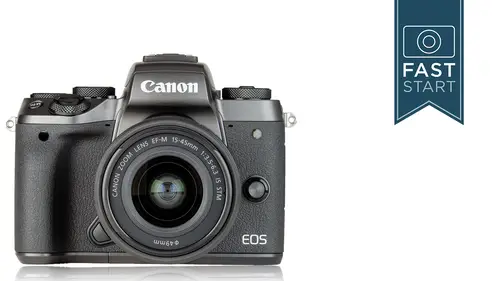
Camera Controls Overview
Alright, let's get into the big section on this class. This is camera controls where we go around the entire camera and we take a tour of the camera and talk about what all the dial and controls do. So let's talk a little bit about the difference between the M5 and the M6. Now, I have the M5 and I created this class around the M and then I'm kind of adding in M6 information because these are based off of the same camera, the same chassis system, the same menu system, the same sensor. It's just that the M6 does not have the electronic viewfinder on the top. And that's the big difference is if you want the electronic viewfinder, one has it and one doesn't. And if even if you don't have it on the M6, you can actually add something later to it. Now there are a few additional features that you do get with the M5 and we'll be going through and highlighting those as we talk about them in the class. One thing is that there's a button on the front called the Touch & drag AF: On/Off button a...
nd this allows you to turn on and off the option for going under the back screen of the camera and using that for selecting where you want your focusing point. So, you can touch and drag your AF point left, right, up and down. And then you can just turn that on and off by pressing that button. We'll talk more about that specifically as we get into the class. We have stereo microphones positioned on the frontward facing M5. If we flip over to the M6 we'll see those stereo microphones on the top. Not a huge difference in the sound quality there, just slightly different positioning on it. Another notable difference between them is that the M5 has a dial function. I'm gonna get into what this does but it allows you to have access to many different functions and you can press down on the button, access one, two, three, four, five different functions and then you can turn the dial around it to control those functions. So, it's a little bit more direct access for certain features. The On/Off has been moved from left side to right side so no real difference there other than the location. The Mode Dial is basically the same but the indicator is on the opposite side so the dials have actually been flipped kind of upside down. So they're gonna turn the different direction. And it's kind of in a different order but it's the same items and they do the same thing when you have them turned to the right positions. They both have built-in flashes although they are in slightly different positions. The button for popping the flash up is in a slightly different position but it is labeled with the lightening bolts so it should be pretty easy to find. The flash functions are going to be basically the same between the two. Looking onto the back of the camera, obviously the big EVF, the electronic viewfinder which is gonna help compose especially under bright light situations. And so if you shoot outside under daytime conditions, and you're thinking about which one of these cameras to get, I would highly recommend getting the M5. I'd much prefer a camera that has a viewfinder. And maybe that's because I'm just getting a little bit older and my minimum distance I kind of have to hold the cameras out a little bit further and I can't see the screen as to how sharp it is. But, if you have really good vision and you want to keep it really small, then the M6 does have some benefits there. If you do want to add a EVF onto the M6 you can and Cannon has a dedicated viewfinder for that, the EVF-DC2. And so you can get a viewfinder and use it only when you want to which is kind of nice. They have a slightly different dial position for zooming in and out when you are playing back images. We'll talk more about this when we get into the playback section, but you can either zoom in and check focus or you can zoom out and get a thumbnail view of all the last series of pictures that you've been taking. And the LCD is a flip down or a flip up. Let me show you real quickly. On the M6 we have one that pops out and flips up like this. And so you can put it in a selfie mode and the camera's LCD is in a position that's really easy to see because it's just right above where the lens is. Now if we look at the M5, and I have it on a tripod so I'm not gonna be able to fully get it flipped out here. But it's gonna flip down and it's gonna flip all the way down onto the bottom. And so one flips down and one flips up, slight difference. And so, if you do a lot of vlogging or selfie shooting, I kind of prefer the M6 for that having the screen above. Looks a little bit more natural when you're looking at the lens. Alright, as I said we're gonna be looking at photos of the M5 for the most part. But pretty much everything is very similar with the M6. Now, when you turn the camera on both of these cameras go through an auto sensor cleaning which has a special type of little cover in front of the sensor which shakes to vibrate the dust off of the sensor. So dust should not be a major problem. If it is I will talk about how to manually clean it off yourself. It's a little bit tricky, not everybody feels comfortable doing it. But the camera has that system built into it so that you don't have to worry about that very often. When you press down on the shutter release that's gonna kind of wake the camera up from it's sleeping mode. The main dial is the one that surrounds the shutter release. And so we're gonna be using that for making a lot of different changes. It might be shutter speeds, it might be apertures, it could be moving things around on the menu system. And so that's a dial that we're gonna be accessing quite frequently. There's a Quick Control Dial on the back of the camera. The M6 has it a little bit down to the right, kind of just below that exposure compensation dial. And we're gonna be using that for a variety of settings as well, the ISO, and working through the menu system potentially as well. And on the back of the camera we have another control dial back here which is also a set of buttons where you can go up, down, left, and right. So that way we can navigate through the menu system, we can move our focusing points up and down, or we can spin it around to control aperture, shutter speeds, and various other settings on the camera. So those are controls that we're gonna be using throughout the class in a variety of setups. Looking at the top deck of the camera. Of course, we have our shutter release. When we press down on the shutter release to take a photo, there's a number of things that are going on. The first thing is that when you press halfway down it activates the metering system, and it activates the focusing system. Along with that it also wakes the camera up if it's in a sleep mode which it often goes into whenever you don't use it for just a few seconds so that it conserves battery power. And if you're in the menu and you just want to get back to the shooting mode, and you want to get out the menu system, press halfway down on the shutter release and it's gonna return you automatically to the shooting mode. And so get very comfortable with that halfway press of the shutter release. You'll be using it a lot.
Class Materials
Bonus Materials with Purchase
Ratings and Reviews
Susan Clarke
John did an outstanding job explaining every part of this camera. As a newbie, this course is exactly what I needed to understand this camera. Thank you, John. Now, I'm going back to watch through 1 more time!
Michael Simpson
John Greengo is probably the best instructor I have come across in my short photography journey. I learned a lot about the camera, something that would have been difficult without the help of the M5 course. Thank you.
a Creativelive Student
Once again, a thorough explanation about all the functions of the Canon EM5/6 Camera operations. For anyone considering purchasing this class before getting your hands on the actual camera, it will give you a head start into the functions of the camera you chose. As a Canon FF User, I wanted to have a camera for urban shooting, yet, wanted something that could use all my Canon Lenses with an adapter. The Canon M5, I believe is a great choice and I'm looking forward to seeing how my lenses work with it.
Student Work
Related Classes
Camera Guides