Lessons
Lesson Info
Add Embellishments
so we've pretty much covered all of our basic shapes and our lines right here. Now we want to go in and start to show you color because we've just been big drawing basic shapes, but not really much interest to them. Stroke. Wait, maybe so here we go. So any shape that we draw that is enclosed weaken. Do a Phil and a stroke on that shape. If I go and use a line, the only thing that I can apply to the line is going to be a stroke weight in a stroke color. So we use the word stroke or border or outline pretty much universally the same. So if I want to add a stroke weight or a border, it's the same terminology. I just want to put a bounding box or thicken the line around my object. So when I draw my object here, I can control the stroke weight in my stroke panel. I can do that right here in my control bar as well. And if I want to control the color of my stroke to the left of my stroke drop down menu in the control bar is a whole list of pre made colors and illustrator, so I don't have to ...
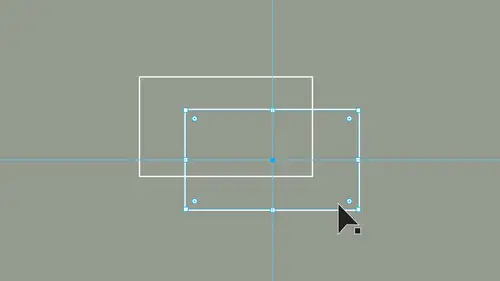
have it black. That just happens to be the default. I can click on any one of my colors in the color palette to change that stroke weight or the border around my object. Next to that is the exact same drop down menu here that is going to give me all of my fill colors. It's the same Swatch panel, and I can go. We and Macon set my fill colors for whatever is going to be a closed shape circle square polygon star. Whatever. You'll notice that these drop down menus are the same, but one displays them smaller than the other. You can set this very easily when you click on your drop down menu. Here you have your little cheese grater in the upper right hand side of your drop down menu. You can click on this, and you can set the way that you're going to be able to view the thumbnails here. Small, medium, large thumbnail, or if you want to set these as a list to do a medium thumb, they also they look the same, so it's easier to see those colors the same Swatch panel for each to fill in the stroke. It just divides them up here so they can select the fill color. When I have that selected. That allows me to choose a color going into the fill and then the stroke around the object and the stroke. Wait, what I have just a lying going in and setting the stroke. Color is easy. I set the stroke color. There is no fill color to this because there is no closed shape. So if I go on, I put a fill color in here. Nothing happens. But there is one weird thing that does happen when you use something like the Arc tool, the Ark Tool. Aiken set the stroke color on, but if I set the fill color, weird things happen and people look at that and it's like, Why is it doing that? Well, it's filling the shape because this is an open line and there is no closed shape to it. It just goes, and it fills it to the beginning in the ending points right here. So what I have is kind of like this bowl shape with no exterior line going all the way around it, and so this is kind of weird part. When you get into filling an open shaped like this or an open line, it just treats it kind of like a shape and just fills it to the beginning and the ending points. So that can be kind of weird. You don't want that. We could go be in and turn off the Phil just by clicking on the box that has the red slash in it, and that turns off the film. So with our filler are stroke. If you don't like the colors that air in here, not a problem. You can create your own going under either the Phil or the stroke panel here. I can simply click on that cheese grater on the upper right hand side of that stroke panel, and I can creating new color Swatch, which is going to be placed in my Swatch panel, and I can use it for my fill or my stroke credit. New Swatch. I can go in and Aiken, slide my sliders back and forth, and I can set up my document to create any color that I'd like. I can go ahead. I'm not gonna add this to my library. Right now, all the library does is allow me to use this color and other adobe applications. For now, I just want to stick with illustrators. When I create the color, it will only be an illustrator. I'm gonna click, OK, and that color will end up in my Swatch panel for my fill or my stroke. It shows up in both places right there, so I don't have to worry about adding it to both. Once I add that color or create a new color, it's always going to show up in both the fill in stroke panels. I click OK, and there's my colors for use in both of those. That's the basics of colors that I have really easy to create, really easy to use now. If I draw other shapes here, I can apply fills and strokes to those as well. Very simple. What's great with this is whatever I've last used becomes my default. So the last time I drew my shape, I had a 70 point stroke around their yellow Phil blue border that becomes my new default when I draw my shapes. So any shape that I draw is going to have those basic attributes, which is kind of nice, because now I don't have to keep setting those. Every time that I draw a draw shape and automatically comes up with those attributes, I like that. So as I go in and I draw my shapes here, I get my feel. I get my stroke like apply whatever. I want Teoh to those objects there on a couple tricks that I'm going to use when I want to go. We in and I want to be able to start moving these around first of all, copying and pasting items. Well, I don't actually copy and paste simply because if I copy something and then I paste it, it puts it right in the middle of my paste board. I don't want to do that. I want to go in and I want to just copy it real quick. Anything that I want a copy? This is true for a lot of the adobe applications. Simply select it. Gonna selected with the selection tool. I'm gonna hold down my option are my all turkey and you'll notice that the cursor doubles up option or alter click and drag allows me to duplicate an object super easy. If I select multiple objects, I hold down my option or alter key, and I dragged them. This allows me to duplicate those very quickly now with multiple objects. Duplicating one or multiples works great, but I can also go in and select multiple objects at once and treat them as if they're one. I didn't group them together. I just selected them all so I could move them all together. And if I would like to scale them altogether, I certainly can. I can go in, hold down my shift key, scale them altogether, or I can pull them and distort them all together. I can rotate them all together as well. If we want to put them or use them as one unit. They're not group together because I can always click off them and just select them individually. But this gives me just a little bit more flexibility. Instead of adjusting a rotating one at a time, I could just do them all, select everything, move scale, rotate all this unit and keeps them all together quite nicely just like that. So it just keeps going on and on with what I can do with the universal, um, ideas of getting shapes in here, moving them around, being able to build on those shapes and have access to my transform panel and edit my items. So speaking of editing are items here now we can go win, and we can get a little bit more creative with our basic shapes. Whenever I draw a rectangle or square or a polygon or a star, you're going to see that I get these little teeny what we call corner widgets. That is little targets in the corner here. And these corner widgets allow me to round the corners of anything that comes and meets at a corner, so I can't do a circle. But I can do all the other shapes because everything meets at a corner. Now these corner shapes are directly edible. In my transform panel using my corner drop down menus, I can select the corner type for each corner and then very tediously select each one and then set those shapes so that I could round all the corners. I'm gonna do this a whole lot easier. I'm gonna select the shape, gonna pull on these corner widgets. And by selecting the corner widgets, this allows me to go in and pull those corners in or out on the entire object, Which works. Great. If I would like to change the corner shapes on this, I can always use my transform panel. But I'm gonna make it even easier. I'm gonna hover over any one of these corner points, hold down my option or my old key, and I'm going to click, which is gonna allow me to cycle through the three different shapes. I can have rounded corners, inverse rounded or flat corners to take these off. I can simply click on those corner widgets, dragged him all the way out to the extreme edge, and it turns off those corner points. So, really, I don't need the rectangle tool or the rounded rectangle tool to give me corners. Just simply click on one of the corners here and pull them all together. What happens if I want to do just one corner? Simple. Go in with a selection tool. Click once on that corner, Object there and you'll see it turns into a doughnut. See how the other ones looks like Targets have clicked on this one had become a doughnut. I've isolated this corner, separate from the others. If I pull on this corner, it will round just that corner. So I'm gonna click on the opposite corner. Click on that once turns into a doughnut. I can now go in and I can get my corners so that they are rounded separately. Click on that one corner and Aiken round those each and everyone individually the second I let go, it goes back to the normal mode. So if I want to edit those corners again, I will need to click on their turn into a doughnut. But I can create basic shapes using just by corner widgets another way that I can do this as well. I'm gonna delete this. I'm gonna draw another shape here, and I want around a couple corners at a time. I could go in and I could take my selection tool. Click on one corner widget, click on the other. But you'll notice that I can't select two If I want to select more than one corner widget or target that by clicking on it, I'll need to hold down my shift key and shift click and turn those both into doughnuts so that it can round those together. Now you'll notice what happens when I go. We and I click on one shift click on the other. Once I get to the maximum port of rounded nous that turns red, I cannot go in and corner widget this any further. I'm Amanda maximum point of being able Teoh around that corner, but I can do this if I want to create a rounded shape with a square end than they could go in. I could rotate this any direction I want Critical Doorway. Pretty simple with my rounded corners. That's one way of doing it. Just by going in clicking on one shift, clicking on the other and targeting those together. Another way of doing it is drawing a shape and using the direct selection tool. If I would like to target those corners and I don't want to go win and specifically click on them. If I use my direct selection tool, Aiken, simply click and drag over and target that one corner. You'll notice on Lee that one corner widget shows up. I could then corner widget that freely from everything else if I would like to go, we had in select multiple corners I can click and drag over multiple corners. I get both those corner widgets and allows me to widget those together. So I can either target that manually by using the selection tool or jump in using a direct selection tool and target those as such. Now, what's unique about this is that no, there are no corner widgets in a circle because we don't have corners. I'm gonna jump over to my polygon tool and I'm gonna draw my shape here. In the last one, I drew Waas the triangle. Now you'll notice that I only have one corner widget tool in the triangle. And when I do this, it allows me to corner widget all the corners. If I only want a widget, one of the corners, then I can go back in with my direct selection tools. Select that shape. You'll see. I get all three. I could click and drag and target just the one clicking Dragon Target. Just the two and I can change those corners independently of the others by default. When I have the shape selected, I get one corner widget which is meant to do all of my object. Grab the direct selection tool, select everything or simply click and drag and target just one corner. And I can isolate that free of everything else. Now I can also hold down my option. Old key an option. Click on these corner widgets to cycle through the different styles here that still holds true no matter how I select those corner widgets. One interesting thing here with the star tool is when I go in with a star tool, I should be able to get corner widgets. But when I draw my shape, I don't see corner widgets on here. And this is the one tool that I draw. That doesn't give me corner widgets in the normal drawing Vote No, I said, You get corner widgets every time you have a corner. I've got lots of corners here, So if I need the corner widgets, I can go back into my direct selection tool and the Onley show up on the star when I go in and I access it using the direct selection tool, I can pull those inner out when I get to the maximum point of widget nous if they turn red and I can't go in and pull those corners anymore. So this allows me to create a star going in or out and kind of create a little starfish there. And there's Middle Starfish. Looks great. I can take this one step further, though. I'm gonna draw star. And when I draw the starving to go in and I'm going to use my up arrow to draw multiple points and then I'm going to use the widget tool here, you can see we got a lot more corner widgets on this. I'm going to pull these corner widgets in a little bit and kind of create a little fuzzy shape right here. I'm in a cycle through all of my shapes by holding down my option or alter key and cycle through Get a little cold virus right there, which I know all too well right now. Option click. And I can flatten all those sides there and I can create a gear. So all of a sudden we've gone from just a basic star to going in and editing these shapes. Using the direct selection tool and with our corner widgets, we can create a lot of different shapes by going in with the corner, which it tool. Pretty awesome. Any of these shapes, say, for the Ellipse tool can be edited this way with our corner widgets. I love it. Corner widgets are awesome. So much fun to be able to do that. So any shape that I draw with a polygon tool, we have the corner widgets. No matter what the unique thing with this is by default, we only have one corner widget, but I can go in, use my direct selection tool on bacon. Target just one. If I want Teoh widget, just one of the corners for want to do them all go in and widget. All the coroner's pulled down my option key, and it's kind of scale. Those in kind of create the look of a socket flattened the sides out around the sides as we go Great, different shapes. Now, one interesting thing with the polygon tool that I didn't talk about is being able to edit this after drawing. Now, the one cool thing we can do with a polygon tool has changed the sides after we've drawn this, and in most cases, like with the star tool. I can't change the number of points or sides once they let go of the mouse, but the polygon tool I can. And in the transform panel, you'll see that I have the ability. Just slide this back and forth after I've created a polygon and change the number of sides very easily. So I don't have to redraw anything after the fact I can do this directly on my image to there is a little pull handle right here on the side. It's the little triangle little diamond shape right there. When they hover over this, I get a plus and minus, and I can drag that up or down to create a different number of sides right there. So transformed Panel allows me to do that. Little pull handle allows me to do this as well. Go in, grab that right there, go up or down and fully added that shape. Now if I draw a star, unfortunately, when I draw star, my transform panel gives me no attributes whatsoever. So once I draw the star, I'm pretty much done. But any other shape that I draw is going to give me the attributes that I need in by transform panel right there. So pretty simple stuff. One thing I do want to share with you, though, because this is really important. I'm gonna go in and I'm going to you draw a rectangle and I'm in a widget, a couple of the corners here. I'm gonna take my direct selection tool. I'm gonna widget the corners into the maximum amount right there. There's two things that you really have to be careful of once you've drawn your shapes and you want to scale them up and down specifically, when you have a stroke weight on those shapes or when you have your corners widget ID to the maximum amount in your transform panel. We have these two things called scale corners and scale, stroke and effects. This is really important if these buttons air turned off and I go in and I scale my object, but I'm gonna put a stroke weight of 50 on this object. If I have my scale, stroke and effects turned off, I'm in reproduce this duplicated by holding down my option key and click and drag. I'm gonna scale this down. And when I scale this down, what happens is the stroke. Weight is going to stay exactly the same, no matter how big I scale this that has a 50 point stroke. This has a 50 point stroke. If you want your stroke, way to scale, your object gets larger. He want to stroke. Wait to grow. Is it grows? You'll have to turn on the scale, stroke and effects. Then, when you scale an object here and you make it bigger as you make it bigger, the stroke weight will also grow. This is a turn on turn off kind of thing, which means it's only going to work when you turn it on. Doesn't work when you turn it off. It only applies to the object that you're using. This could be very handy. It can also be very annoying based on what you're doing. In some cases, you may want your stroke wait to stay consistent, so you want to turn off your scale, stroke and effects so that when you do scale something, your stroke weight, it's always gonna be the same. Other times you do want it to grow, so you'll need to turn that on. Turn it on. It only applies when you turn it on, turn it off and then it only applies to your objects that you have when it's turned off. The next thing is the scale corners. This can be really frustrating. I've run into this and people have asked me about this. I have gone in and I have which did my corners to the maximum amount here. I could not widget them anymore. It turned red. If I go, we and I try to scale my object and I hold down my shift key. You'll see I can make it bigger, but I try to make it smaller and it only gets shorter. It doesn't scale those corners. I can make it bigger and this corner stay the same. But I can't go in and I can't make it any smaller. And the reason why is because my scale corners is turned off. If I turn on my scale corners, I can take my object and Aiken scale that proportionately in keeping those corners in proportion with the size of my shape. That's what the scale corners turned on. If I have my scale, corners turned off and I try to do that. Those corners will always stay the same. The shape will change. You can see that. But as I go back in here and I try to scale its smaller I run into the point where I can't make those any smaller. So those air something that you're going to run into the scale corners if you wanted to look the same and scale proportionately turn the scale corners on, if you don't have that turned on, then it's going to keep the corners the same no matter what shape you make. But there's gonna be a point in time where you cannot go in and you can't scale beyond that edge when you go in and you scale try to do that and I can't scale beyond that. It just keeps shortening my image, scale, stroke and effects something you have to get used to, but something that I just want to make you aware of because that could be frustrating. They're normally turned on by default, so you don't run into those issues. But I don't like to go in every time and have to keep changing the stroke weight after I scale something. If I want to keep everything the same, so something to think about as you're working
Ratings and Reviews
Tomas Verver
I have done all Jason Hoppe Illustrator Courses. I still like the way Jason is teaching. i like to train my Illustrator muscles. Although I'm quite advanced and a few years of experience in the program. Still some smallers tips/trucs are picked up using this course. And it's a nice refresher, course to keep up to date with your skills. As part of the pass it's a nice course.
Peter Tan
As usual, Jason's teaching of AI is straight forward and right to the point, make the student thinks AI is too easy. Great to learn from JASON.
a Creativelive Student
Provides a great overview
Student Work
Related Classes
Adobe Illustrator