Finishing the Composite: Final Touches
Lesson 9 from: From Shoot Through Photo Editing: Building a Composite in PhotoshopAaron Nace
Finishing the Composite: Final Touches
Lesson 9 from: From Shoot Through Photo Editing: Building a Composite in PhotoshopAaron Nace
Lesson Info
9. Finishing the Composite: Final Touches
Lessons
Class Introduction
07:08 2Shoot: The Book Scene Background Shots
24:51 3Setting Up and Testing for Model Shots
24:00 4Shoot: The Model Shots
17:11 5Culling Images and Merging HDR Shots
13:31 6Compositing Background Images
15:39 7Compositing Model: Cut out and Color Matching
23:43 8Making Shadows Realistic in Photoshop
25:03Lesson Info
Finishing the Composite: Final Touches
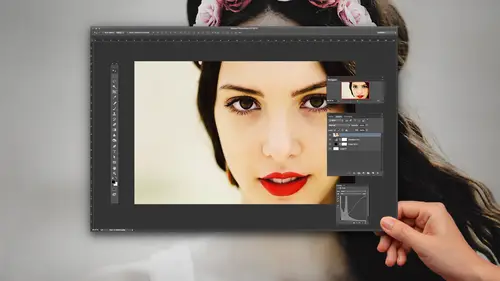
So we have our composite, definitely looking a lot better than it did when we started, so our shadow really is kinda coming into play here. This is our original fake shadow, we're gonna go ahead and delete that out, we don't need that just yet, we can see our color and our light match quite a bit better than when we started. And now we're just gonna do some finishing touches to the image to kinda like bring everything back together again. So the first thing we're gonna do, now by the way everything we've done up until this point, I've either been just affecting the background, or just affecting our subject, 'cause we wanted those to kinda like match, and now that they are matched pretty decently, what we wanna do is affect the image as a whole and that's gonna help blend them together even more. So everything that I do on top of this, let's say we're gonna grab our Curves adjustment layer here, gonna make this a little bit brighter, and then I'm gonna add some red, and some, here we go...
, some green, there we go to make a little bit of orange. Alright, on my layer mask here, I'm gonna hit Control or command + I, to invert that, and then we're gonna use our gradient tool, and I'm gonna paint from white to transparent, something like that, to make a little bit of a glow where our lantern is, just a little bit more and then you know what, I'm gonna paint it black over top of his face, just a little bit. So stuff like this I'm doing on top of my subject and on top of my background, and that's just gonna help both those blend together quite a bit more. I'm gonna hit command + J, just to duplicate that and then we're gonna make a little bit more of a strong glow coming out of the lantern right there. Alright, so we can see just kinda like turning that light source on, a little bit more kinda helps to bring our subject into this scene a little bit better. Alright, looking good guys, we're gonna bring our subject here, I'm gonna bring a little bit of our background color, so we're gonna create a new layer, we're gonna bring a little bit of this color that's in our books, I'm gonna use my brush tool, and then hold Alt, or Option, and sample the color here in the book, and we're gonna paint this over top of some of his clothing there and that's just gonna help all this blend together a little bit better. So we've got some of the color from our background, I'm gonna change our layer blend mode from Normal all the way down to Color, it's gonna be way too much at this point, it's you know definitely too strong of an effect. So what we'll do is just lower our opacity and get those to the point where they do, everything does start to blend together a little bit better, but you don't notice that it has a color. But if you can see down here, the original, there we go, the shoes have a little bit like a blue cast to them and now we've changed that to a cast that's a little bit more appropriate for our image. Alright, and I think the shadow might be a little bit too dark here, so I'm just gonna lower the opacity of that just a little bit more as well. Alright, looking good, do we have any suggestions from in the studio audience? We just got a few more minutes here, yeah there in the back. I was just thinking, maybe in the bottom of the stairs, to darken it up to make it look more caverness, instead of the book, instead of it looking like that's where it starts. That is a cool idea, alright let's do it. So we wanna layer above my background layer here, alright, and we're gonna use a, I'm gonna use a Levels adjustment layer, there we go, and we're just gonna make our lights just a little bit darker here, there we go, let's start off with that. Alright I'm gonna hit Control or command + I, on our layer mask, and then paint just a bit darker here, in this area, I don't know if I could get away with just having this like be a black hole, I might be able to. There we go, we can definitely do it a bit darker, and then I'm gonna do this stair a bit darker as well, and this stair a bit darker as well. Alright, and it looks like I'm gonna need to add some color here, to help it adjust with the rest of what's going on too. So we're still using Levels, and I'm able to add some color there as well. Alright, let's go back to our RGB, and we'll just bring this down, and brightness just a little bit more, let's see I'm gonna try duplicating this as a test to see if, what would happen if I brought some of this dark area, let's see, overtop of the books as well. Alright, so I'm gonna make a selection outta there, I'm gonna use my gradient tool, to paint from white to transparent and then do something like that, there we go, to kinda make it look like it covers that area as well. Alright, there we go, we're gonna fill that with white and then use our gradient tool, oh not a Radial Gradient, we wanna use a linear gradient here, to kinda fill that up there as well. Alright, cool, let's see if we can make that even darker. Yeah, that does look really cool, now I think I need to make the side a little bit darker as well. Cool, good suggestion by the way, awesome. Just to, yeah, kinda make that into a little bit more of a black hole, I think that takes care of some of our shadow issues as well, making it a little bit, our shadow job a little bit easier. Alright, cool, and then I just wanna use my layer mask to paint this away, where our shadows are, and this is pretty detailed work, what we're doing right now, so you know I'm trying to do this relatively quickly here, but definitely you know if you guys are gonna be doing this up at home, I would recommend you know taking your time with it, and you know this is the sort of thing where I would be making selections and you know, doing my best to make everything as well as possible, in this case, I'm just grabbing a brush tool and kinda painting in a new shadow here. There we go, without any selections or anything like that, but this would be a good time to kinda spend a little bit more time and energy to get this perfect on your own. And for those of you guys who're kinda curious, this type of composite, normally on my own, I would usually, probably spend, anywhere from four or five hours trying to get this perfect. So you can definitely do something in 90 minutes, but there's still a lotta color work and things like that that need to be done to this image to look perfect, so you know, as you're compositing, these things are like kinda time and labor intensive tasks, so again we're trying to get everything we can done here, in like 90 minutes, but if I was doing this at home, I would spend quite a bit more time on it. Alright, and can even take care of like, take care of like the little tear in the book there. Cool, alright, do we have any other suggestions, from folks in here or home? Well I think we're just out of time Erin. Oh well then nevermind. (laughter) Do you have any final words for us about compositing, and just about encouraging people to go out there and try it all. Well compositing is a lot of fun, it's super cool, you can create images that you can't do any other way, and definitely, you know, if you're starting out with a composite, start of with something that's a little bit more simple. Start with something that you can actually do, and say, wow I did that, that's like, maybe try your next composites, try photographing someone from the waist up and maybe try just putting them in a different background, that way you're gonna cut them out, put them in the background and you can match some of the light and some of the color, but you don't have to worry about a shadow. So that's where I started out when I composited, and then I was like alright that looks cool, how do I make things even harder, and harder and harder for myself, so this composite, it's a relatively difficult composite to pull off, and it's close, I think the shadows need probably like another hour on them to get the colors just right, the color of the lantern and the books and everything like that probably needs another 30 minutes to get those exactly right, so this is, and I do plan on actually finishing this composite, spend a couple hours on it so, yeah, I would say start off with something that you're comfortable with and then just work your way, a little bit as you go along, and yeah, again, use everything that we taught in this class, just remember if you're gonna be doing anything with scale, you have to scale everything from your light source, you know we used a small LED in our book scene and we match that with a larger strobe in our image. So just kinda think about those things, sketching helps out a lot, if you can sketch your final image, then you'll be able to figure out quite a bit of what needs to happen before you even start your shoot, and most of what we did to make this composite successful happened before the actual photoshoot, most of this is pre-production. So the better job you can do in pre-production, the easier it's gonna be during production and post-production.
Ratings and Reviews
Steve61861
Tremendous course. Loved getting an advanced course from a great teacher. I learned a ton of useful things in this course and am certain that I will be viewing this course over and over. Worth twice the cost! Thanks Creative Live!!!
AmandaReese
Love love love this class! So much fun and informative.