Lessons
Lesson Info
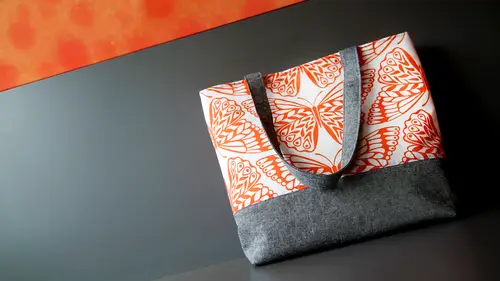
Prepare your Materials: Cut & Fuse
Ok, we thought about our materials and our stabilizers and we've talked about our proportions and dimensions and so cutting infusing is what is on the table now so I have most of my materials already cut infused with the appropriate stabilizers and I just have a couple pieces left so we will work on those because I wanted to show you um you know, cutting is pretty straight forward, especially when you're doing rectangles but sometimes it's easy with the lines on the mat and lines on the ruler to kind of you know, what am I looking at there's lines and numbers and and everything so let's just cut one less piece here which happens to be the interior pocket for the lining on the bag so my measurement on this is um ten and a half by seven inches, so this piece of fabric is a little bit bigger and in general you want to cut off the salvage from your fabrics, which there's not a salvage here to show you but it's the woven edge that's on either side of your fabric and sometimes that can act a...
little funny, especially for your washing your fabrics it could do some weird stuff with shrinkage, so I like to just cut those off um so I'm going to do is I'm going to line up I do have one really straight edge here actually let me turn this I'm just going to trim up and get a nice rate angle on thus piece I'm going to line up the spot him edge with one of the lines on my mat and that I'm just going to make a nice right angle on the one side by using thought lines on my ruler and the line on the mat and some people are very picky and they should be for quoting to not heavily rely on the measurement of the lines on the map because sometimes mats khun um warp or maybe they're not printed quite quite correctly on dh that really if you need precision which we don't because it's just a pocket doesn't have to be a certain exact measurement but if you did for quoting you'd want to really use the numbers on your ruler more than lines on the mat so I have this lined up here and I just want this raggedy edge to be gone so I can use my rotary cutter and it's gonna cut along there and I always put the ruler on the part that I'm trying to preserve so I don't want to cut on this end how can I explain that anyway if if I veered off into this party wouldn't matter because that's that's the part I'm cutting away ok so now I have um my right angle lined up here and so I'm going to measure out ten and a half inches so my ten markets here and then I'm gonna use the half inch on my ruler and lots of people have different preferences on rotary cutters. I mean, this is kind of a tiny little wimpy one, but that's what I use and I'm comfortable with it actually took me a long time to even, um get used to using a rotary qatar I always use shears and shears or fine you might want to mark that with one of our marking tools that we talked about and then just cut with this year's that's totally okay. You know, it's the's can be a little scary, especially if you read about, you know, injuries that can happen if you don't keep your fingers way. So if you're at all like that, then I would say you scissors or shears ok, so that was my ten inch ten and a half. What do they say? Ten and a half inch measurement and then the other dimension is seven. And again, if you know you're slightly off and you make it ten by seven and a half or you know it's not really going to matter because it's a pocket piece, okay, so that's basically, how, um I use the rotary cutter in the mat in the ruler to cut the pocket square, so, um I'm going to set this aside what I like to dio is label all my pieces as I cut them, so I'm just going to write on here lining pocket and it may seem kind of silly because how could you forget that? Well, let me tell you, if you're making a complicated bag or even a pretty simple bag there's a lot of pieces and it's really easy, tio get everything cut out and then you're like, ok, I don't know what what do I do now? So so that is just a simple way to cut I have actually questioned about sure so one of the pieces in the pattern is twenty five inches long, and the markings on the mat on ly go to about twenty four or so is very is there a best practice to use when you're cutting something that might be longer than the map that you have? I often caught on the fold, so if there's something like a strap, which is what you're referring, teo, you can fold your fabric, basically salvage to salvage and get a nice straight line across the top it's perpendicular to your fold and your salvage and on dh then you can cut down from their god that makes sense yeah, absolutely okay, thanks, yeah and it's really important that your perpendicular to your fold because otherwise and when you open it up you might have a piece that sort of goes like that where your fold was s o you know, trying todo any other questions about the cutting in defusing no work you all your average person and cut them off that's a good question the way that the materials and the catalyst is written is thie species out of fabric cut these pieces out of stabilizer fused them together, which is a totally you know, normal, acceptable way to do that I'm going to show you a little trick I have now, um some people want to stabilize all their fabric, they'll have like their whole, you know, yard or how much they bought for a particular project and then they'll roll out all their interfacing and then they'll just like, refuse the entire thing and then cut out all their pieces, which I think that's called like block fusing or something like that, which you can be really wasteful. So my I think that I'm going to show you right now is kind of like a cheater in between thing that I like to dio so I'm going I have this piece cut that's the lower panel of the bag and I'm going to use it to this feasible fleece and I'll show you my little kind of cheap trick, so one thing I want to mention is for everything cutting, fusing, sewing everything, every word that comes out of my mouth about this is that there are a million ways to do everything so when I'm showing you today is the way that I do some stuff, but basically everything can be done in a different way at least one or two or three ways. So, um, so yeah, definitely if there's any other questions about if something could be done a different way, just asking and we could talk about that, so all right, so you can see that, um, this is my lower panel, I've already fused this with thie cotton woven and are facing, but I wanted to have just a little more body because this fabric tends to be just a little windier than that campus I'm using, and I want him to be more similar, especially since it's at the bottom. So I've done that first, and now I have places on a piece of fuse herbal fleece that has the bumpy glue side on it, and you can see it's a little bit bigger, so I'm going to show you my little trick over here, but the ironing board and I'm going to grab my water bottle one thing that I like to do is not have steam in my iron, but actually spray my work with water, which, um I don't know it's kind of a weird thing but I think it started out of the fact that my iron always leaked but that as we go I'll tell you some other reasons why it works for me so anyway so I'm going to just give this a little mist and then what you want to do is if you have one you know straight and of your um ah police or whatever your stabilizer is you know lined it up on that and then you can just steam right up I can steam her press off this edge and then I can go right up to the edge obviously I don't wantto iron off the edge because then I'll get glue all over the bottom of my iron this works well for little pieces to like the flap of a pocket sometimes it's kind of fussy to cut around so this will get fused maybe not one hundred percent this way just enough to stick it on here this woman takes a little bit longer the feasible fleece I find takes a little bit more time to fuse and then also because this has the extra layer of interfacing okay so I'm going to do that and then I'm gonna grab my shears or you could move it back onto the um cutting mad if you wanted to and then now that this is kind of got a hold on my piece I'm just going to trim. And then that way my interfacing is there my stabilizer is the same size and then I can go back and um you know fully fuse it because then I'll be ableto iron right off this edge and if you do get stabilizer glue on your iron which you will no matter what a good trick I always have the dirtiest iron and I'm always looking for ways to get that off and I find that some of the iron cleaners air not great um is the magic eraser you know that like mr clean weird I don't know what that thing is but if you use that on a cold iron like you wet the or maybe to the hot I and I will just try it try call first and you know you you wet it and then you scrub it on the bottom and it really it really works good so right now you're doing a police on top of a regular stabilizer would you ever do two layers of the same stabilizer if he just didn't happen to have sure yeah you could do you could do two layers of the cotton interfacing um that is definitely an option it's it's funny because it looks different in the end like even though it's on the inside of your bag like the usable fleece is just a little bit puffy and you can just like see see that somehow um so yeah I would definitely sermon and then flip this over and you again you don't wantto press ray on the feasible another thing speaking of ways that people do things differently aa lot of people like to reduce the bulk in the themes by not by having their interfacing pieces cut smaller and a lot of things like say you're making a dress and it has a collar or something like that that has, you know, a little curve or a point or something like that where it's very important to have it be like nice and crisp in perfect that I would cut the interfacing smaller but for a bag I especially because we're using feasible I always have it go the same size because then I can use my teacher trick and then also um if de laminates it's still kind that scene because if you turned it off and you said the bag and the de laminated than you and how this like crunchy, bubbly stuff and you would be able to kind of see that through that exterior the bag then you will not be happy so all right, so this is good got that stabilized um and I'm gonna make a quick little label for it so this isthe thie exterior lower panel ok? Do you like to use the usable who police despite itself or do you like to put that first layer of just regular cotton and I using itself for the for the campus part of the bag. I just used the fuse herbal fleece on and there's different. This is called thermal in thermal liam from palin and there's. Thermal lamb plus, which is a little denser. I guess so. It's really about, like, going to the store and, you know, looking at the different things and thinking about what you want, but yeah, you can definitely I use it by itself all the time. I just kind of want to show you the one example of a combo, so I never knew that you could actually like interface on top of other interfacing. So I think that's really interesting. Yeah. I mean, I don't do a lot of that just because I'm lazy. Well, I figure like, if you if you find if you find one thing, they can do it all, like, you know, the feasible fleece is, like, bulky enough or whatever. Then then you don't need it. But like, in this instance, where I was kind of trying to balance the two fabrics, then you know it's, nice to know you consort at one extra layer in there.
Class Materials
Bonus Materials with Purchase
Ratings and Reviews
Lynnette Simpson
5 stars +++++ I thoroughly enjoyed the whole course. I found that these classes gave me the understanding and confidence of sewing 'any' tote with both a slip and zipper pocket, etc. After watching these classes of Betz I'm able to put together my own tote without having to refer to patterns or instructions. I started as a beginner not able to figure my own dimensions. Now I have confidence to do just that. Yes, very happy I purchased this class and am happy with the confidence it has given me. Thanks Betz and creative live Cheers Lynnette
a Creativelive Student
Betz is organized, pleasant, and interesting. I am enjoying her courses. I watched a free preview, and that sold me on getting all of her classes. Love you, Betz!
user-d19582
I enjoyed this class very much. Great class for the beginner who wants to fine tune their techniques. The instructor is very knowledgable and guides you through the ins and outs of making a better bag. I am looking forward to her next class, I believe it airs the end of January. Thank you Betz