Post-Processing - Cloudy Skies
Lesson 20 from: Beginner's Guide to Astro Landscape PhotographyPeter Baumgarten
Post-Processing - Cloudy Skies
Lesson 20 from: Beginner's Guide to Astro Landscape PhotographyPeter Baumgarten
Lesson Info
20. Post-Processing - Cloudy Skies
Lessons
Class Introduction
01:02 2Understanding the Night Sky
08:18 3Planning Your Shoot
03:05 4Scouting Your Location
08:47 5Gear Essentials
08:44 6Camera Settings
08:51 7Astro Landscape Composition
08:50 8Light Painting
01:28Time Lapse
13:25 10Photographing the Moon
05:30 11Photographing the Aurora
04:05 12Photographing Meteor Showers
04:08 13Star Trails
07:04 14Capturing Panoramas
03:50 15Shooting Multiple Images for Stacking
05:36 16Getting Creative
04:56 17Post-Processing - Astro Landscape
06:23 18Post-Processing - Stacking
10:22 19Post-Processing - Light Painting
06:22 20Post-Processing - Cloudy Skies
11:59Lesson Info
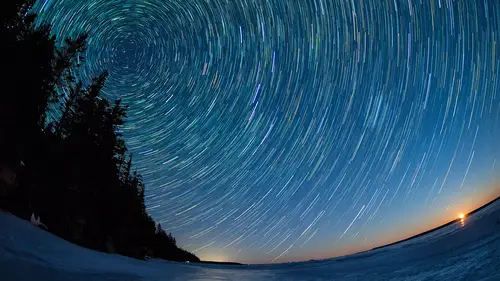
Post-Processing - Cloudy Skies
When we first got here to Joshua Tree, man, I was really pumped about getting out and shooting and have high hopes for some amazing astro shots that night but mother nature had a different plan in mind for us and by the time we were all done, I kinda walked away feeling rather bummed out, completely disappointed with what we got because a fair amount of cloud had come in and it was interfering with the night sky 'cause I still see some stars, Milky Way was almost completely obliterated, and you know, mother nature was giving us lemons. And when I got home, uploaded the images on to my computer, I saw potential and decided to turn those lemons into lemonade and that's not unusual at all. I mean, there are so many times where I've been out shooting, maybe for all night long, several hours, and you know, just didn't get the results that I was hoping for. That's pretty typical I think in almost all styles of outdoor photography and it's absolutely the same in landscape. So, let's have a lo...
ok now at one of the images that I got and wasn't all that keen on it initially and so, here it is here. And you can see some of these rock outcrops, we've got a lot of cloud on the horizon here you know, we definitely have some stars rolling through, there's Jupiter. Got a plane going through up here in this top left-hand corner. Overall, not all that impressive but I was able to turn it into something that looks like this, all right. And I'm gonna show you how I did that. And so the first thing I wanna do is, I don't have to worry about lens corrections for this shot 'cause I know it doesn't matter with mine, I'm gonna go to the exposure slider and I'm gonna start bringing that up. All right. So, I wanna some detail in the foreground, all right, but what's happening here is those clouds were so bright that I'm actually beginning to blow out some of these highlights here and I need to pull that back in. So, normally I'd be sliding the highlights to the right, I'm actually gonna bring them down to the left a little bit. Just a little for now and I might readjust that afterwards. All right. Now, same thing that I did with that first shot, I'm gonna go to the dehaze and see if I can clean up some of that milkiness of the clouds. So, gonna bring that slider over and look what it's doin'. I can actually now begin seeing not only can I see you know, more of space, but the Milky Way is beginning to show up, here we go. Let's bring out some vibrance. Let's bring out some of that color. Go to the shadows here, pop those out. Now, I'm getting some of that detail on the foreground that I absolutely love here because you know, that's why I'm here, it's not just to photograph the Milky Way, but to see some of the landscapes that exist here in Joshua Tree. And so, I'm kinda liking that. All right. Now, I also wanna try to you know, really control the lighting in here. I'm not happy with that at all. And so, I'm gonna use a completely different tool here. I'm gonna use one of the graduated tools, this radial filter. So, I'm gonna click on that. All right. And I've got an exposure set from a previous time that I was working at two-thirds of a stop and I'm gonna start here on this cloudy area and now I can see some of that detail on the cloud here between these two rocks but I'm not really losing any of my other components. I might actually bring up some of the shadows too here. There, getting some of this the dimension in the rock. All right. That's looking pretty good. All right. So, if you're happy with that, I can click done. All right. Those settings have now been recorded. I'm gonna play with the white balance a little bit. I might keep it the way it is but let's see what happens if I do warm this up. Too warm. Let's go back down, let's see what happens when we cool it off a bit. Oh, I'm kinda liking that. I'm kinda getting a neutral sky and I think I kinda like that. So, now I'm close to 3800 kelvin. All right. The blue on the horizon here actually looks kinda like, blue sky. All right. So, that looks pretty good. One of the other tools that I like to use if I wanna bring out some detail or sort of, add my own you know, artificial lighting, is I'll use the adjustment brush. So, I'm gonna click on that, menu changes here and I'm gonna see if I can paint in some light on some of these rocks. Now, not a lot seems to be happening at the moment but of course, I can adjust that afterwards. So, couple more strokes. Just to add a little bit more dimension. And so, now that I've applied those brush strokes, I can play with my exposure. There we go. A slight little pop and now, I've got some dimension being added to these rocks. All right. Last thing I'm gonna do is I'm gonna go back to, so if I'm happy with that, I can click done. Now, I'm gonna go back and just play with my exposure settings again, now that I've made all of these adjustments. Just wanna make sure that I'm happy with the overall exposure. Yeah, I think that looks pretty good. All right. I can still see the Milky Way. Overall, I'm pretty pleased with that. All right. Now, the one thing of course that you'll notice, or maybe two things you'll notice, is I was using a fisheye lens for this. And therefore, the horizon has got a definite curve. For night sky photography, I don't actually mind that too much. Daytime, I try to avoid that as much as possible. But I am gonna show you the way that I would correct that if you would prefer a straighter horizon line. And of course, we have those the lights from the airplane in the top-right corner. And so, we're gonna have to fix that up a bit. All right. So, now that I've made those adjustments, gonna right mouse click here and I'm gonna bring it into Photoshop. All right. So, here's the image now brought into Photoshop. There's my base layer, I don't wanna really mess with that so I'm gonna make a copy of that, drag it down here to the new layers icon and maybe the first thing we'll do is we'll get rid of this light trail here. So, I'm gonna zoom in a little bit so I can see what I'm doin'. And real simple, use the healing tool, go over here, one click on one end, go to the other end, hold the shift key down, boom, gone. That airplane has disappeared. Let's zoom back out again. And now I wanna do a little bit of correction to the horizon. For people who do shoot with Olympus you'll remember that we've got a fisheye correction feature in here. Unfortunately, what that does is it saves your image as a jpeg and I don't wanna work with jpegs in my posts so I'm not gonna be using, I didn't go and initiate the fisheye correction ahead of time and so, I'm gonna play with some adjustments here and my favorite tool for that is under the edit tab. Go to transform, and warp. All right. So, here's my grid and I can begin dragging these little handles. And I'm gonna begin adjusting and I'm not gonna go for perfectly straight. I don't think it needs it. I might bring the center up just a little but not a heck of a lot. All right. So, we can certainly play with that feature a little bit more but I kinda like what I'm getting here. Don't wanna lose part of the image down here so I'll stretch that out. And notice that really the only part of this image that's being altered is the bottom third, all right. These stars will still be nice sharp points, some of the ones a little closer may have become slightly elongated but it's really not very noticeable at all. So, once I'm happy with that, click the checkmark, all right. Now, the one part that catches my eye in this shot is the fact that I'm still getting some you know, curved horizon over here. The problem with that is that I believe those were actually mountains but because it's a fisheye lens, I think it's just, it looks to me like it's just a continuation of the horizon and I'm gonna show you a really simple way of correcting that without sort of, messing around with the rest of the image. So, I'm gonna zoom in here for a second so I can see that a little more clearly. All right. Then, I'm gonna use my selection tool here and I'm just gonna create a selection around that component, including part of the rock. Finish that off. There we go. And now, I'm gonna press command C, command J, to create a separate layer from that and if I turn off these other two layers, you can see, there we go. So, that's what I've just created. All right. And now, I'm gonna just play with that. All right. So, back to my move tool here and I'm gonna start skewing this. If I hold the command key down, I can actually begin skewing this a little bit and you can see what's happening to that mountain. It's actually beginning to flatten out. We put millions of years of erosion happening in seconds here and I'm pretty happy with that already. That already looks more natural. So, if that's good, click the checkmark but what you will notice now is you can definitely see a distinct difference between this layer and the other one. Well, let's blend that in by adding a layer mask. All right. Choose the brush tool. When you're masking of course, black paints out part of the layer, white paints it back in and so, I've got it, so I'm gonna set it at 100% by pressing zero on the keyboard and maybe a slightly smaller brush and begin brushing that out so that it blends in nicely. There you go. I don't think that's really noticeable at all. Turn that off and on and you'll see the difference. There you go. First, second, the rock is still lining up and maybe it's off just a hair up here. There we go. Now, the rock doesn't look like it's out of place at all and the horizon has been straighten out a bit. And there you have it. So, from our original raw image, a few adjustments, and we can you know, take what was a rather disappointing shot to begin with and really bring it alive.
Ratings and Reviews
Lana Froemming
I purchased the Creative Live + Olympus Step Outside Conference Bundle some time ago, and it has taken me this long (too long) to view the astrophotography class. Although not a beginner, I have been using Olympus gear (EPL5 & EM1) for about 7 years now, I have only dabbled in astrophotography – and as a result, blown my fair share of what should have been killer shots. When I did give it a go, I obtained most of my settings’ tips by combing through Peter’s blog posts and then racing out the door. Although I feel that I know my camera pretty well I still learned so much from this course. I appreciate that he walked the viewer through multiple night time photography events including shooting the milky way, the moon, aurora, meteor showers & star trails as well as talked about the different camera features including night sky panoramas, in-camera multiple exposures, live comp & time lapse and presented a variety of lens choices and why (plus so much more). What I love about Creative Live is that once you purchase a “class” you own it and can return to your classroom over, and over again. I also appreciate that they work with experts who are also amazing teachers. Peter is one of those.
Doug Marshall
Some classes are just fantastic and this is one of them! Peter Baumgarten is a wonderful presenter of his extensive knowledge, experience and passion for the subject. This is a course I will return to watch again and again. Highly recommended if you are like me and are interested in getting into astrophotography and landscape.
elizabeth chambers
To my way of thinking this was the best photographic genre instructor featured during the Olympus Step Outside series. He may be a more seasoned instructor than the photographers demonstrating landscape and bird photography. Whatever the reason, I thought he seemed to understand his audience particularly well. Great advice and the post processing was interesting. Likely because of my familiarity with Lightroom, I found the post production done by the bird and landscape photographers rather mundane whereas the astro photography post production was new and interesting to me.
Student Work
Related Classes
Outdoor