Lessons
Class Introduction
01:02 2Understanding the Night Sky
08:18 3Planning Your Shoot
03:05 4Scouting Your Location
08:47 5Gear Essentials
08:44 6Camera Settings
08:51 7Astro Landscape Composition
08:50 8Light Painting
01:28Time Lapse
13:25 10Photographing the Moon
05:30 11Photographing the Aurora
04:05 12Photographing Meteor Showers
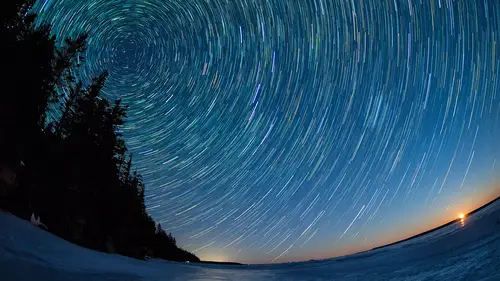
04:08 13Star Trails
07:04 14Capturing Panoramas
03:50 15Shooting Multiple Images for Stacking
05:36 16Getting Creative
04:56 17Post-Processing - Astro Landscape
06:23 18Post-Processing - Stacking
10:22 19Post-Processing - Light Painting
06:22 20Post-Processing - Cloudy Skies
11:59Lesson Info
Planning Your Shoot
Regardless of what kind of photography you're into, every shot you take requires some planning. Sometimes, it's a matter of just creating a simple composition, bringing the camera to your eye and pressing the shutter release. In astral photography, there is a great deal more planning involved because you are literally shooting in the dark. One of the first things we want to look at is lighting conditions. Your enemy at night is artificial light. We want to make sure that we're in a dark sky area and there's dark sky maps that you can view to see where in the United States or anywhere in the world that you can capture night sky photography. Now we're on the very edge of one right now because, of course, we've got L.A. off in the distance. That will create some urban lighting for us. So you don't have to be in a completely dark sky area, but you will definitely want to make sure that you're in an area where urban lighting, city lights, isn't gonna be an issue. The next source of light th...
at you're gonna have to fight is the moon and there's nothing you can do about that. So we planned this trip to coincide with the new moon phase. We've got a fairly large window of a little over a week that you can shoot at night where the moon isn't going to interfere with your images. So that was the second thing that we had to look at. Now the third thing that you might want to consider is the actual orientation of the Milky Way. If your primary goal is to capture the Milk Way in that beautiful arc, then you're gonna have to do that in the spring or early summer. Perhaps the last thing that you want to look at is exactly where is it that you wanna go. Ideally, you're looking for a location that's got some interesting foreground features. even if you haven't chosen anything specifically yet. And certainly National Parks are ideal for that but you don't have to travel to a National Park to get a great astral shot. So once you've figured out the big picture things and you've chosen your location, now you're gonna focus on the minutia of trying to get that really good shot. Get out early in the day to do your scouting. You want to be able to have enough time to find some interesting foreground features that will really showcase that Milky Way. The Milky Way is just a backdrop. You want something in the foreground that really stands out. As you're doing your scouting, you'll also want to consider safety. When you see those great images online and the Milky Way is nice and bright and the foreground is easily visible, that is not the way it looks when you're actually out in the field. Most of the time, you can't see anything, and so you want to make sure that the area you're going to is safe and you also want to make sure when it's all over with, you know how to get back to your vehicle. If you're shooting in a remote location, this might sound silly, but make sure you've got enough gas in the car. By definition, you're out in the boonies. You want to make sure you can get back home and not be stranded on the side of the road. All of those things need to be considered and then once you get to your spot, you want to be able to look around and find areas that are really gonna stand out so that you're ready to shoot once that dark sky hits.
Ratings and Reviews
Lana Froemming
I purchased the Creative Live + Olympus Step Outside Conference Bundle some time ago, and it has taken me this long (too long) to view the astrophotography class. Although not a beginner, I have been using Olympus gear (EPL5 & EM1) for about 7 years now, I have only dabbled in astrophotography – and as a result, blown my fair share of what should have been killer shots. When I did give it a go, I obtained most of my settings’ tips by combing through Peter’s blog posts and then racing out the door. Although I feel that I know my camera pretty well I still learned so much from this course. I appreciate that he walked the viewer through multiple night time photography events including shooting the milky way, the moon, aurora, meteor showers & star trails as well as talked about the different camera features including night sky panoramas, in-camera multiple exposures, live comp & time lapse and presented a variety of lens choices and why (plus so much more). What I love about Creative Live is that once you purchase a “class” you own it and can return to your classroom over, and over again. I also appreciate that they work with experts who are also amazing teachers. Peter is one of those.
Doug Marshall
Some classes are just fantastic and this is one of them! Peter Baumgarten is a wonderful presenter of his extensive knowledge, experience and passion for the subject. This is a course I will return to watch again and again. Highly recommended if you are like me and are interested in getting into astrophotography and landscape.
elizabeth chambers
To my way of thinking this was the best photographic genre instructor featured during the Olympus Step Outside series. He may be a more seasoned instructor than the photographers demonstrating landscape and bird photography. Whatever the reason, I thought he seemed to understand his audience particularly well. Great advice and the post processing was interesting. Likely because of my familiarity with Lightroom, I found the post production done by the bird and landscape photographers rather mundane whereas the astro photography post production was new and interesting to me.
Student Work
Related Classes
Outdoor