Lessons
Lesson Info
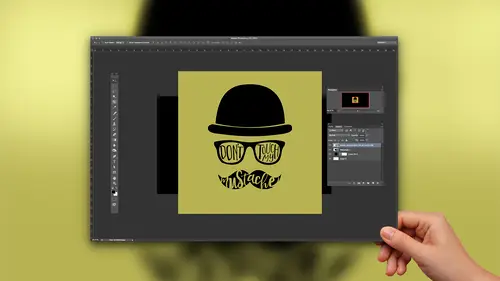
Using Type to Create Border Designs
So now we have this cool text and we're gonna add this border behind it. So I'll go back to my type tool, and I'm gonna click again to insert my text. And I'm gonna pull up my beloved cliff panel and I'm scrolling way back down. At least it scrolls kind of fast, uh, to something called Skitch. And this one is They have so many different versions. So Skitch Borders, Skitch, Borders, Phil and Skitch Borders. Think I went with solid? We'll see. Yes. So Skitch border solid. This is a really cool collection called Skitch. And they've got borders, ding bats, they have the characters, and then each thing comes in different variations, like shaded or filled or empty. I don't know. It's really cool. And they have these little borders. So the way that this works is that these glitz, they're actually meant just like like letters. They're meant to be joined and combined with other blips. So if you have ever bought graphics before to use ah, where you're mixing, um, like, you have a frame, maybe, a...
nd you're gonna put a word in it, but the frames not long enough for your word or It's not tall like somehow the size isn't right. Then you want to find a font that can do this for you because I can create the border to be just the with that I need. So all I need to do is choose the end. So for the left end, I'm going to go with this guy and double click to enter it. And then Oh, no. Now I have to find the middle piece. I will admit this is a little tricky. Maybe it's this new. Gosh, Let's go back. Sorry. Uh, that one is a little tricky. You have to find the right middle piece. Skits. Skitch borders solid. Okay, so this guy and then it's like one of these. Nope, This one. Okay, so see this. I can keep entering this as long as I need Teoh to make this border the length that I need. Because if you make it too short, yes, you can enlarge it. But then you're enlarging the heights also, So that may not be what you want, so I don't know if this is the right. We'll see the night when I'm done, I put the end cap on it and then I can set it. We'll have to change the color to Let's see who close, but not quite. Let's go ahead. I'll do that. Same keyboard command this time, Ault. Our option Delete. Fill it with black. We can drag it in place in the layers panel. Of course, it needs to be underneath drama queen. And then I'm just gonna insert, um, in 30 my cursor. Remember, um, was it this guy? Yeah, so we'll just add, like, two more of those in there. So now, yes, now that is going to fit. Okay, so that's a little example of how you can take cliffs and actually combine them. You know, if you find a font that's designed with those features, then it's pretty awesome. That same funt also has some fun characters. If we go from sketch solid if we go toe skit skitch ornaments, let's do shaded, I guess. And we can put some little stars. They have these little stars down here. So I might just make a couple of these now and I wanted those black to Kush. Let's just do that, Um, and maybe I'll put in another one like this one and you know so they're actually all different. And once I get them added, I can use my move tool, Teoh, move them around. I can select this one without grabbing it here because what's showing up in the layers panel? Of course, because it's a type player. It's showing me the character that's type. So, like the layer that says Drama Queen is called Drama Queen. But these little stars are mapped on the keyboard to the letter B or C or why. So when I'm looking at this time like the What's that? Well, that's the star right here. So I could just instead of going to the glitz panel once you know what, that's matched, Teoh. Although not all glyphs are mapped, so this doesn't work For every cliff, I could just type the But when I don't know where it is over here and I have to start looking. I could save myself the hassle with the move tool active. If I command or control, click on one of the layers, it will select it for me, so it can just be a little easier when you're, you know, doing this. Okay, so for the sake of time. I'll just duplicate this one by using the move tool in holding, alter or option. And then I can drag it around. Maybe if I want to rotate it, I'm gonna press commander Control T. And I can spin it so it doesn't look like it's the same. All right, so now we have some stars going on, and then maybe we add the text here that said, um will change the spot to for this. We're gonna use abig nail. And I think I said something like the glib panel. It's such a drama queen. So I'm selecting it all and scaling it down, committing it. And now I'm going to move it over. We'll move some of this. There we go. And last but not least, I had one more cliff. If I can find it. Yeah, this crown. Wait right here. Those were shaded as well, right? Yeah. The black one is shaded, so go ahead. And, uh what sketch? Oh, my gosh. Do you guys ever have photo shop? Lately? He's been doing it. It loses focus. And I'm like Photoshopped stay focused. But like I'm time, I'm working in photo shop and suddenly it switches to safari or, uh, bridge does that? Does that happen to anyone? Because I haven't figured out the solution. I've tried Googling it, and it's not C. It just did it. It's not, um, working out. So I don't know if it gets tired or what. So I apologize if that happens on camera, that's very annoying. But I promise no one's more irritated about it than I am. There we are. Okay, so we've got this. Let's just leave that for right now. Will enter one more here. We want this time instead of shaded. I want Phil and the Crown. And yes. Okay. So I just added two more glitz. One is shaded and one of the Phil I want this one. That's the Phil. I want it white. So I'm gonna do that thing. Keyboard shortcut. In this case, command delete to fill this with my background color, which is white, and we'll humans, we can see here. I can move this into place and drag it behind the other one. And I have a whole new graphic. So not only are glitch sometimes meant to be lined up side by side to make new designs, but they can also sometimes be layered. So here we have a shaded glitch on top of a filled cliff. So you can create all kinds of looks and graphics and really fun text and and that such So I want to now scale these. And I don't trust my set up Teoh not lose focus again. So instead of highlighting the text one layer at a time and then scaling it up and then getting the other layer and scaling it up instead, what I'm gonna do is select both layers. So I've got one selected here, and I'm going to shift click to select the other. And then I'm gonna press commander Control T to enter free transform. And now, if I shift and all or option dragged from the corner, I can enlarge this and it should snap into. There we go. Yeah, because this is vector information. So, um, there you have it fun. Little design, totally done with type. And I don't know the stuff. Just I could make these all day
Class Materials
Bonus Materials with Purchase
Ratings and Reviews
Monica
I loved this so much. It's short and sweet and gave me exactly the information I was looking for. I wanted to start designing printables for my Etsy shop and didn't know I could do what I wanted to do in photoshop (which I already had as a photographer) and I was so happy to find out I don't need to upgrade my Creative Cloud subscription.
Shelley Messersmith
Kahra does an excellent job of conveying what could be boring material by using real life teaching. I learned so much and the course instilled a desire to use the techniques and learn more about typography. Thanks for the great lessons and the enjoyable course!
Sean Aikins
That was a great class, thank you for putting it together CreativeLive and thank you to Khara for presenting!