Lesson Info
6. Coffee Cup Project
Lessons
Lesson Info
Coffee Cup Project
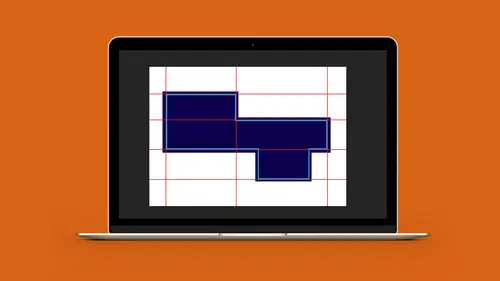
So, we're gonna show you how we work on a coffee cup here. Now, coffee cups are curved, okay? So, how do you do something, it's like, (laughs) totally different world? Oh, look, we have a glue flap right there, and why do we have a glue flap? Well, of course, because it's a coffee cup, and we want to make sure that it's glued very well, and you don't print on there because, hmm, water gets in there, hot coffee, and what happens? Yeah, your lap gets nice and warm, not what you want. So, here's a quick dieline for a coffee cup here, and it's interesting because I don't have any bleed area on this, and the reason why, on a coffee cup, is actually quite interesting because we really don't have a bleed area on a coffee cup. Picture this, because the top of the coffee cup right here rolls over, okay? So, you know, we could print right to the edge and it's gonna roll over to create the top of the lid. The bottom here is going to be scored and glued for the bottom to go in, and then, this flap...
is gonna come around and touch this flap, which is right where's it's going to glue. So, we wouldn't have a die cut on a coffee cup. That would be kind of crazy, (laughs) unless, of course, we'd like it to leak, that would be great. So, I just use the same legend for everything. That way, if there's nothing on there, at least the legend's there, if I were to build something. So, we have our live, we have our trim, we don't have a bleed here, or a die cut, but we do have the glue area. The biggest thing is is how do you curve something to the curve of the coffee cup? And if we were to go in and we were to put artwork on this, and you actually create the cup, this logo is now going to end up as a smiley face. I know, and they're just like, "No, it won't." It's like, you always make a mock-up of everything. Just because you think it's going to be that way, it doesn't mean it's going to. Thinking in a curved structure is really difficult. So, just to get a quick concept of how a coffee cup actually is is that a coffee cup is just a segment of an overall, just extremely large doughnut, okay? And we just take it and we wrap it around. And people are like, "Well, that's not how "the coffee cup works." It's like, take your coffee cup apart. I promise you, that's how they are. I know, it seems weird. But how do you set up a grid structure with something like this? Because I can't take my grid structure that I set up under my preferences here, and go in and set up a curved grid structure. You kinda can because I can actually create artwork, which I can then turn into static guides. So, you can draw anything in Illustrator, it has this feature that if you draw a line or a shape, you can actually turn that into a guide. So, this is how you create guides and grids on curved artwork. Remember, it's a giant curve with a pie slice. So, what I had done is when this was created here, I went in and I looked at how this was built. And because this was a pie of a giant circle, we actually have the center of the circle, and then we get our little pie slice coming right out here. So, our guides, right here, are nothing more than lines that come in, and then, just simply form this shape. So, if I wanted to put any vertical type on here, say I wanted to put this coffee cup is hot, and I want to put it so that it's vertically on the cup, I will need to put it so that it is going to be in line with my guides. But how do I go through and, kind of, like, this is the windshield wiper effect. How do I go in, and if I want to put this coffee is hot, and I want to put it right here, how do I know just how much to rotate it? You know, is that good enough? It's like, okay, but should it be here? Well, if you don't have it in the right position, you can see that this may fit right here, but it doesn't fit over here. So, you can't just guess, at all. So, what we do is we're gonna go in, and I'm gonna show you how we're going to create this. And I've got these two lines right here, and we have found the center point of rotation, which is so incredibly important. And this is gonna solve all of our problems, because a lot of people are like, "I never even thought of that." So, here's what we do. With these guides right here, we start off with just one of the very basic guides itself, and this guide right here, I just drew the guide down to where I knew the center point was. Very simple, okay, 'cause I drew my full circle, that's what the overlay is showing you. At some point, there's the middle, and this is the middle right there. Little bit complex, but we're gonna show you. So, I've got my guide coming right from the edge, parallel to the edge, coming right down into the center of my circle here, which is exactly why I drew the circle. And yes, the center of my circle, right here, is exactly this point, so I've got that, awesome. Now I'm gonna take this guide that I have, and I'm going to rotate this guide using my rotate tool, but I'm going to bring it down to the actual center, and I'm gonna hold down my option key, and I'm going to option-click. Option-click is going to bring my point of rotation down to the reference point, and then the option is gonna call off my options dialogue box. And what I'm going to do is I can go in here and I can preview the angles here. And so, I could go in and say, okay, I would like a line every five degrees, or three degrees, or two degrees, whatever it may be, and that's going to give me a duplicate line. So, if I do something every two degrees, it rotates around that anchor point. And I'm gonna click copy, and it's gonna give me that guide, and I want to duplicate that repeatedly. So, I'm not gonna go back through that whole process. I'm gonna use command-D, and I'm gonna keep duplicating that, creating a perfect grid structure. If anything needs to run vertically on that coffee cup, guess what, now I have the reference line for it. Beautiful. That works great, and yes, it's on its own layer because I don't wanna do anything unless it's isolated on its own layer. Wonderful. So, there's that line right there. Those are all my vertical guides, and I can put anything along there, just as long as I rotate it. Beautiful. And now, if I put my little coffee line in here, I can see that now, wherever I put it, if I'd like to rotate that, I can rotate that so that it fits along those guides, wherever it may be, and now I know, when the cup is actually formed, it will actually appear vertical. So, that's good. How do I do my logo? Well, the logo's tricky. Yes. Quick question on that thing. Can you snap that to the guide? Well, we haven't turned them into guides yet. Okay. These are just lines. We are gonna turn them into guides, yes, but then, once you have it as a guide, you can snap to that guide. Thank you. Yup, you certainly can. So, this takes care of all the verticals, but what about the horizontals? Well, this overlay that I've done right here, that I've actually drawn these circles, and those circles also originate directly from the center here. I can go in, and now, we want to create multiple circles so that I get both my horizontal and my vertical, if you wanna call 'em that, my grid structure. So, I've drawn a circle from that center point to the top and bottom of my cup. With these two circles drawn, I can go in and I can use my blend tool. I know, it's like, seriously? And my blend tool right here, and I'm gonna blend these two together, but I'm not gonna blend them together so that I get this color. What I'm going to do is I'm going to double-click on my blend tool, and I would like to have a certain number of steps, therefore, creating a grid structure. So, if I would like 12 steps, I'm gonna say 15 steps here, 'cause that's one, two, yeah, that's gonna be a bit tight. We'll just do 15, you can always change it. And then I'm going to click on the top part of the one circle, and I'm gonna click on the top part of the other circle in the corresponding, and I get my grid structure, okay? There it is. If I want to change this, I can always go back to my blend tool, double click, and I can change the number here, and so, I can very easily see what it's going to look like, to get my grid structure. So, that's the great part of this. Well, now I have this extremely busy-lookin' field. So, I've got my guides, my overlays on two different sections, two different layers. I'm gonna select everything on this layer by clicking on the little dot right here, and I'm gonna turn these into guides so that they're no longer lines. They're actual guides that I can turn on and turn off. So, if I go under my view menu, and I go under guides, I can actually make guides out of what I've drawn. So if I make the guides, there it is. I need to expand this first because this is an appearance. It's not actually all these lines. In fact, I'll show you that they're not actually all these lines. You can see that it's like that. I need to expand 'cause it's an appearance here, expand. Here it is, so now, there are lines. So, now I can go in under the view menu, under guides, and I can make guides, and now, guides. And it got rid of them completely. Don't know why they would have. Oh, probably 'cause my guides weren't turned on, there we go. (chuckles) View, guides, make guides, awesome. See, there's my guides. And I'm going to grab all of these. View, guides, make guides. There's my guides. And I can, of course, select them all, put them all on one layer, so that all of them are there together. And lock that too so they can't be moved or messed with at all, awesome. And there's my grid structure on a curved basis. I'm gonna go in and I'm gonna grab my artwork here, and this is what's cool. If you've ever tried to curve something in Illustrator, I'm actually not going to try and curve it manually, just not gonna happen. So, I'm gonna use the effect panel, and I'm going to use my warp. And I'm going to go in and I'm gonna arc this. There is a difference between arc and there's a difference between arch. So, when I go in and I arc something, you can see that the top and bottoms are going to conform to a slice of pie. If I do an arch here, it's going to be totally different. So I'm gonna arc this, with a preview here. I'm gonna zoom in so we can see this a little bit better with my grid. Effect, warp, arc, preview. And I'm gonna arc this so that my structure is going to curve with the guide. Click off that to see, it's a little bit tricky to see. And therefore, there's my logo. That's how it curves. One tricky thing that once you apply this arc or this curve, if you want to go back and edit this, it may not be quite right. You go back under the effect menu, and you go back under this warp, and then arc again. It tells you, okay, do you want to apply another effect on top of this? And it's like, no, I don't. That's where you want to go to your appearance panel. So, go under window, appearance. And this is where you're going to edit your effect, by double clicking on this, so you do not lose what you've done. It keeps the original settings. You can click on here, and then you can adjust this ever so slightly to get where it is that you want to be, and dial it in without starting all over. And there it is. So, I can turn off my overlay, and now I have my coffee and my content right there. And if you print this out and mock it up, the logo will appear straight, and this will appear vertical on there, all based on the really cool grid structure. Now, there is one other way that we could do a grid structure really quick as well. This was kinda the longer process so we can explain to you how the whole concept works. But a really cool way of doing this is once you find the center here, and you can go in and use your polar grid tool and draw from the middle by holding down your option key. And when you do this, you can see that you can draw a grid with dividers on it right there. So, I'm just gonna turn off my overlay, right, I'm gonna put a grid, guide right here so I know right where my center is, and I'll show you this quick method right here. So, if I go in and I use my polar grid tool, hold down the option key to draw from the middle when I draw this, if you use your up arrow while you hold down your key, you're going to get multiple radius lines. And then you can use your right arrow to go ahead and get lots of vertical divisions as well. So, this creates a very large and a very big fan, but you can go in and take this and convert this all into a grid structure as well, so that you have that right there, and you can see that. So, that's one way of doing it as well. But at least you get the concept of how we go about creating a grid structure on something that's curved. Key is find the center with that. I know! Pretty sweet. And then, you got your structure all set up, and now you know that your artwork is all good.
Ratings and Reviews
Tomas Verver
Although I do not any Packging Design at the moment it's still a nice basic introduction course. As i love the teacher teachingstyle and a part of the subscruption it's a nice course. Atleast for beginners in this niche.
Kathleen Kamiya
This was my first technical class of how to create dielines in Illustrator. It was easy to understand and really helpful. The teacher is great! Thank you!
Pieter H
Great class!! Great teacher.
Student Work
Related Classes
Adobe Illustrator