Lessons
Day 1
1T-Shirt Appliqué Prep
27:26 2Basic Stitching: Satin & Zig Zag
21:16 3Adding an Appliqué to Your Shirt
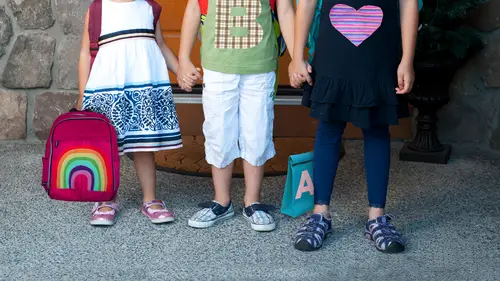
42:01 4Backpack: Rainbow Appliqué Prep
26:58 5Building the Fabric Rainbow
16:12 6Zig Zag Stitch: Layered Rainbow
19:46 7Creative Kids Clothing: Simple Skirts
36:32Adding Binding Tape to a Skirt
25:39 9Adding Elastic Waste Band to the Skirt
27:58 10Easy Superhero Cape
22:56 11Embellishing Your Cape
35:15 12Basting the Cape
20:26Day 2
13Oil Cloth Lunch Tote Prep
29:13 14Sewing Oil Cloth Lunch Tote
30:01 15Building the Lunch Tote Body
21:14 16Adding Pearl Snaps & Eyelets
29:00 17Creating Unique Cloth Napkins
42:27 18Prepping Images for Art Tote
32:25 19Creating Denim Frame Around Images
23:49 20Patching Together the Art Tote Bag
29:04 21Creating Box Corners on the Tote
26:14 22Adding Lining & Handles
24:05 23Oil Cloth Art Folder
30:49Lesson Info
Building the Fabric Rainbow
Now, if you used other designs, and in the past, that is just as late as the rainbow. A susan's elizabeth online is asking that question. Yes, you know what I love is geometric shapes, it's, perhaps overlapping circles, or something else that just has a I think there's something universally appealing about thes smooth, accessible shapes on the opposite side, layering the stars, for example, the patterns that are in the packet or nice and different sizes. But I just think there's so much freedom in these apple kate patterns because you can really make it a simple ours complexes you like. Another thing that would be nice to do is almost like a portrait approach, tio a design or face, or a detailed of something that would kind of reflect a few layers of fabrics. For example, if your daughter or son had a doll or a toy they really loved, you could make, for example, a simple face and then layer a hair around and over the face and then continue building that way. My good friend gretchen was...
sewing with me last week and made an absolutely wonderful piece for her daughter be, and she took my basic yellow many fig face on dh with my pattern added that to a really nice plane blue t shirt and then her daughter loves a certain character so she improvised free handed and improvised hair eyes and mouth and then a head scarf that really mimic that one and created the entire thing in three different passes and it's just her not so charming I really liked that was a nice mix of the simple and then the detail um freezer paper when you're making all your patterns I love free service paper for patterns that's such a nice approach and I really like it too because you can kind of do a few different directions with it and one of my favorites is with fabric paint you could make a negative freezer paint almost like a reverse application and then paint fabric paint or on paper you know what of appropriate our paint but you can do a really sophisticated freezer paper design and then have it be absolutely wonderful negative space for your what turns into your letter face or star rainbow or anything and if you haven't freezer paper you can usually find at larger grocery stores in a roll and it's like honestly about the size of a baseball bat so if you buy a single one you'll probably have freezer paper for your next a few years of projects if not longer yeah and then what's nice is it's like one side is very papering and easy to drawn or mark on and penn through and the other side has a little bit of a it's it's like if you've seen it zits similar to what you buy like for example fisher meat wrapped in at the store sometimes but has kind of a shiny side that also if you do ah the appropriate ironing on it will cling to fabric and so you can use it to cut out really nice pieces or in my case, as I mentioned, you can paint the part that does not have reserve paper on it will be a wonderful stencil it's really nice stuff thank you for mentioning that. Okay, he was just asking about freezer paper so that was came in perfectly thank you for that holly great news the other day on not like I can make an oval now yes isn't it nice for those shapes with curves or specifics? Discovered precedence seal which is really yeah fun for drawing stuff out and are sewing a line. All right, so I have I just finished my seventh peace and you'll notice that each of these for example, just show five, six and seven as the's examples five and six have the seam allowance that's a specific extra amount allotted to be the overlap you won't see that but it's nice to have their to strengthen the bond and make it niedere so that's what that dotted areas for the seventh one since it will be the top of the entire design does not have the same allowance because the underside of seventh one is just going to be our rainbow so you'll notice the seventh is particularly small so now that I've let my this unroll just a little it's still going to be a bit of a challenge but we can hold it down with some pattern waits I'm going to start pressing my first fabric and and for this one because it is rolling and really as I said they're sony brands and so many differences I'm just going to pin this down for now and I'll obviously take the pens out before going much further but I'll just hold it in place and since this I love this this kind for being lightweight and easy to use but it's not as aggressively stickiest some of the other brands if you're using another brand it made that lies flat and it comes and sheets for example it may just grab your application immediately and this won't be an issue at all but I'm just gonna pendant around it was obviously knew tio all of particular process and there and we just got a question that come into saying how perfectly do you need to follow the path? And if it's not to the perfect size will the stitching cover it enough to make it work or should I re cut? If I've made any kind of error you know I would keep this's a bit of a detailed answer, but with this particular pattern, everything on the underside will vanish under the layer over it. Everything on the upper side will be his exact stitch, so I wouldn't be as concerned about small places here. There were the fabrics just barely showing I would want to make sure that my upper curve is need. And this exact will definitely be a very nice kind of calming few just joining so it will give it a nice overall look and I will say as ah, anybody knows she's worked with different types of craft materials. This is a lot easier and it's lying flat, eh? I wish I could go back in time twenty four hours and put the sender under a dictionary or something heavy. But it was in my carry on bag rolled up yesterday to come here so that's, just how it all unfolded. So I'm gonna pin this tone actually just gonna pennant right into the ironing board. Now that I have my red and I have a nice padded ironing board surface, so give it some stability to stay in place much better. And one thing that you can check is that your back piece is khun grew it with the edge of the rainbow, so now pin this window if you want to match he want to match your base so that its neatly lined up there will be a few differences here and there with your fabric with it's really not a big deal and this reads is such a fun overall that it's not going to matter too much but and if you're using a stick your version this will press right and as I said but because the one I'm using isn't a sticky it's a little more subtle yes smoothing it down with your hands adding just a little warmth from the iron you don't want to have a huge refuse this you want to make sure that it's not melting the whole thing but yeah having it joined together having joined together is the ultimate goal all right? So living right along with that one so when you're using when you're at the craft store in choosing which materials to get for your next project well I love this kind of lighter weight off usable applicator person like this it is going to be a pretty durable finished product but the rainbow you can go with a heavier, stickier, more tactile version and will work just fine, he says. You can see as I layer now I can take it pens out my fabrics in the right place my main concern now is just keeping my work space flat so that it doesn't curl up and knock some of these offer out of alignment as you can see the rainbow in the rain rose starts to take form here's my green didn't want to skip a color um so just give you a preview of what's ahead when these are all neatly aligned with this rainbow I really like how it just feels like the colors are very vibrant and I mean obviously there's a lot going on so it's not a subtle pattern at all but the total simplicity of the lines let's you really have a lot of fun choosing your exact fabric so you don't feel like you have to use a very neutral are very simple palate because it's not overly complicated okay so here's putting my last ones into place and as you can see this last one is by far the smallest and most most discreet so what I'm going to do here since mine is being pinned down some gun avoid the penned areas but I'm going to give us a warm press I've turned by iron down so it's not going to fuse and melt everything I mean susan shelby is saying do you have any secrets for getting the fusing off the iron if you hit it oh yes absolutely that happens also well sometimes get on your ironing board one thing I would do which is a very simple thing but there's a product for cleaning your iron you can buy it fabric stores I don't remember the name but very useful and then you just hear iron and you put the material on the iron itself so it it just cleans that literally cleans out while you're sewing meanwhile, you're using your iron on hot it's always like an oven cleaner in a way where you would run your oven according to the directions the same way yeah and then one thing I love to do which I do at home is get simple like a vintage sheet or something I've got plenty of yardage of nothing valuable but something I just enjoy the look of and I make ironing board covers and then they last about a year and then they'll end up with few zobel or spills or something on them and you can just make another one it's much prettier than the ones that come with the manufacturer you know, just on the iron ironing board at the source you'll have fun replacing them so now I'm going to just with us warm iron just give this a little help again if you have a very, very sticky and are facing I mean excuse me if usable double sided interfacing you will not need to do this step because the fabric will just cling to itself and that's what the one I used for this was like but so now that we've joined our fabrics will want to candle this very carefully because we're gonna make sure that the fabric songs jump around too much, but I think we can pin it now that it has some body to it so when you press it down we'll now be joining it to a white quoting cotton layer so our next step is working very gently with us. You want to make sure you can peel away your if usable this's coming off very easily, which is great and you'll I decided to do it this way so you could see easily from us overhead view what it looks like finally we're at a pretty part ok, so now you can see a couple of love a couple of these very high just hanging down just to show that you can easily turn them. But so now I will dio is take our white press quoting cotton make sure there's something break that will show through and just neatly lay it over that press it down, smoothing with your hands and now using your hotter iron on the correct setting, follow those manufacturer's directions and fuse this so it's going to form a really neat durable backing and what's great about this is that now carefully you could flip your rainbow over and now is the time to make any corrections. I kind of like a slightly homemade warm look but if anything seems a little bit uneven you khun just it now and then you refuse it together always working from the center, since this is at one complete fabric and it's going to smooth in that direction, you never want to iron it this way, because you'll simply pick up your fabric edges and drag them. And so learning from the center out is essential, and we'll give it one. We're really good press well, our ladies at the same stage. What raid, what? One one dot, one rainbow away. Good. There you go. Yeah, I love this project is just makes me really happy to see it kind of comes together, like if you've ever soon address you're excited about, and you get to the stage where it really starts look like address, so just for simplicity's sake, you may either turn this away or keep it the way it is either. Works fine.
Class Materials
bonus material with purchase
Ratings and Reviews
Amanda Siska
Susan's projects were the best introduction to sewing I could have hoped for! I wasn't able to watch every project, but the ones I saw were simple, VERY clearly explained, and perfect for a beginning seamstress like myself. I'd never used binding tape before, or elastic, but now I'm confident about making my own binding tape and adding elastic waistbands to pretty much anything. I was immediately inspired to make a few skirts for myself after watching the simple children's skirt in this course, and I'm planning to make cloth napkins and an oilcloth lunch sack as well. I wish I'd gotten to see the applique portion, so I think I'll have to purchase the course in order to see that part. I'm positive that it will be just what I need to learn the process! I see that the previous reviewer was disappointed by the lack of diversity of crafts for this course, but I find that the name "Simple Sewing Projects for Beginners" was completely accurate for what it was. Perhaps it was categorized in a craft category, which would still seem applicable. I think it was advertised as having back to school projects to make for your kids, which is an even more detailed description of the course, since it includes clothing for boys and girls, as well as a lunch tote, cloth napkin, cape, and maybe more things I missed. Overall, this was my first Creative Live experience, and I was blown away by how informative and fun it was to watch!
user-c76ced
What a great class! Susan does a fabulous job explaining each project and is great at giving you a heads up on what issues you might face with each project. I've now made two applique projects with another in the works. I've also made two of the girls skirts. Susan gave me the confidence to try and I am really happy with the results. Hope to try the binding tape soon. Thanks for offering this video.
user-c468fb
Fun projects to make for your little one. Susan explains things so clearly. Very nice that she also offers patterns and written instructions for free