Lessons
DAY 1
1Class Introduction
13:24 2What is a Baby Plan?
29:09 37 Steps to Baby Plan Success
26:59 4Shooting Prep for the 4-5 Month Old "Smiling Stage"
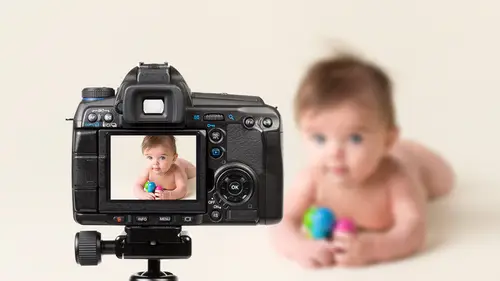
14:33 54-5 Month Olds: Tummy Time and Headshots
21:02 64-5 Month Olds: Basket Shot
20:34 7The Baby Plan Structure
28:28How to Price Baby Plan Sessions
19:23 9Exclusivity and the Product Line
37:46 10The Annual State of Mind
20:31 11Pre-Consultations
43:15 12The Art of Language
08:04 13Designing for the Annual Product
15:00DAY 2
14Pricing Step-by-Step
09:29 15How Much Money Do You Need?
15:32 16Building Packages
22:54 17Shooting Prep for the 6-8 Month Old "Sitting Stage"
11:23 186-8 Month Olds: Chair Shot and Baby Food
14:28 196-8 Month Olds: Bucket Shot, Set Design, and Coloring
19:35 20Creating Efficient Systems
09:04 21A Shooting System
08:49 22Client Systems: Database, Workflow, and Session Tracking
34:34 23Client Systems: Communication Tracking
25:33 24File Management
09:17 25Policies for Baby Plans
41:00 26Customer Service
34:19DAY 3
27What is Collateral?
26:32 28Collateral: Printed vs Digital
31:39 29Designing a Brochure
18:52 30Shooting Prep for the 1 Year Old "Standing Stage"
07:50 311 Year Olds: Using Different Props
10:45 321 Year Olds: Cake Smash - Lehan
13:12 331 Year Olds: Sitting and Standing
07:59 341 Year Olds: Cake Smash - Alexsy
17:09 35Retouching Workflow in Photoshop
38:23 36Creating a Panel Series
26:16 37Designing Wall Products
19:37 38How to Launch Your Baby Plan
14:41 39Targeting Your Ideal Client
11:49 40Marketing Your Baby Plan
35:32 41Effective Promotions
24:46Lesson Info
Creating a Panel Series
I want to do a panel siri's of the food thing from when he starts to when he becomes a mess all on one sheet ok the trick to this is editing age image very similarly and compositing them together to smooth out your background right because that's going to be the hard part is making baby the same size you know proportionately making sure my lighting is good and making sure my backgrounds work seamlessly together I'm pretty darn destructive about this I just want it to work so um my backgrounds are going to get really brushed together kind of like what we just did to smooth out the banding issue but on steroids okay so um we have several images let's go ahead and maybe do sh we do three together for god that one is a keeper don't you think so is that one which one should we do that one or that one that one okay so we'll give that one four stars we've got to start off with him doing nothing so we'll start off with that because we're creating a story right so we'll do that one will do that...
one booth that's pretty cute he's like what did I d'oh I actually like that one teo that one's cute too um okay so we're going to do those but I'm gonna put the one where he's looking up last does that make sense so of you sort by raiding get my oh my for starters when my four stars go early what happened? Oh, it's because I'm not there there here's my four images. Okay, so have a couple of verticals a couple horizontal. I'm gonna probably do this one at the very end because he's looking at sound good. Okay, let's, go and open these four images hope they're short look for sharpness that one's a little soft, but, um I should he should be okay. Ooh, that one's who is it? It's doable it's a little soft. See how little it's a little bit and this is the danger you get with continuous light with strobes. You'd never have this problem, so but there's there's present cons to working with strokes and continuous lights and I just have to figure out what works best for you. I don't want that stroke going off in my baby's face, but it means I have to be really good at shooting and not a camera shake and when you've got toys in your hands and trying with one hand to shoot and you're going to end up with a little camera shake and that's exactly what this is just a touch of camera shake, okay? Even though I shot at one three twenty five a second, I'm the one point four so that focus point had to be right on his eyes which it wass but I moved a little bit and even at one hundred one three twenty five second I'm still going to get a little bit of shake I'm pretty fussy about sharpness though but I'm sure you guys who shoot on location all the time see this a lot I get it a lot outside okay so then this one is not it looks ok ok isn't he just delicious? I want to eat him so I'm going to go in and enable my lens profile correction let's go ahead and get all these back to where they were sure there's a faster way to do this but that's okay um I didn't do the first one first so I'm gonna do mine the lens profile correction and then go into my red's kind of reduced the reds and orange just touch and then my exposure this one actually looks a little bit bright doesn't it increase? My blacks opened up my shadows get a little clarity okay then I'm just going to apply the same effect on all of them select all synchronized it'll apply the same color tones and exposure to all the images but I have to be careful because I think I just did my exposure on some of these when I was shooting and this one looks little darker doesn't it? So I'm gonna go ahead and increase my expos just to touch their decrease it there so that they all match. That looks pretty good and that looks really good. And what you could do is kind of look at your backgrounds to make sure your backgrounds have a similar range of tone. Does that make sense to see other backgrounds? Pretty much match on that one. Do you see that color in the background is very similar. That's what you want? Okay, so I'm gonna select on my images. Go ahead and open a mall. There's a lot of my computer right now. So my complaint at me and go t much I shot this with one hundred two, didn't I don't get this in the nine hundred that's? Why? The g eight hundred files are huge, so sometimes I take a little bit of time too to open okay, so then when I typically do just to make life easy on myself, if I make a new canvas that's large and then shrink it down after the fact. So let's, go ahead and make this twenty four inches by twelve. Okay, so just a new canvas that's all I did. Then I got to go through and get my images. This was the first one, right? Where is my new not used to working on a small screen so it was pop that on there and you could go ahead and just open up a new canvas first and then drop them all onto the canvas I probably would have been easier but here I am here I am okay, so the first image we wanted teo is it this one? I think it is this one right? So I'm just going to drop it down in size I might have tio we're gonna do this one next right? So you want to make sure he's the same size in all the image on all the layers so what I do is put it over the top then reduce the opacity so that I can see kind of get a same size reference so it makes sense that helps me kind of see if it's the right size so then I'll pop him over there and I can move this one to the back if I want to come to see what I'm doing but I am going to end up masking off these edges so that I can see everything together does that make sense right now? I'm just kind of trying to get everything in the right size oops someone trying to get everything him in the right size on every image and then I'll go back later and kind of repair backgrounds and start masking stuff off son never reduced getting the right size he's still too big they're uh looks pretty good right we'll put him right there with him over there. So cute place is gonna freak when she sees this okay? And then the final one actually need to turn I need to reverse some don't that's too big do you see what I'm doing guys? You see, I reduced my capacity I'm kind of shrinking it down so I get him to be the same size on every image I'll move this one over here because that's gonna be the final image okay, so then it's just a matter of masking everything else so you can see everything right? And fixing your background is really all it is. So, um this is my image wait, where is it sometimes I have to like think myself where is everything? This right here is my image of the very back, right? So that's the one I probably don't have to do anything too because everything else is gonna lay over the top of it. So I put that layer on the bottom. This layer is the one over here on the left. Okay, so I'm gonna go ahead and unchecked these so I don't see them. I need to be able to mask part of this office that we can see him we can see this layer beneath it so you just file a mask, used my brush tool at a hundred percent and start bringing him back in and then I can start moving them around, make sure he fits the scene. Sometimes that snap feature really drives me crazy. And then I'm going to play around with my brush tool and the shadows to make sure ratios herewith make sure I'm not losing any shadow next to him so it feels like it was composited. Does that make sense? So this is really just about using layer masks to your advantage and some people will, like do this really heavily with cutting out and stuff. I kind of think doing it with a layer mask is just fine. And then fixing your background, it's totally up to you. This is the poor, cheap man's way of doing a composite. Okay, this is basics starting tio to get the basics of compositing. So then we're gonna start with this image. Where does he go? We're gonna go ahead. Just start masking it out so we can see that you see what I'm getting at what's happening here and move him over. God he's. Cute. Isn't he just, like, delicious. I wantto eat him. All right, brush tour and sometimes like it, I am distract myself and I'm like, oh, squirrels, where am I, what am I doing, what am I on? When you're really tired and you've been editing forever and you don't know where you are in a peace doesn't that just like I can't think straight have a smell of time this said cheers all funky and fix it later do you think I'm talking about this right here is all nasty funky it'll get fixed story and then we have him looking up at the end of course was just soak your hate my job horrible thing one hundred percent sometimes I'm like you know when things don't work like your own room I have a small time oops stuff too much and notice how my background is a little darker down here than it is over here that's because in this image feels actually this image feels a little over exposed you see that how it's lighter than everything else so I might actually do a curves adjustment on just that layer so I'm going to go ahead and clip that layer clipped the curves layer to this one and play around with it until I feel that the background matches the rest of the scene okay so I'm gonna reduce ah it's too much air produce my highlights so you are trying to get it to match the rest of the scene there we go that's better now I fixed the color in the front do you see that by just helping myself with that curves so um I'm gonna continue going along this route? It's still not quite right. It's a little bit light. Yeah. Is this a product that you would have already made up before client came in? No, this is this is individual products that we would offer to our clients at each baby plant session. Create a collection? Yeah, be like a signature product. What happens is, is some folks don't. I'm like talking in anything at the same time here, which sometimes my little blond brain kit no, I just realized how, like, totally self deprecating that, um, some planes don't do an annual product. This is this. We have samples of this kind of thing at our studio. It's, like this is the classic month seven month product that we would do that they could buy a gift for family or whatever if they don't want to do an annual product. I always try to talk plants into doing some kind of annual product. Um, but they don't have to, you know, I mean, I don't want them to feel obligated to have to do that. So, uh, it's really it's really a matter of giving them options, but, andy, I want exclusive, maybe pam products, you know, I want products that are just baby plan, and this is one of those so they can't get this on the newborn session. Obviously, it would be weird to do on new recession, but even kids sessions, but the other thing will do here, like the one year if they wanted to do something, I will have them hold the letters of their name and photographed them with the letters of their name and do like kenley across like, in this set up, so or kenley is one, you know, and, like have her all these different bases of expressions, but they pay for that there is a definitely an up charge for this product. They can only get it in certain sizes in certain finishes, so it has to be at least a twenty inch. I think it's sixteen after look, um, but it's a certain size that they have to get this that or larger, especially because you're putting so many pieces so many images on one piece, you want to make sure that they're getting at large enough so that you can see the faces and the detail in it, that fellow tonight's profession should keep working. Sure, he looks a little small here, doesn't he? Does he feel small to you guys? So sometimes that happens to me, and I feel like I gotta, like, change the sides so sizes huge when it comes to composite that's color light atmosphere in size is your acronym class yes I learned that from ben sharkey's amazing composite color the color between each image has to be accurate and the same you don't want a color tone on one image to be a blue cast on the other to be a yellow cast so that's why custom white balancing is in camera is so important because it's going tio make sure your color is consistent across all images lighting the lighting director should be the same if I had shot the light on one side and then their side it would look really weird okay atmosphere you want teo this is especially true when you're compositing things that have distance in them it's like this right here is just a cute little charming composite we would do for a baby they're not really worried about background but if you're putting something in the distance like hills or a castle or something there's atmosphere between you and that object if you ever look at the horizon it's always on a funny day you'll see hes like the mountains will have hayes on them that indicates distance and that's the atmosphere that that's in the image so you know if you don't add atmosphere it tends to look flat and not dimensional and then size perspective you want to make sure the perspective matches and that's what I'm trying to do here that's why I'm kind of shrinking and expanding him to make sure that he looks proportionate in each image and not smaller or bigger and one of the other does that make sense and then you're actually compositing like putting a kid in an environment they gotta fit in their environment compared to the other objects in the environment. So and this is something that I still struggle with this is size and perspective like you know if you're going to put a kid on a bench next to a door make sure the kid is proportionate according to the door if the kid is too big for the door there look like alice in wonderland and looked kind of funny if you're going for that look great but you know that's a real kind of atmosphere than fine it works but for the most part you should be very careful I'm going to see if I can fix this little area here before I start fixing background just to make my life a little easier on myself there we go that's better a year ago okay, so this is starting to look like something right now it's just a matter of kind of fixing my background and adjusting things and cropping to make it look right correct okay so one of the ways we can do that is all often leave my layers here so I could go back and find things this layer is still bugging me does it look like he fits right bath better isn't it? Is this guy? Is he still too big? Here is me third wants to small there we go mr spoon man needs to get a little bit of an expansion there we go sometimes it's so hard to see and that's why when I do like competitive work with um my images I'm constantly sending my stuff to friends and mentors and people who I trust who see this judges who aren't going to be judging my work and be like what's wrong with it I can't see it what's wrong with it on dh they'll pick it apart and tell me truly what's wrong with it so thanks for the help, guys. So then when I do it's kind of start to get into destructive mode, I'm gonna press shift command option e what that does is it takes all my layers from below and makes one layer at the top so I could pretty much groupies and unchecked them and now I just have this all on one layer does that make sense? So shift command e takes all the layers I just produced below it and makes it smashes it into one layer above so it doesn't destroy my layers beneath that makes sense so I can still go back and fix things well then I just start kind of doing my little marquis tool trick and playing around with stuff and it won't always look good the first time out gets close to that rule hairline as I can do on the right layer jules and stretch it up that's good because then when I mean I know I'm like totally stretching pickles pixels right now and I'm okay with that you're going to see when I zoom in how stretched it looks do you see that? But then all I can do is take that brush trick duplicate my layer, use my brush tool around forty percent and start just blending things in so it looks right and then I'll take it off ezra when I'm done here reduce my capacity here and there to kind of make it feel right and then I'll just layer mask it my poor computers like it's a big file like you do and then I just take it and remove it off him if you're I'm not being neat about this you could be a lot neater than I'm being I'm kind of in a hurry but so you know you could see these takes some time so you don't want to not charge for it it's not a huge amount of time I've been here, I've done it's like in what twenty thirty minutes my clients think it takes forever they're like I want you guys to see what the finished product looks like it's taken ezra I hope lacey likes this you think? Cathy you think lacey well she's in the control room um have lacey is away watching right there if you want teo messager lacey message me and let me did she message you q but oh my god, how cute is little mr ezra and his food fight adorable so that's basically the product you can tweak it from there and kind of make sure it works right and look at it up close to fix those pixel details and things like that but that's a quick and dirty for man's way of doing a little photo shop product that tells the story of mr ezra self feeding for the first time and this is such a milestone moment for this age and this is kind of what I love about doing these kinds of products because the quiet cannot do this themselves they cannot do this themselves at all when you capture these moments I mean oh my god, I mean, lace is probably freaking out right now how cute this is so and she's supposed steve it promised let's go save um so cute any questions about that before I move on to anything else, questions from the internet or anything? Yeah, I think you've answered a number of these I mean, this was people were asking if you charge more for that type of thing on dh then you were just wrong it's an example but a question of come on about the size of the canvas that you were using I initially put in a twenty four inch wide by twelve at three hundred d p I that's a pretty big candidate like photoshopped campus I'm not talking gallery up camera I'm just talking the actual terminology for what you would use a photo shop that's pretty good size you khun go up in size teo easily twenty by forty no problem with that size canvas on of course you can shrink it down any way you want so I kind of usually just pick a size in the middle I typically do these as long skinnies because that lends itself to the story but there's no reason why you can't have some fun with it and try different shapes you know try squares try you know doing things on a print like print on a circle and matted on a circle you could use some really fun stuff there as well. I mean, can you imagine having a child lie down on the ground and you shoot and put their head in the middle of all these little different expressions on a circle on the outside with circle and put he's our world in the middle? I mean hello you could do cute adorable stuff that is creative and different with this same methodology print it and then put a circular matt around it. And how cute is that you could even write if you have good handwriting? I love calligraphy and totally in the clear right now, there's some amazing clue calligraphy classes on creative five just jonesing to watch side notes parole back to regular scheduled programming. You could write cute little saying and pencil around the outside that has to do with a child in your world and you hurt walking out so I mean, you get teo it's just amazing how much stuff you could do that your clients can when I'm trying to get you to do is think about product design and delivery in ways that nobody else is in ways that are just charming and delightful. And your clients oh yeah it's worth paying for because I can't just print that at costco makes sense, okay? And joan says julia, that was awesome. I'm glad. I hope this technique you see how you can use this technique in lots of different ways. So have a child hold a letter since father named kenley is one or low. Mr ezra his food this spoon discovering his spoon, the cake smash you could easily do this with is perfect for that, okay, you know the expressions doing expressions board around a circle, all kinds of good stuff, okay? So there's lots of ways to use this technique and it doesn't take that long to do but it looks like it did that's the key but the cool thing is is that I've been shooting as read something with lonely weren't baby he's like oh my baby playing I got to come back and shoot him again when he's won but anyway we did that captured connection tess and I got to photograph him as a newborn and now here we are doing him a six month it's so you get so attached and what's beautiful when I tell my clients all the time is the mask of the face this little area right here does not change when you look at his one year images you will see and then look at him at one you'll see the essence of this right here in his newborn imagery and that is just the coolest thing ever to see that this little person because it makes you think what's he gonna look I get five and what will I still see here that I saw a newborn that I thought one year and then I will see again at five years old and I do that with my own son and his newborn pictures and to communicate that to your clients is another way to get them emotionally attached the process and the portrait you know, the essence of who someone is all right, let's, go into, um I'm just gonna show you some of the images that we shot from the glass couple sessions so you can kind of see what we what we got. So I love crying images. Is that matt? Madam e I love I love the these kind. You ah, little peanut. This is little cake smash behind from today, testing out the cake. Like, what is that? I love the way the little overalls are falling off of him here is like, here you want some bob out of here? Green fingers so cute and here's a little lexie. So this one here I'm going to go in and do that shadow highlights to really accentuate her face and helped the shadows in here to make her eyes just hello. And then I would do have been yet around the outside. So it looks like she was just lit from underneath on peking beneath that chair. And that is such a one year old thing to do to get down and play peekaboo and so that's. Why, I remember when? I don't know if you remember this or not you guys didn't have a really good view or not, but lauren was worried about her falling and I knew that she had a grip on the chair that she was fine. I'm like lauren back off back off because this shot was there and I wanted to get her underneath the chair peeking out at me like that, so don't miss those moments because they can really be adorable. Oh my god, how cute is that smile? So anyway, she's a bit of a love muffin, I want to show you really quick, tio what? I shot these with a fifty as you're not the curious thing ever, so I'm gonna open this one. I just want to show you really quickly what that lends correction thing does so this you can see the bad vignette ing and distortion that my fifty millimeter lens does the minute I click this button, watch it like sixes all my problems right away, it's like one of the things that is just flipping awesome and that's that's a that's a done image, I mean, I don't have to do much more to it. I'll just go ahead and make sure shar probably accentuate the highlights in the eyes just to touch and on the lips will get this little highlight right here and accentuate that and along her fingers to really see what she's doing. Maybe crop it. All of it. And then I'll be done.
Class Materials
Bonus Materials with Purchase
Ratings and Reviews
Natalia Malinko
I just finished to watch this course. And I confess: I've been struggled all the time during the viewing to say already: I LOVE IT! So, I LOVE this course! Julia is so nice teacher, and photographer, and person. And she is so incredible organizator of whole child's photography business. She is amazing, so meticulous, so persuasive trough all and each one of the important points of this business. And she is just great in the part of studio´s shooting examples with the babies. This is one of the best and most valuable courses I found in Creative Live, thanks!
Dawn Potter
I've been so fortunate to be able to be a part of the Live audience experience with Julia. She is an amazing person, photographer and teacher. She does a fantastic job of explaining in detail, the steps she has taken that have helped her success as well as the steps that have set her back. We are so lucky to be able to learn from her experiences and to have someone who is willing to put herself out there to teach us and help us to grow as photographers. For anyone considering adding a Baby Plan to their portrait offerings, this class is a MUST have. Julia, you are #awesomesauce !! xoxo - Dawn Potter www.dawnpotterphotography.com