Retouching Workflow: Luminosity Mask
Lesson 28 from: The Art & Business of High-End RetouchingPratik Naik
Retouching Workflow: Luminosity Mask
Lesson 28 from: The Art & Business of High-End RetouchingPratik Naik
Lessons
Day 1
1Introduction and Pre-Shoot
19:30 2Shooting for Retouching: Beauty Look
27:52 3Shooting for Retouching: Beauty Continued
36:58 4Shooting for Retouching: Fashion
35:04 5Shooting for Retouching: Fashion Continued
27:47 6Shooting for Retouching: Male Fashion
23:13 7Culling for Retouching
16:47Annotating for the Retoucher
37:27 9The Retouching Industry
15:19 10What to Know Before You Get Started
27:07 11Tips for Retouchers & Gear
36:16Day 2
12Overview of Photoshop Workflow
37:29 13Photoshop Workflow Continued
43:34 14Retouching Workflow: Camera RAW
38:29 15Retouching Workflow: Beauty Image
30:31 16Retouching Workflow: Healing Brush
24:29 17Retouching Workflow: Content Aware
32:55 18Retouching Workflow: Dodge and Burn
31:08 19Retouching Workflow: Frequency Separation
31:03 20Retouching Workflow: Frequency Separation Continued
16:04 21Retouching Workflow: Color Correction
26:08Day 3
22Retouching Workflow: Contouring
34:56 23Retouching Workflow: Sharpening
17:39 24Retouching Workflow: Color Toning
28:54 25Retouching Workflow: Color Picker Table
20:24 26Conversion to Black and White
27:10 27Conversion Q&A
13:54 28Retouching Workflow: Luminosity Mask
14:31 29Retouching Workflow: Male Model
30:01 30Retouching Workflow: Male Model Continued
39:26 31Retouching Workflow: Fashion
28:39 32Working with Clients & the Business of Retouching
46:15Lesson Info
Retouching Workflow: Luminosity Mask
Before we begin talking about male models there's one really cool technique that I want to show you guys in regards to adjusting shadows and highlights I think would be really cool thing to demonstrate considering it is a topic that isn't explained very concisely and easy to understand I got a lot of common saying, you know is anything else you would do in regards to something like your child makes her where you have this fine control said yeah, you know, I thought of something and I want to showcase it to you guys so what I want to do first and foremost, is I'm going to first flatten everything this is just an example I would typically never just flat everything and save it ok, so don't freak out about that I will go ahead and duplicate this layer and put it into a new document just in case I don't want to save over my psd should be very terrible because none of you will get this pasty okay close don't save since we ready have safe copy now the intention of this next tutorial is somet...
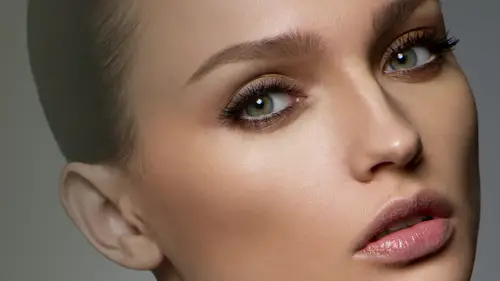
hing called luminosity masks and luminosity masks allow you to adjust exposure in different areas just based on whether it's a shadow or height I'm just gonna go ahead and show you exactly what I mean because it is something that I use on very selective basis but very powerful so say we have our image here which we are so accustomed to we're going to apply first is go into our channels which is under window and you see it's, his channels now already talked about channels I'm not going to go over this again. However, in channels there is a way to select every light part of an image bird mid tones the lights okay it feathers from the mid tones. Alright, your lights and the way to do this is, uh she here command and click on the rgb. What this does. It brings up this little marching aunt uh, cursor or marching and selection and you can see it's even selecting a little bit of the bits in the dress and it doesn't indicate everything that selected but it's giving your best estimate of all the areas that are going to be selected in the image. Now once this is selected within my channels going to come down and click on this mask option it's like a mask, but it is essentially a selection that is saved. What it did just now is it brought up this alfa one channel here. What also one means is basically these are your lights and your mid tones and so forth, so when you look at this image, you notice that just the way a typical mask works the light areas with white areas are the ones that show through the black heirs are the ones that are completely concealed, so this means we can use the selection to add a curve to it, and it'll make sense the moment that I apply it, so check this out. Now I'm going to reading this two lights now, the way to make and use this election is I'm going to again click on command and click on the thumbnail, which is noted as lights, so it brings out this marching and selection again. Now I'll go back to my regular layer stuck, making sure that rgb, red, green and blue are also visible and you don't you wanna make sure that this light I is not visible, okay, so essentially rgb is visible, and so is your main rgb child here. Okay, so once we have this selection done and this lights will only be to make a selection that's also have use for now, we'll come back here into our layers panel and making sure the marching band are still visible will go into the adjustment layers, and now we're going to cook on curves, and this is just an example of one way we can use so equipment curves, and we'll bring the curves up and down. And if you notice what's happening is a curve is on ly applying toe light areas of the image from the highlights the mid tones the shadows itself are not being applied even if I bring this up here nothing happens because the mask itself is allowing us an option click on the mask shows us what the mask looks like and now this function just like a regular mask the black hairs are not showing the changes we just made the on ly areas that are being affected are the bright areas of the mask which is obviously face the arms and so forth so it makes a really beautiful detailed mask of the major this's really cool because you could use this for landscapes, portrait, whatever you want and you can get really fine control as to exactly where you want everything to be affected so that's wonderful however this can get really defined we can say you know what? I don't want to define the area affected just to be the light areas I want to be just the highlights. So then how do you do that? Excellent if you're already feeling bogdan mildest, I include in action that has everything from every single level of detail you have your lights, you ever super highlights and you have really detailed highlights and also shadows and really deep shadow, so you have this fine selection of control I would included one channel that has just midterms you you can have something that controls something in between now as just as I mentioned, we're going to go back into our channels and continue from where we left off where we have our lights instead of just using our lights we can go even further and say we want a more defined area now I'll click our command um on my lights and the springs of the marching aunt selection but instead of just using your marching ants on dh selecting lights we can go even further and what I'll do is I'm holding these three options down which is shift option command and it's going to bring up the x in this little box right next to the hand which is hovering over lights and what that's going to do is going to refine the selection even further as you see the marching aunts went and shrieked even further and again I'm going to go and click on the mask our channel one more time and create this other alfa mask and you can keep on going further and further by clicking on x again using shift option command creaking on the channel and it keeps getting further and further further you have lights you have super lights and you have your just your brightest highlights this's fantastic so again simcon same concept we can click on save this alfa one which is your super lights? Did I hear some brains exploding? Excellent, thanks. Now with super lights, I'm gonna come back into my there's palate and go ahead and use another curve, for example. Now I can bring that down and you can see it doesn't affect every single area except for the brightest part off the highlight region standard. Typically we'd come in over, you know the highlight era here and drag that down just to emphasize more of the highlights that are being controlled. The other thing you can use it for is pretty much anything let's say I'm gonna click on my super lights sounds like a superhero super here, and we can go ahead and say, use another option like pretend we want to use selective color or even photo filter black and white color balance anything that can be used as a mask is essentially applicable is ethical and fair game in your adjustment layers, but mostly what I use it for is through my curves because then I can manually select and define where where I can place one thing or another. Now so then how do we get our shadows? Basically, what we'll do is we'll go back to her lights, we will duplicate this oops, I will duplicate this by selecting my lights, bringing it down here and hovering over this new layer icon and it makes a copy I will select it and had command I and it brings up all the shadows and if you want more define shadow range just secretive for highlights who's the same process we will shift option command, click and then at another one and I messed up somewhere and I was not cool again. Here we go so what happens is we have more copies and it continually keeps going lower and lower you can see here it's getting more and more to find and keeps going further and further and really starts extract hair even it's really making distinctions between shadows and your darks so this is really cool because then you can lift up shadow areas by using this mask and coming in and applying another curve and again when you whenever you load this election, make sure that only these three are selected but you're essentially making these use them as masks okay, fantastic. So we'll go back in and click on the curve and go up or down on the section. The other cool part is we can combine this with our rgb and adjust tones separately and it doesn't affect anything other than what the mask has selected and if you ever want to see your mask you can essentially hit option and click on mask itself, which brings it to exactly what is showcased and she looks rather scary but just remember that the black itself is where the detail is not showing through based on adjustment you make it's only in what is visible through the white pixels yes could you do a quick clarification for pure emotions and joe photo como they said that you made the new channel called lights and somehow selected only the highlights and they missed how you did that. Okay, sure so he said that we he wanted a clarification on the fact that when I selected by lights I only selected my highlights what did he mean by that is essentially the fact that whenever so let me go and rephrase this when I have my lights and the way that I made this was essentially just clicking command an rgb what that did was made a selection of all my lights from there I made a channel by clicking on this channel icon, and here it is again at the bottom as this is essentially the same things I believe that was my accent. So when I click on command creek on the actual alfa china itself, it essentially selected all my highlights. But however, this whole selection here doesn't showcase the fact that it's also selecting all the other white bits but the reason why doesn't showcase that is it's feathering out its feathers that are automatically so this is not a precise representation of the selection made across all the lights if you want a precis of representation just look at the mask itself which is this alfa channel and don't pay attention to the marquis that is being made just know that any area that is bright and not dark is being selected to a particular degree okay and then this allows you to bring up a curve or whatever that you like and it automatically selects every bright area as well as the highlights I hope I hope that answered his particular question I hope so too yeah let us know if it didn't go great okay fantastic I should stop seeing that it was like yeah you should finally so this is great whenever you have you know fashion means that we're gonna work on next for example or the male head shot let me go back just for demonstration purposes and go back on dh re flat in the slayer I quickly just want to show you the action so you can kind of see the extent to which it makes you okay so we have this uh see action here called luminosity masks which is part of the year donald content and when you click on it what it does is it automatically makes everything for you so you have your lights, light lights, bright lights, super lights and it goes into your dark regions as well as well as your mid tones. So you khun distinctly modify whatever you like accordingly, some people prefer this. Some people prefer blended modes. You know, they both almost kind of the same thing. This is just really cool visualization and sometimes very useful for, you know, whatever you come up with, but that's, not you definitely wanted to show you since it's something that I've used for quite a long time.
Class Materials
bonus material with purchase
Ratings and Reviews
Valentina
Pratik has been a revelation and a revolution at the same time, even kinda a benediction because of its huge generosity to show us such an efficient and powerful workflow. His genial approach turns impossible things into possible. What amazed me most, was Pratik ability to see further the shot and take the best of it to reach the perfection. The original photo is still there, very recognizable, but through a precise and meaningful workflow, it becomes eye-catching, high quality, high impact. Pratik is a wonderful person, very genuine, high talented, with a sophisticated sense of the aesthetics and arts. This course changed drastically my way to look at photoshop and at the retouching techniques. Thank you!!
peter
Really wonderful course, thanks. May I suggest a fantastic idea for maybe those who purchase the course? It would be extremely useful to be provided with a summary of the content of each video segment, perhaps a 30-60 second video with written 'dot-point' sheet at the end of each segment, to be reviewed at a later time. It just takes too long to replay each video to get the important messages. The notes provided by Pratik were a step in the right direction but they need more detail of what was presented, including tips and tricks, in each segment. In this way, once having watched the entire course, you could go back and review the nitty-gritty aspects of each segment quickly and efficiently. These quick 'summary' clips could make up a separate 15 minute video, recapping in detail the hard-core content of the course, without interruptions from questions. This would be extremely useful and hopefully not take the presenter too long to film. I feel this would be a wonderful 'added value' aspect of buying the course, as it would not be available for for free viewing. It would certainly encourage me to buy more of the available courses. Keep up the great work at Creative Live! I have stopped my Kelby subscription and just watch you guys now!! Well done!! Peter Bourne Australia
user d3cdf7
I have been a retoucher since 1992 and a commercial photographer and I am amazed at the wealth of information Pratik is teaching us. Love his great sense of humor. Yes, retouching takes me way into the early part of the morning...up to 4 am. I've learned to listen to Books on DVD from the library which help my attitude much better. Several degrees behind me and I know I was meant to make a difference with portrait photography. NO ONE wants reality, especially at elder ages. So I continue to learn to retouch professionally and not use a quick retouch filter which renders a fake look. I may incorporate a light retouching filter, but I find I must always do some manual retouching first, in order to have the appearance look real. Which is the old first rule to retouching itself. In the film days, I use to make my own texture screens in order to create more beautiful faces. My photographer friends would ask for my help in using them, when they had blurred an important celebrity shot. The texture screen would help spread the dots and give the appearance of your digital noise now. The results were the image looked more focused Thank you Pratik Naik, for being so generous with your techniques. I am interested in how to price out retouching jobs, as I have been told I give my retouching away with my photography. Thanks,, Jeri Goodwin-Akari cherished moments photography in walla walla, WA
Student Work
Related Classes
Portrait Photography