Retouching Workflow: Camera RAW
Lesson 14 from: The Art & Business of High-End RetouchingPratik Naik
Retouching Workflow: Camera RAW
Lesson 14 from: The Art & Business of High-End RetouchingPratik Naik
Lessons
Day 1
1Introduction and Pre-Shoot
19:30 2Shooting for Retouching: Beauty Look
27:52 3Shooting for Retouching: Beauty Continued
36:58 4Shooting for Retouching: Fashion
35:04 5Shooting for Retouching: Fashion Continued
27:47 6Shooting for Retouching: Male Fashion
23:13 7Culling for Retouching
16:47Annotating for the Retoucher
37:27 9The Retouching Industry
15:19 10What to Know Before You Get Started
27:07 11Tips for Retouchers & Gear
36:16Day 2
12Overview of Photoshop Workflow
37:29 13Photoshop Workflow Continued
43:34 14Retouching Workflow: Camera RAW
38:29 15Retouching Workflow: Beauty Image
30:31 16Retouching Workflow: Healing Brush
24:29 17Retouching Workflow: Content Aware
32:55 18Retouching Workflow: Dodge and Burn
31:08 19Retouching Workflow: Frequency Separation
31:03 20Retouching Workflow: Frequency Separation Continued
16:04 21Retouching Workflow: Color Correction
26:08Day 3
22Retouching Workflow: Contouring
34:56 23Retouching Workflow: Sharpening
17:39 24Retouching Workflow: Color Toning
28:54 25Retouching Workflow: Color Picker Table
20:24 26Conversion to Black and White
27:10 27Conversion Q&A
13:54 28Retouching Workflow: Luminosity Mask
14:31 29Retouching Workflow: Male Model
30:01 30Retouching Workflow: Male Model Continued
39:26 31Retouching Workflow: Fashion
28:39 32Working with Clients & the Business of Retouching
46:15Lesson Info
Retouching Workflow: Camera RAW
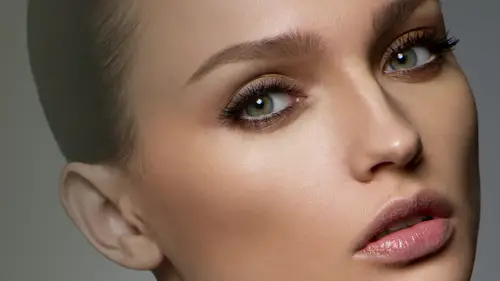
This photo was shot by dixie dixon actually, quite recently in the bahamas, we were out there shooting it's amazing model for one of our workshops and this end up being quite a really beautiful image that I like to use, uh, to explain the main formula of retouching. So every retouched image that you see has a particular formula. Can anyone guess what that isthe? No. Okay, so essentially, there are three main things that encompass retouched image number one is you must have a clean skin and by clean skin, I mean that the details of the skin or any blemishes or flaws at umc must be removed by either they're clean bush for hearing russian. Well, any distractions must be removed any flyaways sphere I call the cleaning process because whenever you work on an image, you don't wanna work in any random area. You don't try to fix everything at once. I know a lot of people do that they'll zoom into the eye for the face and start trying to collect correct the same time they try to heal, try dodgi...
ng bird because it blotchy ms and we don't want to do that. We want teo separated, make distinctions, right? So this is why we're going to be talking about this formula it's that weaken tackle what's on her mind. At the right time because there's a time and place for everything, the more you wilmore impatient you get, the more patients you have to help because of the fact that you're going to take a lot longer to work because you're being very destructive the same time so the first step cleaning of the skin that doesn't mean fix the color doesn't mean fix the light and darkness doesn't mean dodging burned fixed transitions this is just cleaning your just healing cloning I think it's the most boring part of retouching but it's the most essential because this is where the strokes build up our own each other now secondly, the next part is fixing lighting issues by lighting issues I mean things like transition transitions in the skin, which is why the transitions from the actual highlights of the shadows as you look on the screen are quite beautiful but still natural they're not blocked your greedy like you'd see sometimes on every issue from his high contrast, you have a really nice transition in the skin from the cheek bones, the forehead, the textures all still there it's her natural texture and she's really beautiful and like someone said, you know we're just trying to make her look how you would see her in your memories in your mind you're destructions or not they're what you see them is beautiful person and that's, what the intention is not to go crazy. You want to keep the texture there, but you weren't even on the skin tonality between shadows and highlights. The second part about that is you also trying to add or enhance shadows on details, bye contouring and things of that nature? You could also keep country of the end, but if you're sure where the direction is it's a it's one place to adjust your lighting, which is why I call it the lighting step along the lighting changes either minimally or a zoo whole setting is about the same in the same step the next. The third part about this whole equation is fixing color issues, so when you see and I don't mean toning, winning by color issues is things like if you have red skin, your orange skin, green skin or pink skin or you know, green, I don't know why you'd have green, but if you have any random color, that is the time to fix it, and the reason for that is again, she do all that once you're going to fail. It's, naka look great, it's better to dissect as you're working and say you are now is the time to heal and clone now is the time to worry about the lying. And when you get into this work for process you know exactly what's going to come when you know where you're going to just what you don't have to worry about history states or when you're gonna go back and fix things so that that's my equation for retouching images now there's a fourth step which is called extras and extras by extras I mean sharpening liquefying resizing for the web or things like color toning which is where that process going and we have a whole section in color twenty as well but that's the extra step as long as your principles are understood then everything else is pretty much standard or you know it makes sense going cross no matter what you shoot again main importance no matter what you shoot this principle will translate sometimes people ask you what do you do if you have a commercial what do you have a shooting a dog cat whatever does matter like thiss principal translate the workflow is the blueprint of what you use it for whatever it is that you're subject matters so let's go ahead and get started I want to talk about quickly um capture capture on camera because the image that we shot yesterday weren't capture one I do know a lot of people use camera so before you go to the image of certain we shot yesterday I'm going to open up another off file from one of my colleagues just to explain how I go about using cameras well, because that's really important even though they're similar I want people to be very familiar with how I do it through camera which is why what I used for the most part since a lot of clients want consistency between what they see on their side too how I process my raw files so uh let me go and open that first and keep in mind rocket be working on this your image here now I have this file here by one of my colleagues and they pull up okay is the beta and carson is a recent one. Um let me do one thing well, quick I'm going to pull up go he created life for rooms and it's the same folder I basically told everyone that I would give credit to the photographers who graciously let me their files so my colleague jaish franconia actually giving this beauty file he he lent it to me for the purpose of devon string you know howard used camera software. Now the beauty of this is that camera is very powerful and it does so much more than you think it does it's basically like footy shop where you have a lot of power but it's very easy to get carried away camera there's a system that I typically use if a photographer likes a particular preference theywill send what is known as an ex mp file with the raw file and what happens when you make these settings you could export um an ex mp file and so you khun sake export settings to ex mp what it does is next the raw file he creates this little tiny file not really tiny obviously but it's another file that says ex m p has the same founding what that does when you transport that with original raw file it loads the same settings as you would on your end or as they did on their end so that being said the first thing that you could look at and I know a lot of people will stick to their history and they say, oh perfect image should have this perfect kissed a grandma south and I don't really believe in that house with you I think it's all relative to the artistic interpretation you have for you work if you want to be blown out, blow it out it's fine, I mean it's all based on you, right? This is why we're artists, we do whatever we want do and hopefully people like what we don't want to do um first thing first is white bones I'm always using white bones to correct typically I found the clients want me to keep the y pounds that they shot it in because I think they're really accustomed to what it is that they shot it in and they think well, I shot in this it's matched let's not tweak it however I will override it if there's something very obvious and I don't do this any special way I won't you take my color checker and click on anything unless they gave me a color check afar like yesterday, then I will do that however, most times they don't any color check your files, they just, you know, preset the white balance and say, here you go, I was told you find but to do that if you were to color jack, you can have this option here, which then allows you to click on any point within the image to define as unusual gray essentially but you can see here if you define skin as neutral gray it turns cooler because if warm told become neutral and cool tones become even cooler, neutral tones become much cooler, which is why you get a shift like that and click on the backdrop you see it actually is unusual great color, so therefore it becomes quite standard. My tent is something I do if I do see a tent here and their if I see a greener magenta tin which happens sometimes well adjusted accordingly, next things that always adjust my exposure to get a good base exposure, I wouldn't say that, um have any particular preference for it I do know that if an image is shot really well his sir graham typically does play out where all the middle but sometimes if you shooting in your hole company blown a backdrop where she's backlight or something like that it's not going to be the case necessarily because you'll have more detail here in your white levels in your black holes so for example, you can have these little checkers here so what that what that means is if I say go up here you typically see that you will have these highlight clipping windows and it will typically tell you and things are much when things are clipped by indicating that they're showing a bread this is actually really interesting to me because on my screen I would have thought that this point would've been clipped but it's not the case it just turned out that my brightness on my monitor needs to be calibrated um but aside from that, this really saves you from seeing what is actually clift and what isn't and it tells you that covers a whole face in red, which is very beautiful and look, we're not going for and they ask how do you save time on retouching, larger image, no detail, awesome and same thing through shadows you can easily see that if I go and dark in it, you can see that the values are completely blown out the back the funny thing is even at zero at zero exposure it does it did look like um it's blown out but it may be just that bits are blown up but everything else is closer to being blown out so you don't see the detail there and that's why I typically will always go by I because even though it's saying that it's not completely clipped I said blood it's blown up it's clipped um if the blacks are crushed it will come for this blue thes blue pixels however it will only come up if you typically are completely crushed so if you have really really dark pixels but they're close to the edge it says it's still not going to come up and for that intent what I'll typically do this go by and to re set each of the settings you can double click on the exposure I'm side this little slider here and what happens is if you make an adjustment and you go back you can double clicking and goes back to its exact place you know to fit around trying to balance it back to the year which takes forever to do that and I was quite annoying so with that being said the first thing is my exposure the next thing that I typically will do is adjust my white point in my black point lots of times what would happen is that I like to expand my history graham out are these the details out? So I have more range within the image to the point where things look a lot more lifelike because either images air faded or they typically have too much details in the blacks or things like that happened where you wanna adjust your white in black point and so this this white slider here and she knows the history graham itself it pushes everything from the highlights up until around here in much more so I slide it back and forth you'll notice that the image will take a shift, but it shifts everything compress it or expands it and I do this it tastes as well I do to the point where I like it sometimes I'll even go further this offer a second sometimes I'll even go further and clip just a little bit because what's gonna happen now is I'm trying to expose for the whole image and not individual areas, so even though the areas that are blown out, I'm going to rescue those details later, so don't stop at a particular point just because some airs of being blown out. What you can do is come back and just recover this which I'm going to be showing your next so first my white and black point, so I sort of read general and then become very so specific in high process mayor off so white and black goes up another really cool tool is this target address paintbrush now there's little looks like a bull's eye when I click that and I come over to my hair, for example, I can click on the hair and go up or down, and what it does is it deepens opens up the area of luminosity I selected, so if I select the face, for example, most of the mid tones will go up or down because it's the same luminosity level. And so if you're lazy and you really don't know what to do, it makes it very easy to go in and throw things by so that's two ways um, that allows you to do so and the third way is you can always go into your curves and you have parametric and point if you notice with the target justine brush, it was basically just changing my curves. It figured out what is my highlight, whatever it I've been tons and adjusted accordingly and it sort of just in the sliders you can also go into a point and what the difference is with this point is you can start adding points like you doing photo shop and it just any particularly that you want and you know, for example, you can say, you know what, I would have just just my midterms and you can start putting points on every other area to anchor them down when she could do it, it'd just just the mid tones without adjusting everything else in the image, so just use atm or, uh, does he have final control? Essentially again, remember, these are just options doesn't mean everything all the time. My main takeaway here is that first and foremost, I get my white balance, right? Secondly, I make sure I white and black points are set to the basic range they're like my overall image to be and then thirty whatever else is then blown out clipped? I'm going to go into just that next and what I then do it after I had just my white and black point is I'm going to just my shadows and highlights because this slider, I think fine tunes things much better, because now I can just take out the highlights. If you notice what happens that pretty much starts taking out the highlights more so than everything it isn't turned on everything it focused on the highlights first and so here I can then see that the area of redness has gone down quite considerably, just because ofthe then focusing on those individual regions same thing with your shadows, and I say I mention this because what typically happens is people don't know when to use what when they will go their highlights and shadows and whitens the blacks and just tweak around but there's a good system to use in that regard so with that being said going forward clarity is something I don't use very much because what clarity does it's like mid tone contrast it adds a lot of contrast into areas of edges and so forth that has that can be emphasized uh from what I understand and it creates a very dirty look sometimes uh it was even worse before I think four shops see us five had a really bad and general contrast by the way if using c s five you're going to see a different menu here because he has five c is for I don't have the same engine that photo shops here six and cc has they have changed the way the camera processes so instead of highlights and shadows or blacks and white I think they have a recovery and feel like feature and the principle still be the same so you don't have to exactly what it is they're doing if you don't have an up to date first in the photo shop now um essentially I also leave clarity and vibrance alone I'm sorry vibrant and saturation alone but the difference between a virus and saturation is that vibrance is like a smart version of saturation what tends to happen is with vibrance I'm sorry with saturation if you have a color that's oversaturated and you have a color that's under saturated. They'll both go up together in saturation you'll have read their extremely saturated and then neutral tones that are you know about even what I find vibrance to do it's like a better version of saturation in the sense that it doesn't work with nearly doesn't work in one point where they don't go together. But what happens if there's a point that's oversaturated typically favors the colors that are less understand that are under saturated, and they both seemed to come together it's a very harmonious effect. And so for that reason, I typically don't you saturation very much and stick the vibrance from most of whatever it is I do with that aspect. Okay, now, once all this is set, uh let's see what else do I do? That's different. I don't really apply my strapping aside from my standard because if your place sharpening before it's all working on the image, I think they have a lot more to do as you working forward it's better to wait the end, which is what comes in the extra step, same thing with tweaking colors say you have a skin tone that's really read you want to change it to yellow or whatever, not yellow that's kind of johnny she, but if you want to change it back to something more regular right you can easily switch and a justice orange tab because sometimes came does go from one point to another you can do that way where you have, um parts that you can do and you can use masks and stuff to find tune and target which areas you want to tweak same thing goes for saturation you can I didn't you can take down the saturation adjust according to the color that you have and lastly illuminates which has become very helpful sometimes when you want skin to have much of a jury appearance or make it much lighter without tampering with any of the other part of the image and it's create because most of the skin tones either and red, orange or yellow which actually isolates them by default now um lastly, lens correction I do enable it whenever I have the option to just, you know, just fixes distortion or vignette ing and things like that I can recommend and lastly, I want to talk about camera profile. This is something many people don't play with do you know that every time you access your camera provided there many different methods of rendering how the colors typically come out too and what happens every time you go into different modes it interprets the raw a different way just based on what profile you like, I found that even the most of time it's an adobe standard I typically like camera neutral maybe not in this case per se a lot of the times what happens all the colors tend to become much more favorable sublime sense where you don't it's all over saturday over contrasting and it has moreover obviously a neutral look which why they called camera unusual so player on that before processing you may get some interesting looks and lastly one thing that has really helped me out is this adjustment brush now let's say you have I should go back and change that back too camera adobe standard let me go back to my justin brush with my adjustment brush this tools extremely handy because let's say you have this adjustment you've made let's say you've expanded your highlights and shadows but there are areas that you want to target selectively let's say you have fall off on an image right like using a beauty dish for a fashion image for some reason and all the sudden you see shadows of the bat on the ground you can compensate for that it's very simple when you can do is when you have you suggested brush tool selected appear you can come down and make sure you have a new selected now let's see that the intention is that you want to start making your background darker so I'm going to load the brush and the way I'm gonna load the brushes I'm going to take this exposure slider down if you notice it's not doing anything to the image, what it's doing is actually loading a brush with your settings and we're going over late like layers and so I'm gonna bring it down say about too on dh when I touch anything else right now and I'm going to keep my flow flow I remember we just talked about flow this where it comes in handy if you didn't know flow that's what's going to really help you I'm gonna keep it to say four and all justice based on how it's how it's looking now when I have my setting set I can also change feather which is a softness rushed my flow is how fast it can operate she noticed there's no opacity down here it's his flow because I think it's much obvious it's very obvious why there's just flow you're passive one work as well uh density is how much of the brush is actually being filled, how soft ism and so forth and so on it's related to feathering they're very similar that sense now my size is my adjusting factor which I can hit my bracket keys and adjust the size because it doesn't load your shortcuts into camera I'm going to take my mental and please let this work is longer start brushing down what happens is it changes this change the backdrop down an exposure and then you can adjust whatever your temperature is tent is to effectively get where you want to be, and this mask actually is a reason why it looks different to me. Turn that off, and what happened was let me actually re do that because the mask was really messing that up for me. Okay, let's, start brushing again, someone start brushing, he knows what happens is the background itself gets darker or the exposure itself is adjusting based on the breast that I'm using turned touch off space for a move, and what this does is once you have your brush settings applied, you can then can manually tweak whatever it is that you want to adjust. So one of the reasons again why this is useful is because sometimes when you're shooting, you tend to get falloff in areas that you don't want but it's very hard to fix within photoshopped because this is actually working on your raw information. It's not working on a copy once you open the image up once he opened, the image of him was in photo shopped. A lot of raw data is gone. You don't have that leverage, you can go back and recover highlights and shadows like you would hear. Similarly, you can load it vicious how'd you then decide which which adjustments to make with the adjustment brush in light room or a camera? Versus a photoshopped these adjustments that you make here are going to be the ones that are extremely glaring they're so glaring that it was a problem with on the set like light fall off for example because sometimes when images air clipped it's very hard to recover the information within photo shop you'd probably want to do it here first just to get a good base I would say ninety percent time I don't use the adjustment brush but I'm showing two most evil just because it gives you an idea what you can do with it another really cool factor is that since you're gonna just temperature it also adjust the temperature of the background background as well it does very realistically because again you worked with the raw data so it's very interesting to see what you can do I'm basically giving people the opportunity to be creative and that allows you to do so many things within this alone another reason why I'd use them just brush is initially we basically made these exposure changes right? But let's say there's an area that you want to find tune and say that once I made these global changes there these areas on the face that are too bright still but you don't adjust the whole image you can say I'm going to tone that down just a little bit before we go and start working you could then go on the justin brush and say you don't like this you can click on it and hit delete and then we reset this all back to default and I'm going to turn down my highlights and then you can start brushing and what happens is anything along the highlights gets tweet just a bit and you can do so that gradually as you like as much as you like and so forth so I guess the main intent of this feature is two things one you can fix a lot of really bad lighting issues sometimes if you screw up that badly to the point where you couldn't in four shot because you know curbs wouldn't rescue that detail for example or if you make a really nice exposure from your camera off hour you can then go into your justin brush to find tweak small detail areas that doesn't make sense okay no that's basically how I use um camera to do most of my stuff yes looking about what color space and bit depth you're working on perfect that's exactly my next topic so you're in the right cheek I like your mind like you're thinking now this is a really interesting topic because it's all about preferences well however down here you're able to set it your color space and your bid depth so a color space essentially is that somehow I wear this when you shoot a raw file let's say you have all these colors that you capture it's it's not contained in anything really so it needs to be assigned something to contain like in this report into a container this container's yur color space pro photo rgb typically your biggest color space contains the most colors that you can work on them when you put into footy shop basically telling the camera hey, I want to take a readable format so I can use it in for a shock all right? So I can give you these options can use whatever you want so pro photo essentially is the biggest container has the most colors available has so many colors you monitor came to see them for the best part about that is as you're working on an image you start losing detail as you're working and so the amount of information starts shrinking down for every adjustment you add or any tweak you make at the end you still get a wider range of course however what the issues with pro photo rgb is at the end when we save and were completed and we have to start converting it to s rgb because for the web we typically convert usagi be for any copy we used for the web sometimes it has problems for the conversion so I will either use prophet rgb if my client wants me to or I was sick to adobe rgb which is what most people's I think use nowadays and also a lot of monitors, you know, encompass most of the adobe rgb range, so you get a natural reflection of what it is that's contained within that color space. Secondly, even though it has less colors in pro photo, what happens is the differences, I think, minimal at the moment in the future, that may not be case when warner's begin to become more advanced. You see more colors, however, the good news is that we're awful. The shooting today has more potential than you're actually seeing on the screen at the moment, so if we were working with the flower people they're filming across the hall, adobe nineteen ninety eight cannot capture all of the color exactly hours yeah and that's a problem, especially if you're working with a lot of colors, you know it's good to have that extended range to start off with that as maximus possible, then shrink early. A lot of the times I feel like I'm at the mercy of la klein demands, and what they will do is they'll tell me they wanted in adobe rgb and sometimes just send the files to work on so that input that I have starts from the ruby rgb and then ended a ruby rgb so it stays consistent, I only changed in that regard without option two, I will start with a profile of possible okay before we move on I got a couple questions about cameron this kind of part of your work floor we'll take those of course yes fantastic so first of all we talked briefly about it yesterday but we just kind of reiterate the you were working in camera raw here but light room has the same engine and does and is almost exactly the same thing so if so if you're using light room it's exactly the same as this correct that's a fantastic question if you can also get you talk a little bit about capture one and just generally uh what you prefer what you used of course so refuse if you're losing light rum the engine is exactly the same this camera raw in the sense where any tweak you make can be then brought into for a shop has a small object per se but the workforce exactly same because you'll notice the menus are stacked equally to the options you have in camera so process would be the same if you's like room I don't use light room because the fact that I have to go work on single files and working straight through footage however there are times in amusing capture one as well like we did yesterday with the phase one files and so what we're gonna do is when you work on the image that we shot coming up next I'm going to bring a capture one again and show you what I do through there which is almost identical work full wise which is perfect because no matter what program using the workflow and the idea and concept should carry over not necessarily tool that I use that's the main takeaway in regards of processing processing is like a hard in itself everyone has their own version of I want to this contrast on this exposure I want time give one file to ten people said expose this based on what you think is right so they're just only a few things and they were all exposure related they adjusted white point black point shadows highlights and overall exposure and maybe some of the curves and what happened was they all came back with a different look all together so nobody has an exact work for that says this is what you should do and that's what you should be at as long as those tools care of that's perfect all right let's go with one from joe topping photography wondering whether you should edit color or contrast first and where the order of which you do first affect the quality of the image in any way I would say that if you're in camera and you doing tweaks it is pre identical however if you're doing it in photo shop were stacking layers it will matter when you do what if you apply colors first it will apply the contrast to those colors but if you do contrast first the colors will be much more natural so if you doing photo shop which is why they've coast the end that's why I would keep colors at the end and that's a good question one from studio modern also about this order of operations why not choose camera profile directly after white balance and then new brightness and everything else member profile often makes a lot of changes and if selected late I find I need to readjust everything else because typically my camera profile say as in my color space and big steps I'm assuming is what you mentioned would be prima standard it's set to mostly adobe rgb a better sixteen bitches depending on what my most my jobs are and I find a lot of my clients mommy's taking toby rgb so I keep that the same and I think what he meant by camera profile is that c where is it under process and r kelly calibration have this camera profile typically it's also dobie standard I wanted to point that out because if your photographer with control very own files not a re toucher you can get away with doing that first and then treating it which which is what I would recommend if you wanted to eat things round before going about because he's absolutely right what would happen is once he switched to say cameron usual your changes will make sense anymore what you did earlier but most of times I do have it kept to uh do a standard because my clients will want me to keep it there and that's that's the only reason why I do uh maria was wondering whether you use the lens correction tab at all and if so where does that fit in yes with lens correction it comes into this camera calibration here where you can check in your lands profile correction and it automatically loads whatever it is that it's shot with on this would come in at any point of your processing during rely as long as you go and make sure that is checked it won't interfere with anything else you're doing so you got a clarification from studio modern saying that they were questioning about camera profile and not color space oh what did he mean this for prior right here this camera profile and obey standard which is what I was referring to yeah so not color space sorry this camera profile here's what you probably want to set first practically any changes if you were going to be change that and adjust your crossings beautiful perfect any other questions here in the room which you turned it down in camera all together a cz much as possible yeah so I typically come in to say over here and I dropped my highlights down as much as possible to compensate and then go into the justin brush and they were suggesting brush you could then come into, you know, adding a new brush and then changing your highlights or exposure, and then you're moving in russia's possible, sometimes with hot spots there blown out, they're completely clipped and when she heard you that too, but not here at the stage because it's impossible do at this stage, so maybe one more actually hear from fashion tv and it's a couple questions about skin tone, since you have so many portrait, how do you side what the perfect skin tone is of your subject while adjusting the white balance and tent? And then do you approach your work flow differently? If you have a very light skin or very dark skin subject in any way, my skin tones first of all the preference and what the skin tone should look like is going to stay based on your own eye, which is again, why should celebrate? You wanted because it's, you know, african in home, you're never going to know. Sometimes the biggest issue of calibration is your skin, your skin. May you come out with two red orange, but in actuality, those oranges or yellow, and so you won't know. And first and foremost is that's always based on I there's, no. Right or wrong, I know there's theories and books out there and say, can should be discolored skin color. But I really don't care it's all about my personal preference and how it should look oer again as a re toucher it's, a photography preference, and he says, I want nothing changed with the color, but I want just retouching done. But if it comes to my own taste, I'll change. I will change it if I see skin that's two yellow or to read will make it neutral and more appealing to the eye. So, again, it's, all about what's happening toe, I think, and what was the second crash? All the work. So my werfel will not change based on it in the city, or how the skin type is, and you'll see why, as they go for it, because it would be identical.
Class Materials
bonus material with purchase
Ratings and Reviews
Valentina
Pratik has been a revelation and a revolution at the same time, even kinda a benediction because of its huge generosity to show us such an efficient and powerful workflow. His genial approach turns impossible things into possible. What amazed me most, was Pratik ability to see further the shot and take the best of it to reach the perfection. The original photo is still there, very recognizable, but through a precise and meaningful workflow, it becomes eye-catching, high quality, high impact. Pratik is a wonderful person, very genuine, high talented, with a sophisticated sense of the aesthetics and arts. This course changed drastically my way to look at photoshop and at the retouching techniques. Thank you!!
peter
Really wonderful course, thanks. May I suggest a fantastic idea for maybe those who purchase the course? It would be extremely useful to be provided with a summary of the content of each video segment, perhaps a 30-60 second video with written 'dot-point' sheet at the end of each segment, to be reviewed at a later time. It just takes too long to replay each video to get the important messages. The notes provided by Pratik were a step in the right direction but they need more detail of what was presented, including tips and tricks, in each segment. In this way, once having watched the entire course, you could go back and review the nitty-gritty aspects of each segment quickly and efficiently. These quick 'summary' clips could make up a separate 15 minute video, recapping in detail the hard-core content of the course, without interruptions from questions. This would be extremely useful and hopefully not take the presenter too long to film. I feel this would be a wonderful 'added value' aspect of buying the course, as it would not be available for for free viewing. It would certainly encourage me to buy more of the available courses. Keep up the great work at Creative Live! I have stopped my Kelby subscription and just watch you guys now!! Well done!! Peter Bourne Australia
user d3cdf7
I have been a retoucher since 1992 and a commercial photographer and I am amazed at the wealth of information Pratik is teaching us. Love his great sense of humor. Yes, retouching takes me way into the early part of the morning...up to 4 am. I've learned to listen to Books on DVD from the library which help my attitude much better. Several degrees behind me and I know I was meant to make a difference with portrait photography. NO ONE wants reality, especially at elder ages. So I continue to learn to retouch professionally and not use a quick retouch filter which renders a fake look. I may incorporate a light retouching filter, but I find I must always do some manual retouching first, in order to have the appearance look real. Which is the old first rule to retouching itself. In the film days, I use to make my own texture screens in order to create more beautiful faces. My photographer friends would ask for my help in using them, when they had blurred an important celebrity shot. The texture screen would help spread the dots and give the appearance of your digital noise now. The results were the image looked more focused Thank you Pratik Naik, for being so generous with your techniques. I am interested in how to price out retouching jobs, as I have been told I give my retouching away with my photography. Thanks,, Jeri Goodwin-Akari cherished moments photography in walla walla, WA
Student Work
Related Classes
Portrait Photography