Handling Common Problems in Architecture Photography
Lesson 5 from: Where Art Meets Architecture: Post-Processing using Lightroom and PhotoshopMike Kelley
Handling Common Problems in Architecture Photography
Lesson 5 from: Where Art Meets Architecture: Post-Processing using Lightroom and PhotoshopMike Kelley
Lesson Info
5. Handling Common Problems in Architecture Photography
Lessons
Class Introduction
02:32 2Image Preparation in Lightroom
07:52 3Overview of Tools for Architecture in Photoshop
12:52 4Combine & Merge Images Simply
10:50 5Handling Common Problems in Architecture Photography
12:44 6Common Global Adjustments
07:57 7Advanced Architectural Processing in Photoshop
21:52Lesson Info
Handling Common Problems in Architecture Photography
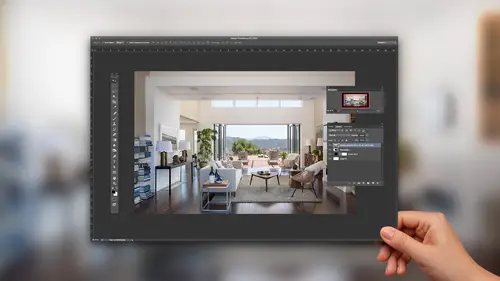
First thing I want to do, let's see. I want to clone out all of these signs, vents, fire alarms. In most cases for architectural photography, most of my clients if they didn't design it into the building they don't want it there. So if you're working for an architect and the fire code says you need to have this hideous exit sign blocking the line of sight. The architect is like, get it out of there. They usually don't want vents. This is not really handled by the architect so much as the contractors and builders. So they say zap em. And these are pretty complicated things to clone out, but I'm gonna show you how to do it super super easily. So I'm gonna clean up our layers palette over here. I'm gonna shift click and select all these, hit command G, put them in a group. I'm gonna rename that group by double clicking on it. Rename it people. And I'm gonna create a new layer. And I'm gonna name this clone. And what I'm gonna do, is I'll first take care of this. I'm going to zoom in here ...
and using the lasso tool the polygonal lasso. You can hit L or you can click and hold on the little lasso looking thing on the toolbar over there. I'm going to just draw out a rectangle, one, two, three, four clicks. And we're gonna close it. And what that is going to do, is that's going to constrain everything I do to that little that area. So if I were to close this, and I wanted to clone this evacuation plan sign out. And I was going like this, and I was grabbing it from over here, you'd start to get this kind of messy cloning situation. Where you'd be grabbing some of the elevator, you'd be grabbing some of the trim over here. So I want to make sure when I clone, everything stays within that area. So I'm going to go ahead use my lasso. Remove that sign from everything else around it. And I'm going to alt click with my clone tool, my clone stamp, and that'll select the sample. And I'm going to just drag that down. And start cloning out very simply that sign. And again, I'll do the same thing over here. And I'm making sure that what I clone does not go outside of that bounding box. Kind of blend it together so it looks seamless. Alright and there we go. We have removed our first problem item. The next thing I want to do is remove this exit sign. Now if I were to do the same thing it might be helpful. I could kind of drag this out. But the problem here is that due to this being so close to the edge of the frame and the perspective changing as we get further and further to the right here. Look at these vertical tile lines in the ceiling. They kinda go far left, a little bit less left, vertical, to the right. If I wanted to clone, then I'd say, okay let's grab this. And I started to paint that in. Right, that's going to look really goofy. That's going to mess with our perspective. So the way I'm going to fix this, is I'm going to use the vanishing point tool. And I'm going to open this up. Let's see here, I'm going to go, filter, vanishing point. And what the vanishing point filter allows you to do is drag out a perspective plane. And Photoshop will automatically calculate. And it will transform your source into your destination. So when you're cloning, I'm going to basically drag out a plane here. I'm going to follow the perspective, the perspective lines of the photograph. I could go all the way to the edge here, but again, notice I'm tracing the lines in the ceiling. Probably go like right there-ish. And then I can select the clone stamp here. And I can alt click to find my source. Make my brush a little bigger. And Photoshop will, like if you zoom in here, you can see that Photoshop is changing the perspective of those lines in the ceiling automatically. So I can line this up, and very simply clone out that exit sign. I don't want to go too far. Right there. And that makes this a complete piece of cake. Alright, we're getting a little bit of color bleed. So I'll just for the moment, take care that sign up here. That difficult part with the tiles in the ceiling. And I'm gonna hit okay. And what we've got now is a perfect clone. And our perspective remains correct in the ceiling. But now I want to get rid of the sign. So the same thing applies here. I'm going to use my lasso. And I'm gonna select this upper half, to make sure that nothing bleeds again. If I wanted to clone this like this, I would start getting kind of a mess. You can see the mess that this makes. When I grab some of that wall or something. So I'm gonna constrain my clone. Just to that upper part of the sign. I'll go like this. Let's get rid of everything here. One, two, three, four. Nice soft brush, I will click. And you see that I grabbed, even though I'm sourcing this whole bit right here. When I clone, it stays within that bounding box. And ensures that I'm not bleeding my source all over the place. And I can kind of go back and forth to get a nice clone. And then I'm gonna do the same thing for the bottom half. So that again, I can grab my source. And it's not gonna make a complete mess out of things. Probably be better if I go from the bottom. Alright, I can clean this up a little bit further. Just to make it perfect. Not going to go too nuts in the interest of time here. Again, bounding box clone and very easily clean that up. Alright, that's looking good. And that, I'll turn it on and off. The pretty perfect clone. What is by all accounts a very difficult object. So next thing I'll do is this one looks very easy. I'm just gonna grab my clone brush, big soft brush. And source from here and start painting that in. I always use a big soft brush to cover my tracks when I'm cloning. Makes it much much easier. But now I want to get rid of this. And this thing is going to be a little bit of a nightmare. If I try to clone this, you know, just by coming in at it, there's going to be all sorts of objects in the way. I'm gonna accidentally grab that, I might get some of the, yeah, see it gets very ugly very quickly. And just using the bounding boxes ain't gonna do it. But what I have to do for this one, is I'm going to use my lasso again. I'm gonna select that whole area. Alright, and here's kind of a trick, my favorite cloning trick. This will clone basically anything. Content aware wouldn't really do this. I'll try a quick content aware so you guys can see how that will not work. Because people like, why don't you just content aware it? Well, I try content aware, it's shift F5. You get this wonky line in the middle. If I zoom in you guys can see it. It's not a perfect clone. Photoshop's thinking for me I know I can do better. So what I'll do is I'll use my lasso to select the general area around that vent. I'll create a new layer. And call it, rename it vent. And I'm gonna use the gradient tool, which is G. Gradient tool here. And I'm going to zoom in nice and close. I'm gonna alt click, and I'm gonna sample part of this ceiling here. And I'm gonna go down to the bottom. I'm gonna switch my foreground and background colors. And again, I'm gonna sample the bottom. And you can see how the tonality and brightness of that ceiling change from foreground to background. And what I'm doing is just mimicking that tonality change. Using the two sample colors here and my gradient tool. So now with my gradient tool selected, I can drag from foreground to background. And that looks pretty good, but I want to kind of line it up better. Something like that looks more accurate. Let's see, I will try sampling from here to here. And I'm gonna drag that straight down. There we go, that's pretty perfect. And I have done a quick and easy job of removing that, but I want to clean this up. Because I've got some bleed. So I'm going to add a layer mask, take my brush. Using a big soft brush, I can just kind of paint out the excess. And you can see what I'm getting is a pretty seamless replacement of that entire vent. Rather than breaking my back trying to Photoshop this thing out. Just boop, see you later. And if I turn off both my clone layers, you can see that were getting places here. So the last thing I want to do, is I want to zoom in and I'm just going to add a little bit of noise to that. To make it more believable. You can see all these files have some natural noise in them. So I'm just going to go to filter, noise, add noise on my event replacement layer. And I just usually do maybe like one or two percent. You can see it, I hope you guys can see it on that screen. But it adds a little bit of noise. Which helps seamlessly blend everything together. And boom, we're done. I can go back to my clone layer. And I can just do a quick clean up here of these little vents, sprinklers. Not a problem. Alright, we're looking pretty good. And I think you guys would understand how to get rid of those now right. Lasso box around, clone them out, not a problem. Alright, boom done. So, alright, I think we're looking pretty good. So what I like to do, is I like to group everything that I've done together. So I'll shift click on the top and bottom layer hit control or command G if you are on a Mac. Group everything together. And then I turn it on and off. And I look at you know, how far I've come. I see if anything jumps out to me as a problem. And honestly I think we're looking pretty good. I love the people, we've added some life. I love how we've balanced the dynamic range of the scene using layer masks.
Class Materials
Bonus Materials with Purchase
Ratings and Reviews
user-748e5c
First, note to CreativeLive: Please include experience levels (beginner, intermediate, advanced). I think the bad reviews were because people expected a more advanced class than this. That, and that some people expect mind-blowing revelations in merely 70+/- minutes. This class was jammed pack with great information. I was looking for this exact information so it was perfect for me. Plus, Mike Kelley's teaching style is easy to understand. Any class taught by MK is worth watching, he always has useful insight and nifty shortcuts.
Chris Murray
not only is Mike Kelley a genius, he is the Bob Ross of architectural photography. It's got a real "Lets just add some happy cars here and some happy people there" kind of a vibe. What a killer tutorial. Thanks Creative Live and Mike Kelley.