Efficient Approach to Optimization & Basic Adjustments
Lesson 4 from: Advanced Workflows in LightroomTim Grey
Efficient Approach to Optimization & Basic Adjustments
Lesson 4 from: Advanced Workflows in LightroomTim Grey
Lesson Info
4. Efficient Approach to Optimization & Basic Adjustments
Lessons
Define Your Folder Strategy
15:36 2Tips for Identifying Favorite Photos & Using Keywords
21:15 3Add Location Information to Photos
11:57 4Efficient Approach to Optimization & Basic Adjustments
04:26 5Optimize Individual Colors
05:33 6Understand Noise Reduction & Correct for Distortion
13:07 7Sophisticated Targeted Adjustments
06:00 8Maximize Template-Based Sharing
12:19Lesson Info
Efficient Approach to Optimization & Basic Adjustments
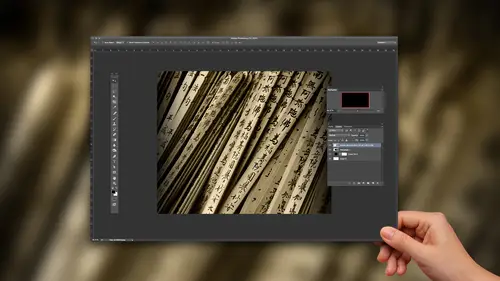
Let's take a look at some thoughts related to optimizing our photos were using the develop module in order to really make the most not only of our images, but also the way we approach. Our images are workflow for our individual photos, so I want to revisit the basic adjustments I know. For someone who's been using light room for a while, it might seem that you know, the basic adjustments are so basic you hardly need them. But I really feel that the basic adjustments represent a tremendous opportunity in terms of really optimizing the overall photo So you might start with an image is take a look at the history Graham. Here, this looks decent. It was a little bit under exposed. Which is not to say that I lost shadow detail, but that I should have brightened this up by probably about 1/2 stop. 2/3 will stop something like that. I need a little bit brighter exposure. This is a type of situation where I might apply a minor exposure adjustment initially just to get that baseline image lookin...
g a little bit better. So here, roughly 2/ of a stop frightening. I didn't clip the shadow detail. I didn't clip the highlight detail with this adjustment. I'm simply shifting those values a little bit because my exposure was darker than need be. Thankfully, the overall dynamic range of the scene was not extreme. And therefore, I'm not losing detail with this adjustment or based on my original exposure. So I don't tend to use the exposure slider much unless the image has a little bit of not perfect exposure from the start. And then I really focus on the whites, blacks, shadows and highlights and just want to go through those relatively quickly, sort of as a refresher for those who have been using the develop module already, but also to reinforce just how important and significant these adjustments could be. So holding the altar or option key on the keyboard as we adjust the white point, I can increase that value until I start to see some clipping and then generally back off until I have just a few pixels. Or maybe no pixels at all, just barely again, depending on my intent for the image in this case, really just trying to brighten up the whites in that rope in this case. Same process for the black sold the altar option key. Dark and down the dark values the darkest values in the image, essentially, and I'm really setting an endpoint here. I'm defining the brightest value and the darkest value and in this case, taking what was a little bit of a drab image stretching out those values, you might say, stretching out the hissed, a gram brightening up the Brightpoint darkening down the dark point so that we have more overall contrast in the image doesn't work for every single image to stretch things out, but it's generally a good starting point, and then I'll go to the highlights. I could brighten the highlights or dark in the highlights, but again, by darkening the highlights, I'm not only darkening the highlights and bringing back some more of that information, making it more visible, I'm actually enhancing the contrast of those bright areas in the photo. It's sort of like a clarity adjustment, and so I'm really getting more details. So there, you see, if I take that highlights way down, I've got a lot more detail in those bright areas. It's not that I had been losing detail necessarily before It's it. Now I'm enhancing a little bit, so I want to keep those whites relatively bright. Maybe about there will work well, and then I can come to my shadows. I want to darken up the shadows to really make that rope pop out at you. Or do I want to see every little nook and cranny of the concrete down below with rope and trying to make this look like essentially a pseudo HDR image? A lot of this just depends on your personal senses. A photographer for me. Personally, I like to darken down the shadows, usually not always but much of the time to add a little bit more contrast. And as a result, I don't really need to even visit the contrast adjustment. In most cases, if I want more contrast, all play with the whites, blacks highlights and shadows instead and then fine tuning color. Thankfully, I find that in most cases, today's digital cameras to a really good job of establishing pretty accurate color under most circumstances. Not always. If you're indoors under mixed lighting, get a real challenge on your hands in terms of color. But generally I go straight for the temperature in 10 sliders and just swing through those extremes. Find the values that I like. In this case, I might keep this a little bit cool. It wasn't overcast days, a little shifted toward the blues just a little bit more. And then mostly with the tent. Just making sure that the image doesn't look too green or to magenta. Here we have some fairly decent mid tone neutral values, and I just want to retain them as they are so right about there looks to be pretty good.
Class Materials
Bonus Materials with Purchase
Ratings and Reviews
skip22037
The Advanced Workflow class was very helpful. I appreciate the extra material that come with the class, i.e. Tim's presets and the 8 lessons I have downloaded. However, I needed help with the downloading of the presets and there were no directions. I figured out how to download them to Dropbox and/or to a folder on my desktop, but I don't know how to install them in my current version of LR, which is Adobe Lightroom CC. I needed a help button, and there is none.
user 0d6f29
I found this class to be helpful with workflow techniques but it's almost identical in content to Tim Grey's Beginner Workflows and his other Lightroom courses. I would recommend the course but not to watch all of the courses as there's lots of overlap.