Lesson Info
11. Working wth Audio
Lessons
Class Introduction
03:37 2Exploring the Interface
11:29 3Meet Premiere Pro
08:43 4Building a Rough Cut
06:11 5Setting up a Project
07:10 6Importing Media
10:55 7Working in Timeline Part 1
15:21 8Working in Timeline Part 2
18:44Refining Your Edit
10:00 10Trim Tools
30:47 11Working wth Audio
13:28 12Adding Music
10:47 13Working with Music
16:53 14Basic Transitions
17:02 15Advanced Transitions
12:07 16Working with Filters & Effects
25:30 17Working with Nests & Sequences
13:09 18Motion Effects
26:03 19Rendering & Positioning
06:03 20Titles & Graphics
18:50 21Basic Color Correction
11:33 22Exporting & Archiving
23:30Lesson Info
Working wth Audio
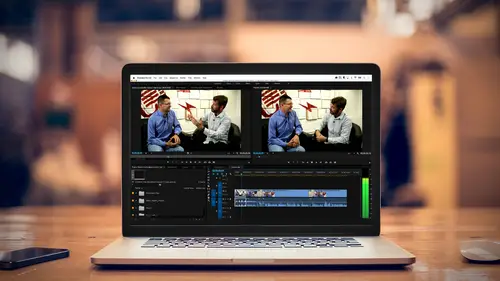
Let's move into working with audio. We have a good idea how to trim clips, how to refine our timeline, tell our story, organize things, and now we want to go ahead and work with audio and we're gonna do a couple things. We're gonna bring some audio in and change our levels, and we're also going to trim some audio and maybe do what's called a J cut and an L cut. Let's go ahead back to our slides for working with audio. You just finished refining your edit. There we go, working with audio. Another wonderfully building slide. Understanding and working with audio levels. Keyframing audio. Fixing sync issues, which we cheated on and we've already learned that. And then maybe adding music or sound effects. The audio was fairly clean on Colin. As a matter of fact, that's a lie. The audio was actually horrific, and I used a separate mic on him so that we didn't get all, a little bit, but not all the beach sounds. So, if people are asking, how did you get such clean audio when you were recordin...
g him at the beach? Did not use a camera mic, ran a lavalier and I intentionally left it on the outside of his shirt because I wanted people to see that's a good way to get audio. I would have maybe dressed it if it was for, you know, but you know it's blogging. He was just doing himself, so you can see the mic. So, we want to deal with audio levels and one of the things that you have seen on your screen but we have not pointed out, is on the far right of the interface are your audio meters. If I hit play, you can look to the right and you can see-- It's very, very boring. The audio levels of what he's talking about. It's a nice sunset, but a little-- As a general rule of thumb, and it does vary depending on who you're delivering to, you want your audio to average at about minus twelve DB. It'll peak at maybe minus six, and of course, it can even get softer depending on how loud or soft the person is. You never want audio to exceed the zero DB level, because then it will just be distorted and noise. It'll be clipped, so you always want it to be below it. Error on the side of safety. It's better to have your audio a little soft and have the person need to turn up the volume, than to have the audio so overmodulated that they can't watch it because it's just so annoying, so frustrating. That is a very important thing. Now, how do you make your audio levels louder or softer? There are a few ways to do this. I'm gonna go ahead, I'm gonna play Colin speaking and his audio levels are perfect now. The ocean and the sun in the background. If I look closely here, there's a little bar, and you know, it was a great question earlier, why do I have a line between it? Because I'm not in my selection tool. If I go over here, I'm in my bring with me tool. But if I switch to my V key, the little red line goes away, and right between this stereo audio track, there's a bar, and I can take this and bring it up and down and you'll notice that underneath it says something DB. These are decibels. If I bring it up, it's going to increase the perceived volume. If I bring it down, it's going to be softer. So, I brought it down. Let's play and see what our audio meters looks like. Harder for us to hear, and it's also not peaking where it was. If I go head and bring it up, and I'm not gonna go crazy bringing it up because I don't wanna blow the eardrums out of everyone in the studio and people watching. I bring it up and now, it's above that midpoint. It's a nice sunset-- He's speaking louder. And if it's too loud, just very briefly... When dealing with audio, it's really good to make sure your mic is positioned well. When recording audio, always have a set of headphones or somebody in the studio going, "Fix your mic!" Yes, I break the fourth wall. I brought the levels up, and when I hit play-- You know, the sunsets that anyone would have captured-- He's still not overmodulating, but there's the potential for overmodulation, and I point this out because audio is additive. If you are recording him speaking and it's peaking at minus two, and then you throw in some music that's even minus 20, it could potentially peak above zero and be overmodulated because the audio adds to each other. You have to keep that in mind when you're mixing audio and adding audio that you need to play all the tracks and see what your levels are doing. We haven't blown it out yet. It'll only let you take it up six DB. For some kind of a foreground element-- But if you have something soft, it's a good way to do it. How else can I adjust my audio? We're gonna be working with some music, and sometimes you may even wanna adjust the audio before you bring it in to your sequencing. You may wanna also adjust it once it's in the sequence. There's something called gain, G-A-I-N. Gain is basically the input volume, and you can have a lot more control with how loud or how soft something is. It is mutually exclusive from this line here. This line can do some other really cool things. You can actually put what are called keyframes and have this audio go up and down, say, if there's music or if there's a background noise. But right now, we're keeping it level. If I wanted to affect the global audio level of a clip, I'm gonna select this one. Let's go ahead and zoom out so you can see what its levels are. Gorgeous reflections-- Yeah, about minus 12. I'm gonna hit the G key. G for gain, yes, you can get to it by right clicking. You can get to it from a dropdown menu. G key will open up this dialogue box. This is a wonderful box, because you can do several things. First of all, it tells me what the peak amplitude is for this clip, which is, it's peaking at minus 10. Which is good, because I said I wanted it to be hovering around minus 12, right? Minus 10, a little hotter, that's good. But I can also change this. I can set it to a fixed amount. I can say, you know what? I always want this to hit minus 12 exactly. Or maybe I can push it, maybe I want it to be minus six. I'm not gonna add any music. I'm gonna put it on the web. I don't want people to have to turn up the volume. Click on that, type in a number, minus six, hit okay, now let's take a look, when we hit play, what it looks like. Only of the important things you wanna do-- It should peak up about minus six. He has one loud point, I think, about right here. (mumbling) That should peak at minus six, set it to minus six. The other option is to adjust the gain relative to where it currently is, so if I wanted to make it louder or softer, but why would I wanna do it if I can do the set gain or bring the dials up? We're gonna learn with the music, but I wanna make this change now so you can see the value of it. There's my audio levels. What if he was really soft right here? I wanna just bring up that section. You start doing something called creating audio keyframes, which means you make markers where you want the audio to get louder or perhaps softer. It's very easy to do. You can hit the command key or the control key on Windows and just click, and I'm gonna zoom in a little bit here, where you want it to get louder. I'm gonna make a point here. I'm gonna make a point here, where it's gonna get softer, but I need to break this so it's not just two points where I want it to get louder, I need actually to have four points because the line has to bend. Now, if I bring up the volume here, when I play this, you'll see he will get louder at this point and then get softer again. Conversely, if he's too loud or maybe there's a cough, I could go ahead and put some additional keyframes in. Again, I did four, and I could pull this down. Let's take a look at what that looks like on our audio meters. (mumbling) He's getting louder, let's really push this. Maximum six. (mumbling) So you hear, it got louder and softer. It's not quite as loud in the studio. Maybe this is perfect, and then I realize, you know what? It just all needs to go down by two decibels, just all needs to be a little bit softer, but I don't wanna mess up those great keyframes. If I hit the G key and I can set gain to minus two, 'cause I want it to go down two on that and I hit okay, I'm gonna be ready to (mumbling) in a moment. It should have reset that. My gain thing is not working. No change at all, no change at all. Assuming this did work, we'll figure that out. You like this, I'm making lots of mistakes so you guys can learn that I make mistakes. I really wanna do adjust by. I'm gonna say adjust by, let's do a big number so it's very visible. I'll adjust by 12 DB. Now, when I hit okay, watch what happens to this line. Everything goes down relative to the lines. The line doesn't change 'cause it's your keyframes, but if you notice the waveforms got changed, so when it made louder, it did. When it made louder? When it got louder. I still have all that keyframing, but now I just brought the volume down for the whole range of this clip. That's the gain tool, and that's how you deal with some volume information. I wanna introduce another area of the interface, because we're gonna be working with this area actually throughout the rest of the course today. That is something called the effects control tab. That's upper left hand corner right by your source window, effects controls, and if we look at our effects controls with a clip selected, I can see several things. There's motion controls, where things are, but there's also a whole thing on audio effects. If I open up these disclosure triangles, I can actually see the keyframing of my volume. It's right there. I could keyframe here, but I generally like to keyframe in my timeline. But this does give me the opportunity, if I needed to change something, to move it around or to even change levels with a slider. This is what's happening behind the scenes, just a reflection of what's here. If I went over here and I hit command and made a new keyframe and brought it down, you see it gets reflected right there. If you completely trash everything, you can reset any effect or any filter with this little return key. I'm gonna reset the parameter, I'm resetting the level parameter. It resets just that one thing that I was on. And if I wanna reset all of these keyframes, I will click on this stopwatch. It will give me a warning, saying, basically, turn off all the animation. I've animated the volume levels, that's why it's called animation. Boom, there's my warning. Will delete existing keyframes, do you wanna continue? Absolutely, because I was crazy when I made these keyframes, and now I'm back to my nice vanilla again. We look down here and we're good to go. You can increase the volume by dragging that middle line up and down. You can increase volume or decrease it by going to the gain key, or technically, you could also increase it here by going to level and bringing that level up or down. There's your slider. You'll notice this line, it's very thin, but it is moving up and down. Now, I'm increasing or decreasing the volume.
Ratings and Reviews
Maude Colin
This class is exactly what I needed! I've been trying to understand Premiere Pro for a year now and I've never been able to do anything with it. I had the feeling that I would never succeed and yet... Abba Shapiro is not only a great teacher, but also the kind of person that makes everything looks so simple. I loved that class and even though I've got everything I needed from it, I really want to do the Premiere Pro bootcamp this year. I want to go further and learn Premiere in depth, just for fun cause that's what it was! With Abba Shapiro, I had fun learning this super-complexe program! It was fun, easy and super rewarding!!!
perrault095
One more amazing class from Abba! The is a fantastic teacher who would explain complicated issues and make it souds so simple. Lots of information to work with. Really great speaker and his humor is brilliant. Love his class!!! Will be rewatching it again and again.
Yevhen Byelyakov
An awesome class that makes the initial hoorays to Premiere Pro so much less intimidating and is guarantee to save you a lot of time. I've created about a hundred clips over the last year or so and after this course identified a huge amount of productivity boosters and also learned a few things to improve the quality of my produce. Looking forward to more in-depths courses. One last comment -- it is basic and gives cursory overview of the topics listed. Do not expect anything too deep or advanced but if you're self-taught, Youtube-style person who still drags the clips around or copy-pastes attributes across all clips, this course will be a great way to improve many of the routine tasks.