Lessons
Lesson Info
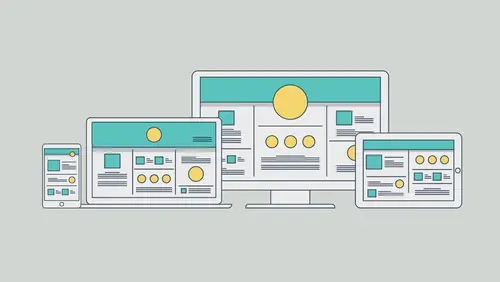
Adding Images and Text
I wanna open up another page, the homepage, and we're gonna kinda check things out a little bit here, but I'm gonna close the master page. So if you click on the tab up here, you're gonna see a little "x". You can also go up under file, close page. I'll go back over and you're gonna see, well there's the content, it's putting it all out there. Don't worry about the fact that the menu, or that bar in the footer looks like it's way up there, when we get to the browser that thing's gonna be stuck at the bottom. Let's go to the homepage. So double click on the homepage to open it up, and what we're gonna do now is we're just gonna start adding content. Now if you notice, look at the menu up here, you're gonna see that it doesn't look all that great because I didn't set all of the states in the menu. I would need to go back to the master page. Now here's something to think about. If I look out here you're gonna see that I don't actually have this content out here because I can't select it, ...
it's on the master page. Content that's on the master will be locked, completely locked, on your pages. Alright, think about and remember that. Cause if you open somebody else's site, it might drive you a little crazy. Okay, we're gonna put an image, a little bit of text, things like that. So to put an image out here, we could come over like I said before, and we could draw with the rectangle frame tool, and just put an image in it. This is a great way... If we wanna put in boxes because we don't have the content yet, and later place content in, it's a great way to do it. You know for wire framing or just checking things out. I already have the images, so what I wanna do is come under file, and we will place. So I'll choose place. Now in here I've got a lot of different things. What I wanna do is I'm gonna place this image called home.jpeg. Once again, when you place images in here it's gonna leave them at their size, their full size, it's gonna link to the original, and we're gonna see it in the assets panel. So I will click open. And what I wanna do is I'm not just gonna click and let it fly, I'm gonna draw. So if you click right now, it's gonna be 100% its original size. I can just scale it as I put it in here. So I'm gonna click and drag, I'll just click and drag. Something like that. Now a word for images, raster images in particular, ping, jpeg, gif, those kinds of things, you don't wanna take those kinds of images and make them bigger than 100%. Matter of fact Muse is gonna warn you, it's gonna yell at you, it's gonna slap you hand, it's gonna say, "You gotta fix that." You can't do that cause it's gonna look like garbage when you publish this thing, when you send it out. It's gotta be the size or smaller, okay that's the idea. Now with images, when you place them we can go out here and scale them, like I said, by grabbing a corner, you don't have to hold any keys down. But if you wanna do this, if you want to distort it, really get crazy, you can hold down the shift key and distort it, you can do that. Now I don't like that, so I'm gonna go to edit, undo but... The other thing we can do with images is if you wanna crop an image you can hold down the command key on Mac or control key on Windows and actually cut part of an image of like that, from any direction or corner. So it's command key on Mac or control key on Windows. Now with this image I wanna show you something different here. We can just put the image out here, and let it go and it would be fine, but we can also put an image in a box and we can let that scale. Cause right now what's gonna happen, watch. I've got my image, I'm gonna drag the corner or the side here and see. You're gonna see it's gonna do this, it's actually gonna scale the image width and height proportional. Now what we can do is we can make it so that we have a box with an image in the back of it, and that way it fills up, let's say the whole page. I'm gonna try that. So I'm gonna click on this, and just I'll delete it, it's fine, delete or backspace if you wanna do that. Come over to the left, you're gonna find that we've got these rectangle tools, and these ellipse tool. If we wanna put an image in a box, we can put it in the background, and it'll just stretch and that image will just fill up the shape, kind of a cool way to do it. So then click on the rectangle, I'm just gonna fill up this whole area, just drag a rectangle, draw it out. I'm gonna make it kinda tall here, that way we have a bunch of room. And I'm gonna let it snap down there and let go. Now it's kinda underwhelming, there's just a box, but if you come up to look at the properties up in the control panel, you'll see fill. Click on the word fill, and you're gonna see that we can fill with an image. So choose add image, right there, and we can go in and choose something if we want. I'll maybe pick that same jpeg image or something like that. And I'll click open. That's awesome, it's basically putting the image in a background of the box. Now the great thing about the box is it's just gonna do this. It's already responsive because I snapped it to the edges of the page. I can go in here and say lets do this, lets scale it if we want and basically you know make it so it will stretch... Or not stretch rather, it'll scale proportionally, but it will always fill up that rectangle. So if I choose scale to fill, look what it does, it just fills it in, and then I can kinda position it a little bit. I can say, "Lets get it dead center in that rectangle." And that's great, that's it, that's all I need to do. If you come out now, if you try and make the screen smaller, we're gonna do this, this page. Drag that gripper right there, and you're gonna see what it does. At some point it's just gonna stop, okay. There it is. Alright, I'll click in there so we can see everything. So with images we've got a lot of different ways to work if we want to. There's a whole bunch more, but what we're gonna do now is we're gonna focus a little bit on working with text. So with text, you can type text in, we can bring text in from other sources, txt files that is, you can bring text files, they're kind of a simpler type of text file. And we've got a lot of formatting we can do. So to do that I'm gonna go out there and we're gonna create some text. So go to the text tool, come out, and I'm just gonna click and drag, and make a text box, something like that. We're gonna type something in. I'm gonna type in "I'm"... And I'll press enter, return. "Brian", and you don't have to type in Brian if you don't want to. Return, "Wood" and I'll just say "developer" or something like that. Alright, I'm gonna select that text and if I look over on the right, if we wanna do formatting for the text, I'll go over to the text panel and we can start to do color if we want to, we can do all kinds of things. I'm gonna center align that text. We can also pick a size. I'm gonna change the size here, I'm gonna go kinda big. These are pixel sizes, so if I go something like 60 or something like that, I can actually go in and change these to be different. This is very similar to other Adobe applications, if you wanna just kinda start working it a little bit, practice, go out and explore some of these... I'll just say let's make this a little bigger, a little smaller, there we go. Now you have leading, you've got indents, you've got all kinds of things you can work with. What I wanna do is I wanna actually choose a pretty cool font. So if we come up here to fonts, you will see that we have a bunch of ways to work with fonts. We actually have three ways, I know that's not a bunch, just hang in there. You're gonna see we have web fonts, and you see it's kinda broken down or categorized by these, if you click on web fonts, it's gonna scroll it up to the top. We have standard fonts and we have system fonts. Now web fonts are essentially type kit fonts. These are something that are included with your subscription, as a member that is, and it's something that you don't have to worry about, you just pick a font, put it on there and you're done. It works live and everywhere. And it gives you a whole bunch of other fonts to work with. Standard fonts are typical fonts that we find on the Web that are like Ariel, Helvetica, Times, that kinda thing. And those work on just about every system. We also have what are called System fonts. These are fonts that, don't use, that's all I'm gonna say okay (laughs). These are fonts on your system and if you use them, they're gonna become a picture or an image when you export or when you publish the site, so we try and avoid those. Go to Web fonts, we're gonna use one of these. And you might not see the same thing I see, that's okay, I've picked some before. So click add web fonts, it's gonna open up a dialogue. You can just say, "Sure, we'll start." There's three kinds we can do actually. Type kit, included in your membership, edge web fonts, they're free basically, and self-hosted. If you had a certain font that you needed to use for your company, for instance, and you bought it, you purchased it, you could use self-hosted web fonts, and just point it to that font and Muse would take care of uploading it and everything you need. So click get started. And in here, we can just go out, and if we wanna pick a font, do something like that, you can search for fonts if you know them, there's all kinds of things we can do here. I'll just pick a few fonts, and when you click on them there's gonna be a little blue check mark, as soon as you click okay, it's gonna sync those to your machine. So I'll click okay, it'll take a couple seconds here, but once it adds them the great thing about that is that you're done. You don't have to do that again, they are on your machine, you can use them for your sites. So I'll click okay, I'll go back over to the text panel, click on the menu, and you can see now we can try one of these if we want to. I can try like this one, okay no. We could try this one or that one, Open Sans Extra Bold, that type of thing. I'm gonna make the font size a little bit bigger, this is actually kinda small so let me make this bigger. And what we can also do if you want, you can type in values, you can do all kinds of things. I'm gonna adjust the leading or the spacing just a little bit here, make it look a little bit better. There we go, not too bad. And what I want to do here is I wanna actually change the color to white. So if you select the text or the box, you can go over here to color and change it to a color or that cream color or something like that, there we go. Alright, so we've got a lot of things we can do with text to work with, a lot of different things to be able to accomplish if you will. The other thing we can do is we can actually bring in text from other places. So if we wanna place text, we can do that by choosing file, place. It's just txt files, you can also copy, paste text in from InDesign or other places as well. It'll lose the formatting, there's no formatting kept but that's okay, you get the text. So if I choose file, and go to place, I'm gonna grab, let's see if I've got it. If I don't have this text, I'm gonna go out and just use some other text I've got. There we go, I've got some text right there. I'll open it up. And all you do if you place text, grab the little txt file. It is just click and drag, or click and it's gonna put the text out there for you, there we go. Now you can go out and center align. We actually have alignment options, I use the smart guides a lot. If you drag things, you'll see that it's gonna align for us automatically, which is great. I'll just get that aligned, and that aligned right there. I might wanna change the formatting. If you do place text or you type in some more text, try out some of the formatting. I'm gonna go over here and I don't even have to select the text, I can select the box or the frame that it's in, and then I come over here and say, "Alright, let's try something different." I'm just gonna pick another font here. I'll do Open Sans again, and I'll do regular, and I'll change the color maybe to white. That looks pretty good. Now the thing about text that we have to concern ourselves with is that it is also responsive, we have to think about that. In the page here, first of all it's hard to read. What I might do is actually draw a box, and put it behind, so lets do that. Let me draw a box. So if you go over here to the left, you're gonna see the rectangle tool. I'm just gonna draw a box and we're gonna put a color in it. So I'll draw a box out here. And I'm gonna go over to the fill up top, and just pick some kinda color. And you notice we've got a lot of effects like I mentioned. We've got things like drop shadows and all that. You're gonna see the word effects, if you click on there you can choose shadows and all kinds of things. I just wanna make this a little transparent, so I'll take the transparency and crank it back a little bit. There we go, just a little bit so it's a little bit easier to read. Now what I want to do is I wanna put it behind the text. So we actually have arrange commands, we also have layers. If you're use to working with layers in other Adobe applications, you'll find that, there they are, they're very similar to work with. I'm gonna come under object and we can see the arrange commands. It just means let's take things and put 'em behind or bring 'em to the front. So I'll choose send backward, now it's only gonna put it behind the one so I'll do that again, send backward. There we go. Now the one thing I am gonna mention here is that, like I said, I just did a save, a command S or control s, sorry, habit, is whenever we put content on the page, like let's say that I'm... That's it, I'm finished, what I'm gonna do is I'm gonna make sure that I actually get it to be responsive. I check it on all my screen sizes, and do that kinda thing. So if you look, I'm gonna grab that gripper and drag, and you'll see exactly what it's gonna do here. Now once again, if I realize that, you know what I don't like what it's doing, I think that this, like once it gets to here, that's not good. So what I might do is back it up a little bit, something like that, I could go... If you remember whenever I say to myself, "Self, I need to make a design change," I'm actually gonna create a break point, click on the plus up here at the top in that purple bar, I can then go here and maybe change the font size, I could try something different and say let's go a little bit smaller, oops. I'm gonna go smaller on that, there we go. And then I could move things around, I could adjust things like this, and it's gonna say from that size smaller, that's what we've got. So I can then keep dragging, if I wanna see what it looks like. There we go. And of course if I keep going, notice that if I keep going, if I get to far, once again, it's gonna start to wrap, I can add another break point. There's a lot of ways we can work in here to get that done. Now what I wanna do is I wanna go back out to the main break point, the larger size screen, so I can click on the purple bar up here if I want too, right in that area up there, and it will just jump out to it. Alright, I think it looks pretty good, not too bad. Once you get further along you'll start to work with text and content like that, and realize that once you get everything on the page, you wanna make sure by using that gripper that it's gonna look good across the different screen sizes. Alright, I'm gonna save this site. Now the next thing we're gonna do is we're gonna start to add widgets and work with those a little bit, alright. So widgets, these are phenomenal. Like I said before, this is the cool stuff. This is if you wanna add a slide show, you wanna do a cool form, you wanna do this or that, you're gonna use widgets so... Done with this page, I'm gonna close it up. So you can click on the "x" on the tab right there if you want to, and come back over and notice not looking too bad out here. Matter of fact, if you're looking at your site and you're thinking to your self, "Well, I probably should go look at it in the browser," and you should, you can take your site and come under file, you'll see that you can either preview and individual page, and in this case it'll actually be the homepage or you can preview the site, the entire site in the browser. So if you choose preview site in browser, it's gonna open up your default web browser. Now the thing about Muse that to me is kind of interesting is that, let me go back here, there we go, is that it just works. That's the whole idea. In all the latest and greatest browsers, it's going to work. I still feel comfortable looking at it in the browser, going to see what I look. And the great thing too is that we can actually look at it on a device and I'll show you that in just a little bit here. Alright, I'll go back over to Muse. So what we're gonna do now is we're gonna work a little bit with widgets. Like I said, these are the cool things. So I will open up the portfolio page. Now on the portfolio page, I wanna add a slide show or something like that. So we can add a little bit of text if we want to, so I might just do that. Go to the text tool, come on here and draw a little text, and I'll just type in "our projects". Now once again, if you wanna go in and try, you can practice formatting, I'm gonna make the size smaller. You'll notice we have a lot of that same formatting up top if you wanna do that. I can center align, I'm gonna go pick a different font, something like that. In need to stop cause we don't need to do this right now. I'll go with Light, alright. We have to test that... Don't forget we're gonna test it, but I need to get everything on a page first.
Ratings and Reviews
wendy fite
Tasked with creating a website for a friend's start-up, I looked at various template driven tools in the market and also signed up for this Creative Live class. My experience with CL classes is wonderful and this Quick Start class for Adobe Muse CC did not disappoint. Brian Wood is very knowledgeable. His pace is fast, and the content he presents is awesome. He de-mystified Muse for me (I am generally a Photoshop/Lightroom users). After the class I was able to start packaging the information story-boarded for the website content so I can confidently design the first draft. I also bought the course so I can revisit some of the tips and tricks. Recommend this course.
Vince Tutay
I've always been curious to see what Muse had to offer but didn't know where to even start. This was a great intro to take you through the steps you would take to design and publish a site. Brian does a great job in explaining stuff which you can easily follow if you have the program open!
Phyllis Bostanci
I didn't know Adobe Muse was easy! Thanks Brian, can't wait to watch the rest of the videos in this series.