Class Introduction: Setting up Your File
Lesson 1 from: Adobe InDesign CC: Print Layout WorkflowJason Hoppe
Class Introduction: Setting up Your File
Lesson 1 from: Adobe InDesign CC: Print Layout WorkflowJason Hoppe
Lessons
Lesson Info
Class Introduction: Setting up Your File
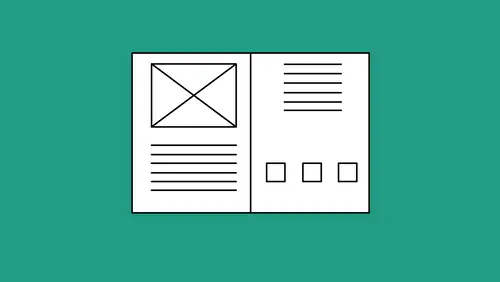
Welcome everyone. I'm Jason Hoppe and today we are going to show you Adobe InDesign Layout Workflow on how you can set up your files to become very proficient at laying out single and facing page documents, master pages, grids, guides, and everything in-between. So we're gonna jump right into getting started with our initial layout. Couple things if you're probably watching this video. You probably know a good portion about InDesign here. What I wanna show you here is be able to get in and really make things efficient, and one of the things that I have a slight pet peeve with is the new startup screens in InDesign. So when I launch InDesign, I get this whole screen with all of my recent content, and then I have to click to create new button, and get through there and when I do create the new button, then I get all of the content over again with my recent items and setting up all of my content. I'm just gonna skip all this stuff, and I'm gonna go right to the preferences, and I'm gonna ...
shut this off just to get the basic dialog box of how I wanna set up my page. So, if you wanna get through all of this start screen content, I'm gonna go into the InDesign menu under the Preferences and start off with the General preferences to set this items. Under the General preferences, we have the show start screen and the show start screen is what you see here with all the content. I'm gonna turn that off. And I'm also gonna use the legacy new document dialog box. If you've been using InDesign for quite some time, it's just the standard dialog box. Doesn't give me all my recent items, all my templates, all the stock stuff. It just gives me the dialog box. I'm gonna click okay. This content's gonna go away, and when I go into the file menu and choose a new document, this is what I come up with. This is a whole lot easier. The only thing that this doesn't do that the new kind of expanded version does is allow me to set the units of my measurements here. Allows me to do everything else with this. This just keeps it a little bit simpler. When I start up my document, one of the default items, if you go to your document presets, which is a default, comes up with facing pages. So, with a facing page document, when people start to use this, they don't know what a facing page document is or how they set it up, because if you do a single page document, it just comes up as a single page. Facing page documents are for a book layout. If you're specifically doing a book, and you want to lay it out as a book with a cover, a back cover, and then your left, and your right side pages is your inside spreads, that's what facing pages is for. But if you're preparing just a basic document that you're gonna have printed off, or PDF, is gonna be multiple pages, and you just want a document or the multiple pages, your intentions is not to bind it as a book with a left and a right hand side, non facing pages is what you want. A lot of people start up a document with facing pages, and then they found out later when they set up something like this. I'm gonna set it up with four facing pages really quick. They have their document. They zoom in. And they see that their document is set up like this, and they get all frustrated with this, with facing pages. If you have set up a facing page document and that is not your intent, you can always go back under the edit menu under document setup, and you can turn off facing pages, which will return your document to a single document set up, or a single page set up that is. So that if I was just doing a basic layout content, multiple page document and I'm just gonna export this as a PDF single page document works great. I'm gonna go back under file menu and choose a new document, and one of the things that I have to keep doing every time I start up a new document is set all my parameters so they can have my content where I like. If you find yourself clicking off the facing pages, go in and create a document with your margins, your columns, your set up, everything that you want, and when you do dial all this stuff in, save that preset, and I have an eight and a half by 11 vertical two column format with half inch margins. I wanna save this because I wanna be able to just call this up every time as a preset. Up at the top, I dial in my information. Next to the dropdown menu I have a little hard drive symbol, which allows me to save my preset and I'm gonna save this. Type in the name. Click okay. Now when I startup a new document, I can go in and I can call up all of my presets. Going under file new. Calling up the new document window. Using the dropdown preset. Dialing that in. I see a lot of people spending a lot of time doing the same thing repeatedly every time they start up a new document. Create as many presets that you want. Put it in there. Dial it in. You're great and ready to go. Couple other things we can do with a new document set up as well, setting up your bleeds and your slug. Course if you know about print production, bleeds aren't something that's necessary when you have any content that hits the edge of the page. Anything that hits the edge of the page has to extend off, and that's what the bleed is. Typically, it's an eighth of an inch. So if I have a picture or a color bar or any context that's going to touch the edge, it needs to bleed off an eighth of an inch. I'm always gonna set the file size to the finished size page. The bleed then goes beyond that edge right there. A slug is something where we can add information not on the page but relevant to the page. We use a slug when we have several different ads that may have different call-outs we can't visually really tell what the difference are when we're running a whole series of ads. There may be an ever so slight style change or a size change or an actual call to action change. That's where the slug comes in, and the slug is going to be an area off the page that we can control whether it prints or not, but it's there and we never have to worry about it printing directly on the page itself, but it can be there in the final output. So a slug it just an area beyond the edge of the page where any content can go that's gonna be relevant to that particular layout. So in this case, if I set up a document here with a bleed and a slug and I click okay, this is my document. The red line is my bleed area, and my slug goes off the bottom. Again, this slug does not have to print. We can print or not that and any content relevant that I do not want printed on the page ends up in the slug. Now, why do we go through and set up all of our files with all this content right from the start? Well, the reason why is because when you go in and you design your layout here, it's always smart to dial everything in first, 'cause we're gonna show you some things that can really affect your layout later. Having these things dialed in first to make your layout workflow work smoothly, these are important things. First of all is the number of columns on your page, and the reason why the number of columns is important is because we can create any type of grid structure that we want here, but there's a couple things that really come into play if I ever wanna do a wholesale shift in my document, and that wholesale shift is gonna be governed by my margins and my columns. I can always go back and change the margins and columns later but when we get into master pages later in this video here, you're gonna see why my set up initially is gonna be extremely important. Here's one of 'em. When I create a new document here, I can create as many columns as I want in my file. If I go in and create a certain number of columns here, and I set my margins to where I want them to be. My bleed, my slug. Everything. And I actually capture that as a preset so I don't have to do that again. Gonna click okay and there's my file. Now, if I have this set up and I wanna add more files to my document here, this is how each and every page is going to look with this particular set up. I can always go back later and I can change each and every page to be an unique number of columns, my margins, and such, but as I go through and I set this up, I wanna make sure that I'm going to plan ahead with my layout, so even though some pages are gonna be two columns, some pages are gonna be four columns, some pages are gonna be one column, I'm gonna set it up for something that's gonna be universally adaptable across the entire document. This is gonna be important. You're gonna see why in a bit. So, any time I find myself repeatedly setting up a different file, I'm always gonna go in and capture all the parameters right here as my preset, so when I go in, I can simply click on the dropdown menu, and I can run with it and go right from there. Nice and easy. Do it. If I wanna change any of these attributes after I've set up the file, I go into the file menu under my document set up and I can change the set up here. If I wanna change my margins and columns after I have set up my document, that I have to do under my layout menu, under my margins and columns, and edit those on a per page basis. One of the reasons why this setting up the margins and columns in the most, in the best fashion possible is this enable layout adjustment here which I'm gonna talk about, which is going to be a life changer for a lot of people watching this, but that's not gonna work unless we set up everything correctly. So, here's my file. If I ever wanna manage my presets, or change any of my presets, under the file menu, here's where I can go in and edit my existing document presets, instead of having to create one, get rid of another, and then use a new one, I can simply just go in, and I can create them right here, or define a new preset without having to go under the file menu and say new. So basic set ups here. Going in. Whether I want a single page document, if I'm just doing some type of basic presentation, or if I'm using facing pages, because I'm going to creating a book, or something that's going to be published. When I set up a document with facing pages, the key to this is always set up the number of pages in a number equally divisible by four. If you've ever laid out a book, you cannot have 37 pages in the book. It's always 36, 40, 44. The number of pages has to be equally divisible by four. If you've ever folded a piece of paper in half, and you've looked at it, you have four pages. You can't have a three page book. It doesn't exist. So anything with a book with facing pages, always equally divisible by four, so that the number of pages comes out to be perfect every time. So with that, I think that pretty much covers our quick little set up here, and we're gonna get into how we can actually begin to build all of our framework inside our files.
Ratings and Reviews
Jayada
Great teacher! Love his classes
Clicks FromMe
Jason Hoppe is a great teacher.
Kara McDade
Student Work
Related Classes
Adobe InDesign