Lesson Info
5. Amplifying an Image with Color
Lessons
Introduction to Abstract Painting
09:47 2Materials and Surfaces for Painting Exercises
04:22 3Flipping Negative & Positive Space
16:09 4Translucency and the Dance of Space
11:06 5Amplifying an Image with Color
13:19 6Start From a Part
15:19 7Drawing Meets Painting
11:17 8Spray, Spill, Stencil: Experimental Applications
10:17Lesson Info
Amplifying an Image with Color
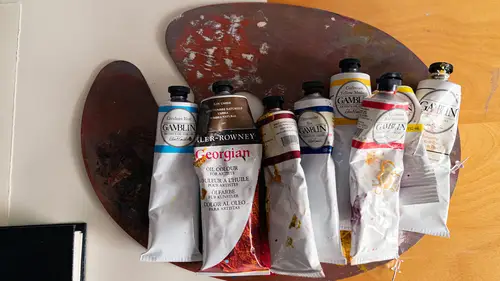
So I love color. I'm just gonna say it again, I love color and I love all sorts of variations of color. I know that for myself. I tend to lean on a more vivid palette and palette being just sort of how you choose to arrange your colors. Um, but I also really appreciate the subtlety of how other artists use color with more neutrals or even monochrome. So one thing I want to show you is that if you don't have a ton of experience with color, one suggestion I might have for you. And again, you can find some of these resources along with this course is to play a little bit with color charts, mix your own colors, you know, sort of do a 12 part chart doing 12 sort of rainbow colors and then possibly even combining those colors to create neutrals. So there'll be some possibilities for you to experiment with that if that's not something that you've done a lot of. I, I really love art history and I really love looking at paintings. So something that I do sometimes is I'll look at a painting like...
for instance, this Coro, this Coro landscape, which I find incredibly beautiful. Although it's not really a color scheme that I use a lot. So what I did is I took the Coro and before I painted a copy of it, which again, is another thing that you could do even with abstract paintings. If you love an abstract painting and you love the colors, you could play with replicating those colors. And what I did down here is I taped off a little grid and every color that I found in the painting I mixed and I put down on the grid before I painted it in to the copy that I was doing. So this is almost like a conceptual version of the Coro in terms of color. And if you look along the side here as well, these are all the trials I did, this is like show your work, this is all the trials that I did as I was developing my grid off of the Coro. Not really taught me that, you know, there's beauty in subtlety, there's beauty in things that I don't normally do and so highly recommend that sort of process to kind of get your feet wet with color and try different color schemes. I've also done that on location when I'm painting out in the field. Um working with, you know, this one is a bit of a brighter color scheme. So thinking about the saturation and brightness of these opaque colors as opposed to the colors the COro is working with. So that starts to give you a little bit of a feel for um your own color preferences and where you might be able to push yourself a little bit around that. All right, well, speaking of pushing color, So I have this studio in this mill building which is over 100 years old and as I walk around the mill building, I often get as a painter and as someone who loves abstraction, I get really captivated by the distressed walls where there's layers and layers of paint on them. And so I did a little photo shoot. I often take pictures of them actually just because I find them incredibly beautiful and I walked around the building and I did some close up shots of different parts of the building and these close up shots I think could be abstract paintings in and of themselves um could be made into abstract paintings. So this one I thought was particularly beautiful with all this chipping paint, um the pink and the green and all the little crevices there. This one I took in the elevator where the door scrapes across the wall. I thought this too in a very different way, was really quite beautiful. I was really just searching for an abstract image to work from something to mix it up a little bit. Here's another one that I thought was really beautiful. Um some scrapes, some tape, some little red lines. So you know, all of these are fair game, right, if you're wondering like I kind of want to work from something. I'm not really sure what it is. You could go for a walk, you could take pictures of the sidewalk, you could take pictures of walls, if you live in an urban area, there's tons of possibilities for that. And then I came upon this and I was like, I'm in love here. This is so cool and beautiful. And you might think I never really considered an old wall to be beautiful, but you might just start paying attention and seeing if maybe that could be a source of inspiration for you. So, I decided this was the image I wanted to try. This is the image I wanted to work from and I like the colors, you know, they're they're they're cool, like I like the colors. But I thought what would happen if I filtered this image? And first I filtered it into black and white just to sort of see, you know, like what are the darkest darks? What are the lightest lights? And then I was like, I kind of want to amp it like I kind of want to make it more intense. I want to work with my like favorite bright bright colors. So I took the image and I amped it up with a filter and I had, I was able to arrive at this which I think is just like so glorious and gorgeous. So this made me want to paint This, made me really want to paint. So you could play with filters, you could play with amping up photographic images to just help nudge you into maybe a zone of color that you might feel is like a little bit more exciting. So I took this painting, it's a pretty this image. It's a pretty um complicated image. So what I did is I actually um traced a map of it, I traced a map, I do this a fair amount. I traced a map of the color shapes on artists throughout the centuries have made little sketches and maps of smaller images like writing in the colors. And then using that for larger paintings back in the studio. But with photography and tracing paper you can make a map. And then I took that map and using some transfer paper. I actually transferred the map down onto a piece of watercolor paper with a pen. I transferred the shapes and then I started to mix colors. These are opaque colors. We have worked with opaque and transparent colors. All these colors are very opaque. I mix them in these little jars because when I put the cap on it it stays wet for a while. If you put it on a pallet, the water based opaque colors do dry out. They can be rehydrated but I kind of like having them stay wet so I can dip back into it when I need to. So I mixed out all these colors based on based on my image and you can kind of see how you know they relate to it. I didn't mix every single color that's in here because part of abstraction is simplifying. Part of abstraction is you know just sort of making decisions about what are your favorite parts and really um working with that. So I made this palette this spectrum out of opaque paint. I made some notations along the side. And then after I transferred my drawing, I started to paint in these colors using my image as a map. Using my image as a reference. And started to work in these abstract paints and created this um the beginning really of this abstract painting based on this uh this wall that I came upon. So I want to finish up a section of this painting with you and you actually think that there are some nice things happening here. I'd probably maybe work this a little further. Um maybe making some of the colors a little bit more opaque. But the part that I feel is really missing and the part that I think really enhances and and amps up the rest of the colors is this big dark blue shape in the bottom right hand corner. Because without that dark, really deep dark shape. The other colors don't feel quite as vivid. So a big part of choosing your colors and a big part of painting is making sure that as colors relate next to each other as they are put down there having a conversation, they're having a relationship. So I'm gonna go ahead and start to paint in as soon as I paint this deep dark blue next to that green, the green really starts to sing. I've painted around the edges. I've actually taped around the edges of this painting so that the in the end, when it's totally dry, I can just take off the tape and there'll be a nice uh nice straight clean edge there. So in some of these bigger areas I might just add a little water to this if the pain is feeling a little bit thick. The great thing about the water soluble paint is that you can just add a little water to make it flow a little better. And I'm just keeping my water off to the side. They're dipping it in. I'm using a round brush. The round brush again holds a fair amount of paint, but it also allows you to get into some of these little sort of smaller areas. Of course I can also use a smaller brush if I want to, which I might, but you can see as this sort of dark area starts to creep in to this middle section here, it really starts to make an impact. It really starts to make um the other colors pop, it amps. Um and you know, not every image is going to have a deep dark color, right? But if you're making up the colors yourself and I mean I could have just used completely arbitrary colors. However I actually really did like what the filtered image gave me as inspiration. So I decided to stick to that. But I feel like you could, you know, choose to change a color um based on what you feel the painting needs for sure. And this. I'm really considering this. I mean this could ultimately, when I'm finished, be an end point, but I also enjoy working on images like this. You know, water based paintings and then transitioning them into um larger pieces. Like if you do a whole bunch of studies like this in a water based media and a couple of them feel like standouts like you know what, that's something I want to explore further. Then you could take these studies and enlarge them and make larger pieces. But scale isn't always the end game, right? I mean, some pieces just want to be small and you really have to ask yourself about the scale and what makes sense for that depending on the image. All right, So my darkest painted in. I really love the way that just sort of amplify the other colors and made them sing. I can because I have these colors in these little um containers which have these little caps on them. I can close them up when I'm done and really push the cap down to keep the paint's wet. So if I come back in and maybe want to put another layer of this particular green on that green, I can easily do that. But the main point is that one, you never know where your inspiration is gonna come from, right? Like if you've never considered looking at a wall or looking at an old floor for an abstract image, give it a try start taking some photographs like that, see if it might be good source material for you. And once you have that, if you're interested in changing up your palette, if you're interested in moving from something that is quite realistic, exactly what you saw to something where the palette is brighter, where the palette is, um maybe something you're not used to then use a filter or just change the color map and play with it. I think you'll find that over time you start to stretch the boundaries of what's available to you as a painter, as an abstract painter. And again, I also really encourage you to look at other artists who use a range of colors, whether it's very monochromatic to more neutral, to really bright and and feed from that get inspired from that. It will ultimately give you so many options for your abstract work.
Class Materials
Bonus Materials with Purchase
Ratings and Reviews
user-f0fd68
Loved the class! I loved seeing all the different techniques!
John Kennedy
Loved the class and the teaching style, would like to see more workshops from this artist,
Jill McLean
Student Work
Related Classes
Design Inspiration